


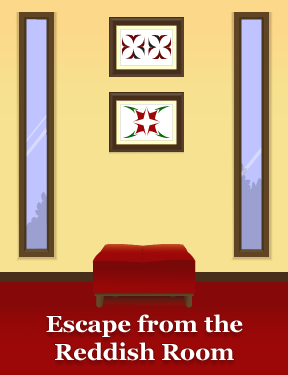
![]() One of the enjoyments of playing an escape-the-room game is the room itself. Since you're stuck here for as long as it takes to explore the room's details and decipher its clues, it does help if this place is the sort of place you'd where you'd want to hang out. Does it look too much like a doctor's office? A prison cell? Maybe that's your idea of a good time but I think it's rather pleasant to be someplace mellow, with a good view out the window and a few books to while away the time over. Throw in a touch of color therapy and, you want to lock me up? Go right on ahead. This is one of the reasons 10 Color Dots' Escape from the Reddish Room makes it onto the Weekday Escape stage this week.
One of the enjoyments of playing an escape-the-room game is the room itself. Since you're stuck here for as long as it takes to explore the room's details and decipher its clues, it does help if this place is the sort of place you'd where you'd want to hang out. Does it look too much like a doctor's office? A prison cell? Maybe that's your idea of a good time but I think it's rather pleasant to be someplace mellow, with a good view out the window and a few books to while away the time over. Throw in a touch of color therapy and, you want to lock me up? Go right on ahead. This is one of the reasons 10 Color Dots' Escape from the Reddish Room makes it onto the Weekday Escape stage this week.
 Escape this crimson-hued room by clicking about everywhere the changing pointer will take you for an up close look, examining every object you find therein with a little less help from the cursor, until you have, through observation and deductive reasoning, solved a handful of puzzles to open the exit door. There is probably some additional textual hinting in the messages that scroll up as you click on things, yet only those who can effectively read Japanese will get much help there (a question mark or exclamation point can only tell so much!)
You may need to rely more on inference for some of Escape from the Reddish Room's puzzles although the indicators are very much there in all but one case. Then it is flawed in a more disappointing sense—everything flows very smoothly and logically until a single moment when a very significant area on a certain important object is easily overlooked. This genuine pixel hunt could be a game killer for some. So for those of you reading this before beginning, just be prepared for that particular bump in the road and you'll find this a very fun little escape. Making the most of its environment, Escape from the Reddish Room presents clues and puzzles in a way that makes spending time here as enjoyable as getting out.


Walkthrough Guide
(Please allow page to fully load for spoiler tags to be functional.)
Reddish Room Escape Walkthrough
Starting Out: Exploring The Desk
Click on the notepad on top of the desk...
Look under paper to find A KEY. Take it!
The very top sheet is folded back so click on it to flip it over. Note the information you find:
"OPEN" and lines indicating the drawer and the door.
Click on the red pencil and you can get a closer view of it.
Back up.
Open the left drawer and peek inside...
Here you find a yellow pencil.
Back up.
Click the chair to move it to the left. Then, zoom in on the right drawer...
This drawer needs a four-letter code:
Remember the clue you just saw?
Change the last three letters of the code to spell the word...
OPEN
Click the red diamond when you've entered the correct code. The black diamond will turn green to indicate the drawer is unlocked.
Once you get it unlocked, back up then click the drawer to open it and peek inside...
get the SCREWDRIVER!
Back up from the desk.
The Bookcase and the Wobbly Picture
Zoom in on the red book on its side in the top part of the bookcase...
Make a note of the number and symbol on this book.
The bottom part of the bookcase is locked, so use the KEY that you found under the notepad to unlock and then open it...
Inside you see more books. Make more notes about numbers and shapes.
Also look inside the red box and you'll find:
a green pencil
and a BATTERY.
Turn right. Here you see another KEY hanging from the wall...
Apparently this is industrial strength string:
Use the SCREWDRIVER to unscrew the key from it's teether.
Use the new KEY to unlock the cupboard under the counter.
Get the BOOK. Inside the book you will get...
A BLUE CONE.
Again note this book's number and design.
Also here is a base for the colored cones. This gives you a good indication of how many you need to find.
Back up. Take a look at the books on top of the counter next to the globe...
Note the numbers and symbols on the red book.
You'll also find something in the blue book on the left:
a torn SLIP OF PAPER with a number on it.
Back up from the counter and turn left twice to face the windows.
Examine the picture with the red and green design on it...
When you click on different parts of the picture, it wobbles.
Maybe there is a pattern to the wobbling?
Use the clues on the red books you've found around the room:
Each book's symbol is a combination of two different symbols on the picture frame.
Click the part of the picture that goes between those two symbols.
SOLUTION:
TOP-RIGHT-LEFT-TOP-LEFT-BOTTOM-BOTTOM
Lastly, click the MIDDLE of the picture as indicated by the book in your inventory!
After clicking the correct edges, remember to click the middle of the picture frame.
Done correctly, the picture doesn't open up, but it does stop wobbling...if you are watching closely, you'll see that whatever was making it uneven has shaken loose and fallen to the ground.
Back up and move the ottomon aside by clicking it twice:
Get the other torn SLIP OF PAPER.
and get the RED CONE.
Yellow 3x3 Grid Box
Turn left from the windows to face the door.
Zoom in on the knick knack shelves mounted on the wall. Here you'll find a YELLOW BOX in the middle of all the other items...
Nothing happens when you click on the buttons, though. What's wrong?
See that little arrow at the top edge of the box? Click there (might be hard as this is a little pixel-huntish) to turn the box around...
Now click the small panel on this edge of the box to open it.
Insert the BATTERY.
Close the panel and click the top of the box again to see all the buttons are lit up (green).
Now you need to figure out the pattern of red and green buttons to get the box open...
Notice that the middle button is yellow?
Look at the shelves that this box came from. The yellow box is in the middle...
...the rest of the items around it are either green or red. So, click the following buttons "R" to change them from green to red...
g-g-R
R-y-R
g-R-g
When the buttons are shaded properly, click the yellow center button and it will open. Get the...
PURPLE CONE.
The Last Two Cones and The Color Puzzle
Turn around to face the desk then zoom in on the right drawer (moving the chair if necessary).
Use the clues you have gathered to enter a new code* into the drawer:
Notice the green diamond is on the left side of the two torn pieces of paper?
Flipped around, the 3107 becomes...
LOIE
...enter that into the drawer code box.
*If this is your first time opening this drawer, you'll need to do the first code first.
When you have the right code entered, click the green diamond. A red diamond will appear on the left side and the drawer...
Back up from the new red/green diamond drawer and then click it to peek inside:
Examine the box of colored pencils...
and get the YELLOW CONE. Now you need just one more cone.
Turn around until you face the door. Barely seen in the lower right corner, under the mounted knicknack shelves, there is a tiny panel in the wall. Zoom in closer to it...
Using your SCREWDRIVER, open the panel.
Get the GREEN CONE.
Turn back to the cupboard under the counter. Examine the colored cones base...
Using the colored pencils as clues, arrange each of the five colored cones from longest to shortest.
The pencils are found in these locations:
RED - on the desk next to the notepad.
YELLOW - in the left desk drawer.
GREEN - in the red bin inside the bookcase cabinet.
BLUE and PURPLE - in the pencil box in the far back segment of the right desk drawer.
Using the pencils as a guide, the correct order of cones is:
PURPLE-RED-GREEN-YELLOW-BLUE*
*Colorblind help:
From top to bottom in your inventory, the cone colors are...
GREEN
BLUE
PURPLE
RED
YELLOW
If the colors are all in the proper place in the base, it will pop open to reveal...
A KEY! Take it!
Exiting
After getting the key from the colored cones puzzle, back up and make a right turn to face the door.
Click on the panel to the left of the door.
The pattern on the panel matches the key in your inventory, but the key won't fit as is...
Examine this key your inventory and take off the square piece with the pattern on it. Now you have the real EXIT KEY.
Use the EXIT KEY to unlock the panel and you'll be presented with a new puzzle. Click on the buttons and notice the shapes they produce.
Remember the clue you found early on in the game?
Go back and look at the first page of the notepad on the desk...
You need to spell OPEN by pressing the buttons. Do this by making a note of which buttons produce which shapes, then working it out until you spell the needed word.
ANSWER:
As if on a phone keypad, the buttons are...
3 4 8 9
When you have it correct, the buttons will all turn red.
Back up and then click on the now open doorway to leave.
Congratulations!
Posted by: elle |
December 12, 2012 2:45 AM
|
December 12, 2012 2:45 AM