

![]()
 Escape-the-room games have a rather insidious premise—it really shouldn't be fun to be locked up and needing to deconstruct enigmatic codes and quirky contraptions just to be on your merry way. Of all the places to be trapped, though, a basement seems to be the most fitting, and if you happen to find yourself kidnapped and thrown into Nekonote's Basement, you'll be happy to note there are no dark shadows, old skeletons, dusty spiderwebs or monster-mouthed fiery furnaces to scare you.
Instead, albeit grey-walled, it's smattered with rainbow colors, soft white lights and clean lines. The only menace are a few cleverly-construed puzzles to occupy your cranial parts while those thick cold bars mockingly block the exit. So it turns out, it's rather fun to click about, looking for signs of anything that will bring you closer to the key to freedom, and the puzzles are the perfect mid-range of challenge. Pay careful attention to visual clues while you explore and it won't be long before you uncover the exit key. Basement shows that Nekonote has some happy tricks up the sleeve and may leave you wondering if we'll get to explore the rest of house someday.


Walkthrough Guide
(Please allow page to fully load for spoiler tags to be functional.)
Basement Escape Walkthrough
You begin facing a barred doorway; there is a color wheel with a keyhole on the right and, on the left, a drawer with four arrow buttons.
Make a note of the position of the colors on the wheel.
If you click the bottom of the bars, you can zoom closer to see:
A clue:
III - - -
A Button.
Push the button and the lights dim.
Back up and take a look around the darkened room.
Turn left from the doorway, and you'll see another clue written on the wall in glow-in-the-dark ink:
- - - II
Turn right from the doorway and you'll see glowing arrows on the wall underneath the picture.
Turn left to return to the barred doorway, zoom in on the bottom of the bars, and push the button to turn the lights back on.
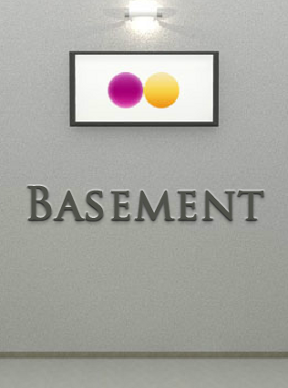
With the lights on again, turn right to face the picture on the wall:
Use the clue you just saw to remove the picture.
Click each side of this wobbly picture frame as shown in the glowing arrows:
L L L R L R R R
L=left arrow; R=right arrow.
Once the picture falls off the wall, look inside the hole:
There's something in the back, but it's too dark to see it.
There's also a third clue:
- - VI -
Back up.
There's a slot in the floor, to the left of the picture. Click it to take a peek what's down there:
It looks like a piece of paper, but it's too hard to reach it.
Back up and turn right; here you'll see three colored panels in the wall, a number pad, and a desk.
Zoom in on the desk.
The right drawer is missing a knob, but you can open the left drawer:
Get a SQUARE WITH CIRCLE CUT-OUTS from inside the left drawer.
Close the drawer then click below the desk to see what's underneath it:
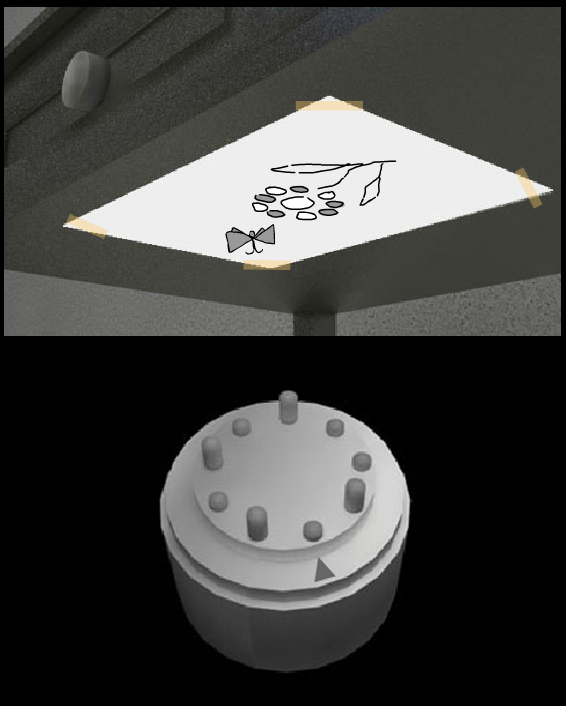
Here's picture of a butterfly and flower (a clue). Make a note of what you see.
Click the arrow to back up from the desk.
Turn right again to face a blank wall. There's something on the floor:
A STICK WITH GRABBY HAND. Click on the end of the stick to expand it.
There's also something high up near the ceiling, between the two lights. Click there to look a little closer.
Here's a fourth clue:
- IV - -
Back up. Turn right twice. Then look inside the slot in the floor next to the fallen picture:
Use the EXTENDED STICK to reach a piece of paper down in the floor slot.
Open the PAPER to get:
A BLUE SQUARE KEY.
There also appears to be another clue here...
Use the SQUARE WITH CIRCLES on the piece of PAPER to isolate three letters:
S E N W
Back up.
Turn right. Examine the drawer to the left of the doorway.
Use the clues you found to turn each arrow in the correct direction:
As on the PAPER w/SQUARE AND CIRCLES, you get four directions:
S (south) - E (east) - N (north) - W (west)
Once you have the arrows in the correct settings, the drawer automatically opens and you can get:
A KNOB.
Turn left to the desk area again. Now you can use the knob to open the right drawer.
Examining the drawer knob, you'll see it has several dowel rods on the back. There is also an arrow next to one of the rods.
Use the clue found underneath the desk to prepare the knob:
Line up the butterfly to where the arrow is on the back of the knob.
Push down the rods that correspond to the dark grey flower petals.
Now you can insert the KNOB into the right drawer.
Screenshot: Knob Solution
Click the new knob of the right drawer to open it:
Get the RED CIRCLE KEY.
Back up then examine the red (far left) panel above the desk. Use the RED CIRCLE KEY to open it:
Get a FLASHLIGHT.
Back up then turn left. Zoom in on the hole above the fallen picture.
Use the FLASHLIGHT to look inside:
Get a PURPLE DOT.
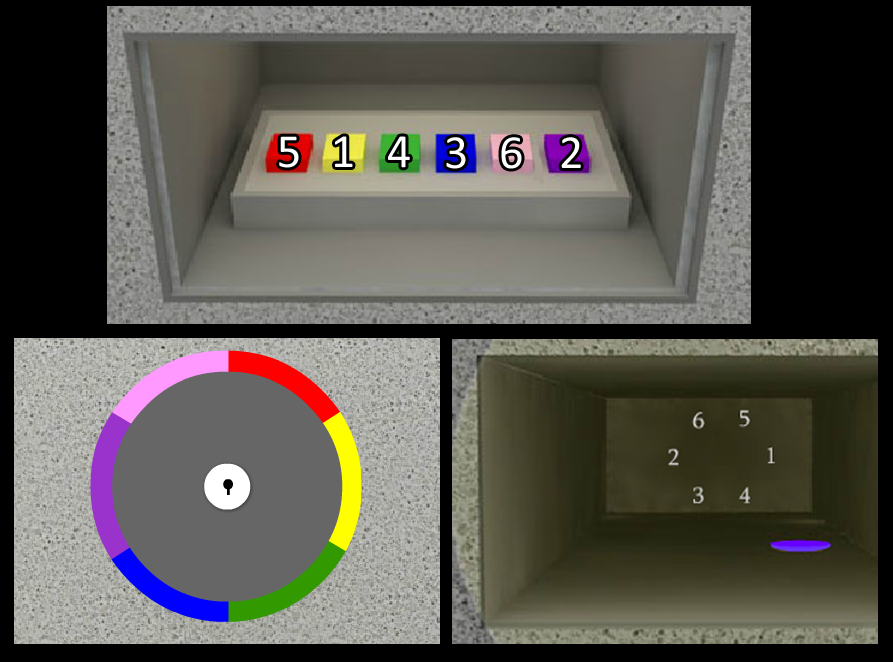
And make a note of the circle of numbers in the back.
Back up, turn left, and examine the blue (middle) panel above the desk. Use the BLUE SQUARE KEY to open it.
Here is a colored-button panel. Using the clues you've gathered on your explorations, push the buttons in the correct order to open it:
Line up the numbers you saw when you used the flashlight inside the hole with the color wheel next to the doorway...
YELLOW-PURPLE-BLUE-GREEN-RED-PINK
Screenshot: Color Buttons Solution
When you've pushed all the buttons in the proper sequence, a box lowers from the ceiling in the scene to the right.
Back up. Zoom in on the number pad on the wall on the right:
Use the four clues you've gathered earlier while looking around the room to know what code to input here:
III-IV-VI-II
Which translates to:
3462
Click enter and, if you used the correct code, it will read "OPEN." Back up.
The number pad opened the yellow panel in the wall. Zoom in to see what's in it:
A YELLOW DOT. Take it.
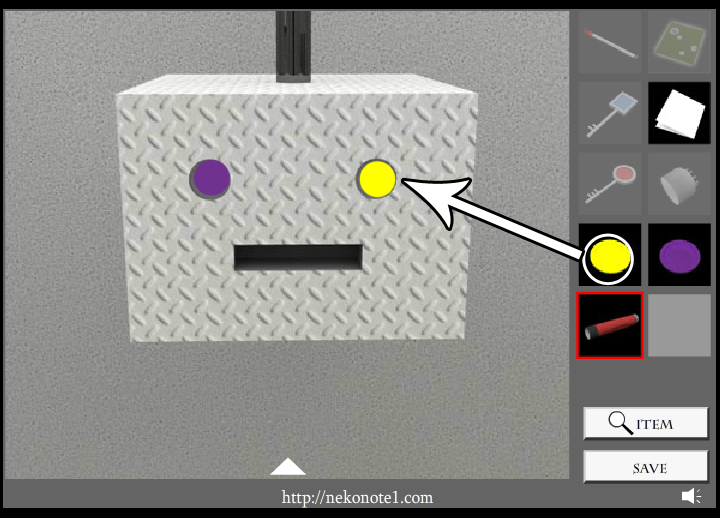
Turn right and examine the lowered box:
Place each dot in the box "eyes" according to the fallen picture: yellow on right, purple on left.
a RAINBOW KEY will drop into the box "mouth". Take it.
Screenshot: Box "eye" Dots Solution
Back up, turn right, and examine the color wheel:
Use the RAINBOW KEY on the keyhole of the color wheel.
This will cause the bars to raise up, opening the doorway.
You can now climb the stairs and escape the basement!
Posted by: elle |
December 1, 2012 2:28 PM
|
December 1, 2012 2:28 PM