


![]() There is a growing trend in room escape games as of late: be minimal, focus on puzzles not decor. The Puritan approach, perhaps? Delving into the essence of a good escape might reveal much more than a few cleverly construed puzzles, but no escape could exist without them. So if we're going to be poking around in starkly furnished, nearly naked rooms, then it's always a welcome sight to see Tesshi-e at the party. As it turns out, an Escape from the Room with No Furniture can be just as full of Mild Escape goodness as any, more dressed-up offering.
There is a growing trend in room escape games as of late: be minimal, focus on puzzles not decor. The Puritan approach, perhaps? Delving into the essence of a good escape might reveal much more than a few cleverly construed puzzles, but no escape could exist without them. So if we're going to be poking around in starkly furnished, nearly naked rooms, then it's always a welcome sight to see Tesshi-e at the party. As it turns out, an Escape from the Room with No Furniture can be just as full of Mild Escape goodness as any, more dressed-up offering.
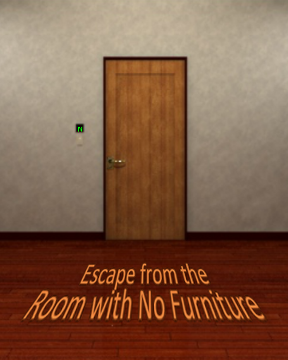 Some things never change—because "he" is rearranging his room and has taken out all the furniture, it happened to be the perfect opportunity to revamp it for a new escape. And, of course, you can't resist the challenge. Your first look around the plain walls and floors, though, might not turn up much help. Just a locked door... Hmmm. Do a little more prodding about and soon you'll notice slight visual clues to send you forward with puzzles popping out all over; you'll be unlocking the code to one hidden niche while garnering clues for opening the next. In the usual Tesshi-e fashion, you don't get the added help of a changing cursor yet attention to details and the narrative hints should be all you need to make your way through the exit, even stumbling upon a "Happy Coin" along the way.
If Escape from the Room with No furniture proves anything new, it's not so much that looks can be deceiving; that's already been well established. Instead, although the characteristic Tesshi-e charisma still comes across in every way, from the opening sequence to the congratulatory light meal in the end, a significant part of Tesshi-e's charm comes from the kitschy furnishings and quirky interior decor. When they're gone, the result is a little less fun. The dull scenery just seems a bit... sad. There are a few other minor changes that are not really improvements as much as they're just different. Different is okay sometimes, yet you know how it is when your friend gets a new hair style and it just doesn't quite look like her? It takes some getting used to. But getting away from the trivial complaints, there is one puzzle/task in particular that was not handled as well as you'd expect from this designer so I'll leave you with this: if you think you know the solution to something, but it doesn't quite work, try it from a different perspective. Or maybe it's just me? Regardless of any nitpicking, Escape from the Room with No Furniture continues the trend of whimsically amusing romps we've come to count on from Tesshi-e, even without the fancy get ups.


Walkthrough Guide
(Please allow page to fully load for spoiler tags to be functional.)
Escape from the Room with No Furniture: Walkthrough
Starting Out: A Locked Door, Clues to Gather, and Areas to Explore
You begin facing the door. Good. Maybe we can leave right off?
No? Locked, huh? Well, you might want to look through the keyhole and see what's needed there...
The HEART KEY! Woo hoo! Take it.
Click. Click. Click. Click. Broke.
Back up twice, then zoom in on the floor by the door and pick up:
the TOP PART OF THE HEART-SHAPED KEY.
Now that you have it, examine the heart-shaped key to get another clue:
4653
Back up and then check out the lightswitch by the door:
There is a digital panel above the switch.
Clicking on it will reveal a series of letters. Trying to spell anything comes to nothing, though.
You can turn off the lights and look around but, at this moment, that reveals nothing as well.
Back away from the door and turn left. Now you're facing a blank wall with two panels: a larger one on the right and a smaller one on the left.
The larger panel on the right would probably open with a screwdriver (if only you knew where to find one, right?)
The panel on the left appears to be key operated, so keep an eye out for one of those, too.
Turning left again, you'll see a picture of Mr. Birdy on the wall and a panel in the floor:
Examing the Mr. Birdy picture, it is (of course) quite wobbly when you click on its corners.
Looking closer at the floor panel, there appears to be no way at all to open it.
Make one more turn to the left to stand before a large wall safe:
Clicking the numbers on the front of the safe makes corresponding lights lit up in a circle.
The number from the heart key, unfortunately, won't unlock the safe.
To the left of the safe is a wall socket cover. Zoom in on it and it appears purposeless. But if you look more closely...
Socket Cover, Small Wall Panel and Green Box
Examining the tiny wall plate to the left of the safe, you'll notice a thin gap along its top edge.
Use the BROKEN HEART KEY to wedge it open.
Back up once to look inside the niche and you'll see a button: push it.
That makes the floor panel by Mr. Birdy's picture open and a balloon fly out.
Back up once then click twice on the fallen A COVER to pick it up.
Examine the COVER.There's something taped to the back of the cover:
take the CLOVER KEY.
Back up and turn around twice then examine the smaller wall panel on the left:
Insert the CLOVER KEY and then click it to turn it.
The panel will open to reveal a green box needing a 4-digit code:
Enter the 4-digit code found on the back of the heart key:
4653
Get the SCREWDRIVER.
Examine the screwdriver and get a TOOTHPICK from inside its handle.
Also take the MEMO from under the green box.
Read both sides of the memo for two more clues.
Large Panel, the Hippo and Mr. Birdy
Now that you have a screwdriver from the green box behind the smaller panel, go back to the larger panel on the right.
Use the SCREWDRIVER to open it up and you'll find:
a green clock,
another digital panel with changing letters,
and a HIPPO. Take the HIPPO.
A closer look at the HIPPO shows something written on its back that looks like compass directions.
Back up and turn left. Look inside the opened floor panel:
Notice how the four holes inside the floor box look like a good place for the HIPPO's feet? Put the HIPPO in there.
That causes a hidden drawer to pop open: get the GLASS CONTAINER.
Also make a note of the N E S W markings on the Hippo's back.
Back away from the floor panel. Zoom in on the Mr. Birdy picture.
Using the clue from the MEMO, you can now open this wobbly picture...
"Mr. Birdy will fly at the tenth time."
Translation: wobble the picture ten times (or less). Just keep clicking one of the corners until the picture slides up.
Get the LIQUID B bottle.
Also notice that there is another digital letter panel here.
The Big Green Wall Safe
By now you may notice that the numbers of the big wall safe are similar to something else you've seen in this room...
...but if you're still in the dark about the answer:
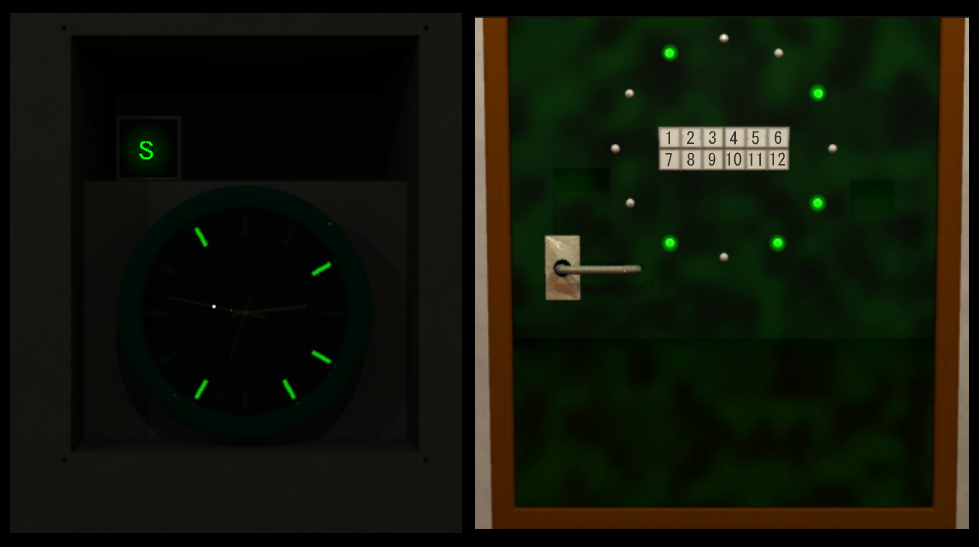
Turn to the door and flick off the light switch and have a new look around.
In the dark, there are new markings on the clock.
Screenshot: Clock in the Dark
Now go back and turn on the lights again.
Turn around until you're facing the big green wall safe:
Click only the numbers that correspond to the markings on the clock when the lights are out.
2, 4, 5, 7, and 11
Screenshot: Clock in the Dark
With the correct buttons lit up, click on the safe handle and it will open.
Get the LIQUID A.
Notice there is a fourth digital letter panel here and a locked wooden box.
The Digital Letter Panels
By now you have found all four digital letter panels, one on each wall. It's time to unlock their secret.
The clue to this is on the Hippo...after placing him in his spot in the floor panel, make a note of the compass directions, then go around the room changing the digital letters to match:
Change the letters in the following locations...
BELOW MR BIRDY = E
ABOVE THE CLOCK = S
NEXT TO THE DOOR = W
INSIDE THE GREEN WALL SAFE = N
When each wall has the correct letter on its digital panel, you'll notice that the light on the wooden box (behind the safe) turns green...
Open up the box and get A STRAW.
The Balloon and Exiting Normally
Turning right from the safe, you'll face Mr Birdy. High up in the right corner is the blue balloon that you cannot reach. Let's find a way to get it down:
Examine the STRAW you found in the wooden box.
Insert the TOOTHPICK into the straw.
Click the blue balloon to get a good angle under it.
Then, with the STRAW/TOOTHPICK combo in hand, click the blue balloon again to pop it.
Back up and then examine the open floor panel again:
Just above the open floor nook is a new item: a SPADE KEY! Pick it up.
Go back to the niche under Mr. Birdy:
Use the SPADE KEY to unlock the metal star safe.
Get the PLIERS.
Make a note of the symbols on the wall inside the metal safe.
Back and turn around to the door. Examine the keyhole:
Use the PLIERS to remove the TIP OF THE BROKEN KEY.
Now you need to repair the key so you can exit:
According to the clue on the MEMO, A+B=superglue. So...
Take the corks out of each bottle, LIQUID A and LIQUID B.
Examine the GLASS CONTAINER from your inventory:
Pour the opened LIQUID A bottle then the opened LIQUID B bottles into the glass container.
Now that you have superglue, dip the TOP PART OF THE HEART KEY into the bowl of glue.
The TOP PART OF THE KEY will now be in your main view.
Finally, use the TIP OF THE KEY on the top part and they'll join together to make a whole key:
THE HEART KEY!
Now is a good time to save your game:
Open "FUNCTION" and select "SAVE" and then "YES." Now you can reload to begin again at this point.
To exit normally, insert the HEART KEY into the door lock and click the handle. Enjoy your reward!
Happy Coin Exit
To get the "happy" ending, don't use the repaired HEART KEY on the door until you've obtained the HAPPY COIN.
Look at the clue inside the metal star safe (under Mr. Birdy's picture).
It tells you "Green Box" and has some symbols.
Back up and turn right to face the wall with the clock and the green box inside the smaller panel on the left. Zoom in on the green box, but don't open it (if you accidentally open it, back up and then zoom in again):
Use the clues from inside the metal star safe to input a new number code on the green box:
The SPADE SHAPED KEY has new numbers on the back.
The HEART SHAPED KEY also has numbers. Hmmm.
SOLUTION:
Each circle/symbol represents a digit on the back of each key. So, as per the clue...
You want the first and third digits of the spade key then the second and fourth digits of the heart key.
That gives you this number:
9673
Screenshot: Happy Coin Solution
With the correct numbers on the green box, click the handle to open it. Now there's something new inside:
The HAPPY COIN. Take it!
Turn back to the door. Use the HEART KEY, click the handle, and enjoy your new ending!
Posted by: elle |
November 28, 2012 12:31 AM
|
November 28, 2012 12:31 AM