

![]()
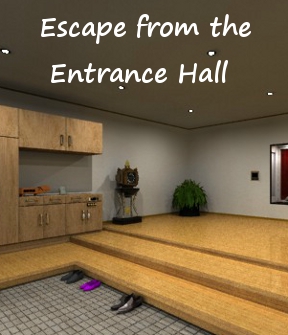 Even with eyes closed, it's hard to mistake a Tesshi-e escape for anything other than a Tesshi-e escape as even the music makes us feel welcome and included in a convivial escapers' circle. So it is the same with Escape from the Entrance Hall: we're welcomed inside only to have great fun at poking around in cupboards and drawers, stringing together witty clues and figuring out the tricks that keep the door locked.
You'll encounter familiar faces—wobbly picture frame, hippo and twirly Mr. Birdies—and find some new twists in clue presentation. Some puzzles are a bit convoluted and, near the end, you're asked to make a choice between a certain iconic token or the means to exit that will tease your decision making (so be sure to save your game before you choose). While Escape from the Entrance Room is not the most challenging, it is very clever and fresh and, most happily of all, definitively Tesshi-e. Enjoy!


Walkthrough Guide
(Please allow page to fully load for spoiler tags to be functional.)
Escape from the Entrance Hall
Starting Out: Exploration
Select your language, English or Japanese, before starting.
Click "NEW GAME" and then "GAME START" to begin.
You begin facing a locked door. Zoom in to examine the security camera monitor to the right of the door:
Press the large button on the bottom left of the moniter to turn it on.
Use the up and down arrows to scan the scene.
Scroll all the way down until you can see four bowling pins on the lawn:
Back up.
Zoom in on the post box to the left of the door:
This needs a 3-digit number code.
There are symbols for three astrological signs above each digit.
The word "POST" is written in the lower right corner.
Back up.
Turn left. Examine the plant shelf in the wall:
Each plant's saucer is a different shape.
Back out.
Now zoom in on the table/chair area under the brightly colored painting:
Take the CHAIR on the left.
There is a box on the table that needs a key.
Also notice the picture is wobbly.
Back up from the table area and turn left to have a long view of two display windows on the back wall. Zoom in on the right window:
There is a panel next to this window that needs a key to unlock.
Inside are four Mr. Birdies, at four different heights, which seem to have letters written on their chests.
Back away from the right window and take a look at the left window:
To the left of the window is a 4x4 grid panel:
Each button has one of four letters: B I R D.
So far, all you can see inside the window is a pretty iris in an interesting planter.
Back up and turn left to see a wall with a plant, clock and cupboards. Zoom in two times to the clock:
Seems to be an ordinary clock...except there's a keyhole to the right of its face.
Back up twice.
Zoom closer to the cupboards area:
On the counter is picture; examine it for a clue:
First Blue, 2nd White...
There's also a Mr. Hippo who needs a 4-digit number code.
You can open the far left door of the cupboards; in it you'll see two tubes: one with a key, one with a happy coin.
The tall double doors are wired shut.
The upper cupboards are too high.
There's nothing in the middle cupboards on the bottom.
The bottom cupboards on the end have bowling pin handles and four dials.
The drawer second from the left is also tightly shut.
Finally, the third drawer from the left will open:
Get the STAMP.
The last drawer has four buttons you can push to change their shapes.
To the left of the cupboards is an umbrella stand:
Take the UMBRELLA out of the stand and make a note of its colors.
Bowling Pin Cupboard
Examine the far right lower door of the cupboards area:
Turn the dials to match the bowling pins you saw in the security moniter:
SOLUTION:
Screenshot: bowling pins
From left to right:
Click the 1st dial twice, the 2nd dial once, 3rd dial twice, 4th dial once.
When the dials are in the correct positions, click the doors to open them:
Take the "S" TILE.
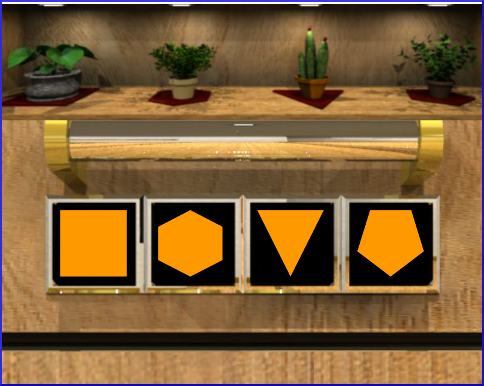
Shapes Drawer
Zoom in on the drawer just above the bowling pin doors:
Push each button until the shapes match the saucers under the plants on the other wall.
SOLUTION:
Screenshot: Drawer Shapes
From left to right:
SQUARE - HEXAGON - TRIANGLE - PENTAGON
When you have the proper sequence of shapes, open the drawer to get...
CLOVER KEY.
Mr. Birdies and Iris Windows
Back up from the cupboards area and turn right, then zoom in on the display window for the Mr. Birdies.
Use the CLOVER KEY to open the panel to the right of the Mr. Birdies display:
Get the PLIERS.
Then, push the button to open the display glass.
Now you can zoom closer to examine the Mr. Birdies display...
Push the button on the right corner of the display's base:
Make a note of each letter and where its positioned.
Back up and go over to the display window on the left, the one holding the iris.
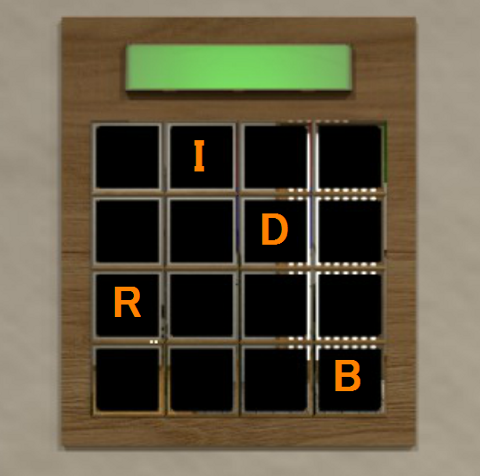
Examine the 4x4 letter grid next to this window:
Each column should have only one letter.
Input the letters according to how they appeared on the Mr. Birdies display:
SOLUTION:
Screenshot: 4x4 letter grid
- I - -
- - D -
R - - -
- - - B
Press the button and it will light green when you have the correct pattern.
Now the glass is gone from the iris display:
Look in and get the "T" TILE.
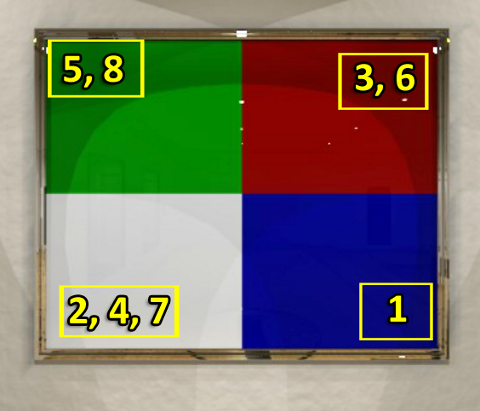
The Wobbly Picture
Click on the corners of the picture in the correct order to get it to open up:
Use the information from the umbrella and the picture on the counter (next to the hippo).
SOLUTION:
Screenshot: wobbly picture
BR - BL - TR - BL - TL - TR - BL - TL
BR = bottom right; BL = bottom left...etc.
When the picture slides up, you can get two things:
SCREWDRIVER
and a TRIANGLE KEY.
Clock and Post Box
Turn around twice from the wobbly picture and zoom in on the clock:
Insert and turn the TRIANGLE KEY on the clock to change the numbers to astrology symbols.
Did you remember to note the symbols you saw on the post box earlier?
If not, you can either note all twelve symbols and their corresponding number, or (the easier way) run over, find the three symbols you need, then come back to the clock to find their number.
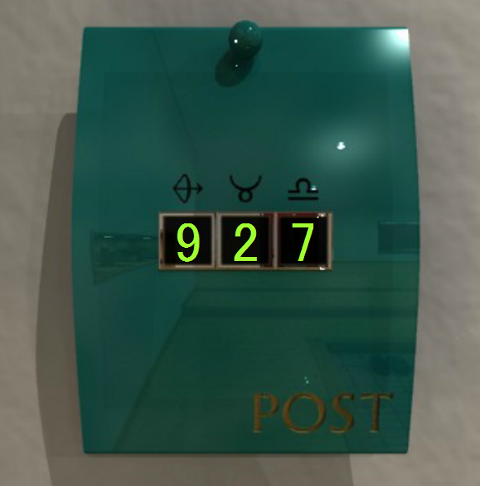
Back up from the clock and turn left, then examine the green post box left of the door:
Now input the numbers you got from the clock to match the symbols above each digit:
SOLUTION:
Screenshot: post box
9 2 7
With the correct code entered, you can click the knob at the top of the post box to look inside it:
Get the PLAIN PAPER.
The Upper Cupboards and the Big Box
Go back over to the cupboards area (turn right from the post box).
Put the CHAIR in front of the bowling pin doors.Now you can reach the upper cupboards on the right side...
Open the upper cupboards and get:
a BIG BOX with a 2x4 grid on it.
So far, you don't know how to open this box.
Back down and take the CHAIR again.
That box looks big and sturdy so...Set the BIG BOX in front of the tall cupboards on the left.
Now put the CHAIR on top of the box.
This way, you can reach the highest cupboards on the left. Open them up and look inside to get:
the "P" TILE.
Also look on the inside of the left door to get a clue. This will help you open the big box!
Climb back down and pick up the BIG BOX again. Examine the 2x4 grid on its front:
Click to turn green only the particular squares as seen inside the cupboard...
SOLUTION:
Screenshot: big box
- - X -
X - - X
With the correct pattern on the grid, the box will automatically open:
Get the SPADE KEY.
Little Box, Some Drawers and Mr. Hippo
Once you get the SPADE KEY from the big box, go back over to the table/chair area...
Zoom in on the little box on the table:
Use the SPADE KEY to open the little box.
Get a STAMP PAD.
At this point, you now have PAPER (from the post box), a STAMP (from the unlocked third drawer), and a STAMP PAD.
Use the STAMP on the STAMP PAD to get...
an INKED STAMP.
Now open up the PLAIN PAPER from your inventory and use the INKED STAMP on it to get...
An important clue.
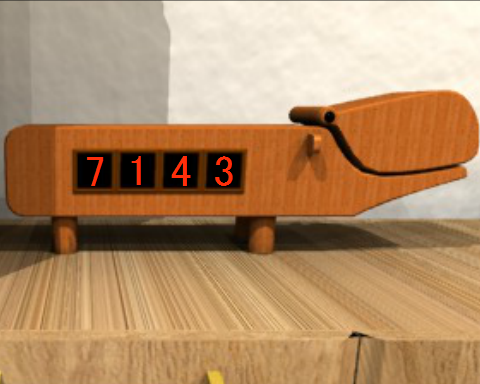
Turn back around to face the cupboards area and zoom in on Mr. Hippo:
Enter the numbers you found on the paper after using the stamp.
SOLUTION:
Screenshot: hippo numbers
7 1 4 3
After entering the correct code into Mr. Hippo, click him again to push him over.
Now his feet aren't blocking the back of the drawer and you can open it.
Open the first drawer under the hippo to see...
nothing at first. Pull it out a bit further.
Examine the screw on the inner right side of the drawer's box.
Use the SCREWDRIVER to remove the screw.
Back up twice and then zoom in on the second drawer from the left:
You can now open the drawer and take the "O" TILE.
The Letter Tiles and Exiting Normally
Back up from the hippo drawers so you can view the entire cupboard area in one long glance.
From this angle, use the PLIERS on the wire that binds the tall double doors of the cupboard.
Click the doors and you'll see a new device:
Those four letter tiles you have collected fit perfectly there. But what word to spell?
HINT:
It's a word you saw while exploring the room.
SOLUTION:
P O S T
Insert the tiles to spell the correct word and the blue panel will open:
Get the WATER BOTTLE.
Back up and open the far left tall door to view your choice:
If you pour all the water into the tube with the heart key, you won't have water left to get the happy coin.
But, if you get the happy coin, how will you reach the key?
If you want to have it both ways, save the game by opening up "FUNCTION" and selecting "SAVE" and "YES." That way, you can restart and use "LOAD GAME" to reach this point again.
For the "Normal Ending," pour the water into the left tube.
The HEART KEY will rise up to the top of the tube. Take it.
Back up and turn left to face the exit doors.
Use the HEART KEY to unlock the door.
Then click again on the doors to open them and enjoy the normal ending.
Happy Ending
After you get the WATER BOTTLE (see the normal ending directions)...
Use the WATER on the tube on the right.
The HAPPY COIN will rise to the top. Take it.
Turn left and face the doors; examine the security camera monitor:
Insert the HAPPY COIN into the slot at the top of the monitor.
Now you have a new word.
Go back into the double doors of the cupboard and view the tile letter device again:
Rearrange the tiles to spell the new word.
Note: you must use the happy coin for the new word to work.
SOLUTION:
S T O P
When you use the correct word, the blue panel will slide open to reveal a button. Press it.
Now new doors will open; go through and you'll enjoy a special happy end!
Thanks to elle for the walkthrough.
Posted by: Dora |
October 20, 2012 11:57 AM
|
October 20, 2012 11:57 AM