


![]() We at Weekday Escape do love our escape-the-room games. But, what is it, exactly, about being trapped in a room, desperately searching for clues to inexplicably situated puzzles, scrounging about for items to construct makeshift tools, all while an assertively jaunty tune juxtaposes our dire predicament, that has us coming back for more time and time again? It may be hard to describe but it does have so much appeal that there's even a Japanese game show based on the concept. Until you land your prime spot on the American version (currently being cast) of the reality program spectacle, you can practice your room escaping skills in Aries Escape: Episode No.004.
We at Weekday Escape do love our escape-the-room games. But, what is it, exactly, about being trapped in a room, desperately searching for clues to inexplicably situated puzzles, scrounging about for items to construct makeshift tools, all while an assertively jaunty tune juxtaposes our dire predicament, that has us coming back for more time and time again? It may be hard to describe but it does have so much appeal that there's even a Japanese game show based on the concept. Until you land your prime spot on the American version (currently being cast) of the reality program spectacle, you can practice your room escaping skills in Aries Escape: Episode No.004.
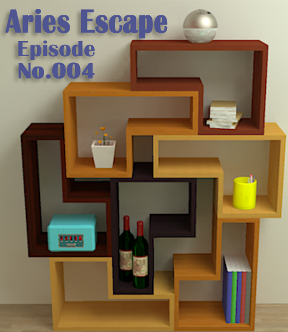 In this episode of Libertechno's game series, you're locked inside a small, studio apartment and need to gather an abundance of clues—colorful pieces of Legos, among other things—overlooking a fair amount of misdirection to solve the codes that will elicit your key to freedom. A changing cursor is a good friend in this situation, especially as certain items utilize tone-on-tone color camouflage to avoid detection.
Libertechno is no pal to the colorblind with this particular offering but does present a generous portion of exploration and code breaking to make our escape feel well-deserved in the end. While this episode doesn't feel as polished as Episode No.005, it is equally enjoyable. Again, there is a "perfect ending" in addition to the regular one although getting that special trinket is a simple matter of looking in the right place, a tad disappointing when you'd rather have a final puzzle to work out. Those who don't read Japanese will also lament the non-English opening and ending narrative, but the design is strong enough to compensate for lack of messaging.
It's only a matter of time before game shows such as Dero will be all the rage. In the meantime, we'll keep our skills honed by playing fun escapes such as Aries Escape: Episode No.004.
Play Aries Escape: Episode No.004
Note: to adjust sound, select the [tool] icon and move the bottom slider to the left. Keep the top slider, which controls click sensitivity, all the way to the right.


Walkthrough Guide
(Please allow page to fully load for spoiler tags to be functional.)
Aries Escape: Episode No.04 Walkthrough
You start the game facing two yellow closets and a door.
Click the left closet to zoom in, then click it again to open the doors.
Inspect the small red shoebox at the top of the stack of boxes.
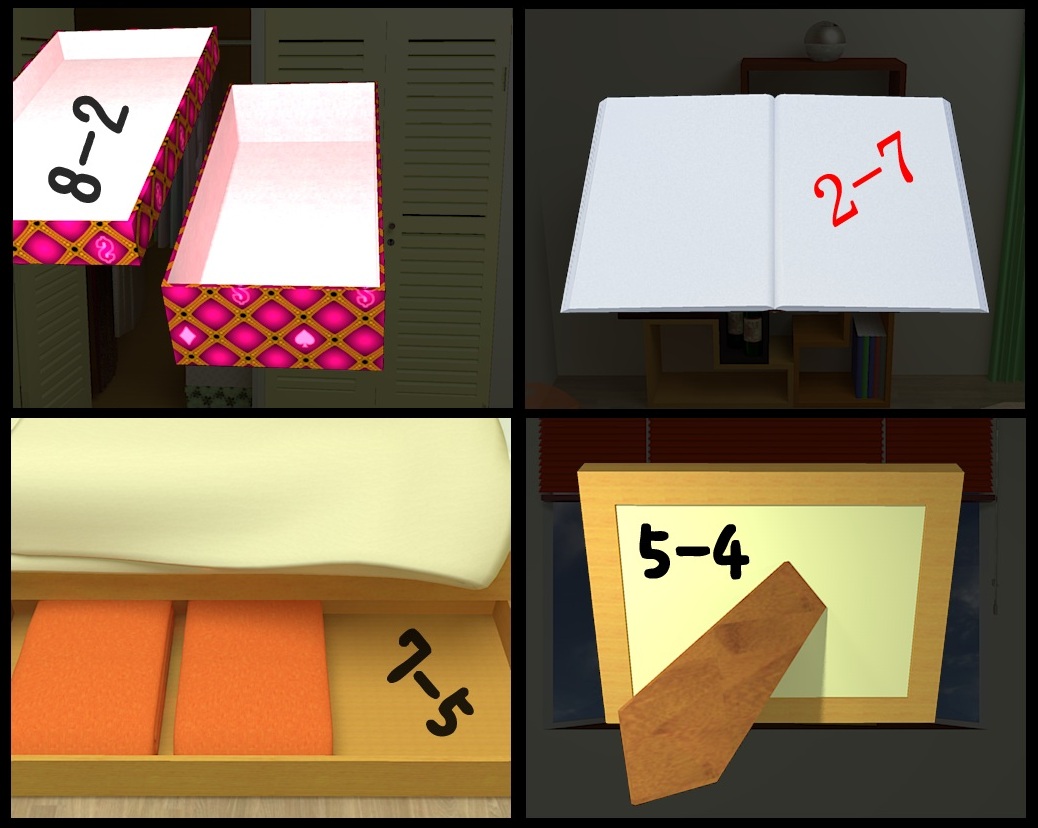
Open the lid and turn it over and note the two numbers found on the other side: 8-2.
Back up twice and turn left to face the bed.
Inspect the clock hanging on the wall.
Take the RED LEGO (1/3) between the 1 and 2 of the number 12.
Go back once and click the bed for a closer look.
Open the right drawer at the bottom of the bed.
Move the two orange blankets from the right side to left side to uncover another two numbers:
7-5.
Now open the left drawer at the bottom of the bed to find the YELLOW LEGO (1/3).
Click the headboard of the bed for a close-up view.
Move the nail polish and perfume bottles aside to find the GREEN LEGO (1/3).
Move back twice and turn left once to face the balcony doors and asymmetrical stack of shelves.
Click the shelves, then click the metallic orb on top of the highest shelf to zoom in.
Press the button at the top of the orb seven times until you see a lego at the bottom.
Remove the silver dome of the orb to uncover the the BLUE LEGO (1/3).
Take a look at the stack of wood blocks on the shelf under the orb.
Take the COPPER TAB out of the block and inspect it in your inventory.
Click the COPPER TAB to separate it into the METAL PIN (2/2).
Click the yellow cup on the middle shelf for a closer look.
Lift the pens out of the cup and look inside to find the YELLOW LEGO (2/3).
Back up once to view the shelves again, then inspect the two wine bottles.
Raise the left bottle to uncover the RED LEGO (2/3).
Back out and click the stack of books on the bottom right shelf to zoom in.
Open the book cover to find another pair of numbers: 2-7.
Move back twice to face the sliding doors again.
Open the glass door and go forward to the balcony.
Turn left to face the fan and click it to zoom in.
Take the SPADE on the floor between the cinder blocks.
Back out and turn right twice to the potted plant.
Use the SPADE on the plant to dig up a pile of SOIL.
Turn right to reenter the bedroom, then turn right again to face the window.
Click the table for a closer look.
Inspect the glass bowl on the table full of blue marbles to find the BLUE LEGO (2/3).
Back up once and take a look at the orange wastebasket on the floor behind the table.
Lift the small orange bin to reveal an ORANGE LEGO (1/3) on the ground.
Move back once, then click the window to zoom in.
Click the pullstring to raise the blinds.
Inspect the framed picture beside the small plant on the windowsill.
Turn the picture over to find the last set of numbers: 5-4.
Go back twice and right once to turn to the shelves.
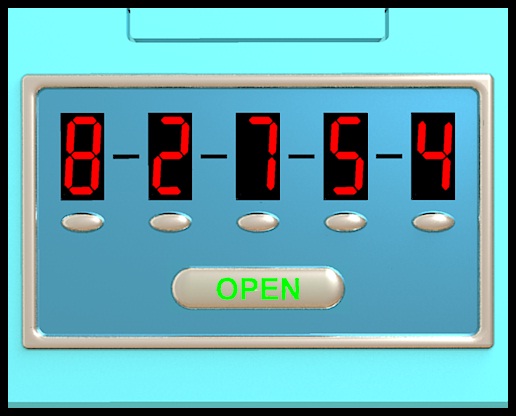
Inspect the locked blue box on the left shelf.
Use the number clues you've found around the room to find the combination and open the lock.
The numbers aren't part of a subtraction equation, they simply indicate which numbers are next to eachother in the combination.
If a number appears more than once, you can infer that it is in the middle of two other numbers.
On the other hand, a unique number indicates that it is next to only one other number and is therefore at the start or end of the combination.
Press the small buttons to enter the combination 8-2-7-5-4 (do not enter repeat numbers).
Press the "Open" button to submit your solution.
Screenshot Part 1.
Screenshot Part 2.
Back up once and open the lid to find a SILVER KEY inside the box.
Turn around to face the wooden door again.
Use the SILVER KEY to unlock the door.
Open the door and move forward into the kitchen.
Turn left towards the washing machine and click it to zoom in.
Open the round door and take the GREEN LEGO (2/3) inside the machine.
Back out and turn right twice to face the refridgerator.
Click the largest section at the top for a closer look.
Open the door to look inside.
Take the BLUE LEGO (3/3) beside the milk on the bottom shelf attached to the door.
Back up once and inspect the lower section of the fridge.
Open the top right drawer to find a NOTE (1/2).
Read the NOTE in your inventory.
The top half of the note should look familiar; it's a diagram of the METAL PIN you removed from the COPPER TAB.
The bottom half of the note shows a similar pin coming out of a different item.
Remember the shape of that item for later.
Open the bottom drawer to reveal the GREEN LEGO (3/3).
Back out and take a look at the left half of pink drawers.
Open the top drawer and take the HAIRPIN.
Remember the note? Inspect the item in your inventory and click it to separate it into the METAL PIN (2/2).
Open the second small drawer from the top to find another YELLOW LEGO (3/3).
Look inside the bottom square drawer to find a NOTE (2/2).
Read this note to find instructions to use the metal pins you collected with a third unknown item.
Inspect a METAL PIN in your inventory and combine it with the second pin to make the SCREWDRIVER BLADE.
Now back up and zoom in on the right half of pink drawers.
Open the biggest drawer to view two pots.
Lift the lid of the right pot to uncover the ORANGE LEGO (2/3).
Open the middle long drawer to find a pair of SCISSORS.
Back out and click the small basket on the kitchen counter to zoom in.
Push the bottle of oil and salt shaker to the right side of the basket to reveal an ORANGE LEGO (3/3).
Inspect the sink in the middle of the counter.
Click the tap to turn on the water.
Put the pile of SOIL under the water in the sink to receive the DIAMOND KEY.
Turn right and move through the door to return to the bedroom.
Move left once, then click the television to zoom in.
Open the small red door on the lower left side of the television.
Use the SCISSORS to cut the wire attached to the RED LEGO (3/3).
Back up and move left once to face the yellow closets.
Use the DIAMOND KEY to unlock the right closet.
Click the safe inside the opened closet to zoom in.
Take a look at the lock at the top of the safe.
Above each number in the combination lock is a colored triangle.
There's only one place you can find all those colors.
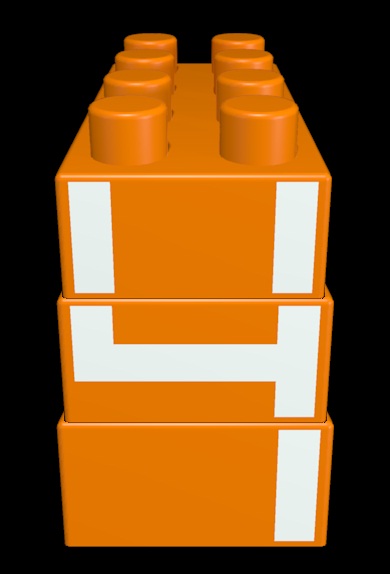
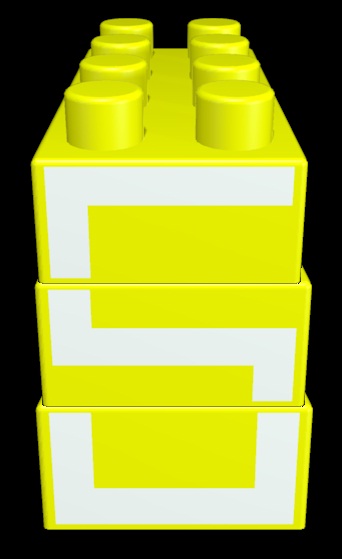
Inspect the LEGOS in your inventory (make sure you have 3 of each color).
If you click the legos to view their sides, you'll find a strange pattern of white lines...
Combine the lines of legos that are the same color to create the shape of a number.
Red.
Green.
Orange.
Blue.
Yellow.
Enter each number under its respective color on the lock to open the safe.
Solution.
Open the safe and take the SCREWDRIVER HANDLE inside.
Combine the SCREWDRIVER BLADE and SCREWDRIVER HANDLE in your inventory to complete the SCREWDRIVER.
Return to the kitchen.
Click the door handle of the exit door to zoom in.
Use the SCREWDRIVER to remove the two screws on the cap covering the lock.
Take off the cap and turn the lock, but do not click the handle to open the door unless you want the Normal Ending.
Instead, go back to the bedroom.
Turn right to face the bed and click the bed to zoom in.
Inspect the headboard of the bed again.
Click the alarm clock to move it to the left.
Slide the compartment to the right of the alarm clock left as well to reveal the HAPPY TOKEN.
Now you can return to the kitchen and go through the exit door for the Happy Ending!
Thanks to Trinn for the walkthrough!
Posted by: Mike |
October 10, 2012 12:22 AM
|
October 10, 2012 12:22 AM