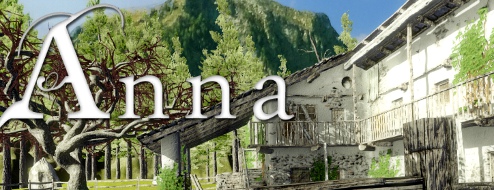
JayisGames.com is now available ad-free!
Jay is Games recommends Cheat Happens with 8,000+ games and 35,000+ trainers!

Anna


  • Currently 4.4/5
  • 1
  • 2
  • 3
  • 4
  • 5
Rating: 4.4/5 (32 votes)
Comments (6) | Views (17,910)

Anna

JohnBNight after night, you dream of her. Anna. But... they're not dreams, they're nightmares. And now, you find yourself staring at the very house you see each night in your sleep. This isn't a dream, but it isn't quite real, either. Welcome to the haunting world of Anna, a first person horror adventure game by Dreampainters that will leave you too frightened to turn your back on a dark corner for the rest of the night.

anna.jpg
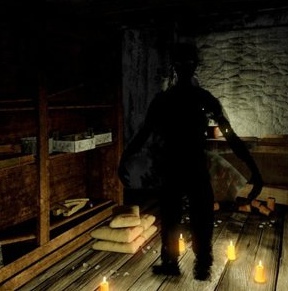
Anna plays out from a typical first person perspective, allowing you to freely move and look about each area. To interact with or examine things, simply click when the cursor changes to a small target. If the cursor switches to a hand, hold the right mouse button and drag to manipulate the object you've just taken hold of. The inventory can be accessed by a middle click on your mouse, and from there you can combine items, examine them, or grab them to assist you in solving a puzzle or two.

Things move at a slow sort of pace in Anna, presenting you with a handful of things to examine at once while challenging you to not only be observant, but to be curious, too. Take a closer look at everything you see, try to pick up objects even if they don't seem so portable. You never know when a short scene will be triggered or what effect your actions will have on the broken, frightening world around you.

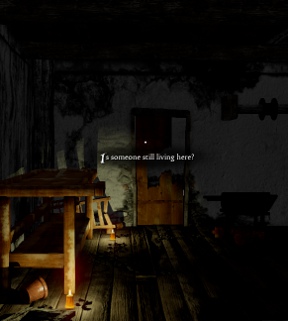
Analysis: Anna isn't the sort of game that flings zombies at you from behind barred doors or splashes screaming faces on the screen when you're focusing on a puzzle. This is a much more subtle and insidious type of horror game, the kind that can really get under your skin and haunt you deep inside. The story and setting lay the groundwork for the spookiness, putting you in a world that isn't quite real and gets even less real as it progresses. And as you discover more of the story behind this house you're in, you start to feel like you're in a very unsafe place. But you can't get out, you can only go forwards. Yipe.

anna.jpgWhat Anna gets oh so right in terms of atmosphere and puzzle design, it tends to skip over some of the more invisible aspects, namely the interface. While moving around is smooth enough, any time you want to use an inventory item or interact with a piece of scenery, it feels as if you have to click more than you shouls. No keyboard shortcuts to be found, just slow mouse menus that many similar games have replaced with button combinations. It's an awkward barrier when you first start the game, and even a little ways in you'll find it somewhat frustrating. But eventually it all sinks in, slowing down your pace and actually adding to the deliberate, haunting nature of the game.

One of the more curious aspects of Anna is that it features three possible endings, each depending upon how mad your character is at the end of the game. In other words, the more paranoid and frightened you get, the less appealing your ending may be. This means you'll probably want to play through the game multiple times to get the different endings, bumping up the total play time to around six hours or so.

An incredibly chilling game with a story and setting to match, Anna is a superb indie horror game that's best played with the lights on. And friendly people in the house to watch your back.

WindowsWindows:
Get the full version

Mac OS XMac OS X:
Not available.
Try Boot Camp or Parallels or CrossOver Games.

Walkthrough Guide


(Please allow page to fully load for spoiler tags to be functional.)

Anna Walkthrough

General Information

Controls

(left/right/middle click is only specified when necessary, otherwise you may assume the regular left click)

  • Walk around with [WASD] or the [arrow] keys.

  • The camera is controlled by the mouse.

  • When the cursor (central white circle) becomes red, that means you're hovering over an object you can interact with (the name appears in the lower left).

  • Left click over an object to get the option to examine, pick up or use it.

  • When the cursor becomes a hand, right click and drag to move the object. You may also left click it to get the interact options.

  • Middle click or press [I] to open your inventory.

    • Click an object to get the interact options to use or examine the item.

    • "Examine" will take you out of the inventory screen and give you a brief description of the object.

    • "Use" will change your cursor and allow you to use the object with another object.

    • Middle click/[I] to exit the inventory screen and use the object elsewhere.

  • Crouch by pressing [C] (never mandatory in the game, just for perspective purposes).

  • Press [H] for an in-game hint.

    • Hint options can be accessed in the Options menu.

    • The hint will only work for interactions in the room you are currently in, so if more than one is accessible, be sure to use it in both.

  • Pull up the menu for saving/loading/exiting/etc. by pressing [F1] (and now [esc] after an update by the developers).

Game Mechanics/Endings

  • There are a total of three endings.

  • The endings are based on how much time you took to complete the game and, in one case, something you do/don't do.

  • This walkthrough will not explain each ending, but take you through the steps to get there.

  • Despite the factor of time for the endings, there are no puzzles/actions that themselves must be performed within a time limit.

Main Walkthrough

GOAL: Getting into the House

  1. Head toward the house and try to Use the Main Door. It won't budge.

  2. Look above it and Examine the Eye-shaped notch. Make note of it.

  3. Turn around and head to the bypass in the river.

  4. Examine the Deep mud pond. Perhaps there's something hidden below?

  5. There's a Big Rock blocking either side of the pond that need to be moved to clear the mud.

  6. Turn back around and go by the stairs to the left of the Main Door.

  7. Look on the side of the stairs and notice the Little Door.

  8. Use the Closable hunting knife on the Little string in the center of the door.

  9. Move each of the doors to expose the Dark corner (you may want to [C]rouch to see things better).

  10. Now use the Cigarette lighter on the Dry branch.

  11. Pick up the Mirror shard.

  12. Head out the enclosure and go into the corner with the large tree.

  13. Pick up the Wooden branch on the ground by the far side of the tree.

  14. Continue around the back of the enclosure to the large rock.

  15. Pick up one of the Dried pine cones on the ground.

  16. Use the Wooden branch on each of the Big Rocks.

  17. Now pick up the second Mirror shard that's revealed in the water.

  18. Head back to the Main Door and use both Mirror shards on the Eye-shaped notch.

  19. Use the Dried pine cone on the Eye-shaped notch.

  20. Now use the Cigarette lighter on it too.

  21. You have to put out the fire, so turn around and head to the Rivulet.

  22. Use the Empty canteen on the Rivulet to get a Filled canteen.

  23. Return to the Main Door and use the Filled canteen on the Eye-shaped notch.

  24. Now use the Main Door to enter the house.

GOAL: Investigating the Light in the Water

  1. Turn to your right and examine the Old handkerchief, making note of what's written.

  2. Head straight into the corner with the stove.

  3. Pick up some Sawdust out of the cart.

  4. Turn around and head to the left of the Old water saw.

  5. Move the pile of Decrepit boards until you reveal an item.

  6. Pick up the Sharp fragment.

  7. Head forward and left to the Broken table.

  8. Examine the Stuck bone hilt on the counter.

  9. Use the Wooden branch on the hilt.

  10. Pick up the Bone hilt.

  11. Go into your inventory and use the Sharp fragment on the Bone hilt to create a Ritual knife.

  12. Turn right and open the Broken Door.

  13. Head straight and go halfway down the left walkway.

  14. Now turn right and examine the Feeble luminescence below.

  15. Use the Sawdust (from the cart in the corner by the stove) on the Feeble luminescence to reveal the transparent bridge.

  16. Walk along the bridge and examine the Circle of limpid water below (hmm, where have you heard about limpid water before?).

  17. Go into your inventory and use the Ritual knife with the Cigarette lighter to get an Incandescent ritual dagger (effects not permanent, eventually becomes a Cooled ritual dagger).

  18. Use the Incandescent ritual dagger on the Circle of limpid water.

GOAL: Finding a Use for the Hollow on the Wall

  1. Examine the hollow on the wall on the back side of the puddle room (hmm, something must fit in that notch).

  2. Use the Empty canteen on the Puddle to get a Filled canteen.

  3. Head into the main room and to the corner with the stove, noticing the three paintings along the far wall.

  4. Open the Stove's Door and Examine the Fire.

  5. Use the Filled canteen on the Fire.

  6. After the event you trigger, Pick up the Key out of the Broken stove.

  7. Go to the Broken table in the opposite corner.

  8. Use the Key on the Drawer to the right.

  9. Open the Drawer and Pick up A heap of tied leaves and a Wooden box.

  10. Go into your inventory and examine the Wooden box.

  11. Head into the puddle room to the hollow on the wall.

  12. Use the Wooden box on the hollow.

  13. Examine the Perforated wooden box.

GOAL: Opening the Stockroom Door

  1. Go out into the main room and into the corner to the left.

  2. Examine the Stockroom door (hmm, it's locked).

  3. Head to the three paintings, then Use the middle one.

  4. Turn right and read the text that appears above the Broken stove.

  5. Go into your inventory and use the Closable hunting knife on the heap of tied leaves to get a Golden leaf, Silvery leaf, Bronzed leaf, White leaf and Black leaf.

  6. Head into the puddle room and check out the two paintings there.

  7. Using the clue written on the wall, Use each of the leaves on the appropriate painting.

    • Golden leaf: middle of the three paintings, with the twin mountains.

    • Silvery leaf: far painting in the puddle room, with the woman by the house.

    • Bronzed leaf: right of the three paintings, with the woman running away.

    • White leaf: left of the three paintings, with the funeral.

    • Black leaf: painting closest to the puddle room door, with the dead bodies.

  8. Something's unlocked! Head over and open the Stockroom door.

GOAL: Fixing the Stove

  1. Enter the stockroom and Pick up the Oil on the ground along the wall by the jug.

  2. Walk toward the black cloud: in the middle hanging from the ceiling is an Oil lamp.

  3. Use the Oil on the Oil lamp.

  4. Now use the Cigarette lighter on the lamp.

  5. Head to the corner on your left and along the wall to the left, Pick up the Plant food.

  6. Pick up the Iron bar off the ground in the corner.

  7. Go to the right and check out the painting on the wall.

  8. In your inventory, Use the Cooled ritual dagger with the Cigarette lighter to get the Incandescent ritual dagger.

  9. Use the Incandescent ritual dagger on the Kid painting.

  10. Pick up the Pulsating heart.

  11. Walk into the main room toward the middle between the Broken table and Old handkerchief.

  12. On the ground is a Warehouse, which you can try to open (but can't). Use the Iron bar on the Padlock.

  13. Pick up some Larch-needles, then Pick up the Spare parts for the stove that you reveal (you may want to [C]rouch for a better view).

  14. Head over to the Broken stove and Use the Spare parts for the stove on it to get a Repaired stove.

  15. Use the Larch-needles (out of the Warehouse on the floor of the main room) on the Repaired stove.

  16. Now Use the Pulsating heart (cut out of the Kid painting in the storeroom) on the Repaired stove.

  17. Finally, Use the Cigarette lighter on the Repaired stove.

  18. After the event you activate, go to the far side of the room and Use the Stairs to the attic.

GOAL: Using the Roots

Attic

  1. Head to the three masks and Pick up the Mask of the Assassin, Mask of the Divine and Face of the Truth.

  2. On the floor by the last mask, Use the Plant food (from the floor of the stockroom) on the Root.

  3. After it turns green, Pick up the Root.

  4. Follow the wall to your left into the corner with the Wardrobe.

  5. Open the doors of the Wardrobe and Pick up the Black dress and Black veil.

  6. In the very corner, Use the Plant food on the Root.

  7. Once it turns green, Pick up your second Root.

  8. Continue to follow the wall, and just past the Mirror, Use the Plant food on the Root.

  9. After it turns green, Pick up your third Root.

  10. In the next corner, Use the Plant food on the Root.

  11. Once it turns green, Pick up your fourth Root.

  12. Continue to follow the wall until you encounter a Trunk.

  13. Use the Iron bar on the Trunk.

  14. Pick up the Seed bag.

  15. In the next corner is the fifth Root on which to Use Plant food and Pick up.

  16. Examine the Symbol of the Goddess on the wall nearby.

  17. Just before the Barred door in the corner is the sixth and final Root on which to Use Plant food and pick up.

  18. Use the Trapdoor to head back to the main room.

Main Room

  1. Head to the Stove and pick up the Ashes of the heart left in the burner.

  2. Use the Mask of the Assassin (off the wall in the attic) to put it on. You'll notice the six niches now have A weird image.

  3. Examine it (hmm, a flame). Use one of the Roots (from the attic) on the image.

  4. Now Use the Ashes of the heart on the Root.

  5. Use the Cigarette lighter on the Root with ashes.

  6. Repeat this for each of the niches (three in the main room, two in the puddle room and one in the storeroom).

  7. After lighting the final one, Pick up the Mask of the Assassin.

  8. Go to the niche in the storeroom and Examine the Carved silhouette.

  9. Use the Mask of the Assassin on the Carved silhouette.

  10. Now Use the Black veil on the mask.

GOAL: Enhancing the Symbol of the Goddess

  1. Head to the main room's niches and Pick up the Wooden basin at the bottom of the flames.

  2. Go into the puddle room and Use the Seed bag (out of the Trunk in the attic) on the Puddle.

  3. Use the Stairs to the attic to find out where the Pond tree burst through.

  4. Head to the corner with the Wardrobe.

  5. Examine the Deformed sapling to the left.

  6. In your inventory, Use the Ritual knife on the Cigarette lighter to get the Incandescent ritual dagger.

  7. Use the Incandescent ritual dagger on the Deformed sapling.

  8. Now Use the Wooden basin (from the middle niche in the main room) on the Wound to get a Blood filled bowl.

  9. Head over to the Chair in front of the Symbol of the Goddess and Examine it.

  10. In your inventory, Use the Mask of the Divine (on a wall in the attic) with the Black dress (from the Wardrobe in the attic) to form a Mourning dress with mask.

  11. Use the Mourning dress with mask on the Chair.

  12. Now Use the Mourning dress with mask.

  13. The Symbol is now glowing red. Examine the Gleaming Goddess.

  14. Use the Blood filled bowl (filled at the Deformed sapling) on the Gleaming Goddess.

  15. Examine the Goddess reborn, then Use it to acquire Anna's key.

ENDING #1 and #2

  • To get the first two endings, Use Anna's key on the Barred door.

  • Which ending you get depends on how much time it took you to get to this point.

  • If you got out before the Symbol acquired the bloody handprints and bones below, you'll get Ending #1.

  • If you got out afterwards, you'll get Ending #2.

ENDING #3

  1. Head to the Door on the floor near the corner with the Wardrobe.

  2. Use Anna's key (from the Goddess reborn) on the Door on the floor.

  3. Go to each of the four surrounding mirrors and Use them until they're reflecing light toward the Central mirror (you will no longer be able to Use them when they reach that point).

  4. Now Use the two masks in conjunction with the mirrors until you can place the Mask of ??? on the Central mirror and create a light bridge.

    • The mirrors will reject a mask if it cannot be used there.

    • Spoilered below is the order of masks to mirrors.

    • If you understand the logic behind the order, please let me know!

    • (outer mirrors numbered 1-4, clockwise, starting with the one to your left assuming you're at the Detached door facing the chasm)

      Be sure to Pick up the mask after you Use it on a Mirror.

      1. Face of the Truth - Mirror 4

      2. Mask of the Divine - Mirror 2

      3. Truth - 1

      4. Divine - 3

      5. Divine - 2

      6. Truth - 1

      7. Divine - 3

      8. Truth - 4

      9. Finally, Use the Face of the Truth on the Central mirror to create the bridge.

  5. Cross the light bridge and head up the passageway.

  6. After the scene, continue up.

  7. At the first candle, head left and keep choosing the left path.

  8. Once you've watched the stove scene, walk to the end of the path to the Carved stony eye.

  9. Examine both the Carved stony eye and Eye of stone.

  10. Use the Closable hunting knife on the Eye of stone to collect it.

  11. Turn around and follow the left wall up the next passageway to the Stony visage with sharp-pointed teeth.

  12. Examine the Stony visage, then Use the Eye of stone on the visage.

  13. After the visage has done its thing, Pick up the Alive eye.

  14. Return to the Carved stony eye and Use the Alive eye on it.

  15. Head back down the passageway and to the right below the red symbol on the ceiling.

  16. Take the passage to the left at the candle.

  17. After each set of dialogue, continue to the end of the passage.

  18. Congratulations! You've beat the game!!!

6 Comments

Anna Walkthrough

General Information

Controls

(left/right/middle click is only specified when necessary, otherwise you may assume the regular left click)

  • Walk around with [WASD] or the [arrow] keys.

  • The camera is controlled by the mouse.

  • When the cursor (central white circle) becomes red, that means you're hovering over an object you can interact with (the name appears in the lower left).

  • Left click over an object to get the option to examine, pick up or use it.

  • When the cursor becomes a hand, right click and drag to move the object. You may also left click it to get the interact options.

  • Middle click or press [I] to open your inventory.

    • Click an object to get the interact options to use or examine the item.

    • "Examine" will take you out of the inventory screen and give you a brief description of the object.

    • "Use" will change your cursor and allow you to use the object with another object.

    • Middle click/[I] to exit the inventory screen and use the object elsewhere.

  • Crouch by pressing [C] (never mandatory in the game, just for perspective purposes).

  • Press [H] for an in-game hint.

    • Hint options can be accessed in the Options menu.

    • The hint will only work for interactions in the room you are currently in, so if more than one is accessible, be sure to use it in both.

  • Pull up the menu for saving/loading/exiting/etc. by pressing [F1] (and now [esc] after an update by the developers).

Game Mechanics/Endings

  • There are a total of three endings.

  • The endings are based on how much time you took to complete the game and, in one case, something you do/don't do.

  • This walkthrough will not explain each ending, but take you through the steps to get there.

  • Despite the factor of time for the endings, there are no puzzles/actions that themselves must be performed within a time limit.

Main Walkthrough

GOAL: Getting into the House

  1. Head toward the house and try to Use the Main Door. It won't budge.

  2. Look above it and Examine the Eye-shaped notch. Make note of it.

  3. Turn around and head to the bypass in the river.

  4. Examine the Deep mud pond. Perhaps there's something hidden below?

  5. There's a Big Rock blocking either side of the pond that need to be moved to clear the mud.

  6. Turn back around and go by the stairs to the left of the Main Door.

  7. Look on the side of the stairs and notice the Little Door.

  8. Use the Closable hunting knife on the Little string in the center of the door.

  9. Move each of the doors to expose the Dark corner (you may want to [C]rouch to see things better).

  10. Now use the Cigarette lighter on the Dry branch.

  11. Pick up the Mirror shard.

  12. Head out the enclosure and go into the corner with the large tree.

  13. Pick up the Wooden branch on the ground by the far side of the tree.

  14. Continue around the back of the enclosure to the large rock.

  15. Pick up one of the Dried pine cones on the ground.

  16. Use the Wooden branch on each of the Big Rocks.

  17. Now pick up the second Mirror shard that's revealed in the water.

  18. Head back to the Main Door and use both Mirror shards on the Eye-shaped notch.

  19. Use the Dried pine cone on the Eye-shaped notch.

  20. Now use the Cigarette lighter on it too.

  21. You have to put out the fire, so turn around and head to the Rivulet.

  22. Use the Empty canteen on the Rivulet to get a Filled canteen.

  23. Return to the Main Door and use the Filled canteen on the Eye-shaped notch.

  24. Now use the Main Door to enter the house.

GOAL: Investigating the Light in the Water

  1. Turn to your right and examine the Old handkerchief, making note of what's written.

  2. Head straight into the corner with the stove.

  3. Pick up some Sawdust out of the cart.

  4. Turn around and head to the left of the Old water saw.

  5. Move the pile of Decrepit boards until you reveal an item.

  6. Pick up the Sharp fragment.

  7. Head forward and left to the Broken table.

  8. Examine the Stuck bone hilt on the counter.

  9. Use the Wooden branch on the hilt.

  10. Pick up the Bone hilt.

  11. Go into your inventory and use the Sharp fragment on the Bone hilt to create a Ritual knife.

  12. Turn right and open the Broken Door.

  13. Head straight and go halfway down the left walkway.

  14. Now turn right and examine the Feeble luminescence below.

  15. Use the Sawdust (from the cart in the corner by the stove) on the Feeble luminescence to reveal the transparent bridge.

  16. Walk along the bridge and examine the Circle of limpid water below (hmm, where have you heard about limpid water before?).

  17. Go into your inventory and use the Ritual knife with the Cigarette lighter to get an Incandescent ritual dagger (effects not permanent, eventually becomes a Cooled ritual dagger).

  18. Use the Incandescent ritual dagger on the Circle of limpid water.

GOAL: Finding a Use for the Hollow on the Wall

  1. Examine the hollow on the wall on the back side of the puddle room (hmm, something must fit in that notch).

  2. Use the Empty canteen on the Puddle to get a Filled canteen.

  3. Head into the main room and to the corner with the stove, noticing the three paintings along the far wall.

  4. Open the Stove's Door and Examine the Fire.

  5. Use the Filled canteen on the Fire.

  6. After the event you trigger, Pick up the Key out of the Broken stove.

  7. Go to the Broken table in the opposite corner.

  8. Use the Key on the Drawer to the right.

  9. Open the Drawer and Pick up A heap of tied leaves and a Wooden box.

  10. Go into your inventory and examine the Wooden box.

  11. Head into the puddle room to the hollow on the wall.

  12. Use the Wooden box on the hollow.

  13. Examine the Perforated wooden box.

GOAL: Opening the Stockroom Door

  1. Go out into the main room and into the corner to the left.

  2. Examine the Stockroom door (hmm, it's locked).

  3. Head to the three paintings, then Use the middle one.

  4. Turn right and read the text that appears above the Broken stove.

  5. Go into your inventory and use the Closable hunting knife on the heap of tied leaves to get a Golden leaf, Silvery leaf, Bronzed leaf, White leaf and Black leaf.

  6. Head into the puddle room and check out the two paintings there.

  7. Using the clue written on the wall, Use each of the leaves on the appropriate painting.

    • Golden leaf: middle of the three paintings, with the twin mountains.

    • Silvery leaf: far painting in the puddle room, with the woman by the house.

    • Bronzed leaf: right of the three paintings, with the woman running away.

    • White leaf: left of the three paintings, with the funeral.

    • Black leaf: painting closest to the puddle room door, with the dead bodies.

  8. Something's unlocked! Head over and open the Stockroom door.

GOAL: Fixing the Stove

  1. Enter the stockroom and Pick up the Oil on the ground along the wall by the jug.

  2. Walk toward the black cloud: in the middle hanging from the ceiling is an Oil lamp.

  3. Use the Oil on the Oil lamp.

  4. Now use the Cigarette lighter on the lamp.

  5. Head to the corner on your left and along the wall to the left, Pick up the Plant food.

  6. Pick up the Iron bar off the ground in the corner.

  7. Go to the right and check out the painting on the wall.

  8. In your inventory, Use the Cooled ritual dagger with the Cigarette lighter to get the Incandescent ritual dagger.

  9. Use the Incandescent ritual dagger on the Kid painting.

  10. Pick up the Pulsating heart.

  11. Walk into the main room toward the middle between the Broken table and Old handkerchief.

  12. On the ground is a Warehouse, which you can try to open (but can't). Use the Iron bar on the Padlock.

  13. Pick up some Larch-needles, then Pick up the Spare parts for the stove that you reveal (you may want to [C]rouch for a better view).

  14. Head over to the Broken stove and Use the Spare parts for the stove on it to get a Repaired stove.

  15. Use the Larch-needles (out of the Warehouse on the floor of the main room) on the Repaired stove.

  16. Now Use the Pulsating heart (cut out of the Kid painting in the storeroom) on the Repaired stove.

  17. Finally, Use the Cigarette lighter on the Repaired stove.

  18. After the event you activate, go to the far side of the room and Use the Stairs to the attic.

GOAL: Using the Roots

Attic

  1. Head to the three masks and Pick up the Mask of the Assassin, Mask of the Divine and Face of the Truth.

  2. On the floor by the last mask, Use the Plant food (from the floor of the stockroom) on the Root.

  3. After it turns green, Pick up the Root.

  4. Follow the wall to your left into the corner with the Wardrobe.

  5. Open the doors of the Wardrobe and Pick up the Black dress and Black veil.

  6. In the very corner, Use the Plant food on the Root.

  7. Once it turns green, Pick up your second Root.

  8. Continue to follow the wall, and just past the Mirror, Use the Plant food on the Root.

  9. After it turns green, Pick up your third Root.

  10. In the next corner, Use the Plant food on the Root.

  11. Once it turns green, Pick up your fourth Root.

  12. Continue to follow the wall until you encounter a Trunk.

  13. Use the Iron bar on the Trunk.

  14. Pick up the Seed bag.

  15. In the next corner is the fifth Root on which to Use Plant food and Pick up.

  16. Examine the Symbol of the Goddess on the wall nearby.

  17. Just before the Barred door in the corner is the sixth and final Root on which to Use Plant food and pick up.

  18. Use the Trapdoor to head back to the main room.

Main Room

  1. Head to the Stove and pick up the Ashes of the heart left in the burner.

  2. Use the Mask of the Assassin (off the wall in the attic) to put it on. You'll notice the six niches now have A weird image.

  3. Examine it (hmm, a flame). Use one of the Roots (from the attic) on the image.

  4. Now Use the Ashes of the heart on the Root.

  5. Use the Cigarette lighter on the Root with ashes.

  6. Repeat this for each of the niches (three in the main room, two in the puddle room and one in the storeroom).

  7. After lighting the final one, Pick up the Mask of the Assassin.

  8. Go to the niche in the storeroom and Examine the Carved silhouette.

  9. Use the Mask of the Assassin on the Carved silhouette.

  10. Now Use the Black veil on the mask.

GOAL: Enhancing the Symbol of the Goddess

  1. Head to the main room's niches and Pick up the Wooden basin at the bottom of the flames.

  2. Go into the puddle room and Use the Seed bag (out of the Trunk in the attic) on the Puddle.

  3. Use the Stairs to the attic to find out where the Pond tree burst through.

  4. Head to the corner with the Wardrobe.

  5. Examine the Deformed sapling to the left.

  6. In your inventory, Use the Ritual knife on the Cigarette lighter to get the Incandescent ritual dagger.

  7. Use the Incandescent ritual dagger on the Deformed sapling.

  8. Now Use the Wooden basin (from the middle niche in the main room) on the Wound to get a Blood filled bowl.

  9. Head over to the Chair in front of the Symbol of the Goddess and Examine it.

  10. In your inventory, Use the Mask of the Divine (on a wall in the attic) with the Black dress (from the Wardrobe in the attic) to form a Mourning dress with mask.

  11. Use the Mourning dress with mask on the Chair.

  12. Now Use the Mourning dress with mask.

  13. The Symbol is now glowing red. Examine the Gleaming Goddess.

  14. Use the Blood filled bowl (filled at the Deformed sapling) on the Gleaming Goddess.

  15. Examine the Goddess reborn, then Use it to acquire Anna's key.

ENDING #1 and #2

  • To get the first two endings, Use Anna's key on the Barred door.

  • Which ending you get depends on how much time it took you to get to this point.

  • If you got out before the Symbol acquired the bloody handprints and bones below, you'll get Ending #1.

  • If you got out afterwards, you'll get Ending #2.

ENDING #3

  1. Head to the Door on the floor near the corner with the Wardrobe.

  2. Use Anna's key (from the Goddess reborn) on the Door on the floor.

  3. Go to each of the four surrounding mirrors and Use them until they're reflecing light toward the Central mirror (you will no longer be able to Use them when they reach that point).

  4. Now Use the two masks in conjunction with the mirrors until you can place the Mask of ??? on the Central mirror and create a light bridge.

    • The mirrors will reject a mask if it cannot be used there.

    • Spoilered below is the order of masks to mirrors.

    • If you understand the logic behind the order, please let me know!

    • (outer mirrors numbered 1-4, clockwise, starting with the one to your left assuming you're at the Detached door facing the chasm)

      Be sure to Pick up the mask after you Use it on a Mirror.

      1. Face of the Truth - Mirror 4

      2. Mask of the Divine - Mirror 2

      3. Truth - 1

      4. Divine - 3

      5. Divine - 2

      6. Truth - 1

      7. Divine - 3

      8. Truth - 4

      9. Finally, Use the Face of the Truth on the Central mirror to create the bridge.

  5. Cross the light bridge and head up the passageway.

  6. After the scene, continue up.

  7. At the first candle, head left and keep choosing the left path.

  8. Once you've watched the stove scene, walk to the end of the path to the Carved stony eye.

  9. Examine both the Carved stony eye and Eye of stone.

  10. Use the Closable hunting knife on the Eye of stone to collect it.

  11. Turn around and follow the left wall up the next passageway to the Stony visage with sharp-pointed teeth.

  12. Examine the Stony visage, then Use the Eye of stone on the visage.

  13. After the visage has done its thing, Pick up the Alive eye.

  14. Return to the Carved stony eye and Use the Alive eye on it.

  15. Head back down the passageway and to the right below the red symbol on the ceiling.

  16. Take the passage to the left at the candle.

  17. After each set of dialogue, continue to the end of the passage.

  18. Congratulations! You've beat the game!!!

Reply

Where can you download the trial, or is there even one? I mean, I've watched many people play this game and it looks really awesome, but where is it? I'm so excited because I've heard of the horror scares and the ritual part of the game, and was really interested.

Reply
elle July 30, 2012 1:25 PM replied to akatsuki

When you click the "full version" link at the bottom of the review (or the screenshot in the middle of the review) you'll be brought to the Anna download page.

From there, you can select one of three options for getting the game. If you choose the "Just Adventure" link, from there is a "download trial" button. I have not used the trial version myself, though, so I cannot verify anything else about it.

Hope that helps!

Reply
malone.audrey August 22, 2012 1:20 AM

At first I was able to get through the puzzles just fine, but I've started needing help more and more since opening up the way to the attic. nothing in there makes any sense to me whatsoever! But I hate to pay nearly $10 for a game and then cheat my way through it. :(
On the plus side, the scares were legitimately good. I hate jump-scares usually but I've been reloading old saves just to see them again and try to catch more.

Reply
https://www.google.com/accounts/o8/id?id=AItOawnR4FbSgDEc6KXBMRYyBqMmL6p-wPzGKg4 September 25, 2012 9:13 PM

Worst $10 dollars ever spent. Don't waste your time, you will find yourself having to cheat, after all, who in the hell is going to figure that you have to light your dagger, cut a paint and extract a pulsing heart and put in a stove to finally get ashes???
Frustrating, game is garbage!

Reply
malone.audrey November 13, 2012 8:59 PM

Well I decided to go back and finish the game. It's too late for me to get ending #1, but I got ending #2 and then cheated like a fiend unfortunately to get through ending #3.
What was even the point? I... I have only a tenuous grasp of the plot I just went through. Maybe if I played it all in one run? I guess it's not the plot so much as the character's motives that confuse the heck out of me? I'm just... I don't even know. Would it make sense if I had the kind of mind that thought the puzzles were intuitive?

Reply

^ Scroll Up | Homepage >

Leave a comment [top of page]

Please consider creating a Casual Gameplay account if you're a regular visitor here, as it will allow us to create an even better experience for you. Sign-up here!
  • PLEASE UNDERSTAND SITE POLICIES BEFORE POSTING COMMENTS
  • You may use limited HTML tags for style:
    (a href, b, br/, strong, em, ul, ol, li, code, spoiler)
    HTML tags begin with a less-than sign: < and end with a greater-than sign: >. Always. No exceptions.
  • To post spoilers, please use spoiler tags: <spoiler> example </spoiler>
    If you need help understanding spoiler tags, read the spoiler help.
  • Please Preview your comment before posting, especially when using spoilers!
  • No link dropping, no domains as names; do not spam, and do not advertise! (rel="nofollow" in use)
chrpa Jayisgames needs your help to continue providing quality content. Click for details Welcome to the Roundup 66 - Retro with four games! After you find the ten monkeys in the chapter, look in the inventory. You will find a...  ...
chrpa Jayisgames needs your help to continue providing quality content. Click for details Welcome to the Roundup 65 with three games! As mentioned in the previous roundups, only odd-numbered episodes are featured since even-numbered are for Robin Vencel's patrons (the...  ...
chrpa Jayisgames needs your help to continue providing quality content. Click for details Hi! Weekday Escape and Weekday Puzzle are here! First we have two new cans from tomoLaSiDo and then two small rooms from isotronic. That's all for this...  ...
6,365 Views
0 Comments
chrpa Jayisgames needs your help to continue providing quality content. Click for details Welcome to Mobile Monday! We have another beautiful game from Nicolet and it's a winter game as it should be. Tasuku Yahiro have released another of their...  ...

HELP Jayisgames.com

Recent Comments


Display 5 more comments
Limit to the last 5 comments

Game of the week


Dark Romance: Vampire Origins Collector's Edition

Your Favorite Games edit

add
Save links to your favorite games here. Use the Favorites editor.

Monthly Archives