

Escape the Room: Limited Time
Platform: Android

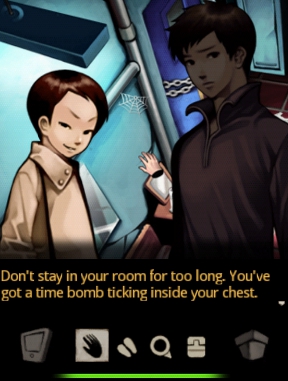
![]() Most of us don't generally wake up with a mystery to solve, and when we do it's usually of the boring "Why am I wearing someone else's shoes and why is my hair fuschia" variety. But for the star of Escape the Room: Limited Time, a free Android escape adventure by Gameday Inc, it's a bit more sinister than that. He regains consciousness on a hospital gurney with a burning pain in his chest and a brand new scar to show for it. His kidnappers appear to be two young children calling themselves Black and White whose only information to offer is that he better get a move on and find his way out... before the newly implanted bomb in his chest explodes. It's a race against time if you want to solve the mystery and survive "the game". Who are the other people you encounter locked up with you in this maze of bizarre rooms, and what have you done to deserve playing this twisted game with Black and White?
Most of us don't generally wake up with a mystery to solve, and when we do it's usually of the boring "Why am I wearing someone else's shoes and why is my hair fuschia" variety. But for the star of Escape the Room: Limited Time, a free Android escape adventure by Gameday Inc, it's a bit more sinister than that. He regains consciousness on a hospital gurney with a burning pain in his chest and a brand new scar to show for it. His kidnappers appear to be two young children calling themselves Black and White whose only information to offer is that he better get a move on and find his way out... before the newly implanted bomb in his chest explodes. It's a race against time if you want to solve the mystery and survive "the game". Who are the other people you encounter locked up with you in this maze of bizarre rooms, and what have you done to deserve playing this twisted game with Black and White?
 Gameplay is simple, as you'll see from a comprehensive tutorial at the start of the game thanks to one of your prepubescent kidnappers. (Just because they surgically implanted a bomb in your chest doesn't mean they don't care.) The game consists of a series of locked rooms to conquer, each one unique and standing as its own "level". Just tap on an icon at the bottom of the screen to choose as action such as "take" or "examine", and then anywhere onscreen to interact. Clues and helpful items can be hidden anywhere so make sure to keep your eyes peeled for sneaky details or suspicious looking furniture. All your items are stored in your inventory where they can be combined, disassembled, more closely examined, and so forth at your leisure. Well... okay, not really at your leisure since taking your time is a good way to wind up spontaneously rearranging your innards.
At the start of each level, the bomb in your chest is reset, and the longer you spend trying to solve each room, the more the representative green bar will shrink and change colour to let you know you're dangerously close to repainting the walls with your insides. Fail or set off a booby trap, and you'll have to restart the room unless you have an object to turn back time to before your unfortunate decision. If you're really struggling, there are several optional in-game purchases you can make for items like "The Hand of God", which instantly solves puzzles, that can really help when you're down to the wire. These aren't necessary to complete the game, of course, but will probably start looking really tempting the harder the going gets as the levels progress.
 Analysis: Limited Time really is an absolutely gorgeous little game that packs a ton of quality and intrigue into a relatively small package. Though the writing occasionally feels a little stiff and awkward, it still manages to weave a remarkably solid bit of adventuring and a great thriller tale in with some really substantial escape-the-room gameplay. It's definitely not early Stephen King and you'll probably think a lot of the plot sounds kind of familiar if you watch schlocky horror thriller movies at all, but it's cheesy, fantastic fun that really adds a whole layer of entertainment to the game to make it feel like a cohesive adventure instead of just a series of random puzzles. Which are, by the way, pretty darn good. The difficulty level ramps up gradually and you'll need to use your brain for a lot more than you would for other titles that just simply have you use objects on other items.
Unfortunately, without the ability to zoom in on the screen manipulating tiny or slim objects can get frustrating, especially when picking up really small objects can be annoyingly precise. I played on an HTC One S, which isn't exactly known for its small screen, and still ran into issues grabbing small items, particularly the jigsaw pieces. The timer is also obviously going to be a turnoff for some players, though it usually feels generous. Without any sort of cursor to change when you pass over an interactive area, you'll need to check everything out and essentially "toss the room". This is, admittedly, exactly what you'd do if you were in the protagonist's situation, but it does make that tendency finicky hotspots that much more painful at times.
Despite an occasionally clunky design and a forced time limit, however, Escape the Room: Limited Time is easily recommended for patient point-and-click fans who love a good cheesy thriller story. It isn't perfect, but it's a remarkably beefy experience packed with puzzles and mystery that you can easily sink into whenever you have a spare moment. The slick, professional design, clever rooms, and engaging mystery makes this a flawed but ultimately fun free title that's well worth checking out for its pricetag of nada.
NOTE: This game was played and reviewed on an HTC One S. Game was available in the North American market at the time of publication, but may not be available in other territories. Please see individual app market pages for purchasing info.


Walkthrough Guide
(Please allow page to fully load for spoiler tags to be functional.)
Escape the Room: Limited Time walkthrough
General Info
Tap text to continue or hit the upper right arrow to skip a whole section.
Drag your finger over your device to pan the screen.
Stage Select
The overall map is shown at the bottom in black squares.
Click the arrows above to navigate the rooms.
Your current room is circled in red below.
Your progress is shown in yellow.
If you need a breather, opening the inventory will pause the timer.
Challenges
(I do not have a complete list and would love help from you guys to finish it up!)
(Thanks to ThemePark and cman9428 for their help!)
Starting Escape the Room - Begin the game.
Item Application 1 - Learn how to disassemble an item through the tutorial.
Item Application 2 - Learn how to combine two items through the tutorial.
Item Application 3 - Learn how to view an item's details through the tutorial.
Escape Techniques - Complete the tutorial.
WHY? - Start Room 0.
Composition Techniques - Combine two/more items.
Well Begun Is Half Done - Escape Room 1.
The Encounter - Meet Jitae in Room 2.
The Helpless - Finish Room 6.
Trial and Error - Get your first bad ending (die).
Safety First 1 - In Room 5, use the stone on the hole in the sphinx room before entering the fan room.
Safety First 2 - In Room 11, use the bent pipe on the lever while the electricity is still active.
How Far Have I Come? - Finish Room 5.
Welcomed Guest - Find the teacher in Room 7.
Between Hope and Despair - Being parted from Seulbi in Room 4.
Preposterous Imagination - Use an item in the incorrect place more than ten times.
Revealing Memories - Finish Room 9.
Old Friend - Save Seulbi in Room 3.
A Brush with Death - Save the doctor in Room 8.
Brutal Escape - (Not sure).
Companion - (Not sure, I think from completing Room 14).
Custom Cursor Lock-on - Equip a custom cursor from the Customize menu.
Meeting with the Developers - Complete Room 15.
Old Friend's Secret - Complete Room 16.
White's Intention - Complete Room 17.
Link to Escape - Complete Rooms 20 and 21.
Reason to Escape - Complete Rooms 18 and 19.
Deteriorating Ego - Punch the mirror in the final area of Room 12.
Hand of Minus - Get 10 bad endings.
Perfect Escape - (Not sure).
Custom Cursor Collection Completed - Self explanatory: collect all the custom cursors.
Jigsaw Puzzle Collection Completed - Collect all 16 jigsaw puzzle pieces.
Escape Memory Collection Completed - See all the event/flashback scenes.
Gold Key Collector - Collect 20 or more gold keys (how it's described in the game, though I it's actually from collecting 30 or more).
Escape Artist - Complete all 21 rooms.
Main Walkthrough
Not all rooms are required to complete the game.
Which rooms are available to you is determined by actions you do/do not take in a previous room.
Basic Room
Room 0-Beginning of the Escape
Playing through the tutorial mode, the game will walk you through each step necessary to clear the level.
Room 1-Traces
Use the hand on the desk drawers and collect the Box Cutter.
Open the cabinet by the door and collect Torn Memo1.
Now collect Torn Memo2 on the floor nearby.
In your inventory, combine the Torn Memos to get the Completed Memo.
Examine the Completed Memo to see that is smells like lemon.
Open the book on the desk and examine it to receive a clue.
Collect the Lighter on the nightstand and use it on the candle.
Now use the Completed Memo on the lit candle to get a Charred Memo.
Examine the Charred Memo and view it to receive a number code.
Use the Box Cutter on the poster between the cabinet and desk.
Now examine the safe and enter the code from the Charred Memo.
0213
Collect the Key and use it on the lock on the door.
Open the door and walk out.
Room 2-Lies
Study
Use the hand on the unconscious man's wrist to awaken him.
Collect the book on the rug to collect Mysterious Book1.
Open the two drawers on the desk and collect Mysterious Book2 and Lighter.
Now open the blue box on the rug and collect Mysterious Book3.
Open the cabinet in the lower left and collect the Candle.
Collect the Scissors on the desk.
Now open the safe by the door and collect the Rusty Cogwheel.
In the upper left corner, get the bottle of Lubricant.
Combine the Lubricant and Rusty Cogwheel to obtain a Cogwheel.
Use the Cogwheel in the space by the other gears.
On the bookcase by the door, use all three Mysterious Books.
Now use the hand on the bookcase to solve the book arrangement puzzle.
The goal is to spell a word.
Each letter is made up of two books.
Solution:
MONEY
(The first half of 'M' and 'N' look very similar.)
Use the Scissors on the rug to get Carpet.
Walk into the passage that opens behind the bookcase.
Back Room
Combine the Candle and Lighter to make Candlelight.
Use the Candlelight in the room to light it up.
Now combine the Carpet and Lubricant to get Lubricated Carpet.
On the rusty metal panel by the safe, use the Lubricated Carpet.
Examine it to get a code.
Use the hand on the safe and enter the code from the panel.
8302
Open the safe and collect the Old Journal.
Examine the Old Journal and read it to obtain a Key.
Walk back into the study, use the Key on the door, and exit.
Room 3-Memories
Bedroom
Collect the Memo near the rug.
Examine the Memo to see a clue.
The four lines represent a set of additions with the sum on the right.
Use these lines to deduce the value of each suit.
With the hand, click the heart safe and enter the two digit value of the heart based on the Memo.
03
Collect the Journal.
Open the toolbox on the lower left desk and collect the Cutting Nipper and Wrench.
Again with the hand, click the club safe and enter the two digit value of the club based on the Memo.
17
Collect the Magnet.
Open the right drawer of the computer desk and collect the Box Cutter.
Now collect the Short Wire off that desk.
Use the Box Cutter on the Voodoo Doll to obtain it.
Click the wired door on top, then click your PDA to answer it.
With the Cutting Nipper, remove the wire on the door.
Now use the Wrench on either of the bolts on the door.
Open the door and walk through.
Room 1
Use the Cutting Nipper on the TV wire to obtain an Electric Wire.
Return to the bedroom.
Bedroom
Use the Electric Wire to connect the two exposed ends.
Click the arrow buttons by the door to open it.
Walk through the door.
Machine Room
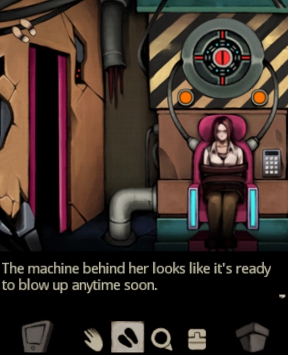
Examine the woman.
Collect the Key Necklace off the Seulbi.
Back up, then combine the Key Necklace and Journal.
Now examine the Journal and view its contents, making note of the last page.
Use the hand on the keypad and enter the code from the Journal.
0650
Walk back into the bedroom.
Bedroom
Disassemble the Voodoo Doll to get a Wooden Doll and Yarn.
Combine the Yarn and Magnet to obtain a Tied Magnet.
Use the Tied Magnet to obtain the Key out of the fish tank.
Now use the Key on the nearby door and exit.
Room 4-Hope
(This room is only accessible if you saved Seulbi in Room 3.)
Collect the Chalk below the writing.
Now collect the Box Cutter out of the pencil holder nearby.
Examine the writing on the lower right desk and make note of the clue.
Open the leftmost highlighted locker and collect the Hammer.
Now open the rightmost highlighted locker and collect the Die.
Combine the Box Cutter and Chalk to obtain Chalk Powder.
Use the Chalk Powder on the mirror and make note of the code.
Examine the die and determine the four digit number, making use of the code from the mirror and the code on the desk.
The mirror code tells you which sides of the die to look at in what order.
The desk code tells you how to add up the pips to get the four digit number.
With the hand, click the safe under the chalkboard and enter the four digit number.
Unfortunately, the mirror code is randomized, making the four digit number randomized.
Open the safe and collect the Heart-shaped Key.
Use the Heart-shaped Key on the locker with a heart.
Now open the locker and collect the Letter Envelope.
Disassemble the Letter Envelope to obtain a Letter.
Examine the Letter and view it to read the contents.
After obtaining the Key, use it on the door to open it, then step through.
Now examine the missing button of the elevator on the right.
Head back left into the classroom.
With the hand, click the metal heart on the lower middle desk.
Use the Hammer on the cracks on the chalkboard and step through the hole.
Room 5-Riddle
Sphinx Room
Collect Short Rope1 off the rug in front of the speakers.
Click the coffin twice to open it.
Now collect Short Rope2.
Open the blue box in the lower left and collect Short Rope3.
Combine two of the Short Ropes to create Flimsy Rope.
Now combine Flimsy Rope and the remaining Short Rope to create Safe Rope.
Collect the Stone off the rug.
Click the speakers and solve the riddle of the sphinx.
Man
Examine the writing by the panel on the right wall for a clue.
Now click the panel and enter the correct number based on that clue.
7 (While not something that could be deduced from the riddle, it may have been worded incorrectly.)
Examine the writing by the panel on the bottom wall for a clue.
Now click the panel and enter the correct number based on that clue.
9 (from 'September', the 9th month and 'Baseball', which has 9 innings.)
Thanks to ThemePark for help on this!
Examine the writing by the panel on the left wall for a clue.
Click the panel and enter the correct number based on that clue.
2 (the word 'time' is in red, and since a regular clock doesn't go over 12 hours, a result over that number would start back at one)
After the floor panel has opened, use the Safe Rope on the stake, then climb down (using the walk symbol).
Fan Room
Click the red panel of bulbs on the top wall.
After speaking to White, click the panel again, then click the lit bulb (which one is lit is randomized).
Examine the fan on the bottom wall, making note that there's a number on the blade.
Now look at the pattern of shapes on the floor and make note of them.
With the hand, click the clocks on the right wall and solve the puzzle by moving the hands into the correct positions.
The clock hands should replicate the shapes on the floor.
The position of a specific hand does not matter, just that the positions are filled (i.e., hour hand and minute hand can be swapped and still be a solution).
After the fan has turned, re-examine it and make note of the new number.
Click the door and enter the new code from the fan.
The code is randomized.
Open the door and exit.
Room 6-Trap
Click the iron bars on the right to speak to the man.
Collect the blue Spray Lubricant and the Instant Coffee off the desk.
Disassemble the Instant Coffee to get a Straw and Plastic Coffee Bottle.
Combine the Straw and Spray Lubricant to create Spray Lubricant with Straw.
Use the Spray Lubricant with Straw on the safe in the lower right corner.
Open the safe and collect the Foil.
Now open the toolbox on the desk and collect the Screwdriver.
Use the Screwdriver on the yellow/black box by the iron bars.
Examine the panel to find out that it needs two fuses.
Disassemble the Foil twice to create Makeshift Fuse1 and Makeshift Fuse2.
Now use both Makeshift Fuses on the panel.
Examine the bulbs on the bottom wall for a clue.
In each panel, the bulbs that flash should trace a number.
With the hand icon, click the desk computer and enter the code from the bulbs.
The code is randomized.
Collect the Insulated Gloves out of the glass tube.
Use the Insulated Gloves on the exposed wires in the lower left and solve the sliding tiles puzzle.
The puzzle is randomized.
After the doors are opened, exit the room.
Room 7-Secret
Child's Room
After answering your PDA, collect the Candy Cube from the snack tray in the upper left.
Disassemble it to get a Blue Block.
Collect the Capsule from the lower left cabinet.
Now disassemble the Capsule to get a Green Block.
Open the cabinet doors and collect the Hammer.
Now open the two desk drawers and collect the Candy Cube and Box Cutter.
Use the Candy Cube on the funny looking key on the keyboard to obtain a Yellow Block.
With the Hammer, smash the lamp in the upper right and collect the Purple Block.
Now use the Box Cutter on the teddy bear in the lower right and collect the Red Block.
Examine the paper by the computer and make note of the clue.
Use the Blue, Green, Yellow, Purple and Red Blocks on the slots in the top wall.
With the hand icon, click the blocks and place them in order as indicated by the clue on the wall.
green, purple, yellow, red, blue
Open the safe above and collect the Key.
use the Key on the door, open it and head into the next room.
Elevator Room
Collect the Steel Pipe on the ground.
Open the upper right safe and collect the Lever.
Use the Steel Pipe on the elevator doors to open them.
Collect the Strange Block off Ms. Kwon.
Now use the Strange Block on the opening below.
With the hand, click the blocks and solve the three puzzles.
After the opening appears, step through into the next room.
Back Room
Use the Lever (from the upper right safe of the elevator room) on the slot to the left.
Flip the lever and collect the Key.
Head back into the elevator room, use the Key on the door, open it, and exit.
Room 8-Selection
Office
Click the man on the ground to try to speak to him.
Collect the Small Key out of his pocket, then back up.
Collect the Ballpoint and Memo Pad off the desk.
Combine the Ballpoint and Memo Pad to create a Memo Set.
Use the Memo Set on the doctor to receive a Hint Memo.
Click your PDA to talk to Black, then examine the Hint Memo and view it for a clue.
Collect the Glass Cup off the coffee table.
Examine the paper above the doctor for a four digit code.
With the hand, click the door and enter the code from the paper.
0692
Open the door and step into the next room.
Lab
Collect the Syringe off the table by the open door.
Use the Small Key (from the doctor's pocket in the office) on the cabinet in the lower right.
Open the cabinet and collect all three Medicine Bottles.
Examine each bottle, then view it to see the color of the label.
Combine two of the Medicine Bottles based on the Hint Memo to make Compounded Medicine!.
Combine Medicine Bottle2 and Medicine Bottle3 (blue and yellow to make green).
Combine the Syringe and Compounded Medicine! to create Filled Syringe?.
Head back into the office, use the Filled Syringe? on the doctor, then return to the lab.
Collect the X-ray Film out of the bed.
Use the Glass Cup (from the coffee table in the office) on the jug at the bottom to obtain Hydrochloric Acid.
Now use the Hydrochloric Acid on the yellow/black floor panel.
Hit the switch you reveal.
With the hand, click the lock on the bottom door and make note of the clue scribbled there.
Use the X-ray Film on the lit panel behind the bed.
Examine the film and make note of the clues you see there.
Now examine the heart monitor and make note of the letter you see there.
To get the corresponding code, you have to use your eyes/ears.
Pay attention to how many times it beeps/how many peaks and valleys occur.
Make note of the four digit code you get from it.
Go back to the lock and enter the number you get from the clues.
X + Y, X from the x-ray film, Y from the monitor.
X is 1423.
Y is randomized, so the lock solution is as well.
Open the door and exit.
Room 9-Judgment
Main Room
Collect the Journal on the table to the right.
Examine the Journal and view it, making note of the dates of each entry.
With the hand, click the door in the bottom corner.
Look at the number written by it and enter the correct code from the Journal.
0521 for the 1988 door
Open the door and step through.
1988 Room/Child's Room
Examine the red writing by the safe for a clue.
Collect the Switch Button on the plank.
Press the elevator button and step through.
Open the blue door and step through that as well.
Collect the Cutter by the snack tray in the upper left corner.
Use the Switch Button (from on the plank in the 1988 room) on the opening by the door.
Hit the switch and make note of the numbers that light up.
Again hit the switch, exit the room and go back to the 1988 room.
With the hand, click the safe and enter the code from the child's room.
2418
Collect Memory Card A and the Balloon.
Head back into the main room.
Main Room
Use Memory Card A (from the safe in the 1988 room) on the card holder.
Examine the screen, make note of the number, then back up.
With the hand, click the door in the top corner.
Look at the number written by it and enter the correct code from the Journal.
1118 for the 1992 door
Open the door and step through.
1992 Room/Lab
Examine the red writing by the safe for a clue.
Use the Cutter (from the child's room by the snack tray) on the wires over the iron bars.
Step through to the next room.
Collect the Wood just below the desk.
Open the blue box on the lower part of the desk and collect the Toolbox.
Examine the bulbs on the bottom wall and make note of the four digit number they make.
Exit the room.
With the hand, click the safe and enter the code from the lab.
The code is randomized.
Collect Memory Card B and the Filler.
Head back into the main room.
Main Room
Use Memory Card B (from the safe in the 1992 room) on the card holder.
Examine the screen and press the red button, then make note of the number.
With the hand, click the door in the left corner.
Look at the number written by it and enter the correct code from the Journal.
0130 for the 2002 door
Open the door and step through.
2002 Room/Study
Examine the red writing by the safe for a clue.
Combine the Wood (from the lab in through the 1992 room) and Toolbox to create a Wood Repair Tool.
Use the Wood Repair Tool on the ladder.
With the feet, climb up into the next room.
Collect the Steel Pipe by the rug.
With the hand, click the bookcase connected to the gears.
Rearrange the books to reveal a four digit code.
2569
Head back down the ladder.
With the hand, click the safe and enter the code from the study.
2569
Collect Memory Card C and Yarn.
Head back into the main room.
Main Room
Use Memory Card C (from the safe in the 2002 room) on the card holder.
Examine the screen, press the green button, then make note of the number.
With the hand, click the door in the right corner.
Look at the number written by it and enter the correct code from the Journal.
1224 for the 2004 door
Open the door and step through.
2004 Room/Office
Examine the red writing by the safe for a clue.
Use the Steel Pipe (from in the study by the rug) on the fan to stop it.
Step through into the next room.
Examine the paper on the wall by the door and make note of the clue.
Head back through the fan.
With the hand, click the safe and enter the correct code, given the clue from the office and the red writing.
'LOSE' was in red: 'reversing' it (flipping it upside down) gives you: 3507
Collect Memory Card D and the Helium Gas Container.
Head back into the main room.
Main Room
Use Memory Card D (from the safe in the 2004 room) on the card holder.
Examine the screen, press the yellow button, then make note of the number.
Combine the Helium Gas Container (from the safe in the 2004 room) and Filler (from the 1992 safe) to create a Helium Filler.
Now combine the Helium Filler and Balloon (from the safe in the 1988 room) to create a Helium Balloon.
Finally, combine the Helium Balloon and Yarn (from the safe in the 2002 room) to create a Tied Helium Balloon.
Use the Tied Helium Balloon on the lever to the left of the toilet.
Collect the Key from the panel to opens up to the right.
With the hand, click the keypad by the exit door.
Enter the code from the memory card screens.
4444
Use the Key on the lock that appears and exit the room.
Room 10-Countdown
Collect the Claw Hammer off the floor.
Use the Claw Hammer on the rightmost key above the gates to obtain the Strange Key.
Examine the Strange Key and make note of the code on it.
With the hand, click the bottom keypad and enter the code from the key.
8314
Now use the Strange Key on the keyhole that appears.
Option #1: Don't Save the People
Exit the room.
Collect the Steel Pipe from near the bomb hole.
Use the Steel Pipe on the opening in the rocks to the right.
Walk through the opening.
Option #2: Save the People
With the hand, click the keypad by the far left gate (the order doesn't matter, but for the sake of this walkthrough, we'll circle clockwise).
Solve the addition puzzle by pressing the numbers on the keypad.
The goal is to get the white number to add up to the blue one.
The white squares indicated how many numbers you must use.
The red squares indicated how many sums you have to make total.
Possible solutions:
7=1+1+1+1+3
12=2+2+2+2+4
9=1+1+1+1+5
20=4+4+4+4+4
16=2+2+2+2+8
After answering your PDA, click the next keypad over and solve those addition puzzles.
77=12+12+12+18+23
50=9+9+18+7+7
91=26+23+12+12+18
61=26+23+12
60=27+26+7
Click the next keypad over and solve those addition puzzles.
211=54+84+73
189=73+84+32
250=51+36+36+73+54
174=28+28+32+32+54
111=32+51+28
Click the last keypad and solve those addition puzzles.
362=94+89+52+52+75
315=52+52+94+94+23
270=52+94+75+26+23
146=23+23+26+37+37
(Thanks to ThemePark:)
250=52+52+26+26+94
Exit the room.
Room 11-Forgiveness
(This room is only accessible if you saved the people in Room 10.)
Bomb Room
Collect the Rock, Iron Pipe and Bent Pipe.
Use the Rock by the stuck pipe.
Now use the Iron Pipe on the rock.
Collect the other Iron Pipe.
Walk into the next room.
Laser Room
Open the safe and collect the Screwdriver.
Use the Screwdriver on the fire extinguisher.
Collect the Fire Extinguisher.
Try to touch one of the lasers.
Use the Bent Pipe on the lever.
With the hand, click the bookcase in the lower right.
Rearrange the books to create an image.
Books should be arranged in 'rainbow' order.
Make note of the image you create for a clue.
With the hand, click the panel on the righthand door.
Rearrange the dice to get the solutions on the right, using the clue from the bookcase.
The solution is based on the color of the pips: black or white.
Relationships are as follows:
white+white=black
white+nothing=white
white+black=nothing
black+nothing=black
black+black=white
Solution:
Pips listed clockwise starting in the upper left corner:
black/white/nothing/nothing+white/white/white/white
black/white/nothing/nothing+nothing/white/nothing/black
black/black/black/nothing+white/white/black/nothing
white/black/black/nothing+nothing/black/black/black
Enter the newly opened door.
Mirror Room
With the hand, click White's wrists to untie her.
Open the end table drawer and collect the Power Glue.
Use the Screwdriver (from the safe in the laser room) on the middle mirror to the right, then collect the Wall Mirror.
Now use the Screwdriver on the middle mirror at the bottom and collect the other Wall Mirror.
Head back into the Laser Room.
Laser Room
Combine the Power Glue (from the end table in the mirror room) and an Iron Pipe (from the Bomb Room) to create a Glued Pipe.
Now combine the Power Glue and the other Iron Pipe to create another Glued Pipe.
Combine a Glued Pipe with a Wall Mirror to create a Standing Mirror.
Repeat this to make a second Standing Mirror.
Try to use a Standing Mirror on the lever.
Now use the Fire Extinguisher (from off the wall) on the lever.
Finally, use both Standing Mirrors on the lasers.
Pull the lever and exit the room.
Room 12-Finality
(This room is only accessible if you didn't save the people in room 10.)
Beginning Room
Collect the Memo by the bed.
Examine the Memo and view it to read the clue.
Now collect the hammer in the lower left.
Given the note above it, open the nearby safe using the clue from the Memo.
6826, A=2 E=8 D=6
Open the safe and collect the Clotted Paint.
Now open the cabinet in the upper left and collect the Flashlight.
Collect the Glass Cup in the upper right and the Battery by the medical tools below.
Use the Hammer on the lower right mirror.
Now collect the Faucet Valve and use it on the faucet below.
Turn on the water, then use the clotted Paint on it.
Use the Glass Cup on the water to obtain a Red Water Cup.
Now use the Red Water Cup on the blue tiles and examine them for a clue.
With the hand, click the keypad on the red door and enter the code from the tile clue.
4536
Step through the now open door.
Red Room
Examine each of the mirrors, making note of the shapes you see on each.
With the hand, click the lever at the bottom and enter the code from the mirror clues.
Each mirror shows half of two numbers, two red and two blue.
Remember, these are mirrors, so you have to flip the images.
9634
After flipping the lever, head back through the door.
Beginning Room
Combine the Battery (by the medical tools) and Flashlight (in the cabinet) to create a Bright Flashlight.
Use the Bright Flashlight on the dark passage above the bed.
You can speak to White and Black, but otherwise just step through the door for the ending!
Room 13-Weight of the Truth
(This room is only accessible if you saved the people in room 10.)
Justice Room
Open the chest by the statue and collect the Hammer.
Collect the Model Knife from the statue (you'll need to click it twice).
Now collect the Minute Hand off the lower right corner of the painting.
Open the safe and collect the Flashlight.
Collect the Battery off the glass table.
Combine the Model Knife and Hammer to get the Knife Edge.
Use the Knife Edge on the blue brick behind the statue.
Now use the Hammer on it to obtain the Blue Brick.
Use the Blue Brick on the slot above the other one.
Click the bricks and solve the tile puzzles.
Collect the Small Key that appears.
Use the Minute Hand on the clock face and collect the Jewelry Box.
Combine the Small Key and Jewelry Box to obtain the Blue Gem Set, Red Gem Set and Blue Gem.
With the hand, click the scales and solve the gem weight puzzle.
Weigh gems by selecting them with the arrows and choosing to put them on the left or right side.
You may also choose not to place them on either.
Press the Weighing button to weigh what you have on the scale.
You only get three weighings per gem set.
Solution:
Place gems 1-4 on the left and 5-8 on the right.
If the left side is heavy, move to step 2.
If the right side is heavy, move to step 4.
If the sides are even, move to step 6.
Place gems 1/2/5 on the left and 3/4/6 on the right.
If the left side is heavy, move to step 3.
If the right side is heavy, move to step 8.
If the sides are even, move to step 9.
Place gem 1 on the left and 2 on the right.
If the left side is heavy, select gem 1.
If the right side is heavy, select gem 2.
If the sides are even, select gem 6.
Place gems 1/2/5 on the left and 3/6/7 on the right.
If the left side is heavy, move to step 5.
If the right side is heavy, move to step 10.
If the sides are even, move to step 12.
Place gem 5 on the left and 1 on the right.
If the sides are uneven, select gem 5.
If the sides are even, select gem 3.
Place gems 1/2 on the left and 9/10 on the right.
If the sides are uneven, move to step 7.
If the sides are even, move to step 11.
Place gem 1 on the left and 9 on the right.
If the sides are uneven, select gem 9.
If the sides are even, select gem 10.
Place gem 3 on the left and 4 on the right.
If the left side is heavy, select gem 3.
If the right side is heavy, select gem 4.
If the sides are even, select gem 5.
Place gem 6 on the left and 7 on the right.
If the sides are uneven, select gem 7.
If the sides are even, select gem 8.
Place gem 7 on the left and 8 on the right.
If the left side is heavy, select gem 7.
If the right side is heavy, select gem 8.
If the sides are even, select gem 1.
Place gem 11 on the left and 10 on the right.
If the sides are uneven, select gem 11.
If the sides are even, select gem 12.
Place gem 2 on the left and 3 on the right.
If the sides are uneven, select gem 3.
If the sides are even, select gem 4.
You receive a Blue Gem, Red Gem and Yellow Gem.
Use these three on the grooves on the wall by the door.
Walk through the doorway.
Gas Chamber Room
Collect the Pickax off the bottom wall.
Return to the other room.
Justice Room
Use the Pickax (off the wall in the gas chamber room) on the red tile circled by the light.
Collect the Red Button.
Go back into the gas chamber room.
Gas Chamber Room
Use the Red Button (from in the floor in front of the safe in the justice room) on the opening on the device.
Press the button.
Combine the Battery (from glass table in the justice room) and Flashlight (in the safe of the justice room) to create a Bright Flashlight.
Head back into the other room and use the Bright Flashlight on the passage that opened up.
You can speak to White, but otherwise walk out the door for the ending!
Room 14-Another Truth
(This room is only accessible if you saved Seulbi in Room 3.)
TV Room
Collect the Halved Heart 1 on the red box by the windows.
Now collect the Hammer off the bed.
Finally, collect the Remote Controller on the glass table.
Examine the Remote Controller and view it for a clue.
With the hand, click the TV and enter the correct code given the clue from the Remote Controller.
It seems to be a randomized permutation of the worn numbers: 1, 5 and 8.
Make note of the red clue off the TV and enter this code on the keypad by the red doors.
1997
Step through the doors.
Tank Room
Click the large tank, then answer your PDA.
Collect the Shotgun off the floor.
Open the drawer to the left of the tank and collect the Bullet.
Combine the Shotgun and Bullet to create a Loaded Shotgun.
Use the Loaded Shotgun on both small tanks.
Collect the Pliers and Tweezers.
Now use the Tweezers on the drain to obtain a Diamond Piece.
With the hand, click the panels to the left of the large tank and solve the memory puzzle.
The cards are randomized, but you're given plenty of opportunities to make a mistake (as indicated by the green squares on top).
Click the clocks and solve that puzzle with careful observation.
There are only two of the clocks that you can change the time on.
Look at the times on the other clocks to determine the pattern.
Solution:
The times, reading left-to-right are 1:40 ahead of each other.
Upper clock- 5:20, lower clock- 10:20
Combine the Diamond Piece and Pliers to create a Diamond Cutter.
Use the Diamond Cutter on the glass of the large tank.
Now use the Hammer (on the bed in the TV room) on the cracks you made to obtain Halved Heart 2.
Head into the TV room.
TV Room
Combine the Halved Hearts to create a Heart Shape.
Use the Heart Shape on the slot by the elevator and head through.
You can speak to Black, but otherwise walk out the door for the ending!.
Secret Room
Room 15-Special Encounter
(You must obtain all four developer cards to enter.)
Speak to each person to get a clue as to what item they want.
Open the cabinet by MJ and collect the CD Storage Box.
Collect the Power Cord off the wall.
Use the Power Cord on the outlet in the lower right.
Disassemble the CD Storage Box to get CD1, CD2, CD3 and CD4.
Examine CD1, then view it to see which person's safe it belongs to.
Open the CD-ROM on the computer, then use CD1 on it.
(You can only view a CD once, so be sure to write down the clues before trying to insert a new CD!)
Examine the monitor for a clue to one of the safe's codes.
With the hand, click the far right safe and enter the code from CD1.
(Thanks to metacom for help on this!)
The grid appears to be a jumbled bunch of numbers.
Instead of looking for a relationship between the numbers, pay attention to the numbers themselves (individually).
Notice how there are more high numbers than low numbers?
The number itself determines how many of that number appear in the grid: one 1, two 2's, etc.
So the missing numbers are (solution): 3568
Open the safe and collect the Fishnet Stockings.
Use the Fishnet Stockings on JM.
Now open the CD-ROM and take out CD1.
Examine CD2, then view it to see which person's safe it belongs to.
Use CD2 on the CD-ROM, then view the monitor for the clue.
With the hand, click the safe on the desk and enter the code from CD2.
Looking at the numbers the way they're presented, the equation doesn't make sense.
How can you transform the numbers so that they do make sense?
Flip the numbers upside down!
Solution: 0679
The 1 at the beginning is presumably ignored because we can only have 4 digits.
Open the safe and collect the Nunchaku.
Use the Nunchaku on KB.
Now open the CD-ROM and take out CD2.
Examine CD3, then view it to see which person's safe it belongs to.
Use CD3 on the CD-ROM, then view the monitor for the clue.
With the hand, click the safe on the left by the windows and enter the code from CD3.
What kind of relationship do you see between the colored grid and the letters below?
The letters represent colors (yellow, red, green, blue).
Count how many of each, in that order, to get the code.
5869
Open the safe and collect the Game Package.
Use the Game Package on ES.
Now open the CD-ROM and take out CD3.
Use CD4 on the CD-ROM, then view the monitor for the clue.
With the hand, click the remaining safe on the far left and enter the code from CD4.
What you see are four sequences of 0's and 1's.
While it may look like binary, it's not (the resulting numbers would be much to large).
What else can 0's and 1's represent?
What about on/off yes/no?
Solution:
(from the number of 1's in each sequence)
4577
Open the safe and collect the Alcoholic Beverage.
Use the Alcoholic Beverage on MJ.
Room 16-Her Story 1
(This room costs 3 gold keys.)
Open the cabinet in the lower right and collect the Screw Wrench.
Click the nearby passageway.
Use the Screw Wrench on the upper pipe end on the right wall to collect the Long Pipe.
Disassemble the Long Pipe to get Water Pipe 1 and Water Pipe 2.
Now use the Water Pipes on the missing segments to the left of the water tank.
Turn the valve to fill the fountain.
Collect the Bucket and use it on the water to get a Watered Bucket.
Use the Watered Bucket on the passageway to the right.
Now collect the Battery and Cutting Nipper off the shelves in the lower left.
Use the Cutting Nipper to obtain the Wire just below the fountain.
Collect the Polaroid Camera off the table.
Now use the Wire to collect the Polaroid Film below the water tank.
Combine the Polaroid Camera and Battery, then the Polaroid Camera and Polaroid Film.
Use the Polaroid Camera on the passageway to obtain Developed Film.
Examine the Developed Film, then view it to see a code.
With the hand, click the keypad and enter the code.
3745
Now click the door to end the level.
Room 17-Her Story 2
(This room costs 3 gold keys.)
Collect the Green Memo off the board above the monitors.
Open the desk drawer and collect the Box Cutter.
Now collect the Glass Bottle off the red cabinet.
Collect the Tweezers, Ballpoint and Piggy Bank off the table.
Hit the nearby red switch to turn on the fan.
Now collect the Red Memo that fell to the ground.
Combine the Box Cutter and Piggy Bank to get a Black and White Coin.
Examine the Black and White Coin, then view it to receive a code (be sure to view both sides).
With the hand, click the safe and enter the code from the coin.
6302
Open the safe and collect the Memo.
Combine the Tweezers and Glass Bottle to get a Blue Memo.
Disassemble the Ballpoint to obtain a Yellow Memo.
Examine, then view the Memo, then do the same for all four colored memos for a clue.
With the hand, click the colored buttons on the glass tube and enter the code from the memo clues.
Each of the colored memos indicates their corresponding number from the grid on the Memo.
It's almost like they're pointing at it...
The square to look at is the one sticking out from the others.
6317
Head up the ladder.
Room 18-Memories (1)
(This room costs 5 gold keys.)
Tiled Cell
Open the safe and collect the Digital Wristwatch.
Collect the Watch Battery and Memo off the table.
Now collect the Small Key by the bed.
With the hand, click the keypad by the red door and hit the right buttons based on the clue you received at the beginning of the room.
Numbers (five of them) that add up to ten.
They must be adjacent.
Many solutions are possible. For example, 3-4-1-1-1 in the lower right region.
Head through the now-open door.
Concrete Cell
Open the safe and collect the Old Key.
Now open the drawer on the chest and collect the Analog Wristwatch.
Collect the Hammer on the desk.
Use the Small Key (from by the bed in the tiled cell) on the cabinet lock.
Open the cabinet and collect the Desk Mirror.
Now use the Old Key on the locked door.
Use the Hammer on the lock.
Make note of the red N and examine the slit for a clue.
Return to the other room.
Tiled Cell
Combine the Watch Battery (off the table) and Digital Wristwatch (in the safe) to create a Compounded Digital Wristwatch.
Examine the Compounded Digital Wristwatch and view it to see a clue.
Disassemble the Analog Wristwatch to get an Old Watch Battery.
Examine the Old Watch Battery and make note of the symbol on it.
Now disassemble the Compounded Digital Wristwatch, then combine the Digital Wristwatch and Old Watch Battery to create a Malfunctioning Digital Wristwatch.
Examine the Malfunctioning Digital Wristwatch, then view it for a clue, making note of the S above it.
Flip the lever on the wall by the lamp.
Use the Desk Mirror (in the locked cabinet in the concrete cell) where the lamplight shines.
Collect the Notebook from the cubby that opens up.
Examine the Notebook, making note of the letter on it, then view it and read the pages for a clue.
With the hand, click the keypad under the S and enter the code based on the watch clues.
The working digital watch said 12:17.
The old battery said + and what you saw were some lines that would turn the original time into a new number.
1847
Click the keypad under the I and enter the code based on the Memo and Notebook.
The Memo said 1P+2P-3P+4P.
The Notebook said 1P 1212, 2P 4215, 3P 1221, 4P 1389.
Making the correct calculations gives you the proper code: 5595.
Now click the N keypad and enter the code from the slit behind the door in the concrete cell.
2316
Head out the opened door.
Room 19-Memories (2)
(This room costs 5 gold keys.)
Hourglass Room
Open the green box and collect the Hammer.
Now open the drawer on the chest (it'll take two times) and collect the Pencil Case.
Finally, open the pink cabinet and collect the Small Magnet.
Examine the hourglass in the upper left, then use the Hammer on it.
Use the Small Magnet on the filings that drop out to obtain an Iron Magnet.
Disassemble the Iron Magnet to obtain Iron Fillings.
Now use the Iron Fillings on the door to reveal something.
Examine the door and make note of the code.
Enter the code on the keypad.
2143
Open the door and step through.
Pillar Room
Disassemble the Pencil Case (from the chest drawer in the hourglass room) to obtain a Pencil, Mechanical Pencil and Ballpoint.
Now disassemble the Mechanical Pencil twice to get two Mechanical Pencil Leads.
Open the panels on the back wall.
Use a Mechanical Pencil Lead on each one.
Examine each of the lit pillars and make note of the two grids and a possible relation between them.
Return to the other room.
Hourglass Room
Click the frog on the door below and enter the correct sequence based on the pillars in the pillar room.
The numbers on the right pillar tell you where to start looking on the arrow grid on the left pillar.
Whichever direction the arrow is pointing for the square corresponding to the number, count the number of similar arrows in sequence.
Do this for each of the numbers, numerically, to get the correct order of arrows you must click on the frog.
R R L L
R R R L
R L L L
Step through the door and watch the ending!
Room 20-The Birth (1)
(This room costs 5 gold keys.)
Open the fridge and collect the Ice Cube.
Collect the Pot, Round Cookie Mold and Measuring Cup off the kitchen counter.
Now collect the Magnifying Glasses in the red cabinet.
Open the drawer below the potted plant and collect the Box Cutter.
With the hand, click the piano and solve the memory puzzle.
Keys numbered 1-8, left-to-right:
1 4 5 6 5
4 5 6 4
5 4 2 1
1 4 5 6 5
4 5 6 4
5 2 3 4
5 5 5 4
5 6 4 2
2 1 6 5
1 6 5 4 5
6 2 1 4
3 4 5 4
Collect the Gas Valve.
Now collect the Matchstick off the coffee table.
Click the couch cushions, then use the Box Cutter on them and collect the Square Cookie Mold.
Place the Matchstick in the ring of sunlight by the piano chair.
Disassemble the Magnifying Glasses to get Convex Lens.
Use the Convex Lens on the Matchstick to obtain a Lit Matchstick.
Now use the Gas Valve on the opening above the oven.
Finally, use the Lit Matchstick on the stove to get it going.
Use the Pot on the lit stove, then use the Ice Cube on the pot to obtain a Small Key.
Now use the Small Key on the safe.
Collect the Triangle Cookie Mold.
Open the drawer below the stove and collect the Unopened Flour Bag.
Combine the Box Cutter and Unopened Flour Bag to get Flour 3/3.
Turn on the faucet and use the Measuring Cup to obtain a Watered Measuring Cup.
Now combine the Flour and Watered Measuring Cup three times to get three Doughs.
Combine each of the Doughs with a Cookie Mold to get Filled Cookie Molds.
Open the oven and place a Cookie Mold in it.
Re-open the oven and collect the Baked Cookie Mold.
Repeat the last two steps for each Mold.
Disassemble each Mold to get three Cookies.
Use all three Cookies on the grooves by the door.
Head out the door.
Room 21-The Birth (2)
(This room costs 5 gold keys.)
Office
Collect the Small Key below the desk and the Box Cutter on top.
Open the chest and collect the Hammer.
Now collect the Small Magnet on the bookcase.
Finally, open the doors of the bookcase and collect the Electric Drill.
Open the door to the left and step through.
Bathroom
Collect the Wooden Stick off the shelf by the sink.
Examine the drain on the tub.
Head back through the doors.
Office
Use the Wooden Stick (from the shelf by the sink in the bathroom) on the opening of the central table.
Open the curtains to let light through and create a shadow arrow.
Now use the Electric Drill (behind the doors on the bookcase) as indicated by the arrow.
Use the Hammer (inside the chest) where you drilled the holes.
Collect the Secret Box, then combine it with the Small Key (below the desk) to obtain a Memo and Preparat.
Examine the Memo and view it for a clue.
Use the Preparat on the microscope and examine it.
Given the hint in the Memo, make note of any patterns you see in the microscope.
With the hand, click the safe and enter the code given by the clues in the microscope.
Notice that the cells only have 1-4 dots inside.
What could 1-4 represent?
They stand for each digit of the code.
Count up how many cells have that number of dots to determine the value of that digit.
4658
Use the Box Cutter (on the desk) on the Balloon to collect it.
Re-enter the bathroom.
Bathroom
Combine the Balloon and Small Magnet to create a Magnetic Balloon.
Use the Magnetic Balloon on the tub drain.
Turn on the tub faucet to fill it with water.
Collect the Key Balloon, then disassemble it to obtain a Bookshelf Key.
Head back into the office.
Office
Use the Bookshelf Key (out of the tub drain in the bathroom) on the locked bookcase.
Open the doors and collect the Secret Note.
Examine the Secret Note, then view it to read through it and receive a code.
Enter that code on the keypad.
3579
Step through the door and watch the ending!
Posted by: Kyh |
June 4, 2012 8:27 PM
|
June 4, 2012 8:27 PM
Here are the solutions to the Room 10 math puzzles in the meantime:
First Keypad:
7=1+1+1+1+3
12=2+2+2+2+4
9=1+1+1+1+5
20=4+4+4+4+4
16=2+2+2+2+8
Second Keypad:
77=12+12+12+18+23
50=9+9+18+7+7
91=26+23+12+12+18
61=26+23+12
60=27+26+7
Third Keypad:
211=54+84+73
189=73+84+32
250=51+36+36+73+54
174=28+28+32+32+54
111=32+51+28
Fourth Keypad:
362=94+89+52+52+75
315=52+52+94+94+23
270=52+94+75+26+23
146=23+23+26+37+37
Please let me know if you come across any other sums I may have missed :)
Posted by: Kyh |
June 5, 2012 4:34 PM
|
June 5, 2012 4:34 PM