JayisGames.com is now available ad-free!
Jay is Games recommends Cheat Happens with 8,000+ games and 35,000+ trainers!

Being One:
Episode 5 - Infection


  • Currently 4.4/5
  • 1
  • 2
  • 3
  • 4
  • 5
Rating: 4.4/5 (147 votes)
Comments (11) | Views (20,284)

TrickyBeing One: Episode 5 - Infection
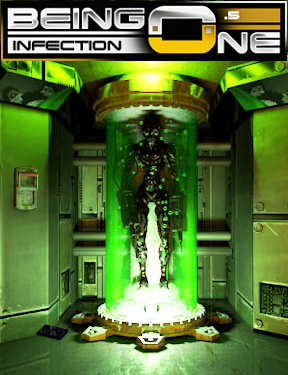
We thought we had seen the last of Being One. But here he is again puzzling his was through another mysterious space station. Here though, the stakes are higher: It's a race against time to cure himself of the disease he's been infected with, battle the station's other inhabitants, and move one step closer to his revenge. But nothing is as it seems in Being One: Episode 5 - Infection, the newest in Psionic's series of horror adventure games.

As in previous installments, Being One: Episode Five is very much a cross genre work. The framework is point and click adventure, where you use the mouse to examine and pick up items from around the station. Your inventory, accessible in the upper-right corner of the screen, has a number of tools you'll use in your investigation: a microscope for examining biological samples, an autohacker used to access terminals around the station, a multi-tool for disassembling mechanical devices, and, of course, a gun for use on any hostile creatures. These tools will often prompt minigames of all different kinds: shooter, arcade, puzzle, and so forth, all controlled with the mouse. The story is told through datapads and evidence collected hidden-object style around the station, and the plot is sure to leave you twisted.

Play the entire Being One series:
Being One: Episode 1 - Escape the LabBeing One: Episode 2 - BloodbathBeing One: Episode 3 - Dark MatterBeing One: Episode 4 - MoonriseBeing One: Episode 5 - Infection

Franchises that release new installments several years after a supposed finale are usually met with skepticism. We're looking at you, Indiana Jones. Fortunately, Being One had enough dangling plot lines and questions that the transition to a new episodic is relatively seamless. It may be a little convenient that the first place Being One goes to after his escape is another atmospheric space station, but let's face it, it's good atmosphere, and it'd be weird if this game took place on a farm or something. The graphics are as gorily beautiful as ever, with some CGI bits that are almost aggressive in their "check out what our animators can do!" awesomeness. The game could have used a little more hand-holding, especially in the use of your new inventory devices. There is a logic behind all of them that is satisfying to discover for yourself, but it's hard to do that when bullets start flying. Also, the game ends rather suddenly, which is good in the sense that an Episode 6 must certainly be in development, but man, let's hope we don't have to wait another three years. All in all, though, fans of the series and of scifi horror in general will be happy to spend a little more time in the skin of Being One, and will definitely be eager for more.

Play Being One: Chapter Five - Infection

Walkthrough Guide


(Please allow page to fully load for spoiler tags to be functional.)

Being One: Episode 5 - Infection Walkthrough

List of Evidence

  • The Falcyon: automatically gained after the flight at the beginning.

  • MK 2 Multi-Pistol: in Security after defeating the gunbots.

  • The Layout: from the map on the table in the sleeping quarters.

  • Nanobots: after examining the remains of a second nanoslave.

  • Venus: from listening to the message on the Quantum Relay about someone afloat in space.

  • Dr. Rycroft's Theory: from the terminal in lab 4.

  • Earth Attack: from watching the QTV Screen in the living quarters.

  • Nanoslaves: from the datapad in lab 5.

  • Weston Carnodyne: from the manifest on the boxes in storage.

  • The Teleporter: from the terminal in lab 4.

Locations of Datapads

  • On the walkway in front of the lift.

  • Next to the skeleton in the living quarters.

  • On the ground next to the pod in lab 2.

  • On the ground in lab 4.

  • Next to the pod in lab 5.

  • On the ground in storage.

  • On the ground to the left in maintenance.

  • Next to the overturned chair.

Locations of Security Cameras

  • Two above the security door after the focusing mini-game.

  • Above the door in security.

  • To the left of the lift.

  • Above the quantum relay (to the right) in the living quarters.

  • On the ceiling in the labs.

  • Above the maintenance door in storage.

  • On the ceiling in maintenance.

  • Above the switch on the wall in the freezer.

  • On the middle pillar in the computer room.

Main Walkthrough

Entering the Nano-Station

  1. You start out in an avoidance mini-game. You cannot die, presumably, the less you're hit, the higher your score.

  2. Enter the Nano-Station.

  3. After the shower, exit the Radiation Screening.

  4. Next is a focusing mini-game.

    • Where exactly to place the focusing meters is randomized.

    • The image will not change as you scroll the meters, you have to do it incrementally.

  5. Enter Security.

  6. Use your gun on the gunbots when they are up; they take about two shots each.

  7. Exit Security.

  8. Read the datapad on the walkway.

Living Quarters

  1. Examine the Quantum Relay and QTV Screen.

  2. Read the datapad by the skeleton.

  3. Enter the Sleeping Quarters.

Sleeping Quarters

  1. Collect the layout map off the table to the right.

  2. Enter the restroom.

Restroom

  1. Use the gun to kill the nanoslave.

  2. Now use the microscope on the remains and shoot the four odd-looking cells.

  3. Back up to the main hallway.

Labs

  1. Enter Lab 2.

Lab 2

  1. Use your gun to kill the nanoslave.

  2. Now use the microscope to examine the remains and shoot the four bad cells.

  3. Read the datapad on the ground next to the pod.

  4. Use the autohacker on the terminal to the right.

    • This is the mini-game called Difference Engine.

    • Watch the numbers as they pass through the middle and observe how they change.

    • Enter the numbers from top to bottom that represent the change in the floating numbers.

    • The code is randomized each game.

  5. Now click the terminal to read the messages.

  6. Flip the swith to the left of the pod to deactivate it.

  7. Back up, enter the next corridor and head into Lab 4.

Lab 4

  1. Use the Autohacker on the terminal.

  2. Read the terminal.

  3. Now read the datapad on the ground.

  4. Back up and enter Lab 5.

Lab 5

  1. Use the autohacker on the terminal.

    • This is the mini-game called Difference Engine.

    • Watch the numbers as they pass through the middle and observe how they change.

    • Enter the numbers from top to bottom that represent the change in the floating numbers.

    • The code is randomized each game.

  2. Click the terminal to read the messages.

  3. Read the datapad next to the pod.

  4. Enter the room to the left and examine the body.

  5. Use the microscope on the body and zap the four abnormal cells.

  6. Back up to Lab 5 and flip the switch.

  7. Now back up to the main corridor.

Storage

  1. Read the datapad on the ground.

  2. Examine the manifest on the boxes to the left.

  3. Enter maintenance.

Maintenance

  1. Read the datapad on the ground to the left.

  2. Examine Access Panel 1 and use the multi-tool on all four bolts.

  3. Solve the pressure mini-game by rotating each dial to match the target.

    • Each dial runs clockwise from 0-9.

    • Simply rotate the dials to match the target.

    • Wait for the target to change, a green light at the bottom should light up.

    • Do this three times to complete it.

  4. Back up and examine Access Panel 2.

  5. Again, use the multi-tool on all four bolts, then solve the mini-game.

  6. Enter the freezer.

Freezer

  1. Use the microscope to examine the remains and shoot the four abnormal cells.

  2. Flip the freezer switch.

  3. Make note of the numbers scrawled on the right.

  4. Back up to the main corridor.

Computer Room

  1. Read the datapad near the overturned chair.

  2. Use the autohacker on the terminal to the far left.

    • This is the mini-game called Difference Engine.

    • Watch the numbers as they pass through the middle and observe how they change.

    • Enter the numbers from top to bottom that represent the change in the floating numbers.

    • The code is randomized each game.

  3. Click the terminal to read the message.

  4. Use the autohacker on the terminal to the right.

    • This is the mini-game called Difference Engine.

    • Watch the numbers as they pass through the middle and observe how they change.

    • Enter the numbers from top to bottom that represent the change in the floating numbers.

    • The code is randomized each game.

  5. Click the terminal to read the message.

  6. Examine the server and enter the code from the freezer wall.

  7. 7491

  8. Back up to the main corridor

Main Corridor

  1. Use the autohacker on the lift and enter the numbers as indicated by the difference engine.

    • This is the mini-game called Difference Engine.

    • Watch the numbers as they pass through the middle and observe how they change.

    • Enter the numbers from top to bottom that represent the change in the floating numbers.

    • The code is randomized each game.

  2. Now use the lift, then exit it.

End Room

  1. Use your gun on all four yellow pipes.

  2. Finally shoot the lightning panel above to kill the creature.

  3. Congratulations! You've beat the game!!!

11 Comments

Being One: Episode 5 - Infection Walkthrough

List of Evidence

  • The Falcyon: automatically gained after the flight at the beginning.

  • MK 2 Multi-Pistol: in Security after defeating the gunbots.

  • The Layout: from the map on the table in the sleeping quarters.

  • Nanobots: after examining the remains of a second nanoslave.

  • Venus: from listening to the message on the Quantum Relay about someone afloat in space.

  • Dr. Rycroft's Theory: from the terminal in lab 4.

  • Earth Attack: from watching the QTV Screen in the living quarters.

  • Nanoslaves: from the datapad in lab 5.

  • Weston Carnodyne: from the manifest on the boxes in storage.

  • The Teleporter: from the terminal in lab 4.

Locations of Datapads

  • On the walkway in front of the lift.

  • Next to the skeleton in the living quarters.

  • On the ground next to the pod in lab 2.

  • On the ground in lab 4.

  • Next to the pod in lab 5.

  • On the ground in storage.

  • On the ground to the left in maintenance.

  • Next to the overturned chair.

Locations of Security Cameras

  • Two above the security door after the focusing mini-game.

  • Above the door in security.

  • To the left of the lift.

  • Above the quantum relay (to the right) in the living quarters.

  • On the ceiling in the labs.

  • Above the maintenance door in storage.

  • On the ceiling in maintenance.

  • Above the switch on the wall in the freezer.

  • On the middle pillar in the computer room.

Main Walkthrough

Entering the Nano-Station

  1. You start out in an avoidance mini-game. You cannot die, presumably, the less you're hit, the higher your score.

  2. Enter the Nano-Station.

  3. After the shower, exit the Radiation Screening.

  4. Next is a focusing mini-game.

    • Where exactly to place the focusing meters is randomized.

    • The image will not change as you scroll the meters, you have to do it incrementally.

  5. Enter Security.

  6. Use your gun on the gunbots when they are up; they take about two shots each.

  7. Exit Security.

  8. Read the datapad on the walkway.

Living Quarters

  1. Examine the Quantum Relay and QTV Screen.

  2. Read the datapad by the skeleton.

  3. Enter the Sleeping Quarters.

Sleeping Quarters

  1. Collect the layout map off the table to the right.

  2. Enter the restroom.

Restroom

  1. Use the gun to kill the nanoslave.

  2. Now use the microscope on the remains and shoot the four odd-looking cells.

  3. Back up to the main hallway.

Labs

  1. Enter Lab 2.

Lab 2

  1. Use your gun to kill the nanoslave.

  2. Now use the microscope to examine the remains and shoot the four bad cells.

  3. Read the datapad on the ground next to the pod.

  4. Use the autohacker on the terminal to the right.

    • This is the mini-game called Difference Engine.

    • Watch the numbers as they pass through the middle and observe how they change.

    • Enter the numbers from top to bottom that represent the change in the floating numbers.

    • The code is randomized each game.

  5. Now click the terminal to read the messages.

  6. Flip the swith to the left of the pod to deactivate it.

  7. Back up, enter the next corridor and head into Lab 4.

Lab 4

  1. Use the Autohacker on the terminal.

  2. Read the terminal.

  3. Now read the datapad on the ground.

  4. Back up and enter Lab 5.

Lab 5

  1. Use the autohacker on the terminal.

    • This is the mini-game called Difference Engine.

    • Watch the numbers as they pass through the middle and observe how they change.

    • Enter the numbers from top to bottom that represent the change in the floating numbers.

    • The code is randomized each game.

  2. Click the terminal to read the messages.

  3. Read the datapad next to the pod.

  4. Enter the room to the left and examine the body.

  5. Use the microscope on the body and zap the four abnormal cells.

  6. Back up to Lab 5 and flip the switch.

  7. Now back up to the main corridor.

Storage

  1. Read the datapad on the ground.

  2. Examine the manifest on the boxes to the left.

  3. Enter maintenance.

Maintenance

  1. Read the datapad on the ground to the left.

  2. Examine Access Panel 1 and use the multi-tool on all four bolts.

  3. Solve the pressure mini-game by rotating each dial to match the target.

    • Each dial runs clockwise from 0-9.

    • Simply rotate the dials to match the target.

    • Wait for the target to change, a green light at the bottom should light up.

    • Do this three times to complete it.

  4. Back up and examine Access Panel 2.

  5. Again, use the multi-tool on all four bolts, then solve the mini-game.

  6. Enter the freezer.

Freezer

  1. Use the microscope to examine the remains and shoot the four abnormal cells.

  2. Flip the freezer switch.

  3. Make note of the numbers scrawled on the right.

  4. Back up to the main corridor.

Computer Room

  1. Read the datapad near the overturned chair.

  2. Use the autohacker on the terminal to the far left.

    • This is the mini-game called Difference Engine.

    • Watch the numbers as they pass through the middle and observe how they change.

    • Enter the numbers from top to bottom that represent the change in the floating numbers.

    • The code is randomized each game.

  3. Click the terminal to read the message.

  4. Use the autohacker on the terminal to the right.

    • This is the mini-game called Difference Engine.

    • Watch the numbers as they pass through the middle and observe how they change.

    • Enter the numbers from top to bottom that represent the change in the floating numbers.

    • The code is randomized each game.

  5. Click the terminal to read the message.

  6. Examine the server and enter the code from the freezer wall.

  7. 7491

  8. Back up to the main corridor

Main Corridor

  1. Use the autohacker on the lift and enter the numbers as indicated by the difference engine.

    • This is the mini-game called Difference Engine.

    • Watch the numbers as they pass through the middle and observe how they change.

    • Enter the numbers from top to bottom that represent the change in the floating numbers.

    • The code is randomized each game.

  2. Now use the lift, then exit it.

End Room

  1. Use your gun on all four yellow pipes.

  2. Finally shoot the lightning panel above to kill the creature.

  3. Congratulations! You've beat the game!!!

Reply
neo1973 May 25, 2012 3:02 PM

Hooray! I love this series!

Reply
BubbaJoe May 25, 2012 3:41 PM

This may be the best one of the series. Varied, looks great, and just fun.

Reply
Akarroa May 25, 2012 10:45 PM

I can't believe it's been three years, though. I feel...old.

Reply
sylocat May 26, 2012 7:04 PM

Just the other day I was thinking of how the endings to ongoing mystery/sci-fi series tend to be disappointing, and Episode 4 of Being One stuck out in my mind as one of the worst ever.

Now, three full years after a series that normally only had a couple months apart, they announce that they aren't, in fact, done? Wow. Just... wow. I am thrilled.

Reply

I had to use the walk through on the "difference game". Unfortunately, the four digit number for the lift does not work.

Nice game even though I can't finish it.

Reply

Sorry about that 4red3s. Going back to the game, it looks like the code for each Difference Engine is randomized, so I'll edit my walkthrough. Thanks for bringing it to my attention!

Reply
sunnylauren May 30, 2012 9:33 PM

I've played all the Being One games up through #4, and the first one is still my favorite. Mainly this is because it's not so shootery and reflex-oriented :). I'm not sure if I want to play this since I tend to get frustrated with games I'm terrible at, but idk. I'd like to know the story, so maybe.

And a sequel, three years later... this gives me more hope for Ghostscape!

Reply

how do i kill the nano slave in the pod in lab five?

Reply
novascottch January 17, 2013 10:41 PM

I wish there was a way to bypass the firewall minigame. The second round is impossible. It's getting to the point where I don't really care enough to keep trying. It's a terrible touch to an otherwise really good game.

Reply
bwalsh999 October 26, 2014 8:55 PM

I really love this series. It is "believable", if you will, and the graphics are very high quality. The plot grows deeper and deeper as you progress through all 5 in the series, and I like the occasional gun fights thrown yo keep you engaged. Props to the game makers. Being One 6 (and beyond) would be very well received indeed!

Reply

^ Scroll Up | Homepage >

Leave a comment [top of page]

Please consider creating a Casual Gameplay account if you're a regular visitor here, as it will allow us to create an even better experience for you. Sign-up here!
  • PLEASE UNDERSTAND SITE POLICIES BEFORE POSTING COMMENTS
  • You may use limited HTML tags for style:
    (a href, b, br/, strong, em, ul, ol, li, code, spoiler)
    HTML tags begin with a less-than sign: < and end with a greater-than sign: >. Always. No exceptions.
  • To post spoilers, please use spoiler tags: <spoiler> example </spoiler>
    If you need help understanding spoiler tags, read the spoiler help.
  • Please Preview your comment before posting, especially when using spoilers!
  • No link dropping, no domains as names; do not spam, and do not advertise! (rel="nofollow" in use)
chrpa Jayisgames needs your help to continue providing quality content. Click for details Welcome to the Roundup 66 - Retro with four games! After you find the ten monkeys in the chapter, look in the inventory. You will find a...  ...
chrpa Jayisgames needs your help to continue providing quality content. Click for details Welcome to the Roundup 65 with three games! As mentioned in the previous roundups, only odd-numbered episodes are featured since even-numbered are for Robin Vencel's patrons (the...  ...
chrpa Jayisgames needs your help to continue providing quality content. Click for details Hi! Weekday Escape and Weekday Puzzle are here! First we have two new cans from tomoLaSiDo and then two small rooms from isotronic. That's all for this...  ...
6,365 Views
0 Comments
chrpa Jayisgames needs your help to continue providing quality content. Click for details Welcome to Mobile Monday! We have another beautiful game from Nicolet and it's a winter game as it should be. Tasuku Yahiro have released another of their...  ...

HELP Jayisgames.com

Recent Comments


Display 5 more comments
Limit to the last 5 comments

Game of the week


Dark Romance: Vampire Origins Collector's Edition

Your Favorite Games edit

add
Save links to your favorite games here. Use the Favorites editor.

Monthly Archives