


![]() Tesshi-e has quite the gaggle of friends; I bet when they get together at the local pub for some buddy reconnect time, it's pretty raucous. For example, it's been quite a while since you've seen Mr. Y and his first invitation to you isn't a simple, "Hey, let's have lunch and catch up on old times." Instead, he wants to trap you inside this new room, especially remodeled for you with puzzling devices, just to see if you can get out. Oh, okay. Why not? Mr. Y always seemed like a funny guy, so let's Escape from the Study!
Tesshi-e has quite the gaggle of friends; I bet when they get together at the local pub for some buddy reconnect time, it's pretty raucous. For example, it's been quite a while since you've seen Mr. Y and his first invitation to you isn't a simple, "Hey, let's have lunch and catch up on old times." Instead, he wants to trap you inside this new room, especially remodeled for you with puzzling devices, just to see if you can get out. Oh, okay. Why not? Mr. Y always seemed like a funny guy, so let's Escape from the Study!
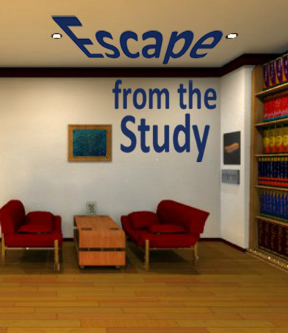 The first thing you'll notice is Escape from the Study has all the trademark qualities that make a Tesshi-e escape game a Tesshi-e escape game, and this is a good thing as Tesshi-e continues to improve. Mr. Y certainly has done more furniture shopping—and contracted a massive case of bibliophilia!—since we last visited his room. Every fixture in this room exudes a functional wackiness sure to elicit smiles and head scratching. As usual, there is no changing cursor but with so many curious objects that you'd want to click on and play with, it's hardly needed. Most clues are visual and point well to where you should go next. There's a fair amount of code-breaking yet escaping from this study relies just as much on manipulation of devices and numbers. Typical to the type of room you're in, you won't find many distractions, the focus being on fewer, yet slightly more riddling, puzzles.
Nonetheless, Mr. Y left nothing out. He knows very well your fondness for wobbly picture puzzles and the happiness you derive from those aptly named coins. Enjoy the piano's serenade while you explore the equally sumptuous and austere surroundings of this studious-looking room. Ah yes, it is good to play a teasing game of "trapped you!" before catching up with old friends.
Note: scroll down Mild Escape's page a bit to find the game window, select a language (English or Japanese), then click "New Game" to start.


Walkthrough Guide
(Please allow page to fully load for spoiler tags to be functional.)
How to Escape from the Study
General Information
Using this walkthrough and other escaping advice
This walkthrough is arranged by puzzle to make skipping to the needed section easier.
If you prefer to have step by step guidance from beginning to end, start with the first puzzle and continue down to the last.
Navigate around the room by clicking the transparent grey bars on the sides and bottom of the screen.
There is no changing cursor in this game, but click-spots are not too fussy. If you click something and nothing happens, then you either don't have the required tool or it's nothing you can work with.
In addition, when you click on certain interactive areas, a line of text will often provide a clue about what it is and what you need to do.
If you can pick up an object, it will appear in your inventory when you click on it.
To use an object, highlight it in your inventory, then click where you want to use it.
Objects in your inventory can be examined and, sometimes, altered by using another item on it. To get more information on an item and view it more closely, select "About Item".
If you want to save your game, select "Function", select "Save" and then click "Yes".
You can also change the language, restart, adjust volume or restart the game from the "Function" screen.
If you think you're stuck, the general good rule of thumb in escape games holds true here:
Examine everything, look everywhere for patterns, and rethink the norm without overlooking the obvious.
Have fun escaping!
Top Left Desk Drawer
Gets a screwdriver
You start out facing a wall of windows, a large desk, and a plant.
Take a closer look at the plant..
Give it a good shaking (click three times) and a KEY falls out.
Pick up the KEY (see above spoiler) and back up. Then zoom in on the desk and click on the top left drawer.
Use the key to open the TOP LEFT DRAWER and get a...
SCREWDRIVER.
Back up and then zoom in right side drawers of the desk.
Middle Right Desk Drawer
Gets a purple Mr. Birdy
Look inside the Middle Drawer on the right side of the desk (it's unlocked).
Use the screwdriver to obtain a BOARD FILLED WITH LITTLE HOLES.
Back up twice, then turn right twice.
Face the two red sofas on the door side of the room. Above them, on the wall, there's a FRAMED BLUE RECTANGLE.
Zoom in then put the BOARD (from the middle right drawer) on it.
A three-digit number is revealed:
5 3 7
Go back over to the desk (back up, click right twice), zoom in on its left side, then click the bottom left drawer twice to bring it into full view.
To open the BOTTOM LEFT DRAWER, use the code you found in the framed rectangle above the red sofas:
537
When it's open, you'll get a LIGHT PURPLE MR. BIRDY.
Right Bottom Drawer
Gets a pink Mr. Birdy
The bottom drawer on the right side of the desk has four buttons, each with a different shape. Look around the room for those same shapes.
Back up and turn around to face the red sofas on the door's wall.
Take a closer look at the coffee table in the middle of the two sofas.
Now examine each sofa thoroughly:
Each corner of the coffee table has a shape.
Under each pillow on the sofas is a number.
Put that information together to know how to open the bottom right drawer.
Hint:
Read the numbers individually; 57 should be read as 5 and 7.
Solution:
The numbers under the pillows nearest the shape indicate the sequence in which the buttons are clicked.
Click the buttons on the bottom right drawer in this order:
1st: triangle
2nd: square
3rd: square
4th: circle
5th: hexagon
6th: circle
7th: hexagon
8th: circle
From inside the right bottom drawer, get a:
PINK MR. BIRDY.
The Wobbly Picture
Gets a green Mr. Birdy
From the wide-view of the desk, turn right once to face some shelves with various ornaments. There you'll see a large picture with a multi-colored frame.
Zoom in on the picture and notice how it wobbles when you click on each corner.
Each corner of the picture is a different color: top left is red, top right is blue, bottom right is green, and bottom left is yellow.
In the middle of the picture is a star.
Take note of the information on that star in the middle: a column of six roman numerals.
Somehow there must be a way to stop that picture from wobbling.
Look around the room for something to match up with the wobbly picture's features (colors, star, and the column of roman numerals).
Have a closer look at the bookshelves; the answer is in the books.
HINT:
There are six shelves, from top to bottom.
The books have a mark on them that should look familiar.
Some are red, some are blue...and so on.
SOLUTION:
Each shelf coordinates with a roman numeral on the picture; from top to bottom.
The colored stars the books represent a corner of the wobbly picture.
Match up the colors and roman numerals to know which corners of the picture to click and when.
Click the corners of the picture in this order:
Yellow
Green
Red
Green
Blue
Red
Colorblind Solution:
Click the corners of the wobbly picture in this order:
Bottom Left
Bottom Right
Top Left
Bottom Right
Top Right
Top Left
When you've clicked the corners of the wobbly picture in the correct order, the middle compartment will open. Take the:
PALE GREEN MR. BIRDY
Panels on Either Side of the Bookshelves
Gets two of "Some kind of part"
Facing the big wall of books, you'll see two panels on each side.
First, head over to the one on the right:
Use the SCREWDRIVER (found in the top left desk drawer) to remove the panel cover from the wall.
Inside the panel, you'll notice a receptacle for...something to fit in.
You'll also get SOME KIND of PART.
Now back up and go over the panel on the left side of the book wall...
On this panel is a picture of a hippo.
Under this panel are seven switches.
Turn around twice and take a good look at shelves on the wall opposite you--there's a row of those same hippos.
Looking at those hippos, you can see how to open the panel.
HINT:
Some of the hippos are in different poses.
Seven hippos, seven switches.
SOLUTION:
The mouths of the hippos relate to the switches under the hippo picture/panel.
An open mouth means the switch should be up. A closed mouth means the switch should be down.
Flip these switches TO THE DOWN POSITION:
3rd switch -- 5th switch -- 6th switch
(from left to right)
With the switches in the correct position, you can open the panel:
note that there's another place where something will fit.
get another SOME KIND of PART.
Heaviest? Lightest? Displaying Birdies
Gets a clover-shaped key
Explore the shelves on the right side of the room (same wall as the wobbly picture). There on the middle shelf you'll find a HEAVY-LIGHT DEVICE.
Clicking on it, you ask yourself: "Which coloured birdy should I place here?"
There are four spots, one for each birdy.
If you've followed this walkthrough exactly, you only have three. Look to the right of this device:
an ORANGE MR. BIRDY is conveniently hanging next to the device.
Click on the orange Mr. Birdy to remove him from the hanging pot.
The HOOK it was hanging from looks convenient--while in this same view, grab the HOOK to save for later.
To know which birdy is heaviest and which is lightest, you need to weigh them. There is A SCALE one shelf below this device...
It looks like you need to fit something on each side (don't make poor Mr. Birdy sit on a bare peg!)
Use the SOME KIND of PARTs you got out of the panels on the book-filled wall. Place each PART on each peg. Now the birdies will fit on the scale.
Weigh two birdies at a time until you've figured out which is heaviest and which is lightest.
Since you can't weigh only one bird (since that would be too easy), you'll have to note the weights of the various color combination then use some deductive reasoning.
You'll only have to weigh six different combinations, though.
Whichever color consistently shows up in the heaviest combinations would be on the heavy end while whichever tends to be in the lighter combinations goes on the lighter end. Toy around with them a bit...
HINT:
These six weight combinations should tell you what you need to know:
purple + orange = 1200
pink + orange = 1000
green + orange = 800
pink + purple = 800
purple + green = 600
green + pink = 400
SOLUTION:
Heaviest to Lightest:
Orange - Purple - Pink - Green
Place the birdies in the correct order, heaviest on the left on down to lightest on the right (see above spoiler). When they're in the proper places, a little panel in the base opens:
Take the CLOVER-SHAPED KEY
Top Right Desk Drawer and Computer
Gets flash drive and activates bookcase button
Unlock the top right desk drawer using the Clover-Shaped Key (from the Mr. Birdy display device).
Take out the USB FLASHDRIVE.
Back up and go over to the computer on the desk. Before you proceed, take note of two details:
Read the moniter; "Displace Me" is written across the screen.
Inspect the flashdrive to see it has a series of ten numbers.
Click the right edge of the computer's keyboard (back up from close view of the moniter).
Insert the flash drive (aka Memory Stick) in the BLUE USB HUB that you can see in close view of the mouse and keyboard number pad.
Back up and zoom in on the moniter.
Click the "Unlock System" icon on the left side of the screen.
To unlock the "system", put together the clues from the moniter display and the USB Flash Drive:
HINT:
There are ten letters in "Displace Me".
The words themselves tell you what to do.
The numbers on the flashdrive give another clue.
The password should be very familiar to anyone who often visits Tesshi-e's games.
NOTE: as there are no spaces between the numbers, there should be no spaces between the letters of the password.
SOLUTION:
First, number each letter in the words "Displace Me" starting with 1 for "D", 2 for "I" and so on.
Then, rearrange the numbers to form the password:
mildescape
NOTE: as there are no spaces between the numbers, there should be no spaces between the letters of the password.
With the correct password entered, the moniter will read "unlocked"
The "system" unlocked is the large bookcase: you can now push the GREEN-LIGHTED BUTTON in the middle of the wall of books.
Book Wall: Secret Door and Safe
Gets you into the secret room
After you have unlocked the system with the computer, go over to the CENTER SEGMENT of the BOOK WALL.The button in the middle row is now lit green. Push it.
The panel slides in, revealing a square hollow in the floor. There's something down there, but you can't reach it.
As you stand back and view this new area, you can see a long ridge on the right side. Click on it to take a closer look...
There is a STICK inside that ridge. Take it!
You should have a HOOK (from the shelf where you got the hanging orange birdy). Use the HOOK on the end of the STICK. Now you have:
A STICK WITH A HOOK on it.
Go back to the hole in the floor; use the STICK WITH A HOOK to retrieve the box down there. Turns out it's...
a SAFE.
*OPENING THE SAFE*
With the SAFE in close-up view in your inventory, turn the dials to the correct positions (see spoilers below):
Note the heart and the club symbols on the safe, one next to each of the two dials.
Look around the room for something similar, and you'll know what to do next.
HINT:
Your answer is on the top shelf across the room.
SOLUTION:
Go over to the other shelves, on the opposite side of the room (turn twice from facing the book wall).
On the top shelf is a clock. Look at the designs and positions of the clock's hands:
Heart is on the 7 position. Turn the left dial on the safe until it points to the 7 o'clock position.
Club is on the 3 position. Turn the right dial to point at 3 o'clock position.
After turning each dial to the correct setting, slide the lever at the top edge to open the safe and get:
SOME KIND of PART that looks like a handle.
*OPENING THE SECRET ROOM*
Now you have a HANDLE-like PART... a very likely prospects for one of those spots where "something will fit in".
Use the STICK and the PART to get the secret door open:
Facing the wall of books, go over to the right side.
There in the wall, where you removed a panel earlier, is a place to fit the "Handle" (aka SOME KIND of PART).
When you insert the PART into the hole, it will turn automatically, opening the left side of the room.
Blue Box in the Secret Room
Gets you the triangle-shaped key to the left middle drawer
When you first walk into the new room (see section above for opening it), you'll be facing A CHAIR.
Leaning on the chair is a SOME KIND of PART that looks like a short cane with screw threading on the end. Pick it up and save it for later.
Click on the chair's cushion to get the first clue for the code to little BLUE BOX (which is on the table to the right of the chair).
spade x diamond x diamond
Get the next clue by looking around the main room for matching symbols...
HINT:
The needed clues are...
On the coffee table (by two red sofas),
In the middle of the desk,
And just under the Mr. Birdy display device.
SOLUTION:
8 of spades x 6 of diamonds x 9 of diamonds =
432
Do the math and then use that 3-digit code (see above spoiler) to open the BLUE BOX inside the secret room. Inside you'll find:
a TRIANGLE-SHAPED KEY.
Weird Watery Contraption
Gets you the heart-shaped key to the exit door
The key you need is in the bottom shelf of the display case. But it's unreachable, trapped in a capsule at the bottom of a tube.
Go over to the desk. Use the TRIANGLE-SHAPED KEY obtained from the blue box in the secret room to open the left middle drawer.
Get an EMPTY GLASS CONTAINER
Now think of how you can use this container to reach your exit key...
Go back into the secret room and turn left. Place the CONTAINER in the left slot.
Pull the lever to send the container up into the enclosed area.
Now what? Pushing the button on the green tank causes water to come out, but the water doesn't go anywhere useful.
Move the container to where it can be filled...
Leave the room and go back over to the spot under the hippo picture panel (left side of the wall of books).
Insert the SOME KIND of PART (picked up by the brown chair) into the hole. It creates a lever-like handle.
Push the handle in.
Now the empty container is under the spout. Push the white button on the green tank.
Water will fill the container and sink down to the slot below. Back up and take the CONTAINER...WITH WATER
Now you can dump the filled container into the tube. The capsule will rise to the surface, where you can grab the:
HEART-SHAPED KEY
Ready to end your escape now? Just use the key on the exit door and enjoy the ending.
Or....you could play around here a bit more, perhaps to find a happy coin before you decide to exit.
The Happy Coin
Just a little something extra
To get the happy coin ending, you should redo something you already did.
It's in the secret room.
It involves water.
Repeat the steps to fill the empty container with water again. Your HAPPY COIN will be at the bottom of the next water-filled container.
Now, with the happy coin in your possession, use the heart-shaped key on the exit door and click again to leave.
Have fun catching up with Mr. Y!
Posted by: elle |
March 28, 2012 2:37 AM
|
March 28, 2012 2:37 AM