

![]()
 The physics puzzle game has been around long before pigs and birds started battling it out. At its heart, though, is a very fundamental concept—manipulate the physics of the provided objects to solve a puzzle. From an outsider's perspective, that simple-sounding task can appear rather banal. Sit down with it and start toying with potential outcomes, however, and suddenly you're hooked.
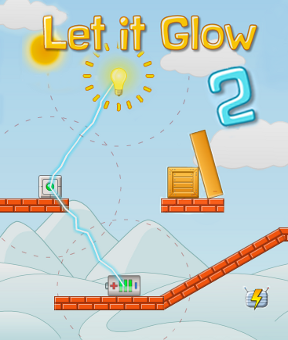
Nothing illuminates this truth more brightly than Let It Glow 2, the well-awaited sequel created by Vyacheslav Stepanov who gave us the original Let It Glow. See, it's not enough to plainly move an object from point A to point B or to propel ornithic projectiles toward helpless oinkers; that can be done artlessly enough without much positive results. In Let It Glow 2, you must arrange electropositive activity through conductors, transmitters and batteries to power light bulbs. Click on objects to remove them causing things to fall perfectly into place. When done correctly, the stream of electricity flows accordingly and there is light!
Analysis: It's very gratifying to make that bulb light up: just a click here and there, experimenting with design until all the parts work, fulfills that inner penchant to build and create. The ease of play, cheerful music and pleasing graphics increase Let It Glow 2's appeal. Adding to its affability, most of the twenty levels are not too hard to figure out. Yet enough strategy and tactical planning are involved to present a satisfying challenge. Those "Aha!" moments when a light pops on above your head fuel the compulsion to keep playing. When you get down to gameplay, there isn't much here in the way of innovation nor will you find great stretches in mental stimulation. Regardless, as far as physics puzzles go, Let It Glow 2 competes well amongst the best and, with only twenty levels, it ends long before you'll tire of playing, which is a mark of a goodness really.
 There are those moments when timing becomes everything. Such minute subtleties of physics law can turn into a lip-biting excursion in precisely timed mouse clicks; if that scenario is frustrating to you, then there are a couple levels you may want to skip. Which brings up a small, nitpicking point: there's no level skipping. Ergo, if you don't want to stop at, say... level 13, you'll just have to hunker down and work through the dilemma. That issue applies to almost everything in life—writing, relationships, living—thus a small possible hiccup in play isn't reason to shrug off a game so gratifyingly enjoyable.
When you do manage to charge up that marvelous Edisonesque apparatus, the warm glow of achievement radiates on screen as well as in your dear puzzle solver's heart. While it might be too short lived to inspire tee shirts, plushies and viral videos, Let It Glow 2 does make for a mighty fine coffee break diversion. You might even land on the leaderboard for posterity!


Walkthrough Guide
(Please allow page to fully load for spoiler tags to be functional.)
Let it Glow 2 Walkthrough
Level 1 -
Click on the wooden box to remove it.
Level 2 -
Remove the wooden box beneath the transmitter.
Remove the large box from the top of the stack at the left.
Level 3 -
Remove the bottom board from the stack.
Remove the box beside the top transmitter to send it rolling to the right.
Remove the board holding the two other transmitters up.
Level 4 -
Remove the board beneath the crate at the upper-right of the screen.
Remove the small crate beside the transmitter at the top of the screen.
Level 5 -
Remove the small crate at the bottom of the screen, beneath the slanted board.
Remove the small crate at the top to make the L-shaped board fall over.
Remove the board holding the large crate up at the top of the screen.
Level 6 -
Remove the small crate directly below the battery to charge it.
Remove the left crate to cause the battery to slide down the ramp.
Level 7 -
Remove the small crate on the right so the board falls over.
Remove the small crate on the right, then immediately remove the small crate on the left.
Level 8 -
Remove the small crate on the bottom left.
Remove the L-shaped board on top of the transmitter to start it rolling.
Remove the board beneath that transmitter to make the transmitter collide with the battery.
Once the battery is fully charged, remove the bigger crate from atop the L-shaped board at the right to cause it to swing into the battery and send it rolling backwards.
Level 9 -
Remove the middle crate on the bottom layer.
Remove the bottom V-shaped board.
Level 10 -
Remove the small crate on the right.
Remove the small crate beside the transmitter at the top of the screen.
Remove the board on the left beneath the large crate.
Level 11 -
Remove the large crate beside the stone panel.
Remove the board above the L-shaped panel on the left to knock the top transmitter off.
Remove the board above the L-shaped panel on the right to knock the second transmitter off.
Level 12 -
Remove the small crate just below the battery to charge it.
Once fully charged, remove the small bottom crate on the right to start the battery and board falling over.
Remove the board when the battery has enough momentum to land on the next platform.
Level 13 -
Remove the board holding up the large crate
Immediately remove the small crate on the stone panel.
Remove the board holding up the transmitter.
Once everything stops moving, remove the large crate so the transmitter rolls down.
Level 14 -
Remove the small crate below the circular transmitter on the left.
Remove the L-shaped board holding back the two wheels.
Remove the long horizontal plank so that the smaller board falls on top of the wheels, rolls to the left, and knocks the circular transmitter down. This may take a few attempts!
Level 15 -
Remove the L-shaped board on the left, bringing the large crate down.
Remove the left small crate beneath the horizontal plank, pushing the vertical plank and crate on the right higher.
Remove the horizontal plank at the top right to set off a chain reaction.
Level 16 -
In the left bunch of boxes, remove the bottom small right crate to cause the plank to fall over.
In the right batch of boxes below the square transmitter, remove the bottom small left crate to cause the transmitter to fall.
Remove the longer horizontal plank in the middle and the transmitter will slide down the wheels and land beside the light bulb.
Remove the horizontal plank below the circular transmitter.
Level 17 -
Remove the horizontal plank below the wooden circle so it drops to the longer plank.
When the board teeters to the right, delete the large crate on the right to send it tilting back to the left. When timed correctly, the wooden circle should hop over the gap to the next platform and push the transmitter.
Remove the wooden circle once it has pushed the transmitter down to the bottom level.
Level 18 -
Remove the small crate wedged between the two larger ones on the left.
Remove the wooden circle.
Remove small horizontal plank.
Remove the large crate in the middle.
Remove the long horizontal plank that's holding everything up.
Level 19 -
Out of the four planks leaning against one another in the middle of the screen, remove the left most one and the small crate in the middle.
Remove the plank holding the transmitter up.
Remove the plank holding the battery up.
Once fully charged, remove the board below the battery to send it sliding down the brick platform.
Level 20 -
Remove the top wooden crate from the bottom pile.
Remove the small crate directly beside the battery to start it rolling.
Once the battery reaches about halfway, remove the second small crate at the left.
Remove the long horizontal plank, lining it up so the battery will fall and wedge itself between the two metal crates.
Remove the bottom wooden crate.
Remove the bottom L-shaped plank.
Posted by: Alex |
January 21, 2012 8:56 AM
|
January 21, 2012 8:56 AM