


![]() Here at Weekday Escape one of our favorite room escape designers is the Japanese Kotorinosu, who tends to bring the escaping fun in two flavors: "normal" escapes (Mirror Escape and Device come to mind) and "mini-escapes" such as Dangerous Gen-Kan Escape 2. This week Kotorinosu has favored us with another wonderful mini-escape in the form of Matryoshka, and while not as densely packed as the "normal" escapes, it is still stuffed with more puzzles than there are layers to the Matryoshka doll.
Here at Weekday Escape one of our favorite room escape designers is the Japanese Kotorinosu, who tends to bring the escaping fun in two flavors: "normal" escapes (Mirror Escape and Device come to mind) and "mini-escapes" such as Dangerous Gen-Kan Escape 2. This week Kotorinosu has favored us with another wonderful mini-escape in the form of Matryoshka, and while not as densely packed as the "normal" escapes, it is still stuffed with more puzzles than there are layers to the Matryoshka doll.
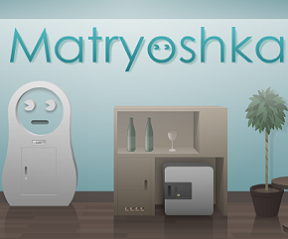 Even if you don't speak Russian you are still probably familiar with matryoshkas, also known as nesting dolls. And just like the dolls this escape unfolds in layers, each one revealing a lovely little surprise. Navigation is the usual point-and-click affair and despite the lack of a changing cursor there will be very little pixel hunting. Instead, you are faced with a logical (and amusing) series of puzzles that, once again, fit together like the nesting dolls of the title. Hmmm, are you sensing a theme here? Not unusual as Kotorinosu tends to build their lovely escapes around a single theme, like Shapes or Colors.
Despite the fact that it is called a "mini-escape" Matryoshka contains all the bells and whistles expected in a well-designed escape game: easy inventory control, great puzzles, intuitive navigation, and even a save feature. The presence of one color-based puzzle may keep the game from being accessible to all, but otherwise Kotorinosu has done it again with an entertaining way to waste time in the middle of the week. Come and give Matryoshka a try and, even if you're a macho guy, discover the joy of playing with dolls (and escaping).


Walkthrough Guide
(Please allow page to fully load for spoiler tags to be functional.)
MATRYOSHKA WALKTHROUGH
NORTH WALL
Check under the cliche hiding spot...er, the pillow. Grab the book and thumb through it.
Looks like a spot where something was erased on the first page and torn out of the second. Oh well.
Note the pictures on the wall. One's got a card slot beside it, the other's got...numbers. Okey-dokey then.
Turn left.
WEST WALL
Check the safe under the table. Huh, it opens already? ...Okay!
Take the white ball. Looks like we can cut it open for something...need scissors or whatnot first though.
Note the lock color on the mini-door and the 4-digit safe next to it.
Note the bit white doll-shaped machine on the left. It's locked...note the color.
Turn left.
SOUTH WALL
Note the four spots on the shelf and the panel on the lower wall. Turn left once more.
EAST WALL
Grab the scale on the right end of the table. Check the bottom just to be thorough.
Crap, it needs batteries.
Check the picture in the middle.
Make a note of the screw.
Note the lock color of the bottom shelf, then check the other 3.
Nothing in the left one, but check the top...another screw, probably holding the large doll down.
Get the shovel from the top shelf.
Bupkis in the right shelf.
Take a look at the oversized doll on the table. Can't grab it due to that screw, but it looks like it can opened if we hit those buttons in the right order...oh well, come back later.
Check the trash can...oh, look! An unsharpened pencil.
That about does it here. Back to the North wall again. Once more to the left!
NORTH WALL
Zoom in on the plant base, use the shovel. Grab the doll...I sense a theme here. Wait, what's that on its chest?
Looks like the pencil fits into it...
Oh! A pencil sharpener! Sweet!
Well, that pencil's sharpened now, so let's try it on the erased spot in the book.
Hmm. An 8-petaled flower with some light petals and some dark petals...
Didn't we see something earlier like that?
Let's head back to that table for a second.
EAST WALL
Yep, the buttons that large doll looks like the layout of the flower petals.
And sure enough, lighting up the buttons that match the light petals and hitting that big "OK" button works! And we get....another doll. Good grief.
Well, let's have a look at this doll...0.3 to 0.9?
Wait, where have we seen those numbers before?
Let's have another look at those posters.
NORTH WALL
Check the numbered poster.
Yep, there's those numbers, 0.2 down to...too small to read. But look at the ones we're interested in, and the circles beside them.
Looks like they rotate in a kind of sequence...maybe it's a clue for opening that new doll?
Yep, the eyes turn. Let's try turning them to match the chart...
Right, Left, Right, Right, Left, Right, Left, OK!
Bingo! Take the paper and the silver key.
Check out the paper. Looks like it matches the tear in the book's 2nd page.
Yep, sure does! Now we've got a clue for...looks like the white doll-shaped device. Something about weight.
Well, let's go check it out.
WEST WALL
The key matches the color of the lock on the doll-machine. Let's try it.
YES! It opens, to reveal....another doll. Looks like it opens, but I don't see a puzzle...well, let's just try it as is then.
Alright, just what we needed! Batteries for the scale!
Pop the batteries in the scale...now, let's get to weighing our inventory.
..Well, seems we can only weigh the dolls. Fair enough.
Looks like the small one's 250 grams, the medium one's 500, and the big 0.3-0.9 one is 950.
The book was looking for something that weighs 1200, though...well, hang on.
950 + 250 = 1200. Let's put the small one in the big one and then put that in the doll machine.
Pop them in, close the door, hit the OK button...sweet! A bronze key! Grab it, then get the dolls back...something tells me we're not done with them yet.
EAST WALL
The lock on the bottom shelf had a bronze lock. We now have a bronze key. Let's try it.
It opened! ...And look, a screwdriver!
Remember the items that were screwed down over here?
First, open the left cabinet and unscrew the big doll from the desk and grab it. Then, unscrew the picture from its frame and pop it open. ...Sweet, a cardkey!
Neat design on it...could be a clue for later. Make a note of it.
Right, let's go back to those posters.
NORTH WALL
Let's try the cardkey on that card slot. BEEP! It opened! ...I think?
Yep, we can move the picture now. Cool, a knife's behind it! ...Looks rusty, though. Guess that's what the book was hinting at earlier. Keep your eyes peeled for a whetstone.
You know, something just occurred to me. Let's go back to the South wall for a minute.
SOUTH WALL
There's 4 spots on the shelf, and we've got 4 dolls...but how to line them up?
Take another look at that cardkey. The designs on it match the shapes on the shelf, and are in 4 different sizes...maybe line the dolls up in that size order?
From 1-4 with 1 being smallest: 3421.
BINGO!! The lower panel's open!
The lower panel has some numbered dials on it, but the numbers are split on the dials. Hmm...let's roll them around and see if we can make a set of numbers with them.
The 2 lines up with part of a 5, but the 3rd dial doesn't have the other half...let's try some other combinations. After a little trial and error...mostly error...we come up with:
4763.
I think I know where this goes. Grab the dolls (I STILL don't think we're done with them) and turn right.
WEST WALL
Let's have a look at the 4-digit combo safe again, and try the number we got from the South wall panel.
4, 7, 6, 3...open says-a-me! And there's our whetstone!
Now, let's sharpen that knife up...but what to do with it?
Well, we didn't find scissors for that ball, so let's use the knife on it instead!
Bingo, a key. And apparently this thing is the exotic Rainbow Cantaloupe. Interesting colors...better make a note of them.
Use the key on the locked mini-door on the other safe...huh, colored buttons.
Pressing them doesn't seem to do anything...hey, wait a minute.
Notice how the colors in the cantaloupe match up with them? And how they layer out one inside another like how these dolls work? I wonder...
If I put one of the dolls in here, and hit a button, it changes its color! That's gotta mean something...
The outermost color is white, just like the doll machine. Inside of that...well, I hear these Rainbow Cantaloupes vary in how their insides pan out. Regardless, though, I've got how to figure this out now.
Time to solve the last puzzle in this crazy room.
FINAL PUZZLE (WEST WALL STILL)
First, let's color the smallest doll to match the color at the center of the cantaloupe. Then, the 2nd-smallest to the color outside that, the 2nd-largest to the color outside that, and the largest to the color outside THAT (just before the white husk).
Next, stack the smallest into the 2nd-smallest, the 2nd-smallest into the 2nd-largest, and the 2nd-largest into the largest.
Finally, let's put this into the big white doll machine and hit that big old OK button one last time!
JACKPOT!! We're outta here, baby!
CONGRATS ON YOUR ESCAPE!
Glad I could help! :]
Posted by: An Onyx Mouse |
December 14, 2011 1:28 AM
|
December 14, 2011 1:28 AM
Matryoshka Walkthrough
General Information
There is only one ending.
To examine an inventory item click in the lower right of the inventory box where the magnifying glass is.
Examine every object you pick up carefully, it could be hiding something useful.
The color puzzle has a random solution, so directions for the colorblind are not possible.
Good luck!
Exploration
You begin facing a wall with a large bench, a small table, and a large potted plant. There are two pictures on the wall.
Click on the pillow on the bench to lift it and take the notebook.
Pull up the notebook from your inventory.
Click on the notebook to open it.
The first and second pages are a picture of a flower and something that has been whited out. Turn the page by clicking on the right page.
The third and fourth pages have more figures. First is a diagram that seems to show that a dull knife + a whetstone equals a sharp knife.
On the opposite page is a picture of a matryoshka, but the lower right corner has been torn away.
Close down the notebook and click on the potted plant. This gets you a close up of the pot.
However, all you see is dirt, so maybe there's another item you need. Back up.
Click on the left picture for a close up. It appears to show placing a matryoshka doll on a plate. To the right of the picture is a keycard swipe. Back up.
Click on the right picture (it looks like an eye chart) for a close up.
In close up it still looks like an eye chart, but you can see a series of numbers going down the left, and instead of letters there are symbols on the right. Back up.
Turn right.
You are now facing a long, low cabinet that has two doors and two drawers. To the left of the cabinet is a waste paper basket.
Click on the waste paper basket for a close up and take the object inside (unsharpened pencil), then back up.
Click on the front of the cabinet for a close up.
Open the left door. It's empty inside, but you can click inside and see that the large matryoshka on top of the cabinet is screwed in. Looks like we need a screwdriver!.
Back up once then open the right cabinet door. Again, it's empty.
Open the top cabinet drawer and take the little gardening spade.
The bottom drawer is locked for now.
On top of the cabinet are three items. On the left is a large matryoshka (that is screwed down). In the middle is a picture, and on the right is an electronic scale.
Click on the large matryoshka for a close up.
There is a lock on the doll with buttons and we don't know the combination. Back up.
Click on the picture in the middle for a close up.
Click on the picture again until it turns around. Yep, still need that screwdriver. Back up.
Click on the electronic scale to take it.
Once you have the scale pull it from your inventory for a close up.
If you click on the lower right of the scale it will tip over, showing the bottom. Note the small compartment? Yes, you need batteries.
Close down the scale, back up, and turn right.
You are now facing a wall with a large alcove. Click on the alcove and you will see four plates that resemble the one in the picture above the bench.
Below the alcove is a panel in the wall, but it won't open.
Turn right.
You are now facing a wall with two cabinets. The cabinet on the left looks like a large matryoshka doll. The cabinet on the right has two bottles of wine, a wineglass, a door on the left that needs a four digit code, and a safe.
Click on the Matryoshka cabinet for a close up.
There's a door in the matryoshka cabinet, but it's locked. There also appears to be a button labeled "ok". Back up.
Click on the safe cabinet for a close up.
Yep, the left door on the safe cabinet needs a four digit combination.
Click on the safe door to open it.
No, it's not locked, although there is a locked panel on the front of the door. Inside is a large white ball, take it.
Back up and turn right.
You should now be facing the bench again. Time to solve some puzzles!
Digging In the Dirt
Click on the potted palm for a close up of the pot itself.
Use the gardening spade on the dirt to dig up a small matryoshka doll. Take the doll and back up.
Sharpening Your Wit (and the pencil)
Pull up the small matryoshka doll from your inventory. Note the hole in the front?
That looks like the shape of a pencil. Use the pencil on the hole to sharpen the pencil.
Close down the sharpened pencil into your inventory.
The Notebook Clue (Page 1 and 2)
Pull up the notebook from your inventory and click on the cover to open it.
You should be on the first two pages, the one with a picture of a flower and a big blotch.
Use the sharpened pencil on the blotch on the right page to reveal a clue, a flower with petals and some of the petals are white.
Close down the notebook and turn right to face the long, low cabinet.
Click on the large matryoshka on top of the cabinet for a close up.
Click on the buttons on the doll for a close up.
Note how the number of buttons is the same as the number of petals on the picture in the notebook?
You need to push the buttons around the outside to match the picture in the notebook.
Click the top button to turn it on (white).
Going clockwise from the top, skip the first button, then click the next two buttons to turn them white.
Going back to the top and counterclockwise from there, skip the first button then click the next one (9 o'clock) to turn it white.
Double check the notebook to see that you've gotten the pattern correct, then click on the ok button in the center.
Back up once and click on the top of the doll to open it. Take the slightly smaller matryoshka from inside.
Back up.
The Eye Matryoshka
Pull up the larger matryoshka from your inventory.
There are numbers on the front, 0.3 to 0.9.
You can also click on the face for a close up. Notice that the eyes rotate.
Close down the doll and turn left to face the bench.
There is obviously a code to the eyes on the doll. Maybe the "eye" chart on the wall can help?
Click on the eye chart for a close up.
Note that the symbols show an opening in a circle on both the left and right for each number.
This corresponds to the "notch" in the eyes on the matryoshka doll.
Remember the numbers on the doll, 0.3 to 0.9.
That means you want to start with the eyes in the position indicated by 0.3, the left eye with the notch to the left, the right eye with the notch down.
Pull up the doll and set the eyes to the starting position. The left eye is already in place, so click on the right eye once.
Now you want the position for 0.4, so click on the left eye once to turn the notch down. Both eyes should have the notch in the down position.
0.5 has the right eye with the notch to the right, so click on the right eye once to move the notch.
0.6 has the left eye still down and the right eye with the notch up, so click on the right eye once again to move the notch up.
0.7 has the left eye notch pointing to the right, and the right eye notch up, so click on the left eye once.
0.8 has the left eye notch pointing to the right, and the right eye notch pointing to the left, so click on the right eye once.
0.9 has the left eye notch pointing up and the right eye notch pointing to the left, so click on the left eye once.
The full sequence from beginning to ending is: right eye, left eye, right eye, right eye, left eye, right eye, left eye.
Once you've moved the eyes in the proper sequence, click on the ok button and back up once.
Click on the top of the matryoshka doll to open it and get a key and a piece of paper.
Close down the doll and back up from the eye chart.
Pull up the paper and click on it to open it. Looks like part of a larger drawing. Close down the paper into your inventory.
The Matryoshka Cabinet
Turn left to face the two cabinets.
Click on the matryoshka shaped cabinet for a close up.
Use the key you just got to open the door and find...yet another matryoshka doll inside. Take the doll and back up.
Pull up the new doll from your inventory and click on the head to open it. Inside are two batteries, take them.
Close down the doll.
Pull up the notebook from your inventory.
Open the book and turn to pages 3/4, the ones with the knife and the matryoshka doll.
Note the ripped section of page 4?
Use the note from your inventory on the corner and the page is restored.
Looks like we need to put something weighing 1200 g into the cabinet, and we'll get something from the mouth.
Close down the notebook and pull up the scales.
Click on the lower right of the scales to turn them over, then open the slot and place the batteries.
Close up the battery slot, then turn the scales back over.
Time to weigh some dolls!
At this point you should have 3 dolls in your inventory. Use the largest (the 0.3 to 0.9 doll) on the scale and see that it weighs 950 g.
Remove the largest doll then weigh the middle doll (the one with no markings). It should weigh 500 g.
Remove the middle doll and weigh the smallest doll (the pencil sharpener). It should weight 250 g.
So none of them weigh 1200 g. Now what?
Close down the scale and pull up the largest (the 0.3 to 0.9) doll from your inventory.
Click on the top of the doll to open it, then place the smallest doll (the pencil sharpener) inside.
Close the top of the doll and close the doll into your inventory. The two dolls together weigh 1200 g.
Place the combined dolls into the open door of the matryoshka cabinet and close the door.
Click on the ok button and you will be rewarded with a brass key. Take the key.
Open the cabinet door and take back the matryoshka dolls. Open the larger doll and retrieve the smaller one from inside.
Back up.
Getting the Screwdriver
Turn left (or right) twice to face the long, low cabinet.
Click on the cabinet for a close up, then use the brass key on the bottom drawer to open it.
Inside the drawer is a screwdriver, take it. Yay, a screwdriver!
Back up.
Using the Screwdriver
Click on the cabinet for a close up.
Click on the left door to open it, then click inside the cabinet to see the screw holding the largest matryoshka doll.
Use the screwdriver on the screw, then back up and take the largest matryoshka. You should now have four dolls in your inventory.
Back up, then click on the picture in the center of the cabinet top three times until you are in close up and it is turned around.
Use the screwdriver on the back of the picture. Remove the backing and take the key card. Back up twice.
The Key Card
Turn left once to face the bench.
Click on the picture to the left of the eye chart for a close up.
Use the key card on the swipe slot to the right of the picture. When the light on the swipe slot turns green, click on the picture to open it.
Take the object from behind the picture (dull knife) and back up.
Now what?
Turn left (or right) twice to face the alcove wall.
Well, the picture seemed to imply placing dolls on plates, and you now have 4 dolls and there are 4 plates in the alcove.
How should we place them, though?
Pull up the key card from your inventory.
Note the pattern on the card. They look like the eyes of the dolls, and they are 4 different sizes.
If you consider the smallest doll (the pencil sharpener) as 1, moving to the largest doll (the one with the flower buttons) as 4, then the sequence would be 3, 4, 2, 1.
Close down the key card and click on the alcove for a close up.
Place the dolls on the plates according to the clue on the card.
On the first plate on the left, place the third largest doll (the 0.3 to 0.9 doll).
On the second plate place the largest doll (the one with the flower buttons).
On the third plate place the second smallest doll (the one with no markings).
On the fourth plate (the far right plate) place the smallest doll (the pencil sharpener.
If you place the dolls correctly, the panel below the alcove will open up.
Sharpening the Knife
Click on the panel below the alcove for a close up.
Open the panel and you will see a slider puzzle with pieces of numbers on it.
Now to solve the slider!
Start with the left slider, You should see part of the number 2, but there's no match for it. Move that first slider until part of a number 4 appears.
Continue to move the first slider until that partial 4 is near the bottom.
Now move the next slider until the second part of the 4 appears. Match it to the left slider.
Once the 4 is lined up correctly, you will see a line on the second slider. Move the third slider until part of the number 7 comes around and lines up with that line near the top.
This leaves you with most of the number 6 showing at the bottom of the third slider. Move the fourth slider until the rest of the six lines up.
When the 6 lines up you will see part of the number three in the middle of the fourth slider. Move the fifth slider until the rest of the 3 lines up.
You now have your code, 4763.
Once you've solved the slider, back up.
Click on the alcove and take back all four dolls.
Back up and turn right to face the matryoshka cabinet.
Click on the left door of the safe cabinet for a close up.
Use the four digit code you just got from the slider puzzle to unlock the cabinet door.
Open the door and take the whetstone.
Back up.
Pull up the whetstone from your inventory, then use the knife on it to sharpen it.
Now what?
Using the Knife
Okay, now we have a sharp knife. now what?
Remember that white ball we got way back in the beginning?
Pull up the white ball from your inventory.
Note the scissors symbol and the lines? Looks like we need to cut the ball.
Isn't it handy we have a sharp knife?
Use the knife to slice the ball open.
Inside the sliced open ball is a gold key, take it.
Note the color banding inside the ball, running smallest (center) to largest (outside). This color pattern changes each time you play the game.
Close down the ball into your inventory.
Getting Out
There's only one place left to use the key, that small panel in the safe door.
Click on the safe for a close up and use the key to open the panel.
When the panel opens you will see four buttons, red, green, blue, and yellow.
Nice that those buttons match the colors found inside the white ball.
Perhaps if we reproduce the ball with the matryoshka dolls we can get out?
What you need to do is color the dolls to match the color banding in the ball, smallest (inside color) to largest (outside color).
Remember, this color pattern changes each time you play the game. For purposes of this walkthrough the example is, from inside to outside, green, red, yellow, and blue.
That means you would need to color the smallest doll (pencil sharpener) green, the next larger (unmarked) red, the next larger (0.3 to 0.9) yellow, and the largest (flower buttons) blue.
Remember, this is just an example. Each time you play the color banding is different, so the dolls would need to be different colors.
To color a doll, place it inside the safe and close the door. Once the door is closed, push the button of the color you need to dye the doll.
Once all of the dolls are the proper color, you need to nest them together, again to match the color banding.
Pull up the unmarked matroyshka (second smallest) and open it, then place the smallest (pencil sharpener) inside and close it.
Close down the doll, then pull up the next largest (0.3 to 0.9) and open it.
Place the smaller dolls inside and close the doll.
Pull up the largest doll, then place the nested dolls inside and close it.
If you did it correctly, you should now have one large matryoshka doll with the others nested inside.
Back up from the safe.
Click on the Matryoshka cabinet for a close up.
Open the door and place the nested dolls inside.
Close the door and push the ok button.
A ladder will drop down from the ceiling. Climb the ladder and you are out!
Season's Greetings!
Posted by: grinnyp |
December 14, 2011 2:31 AM
|
December 14, 2011 2:31 AM