JayisGames.com is now available ad-free!
Jay is Games recommends Cheat Happens with 8,000+ games and 35,000+ trainers!

Nick Toldy and the Legend of Dragon Peninsula


  • Currently 4.4/5
  • 1
  • 2
  • 3
  • 4
  • 5
Rating: 4.4/5 (457 votes)
Comments (35) | Views (18,573)

joyeNick Toldy and the Legend of Dragon Peninsula
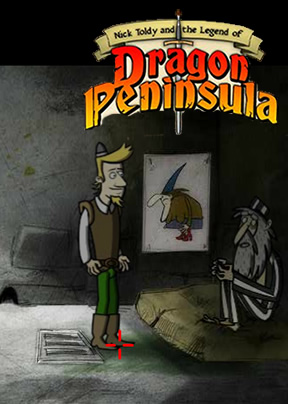
Red Herring Labs, makers of epic point-and-click adventures like Morningstar and Hetherdale, takes its high production values and evident love for the medium toward a more comic, Monkey Island-esque direction with its new game Nick Toldy and the Legend of Dragon Peninsula. Control a young man who dreams of becoming a knight, slaying a dragon, and winning a princess... or at least that's what the brochure promised him. But the reality of Dragon Peninsula is a little more... bureaucratic. His first major puzzle involves filling out a form and getting a permit. Doesn't sound too enthralling, but it ends up being both very funny and a good work-out to the inventory puzzle solving quadrant of your brain. You know. It's right next to the frontal lobe.

Adventure games all handle their controls a little differently, but the general concept of gaining and using inventory is the same. This particular game keeps your inventory handy at all times on top of the game window. Select an item by clicking on it and use it on hotspots in the scene, on other inventory items, or on the small magnifying glass to get more details. All clicking in the game is single left clicks, no need to hold, drag, or right click. You can tell an object can be interacted with by hovering over it. If it gets a small text label, like "man", you can click on it. The menu contains sound and music controls and an option for saving the game.

Nick Toldy and the Legend of Dragon PeninsulaAnalysis: Puzzle solving and item combining in Nick Toldy can be a bit fussy. The game avoids strict linearity by giving you several puzzles to solve at a time, but puzzle solutions are occasionally illogically specific in what must be done first. For example, without spoiling you with an actual solution, you'll have among your items three items that seem like they go together, like a chain, a clasp, and a pendant. But the game will only accept the combination of combining the chain and the pendant first, and then adding the clasp. Combining the chain and clasp gives you a "this is no help" kind of message. This can cause you to erroneously think you're stuck, even though you actually have the right idea about what goes together.

For the most part, however, the game gives good clues about what to do without holding your hand and making it too easy. Items picked up early on are kept and reused later, which is sensible and definitely more realistic than the escape game hero who chucks away his screwdriver. Yet the inventory never gets overwhelmingly large and traps you in that boring slog of trying each one of forty-seven objects on a hotspot. At an hour plus game length, Nick Toldy and the Legend of Dragon Peninsula will give those who yearn for the glory days of Sierra Entertainment a meaty afternoon's entertainment, and probably win some new fans to the genre as well.

Play Nick Toldy and the Legend of Dragon Peninsula

Walkthrough Guide


(Please allow page to fully load for spoiler tags to be functional.)

Nick Toldy and the Legend of Dragon Peninsula Walkthrough

Chapter 1

Port

  • Click the swordsmith outside the sword shop to speak with him.

  • Click the sleeping sailor on the dock to investigate.

  • Click the doormat in front of the tavern to find the Key.

  • Go back into the alley between the tavern and the barn.

Alley

  • Take the horseshoes on the ground beside the stables.

  • Use the Key on the chest in front of the tavern back door to receive the Coffee and Padlock.

  • Click the swordsmith backdoor to open it and receive the String.

  • Continue down to the practice range.

Practice Range

  • Click the man at the desk to speak with him.

  • Give the man the Knight Application Form from your inventory.

  • Take the XXL Leather Armor from the left dummy.

  • Take the Spear from the wooden target.

  • Use the Spear on the right dummy.

  • Take the Wooden Sword and Wooden Arm from the ground.

  • Use the Spear to take the Apple from the tree above the man.

  • Click the Apple in your inventory to reveal the Worm.

  • Return to the stalls in the alley.

Alley

  • Click the man standing next to the mule to speak with him.

  • Place the Wooden Arm from your inventory into the stove under the pot of cold water.

  • Go inside the swordsmith's shop.

Swordsmith's Shop

  • Take the Lime next to the pile of sand.

  • Take the Hammer and Tongs leaning against the side of the anvil.

  • Use the Wooden Sword from your inventory on the pile of sand.

  • Use the Spear on the hanging chandelier to knock it down.

  • Take the Candles, Wheel, Chain, and Hook that fall to the ground.

  • Place the Horseshoe on top of the smoldering coal on the furnace.

  • Click the bellows beside the furnace to heat the coals.

  • Use the Tongs to pick up the Sword-Shaped Iron mold in the sand.

  • Put the Sword-Shaped Iron on top of the anvil.

  • Use the Hammer on the crude sword to shape it.

  • Use the Tongs to pick up the Forged Sword.

  • Place the Forged Sword on the smoldering coal on the furnace.

  • Click the bellows to heat the sword again.

  • Pick up the Red-Hot Sword with the Tongs.

  • Put the Red-Hot Sword in the bucket of water.

  • Take the completed Sword out of the Empty Bucket, then click the bucket to add it to your inventory.

  • Go back outside to the alley.

Alley

  • Put the XXL Leather Armor from your inventory into the pot of boiling water.

  • Return to the port.

Port

  • Give the Coffee from your inventory to the parrot on the sleeping captain's shoulder.

  • Click the fed Parrot to add it to your inventory.

  • Click the Captain to take his Eyepatch

  • Use the Sword to cut the the rope tied to the docked ship.

  • Click the anchor on the other side of the ship to raise it.

  • Click the sail to move the ship forward.

  • Lower the anchor, then raise it again and take the Troll Head hoisted up with the anchor.

  • Use the Eyepatch on the Troll Head to make it a One-Eyed Troll Head.

  • Attach the String from your inventory to the Spear, add the Hook, then add the Worm to complete the Fishing Pole & Bait.

  • Use the Fishing Pole & Bait on the ocean to the left of the dock to receive a Bucket of Herring.

  • Go back to the alley.

Alley

  • Click the Pot of Cold Water to receive the Snug Leather Armor.

  • Go inside the swordsmith's shop.

Swordsmith's Shop

  • Place the Bucket of Herring from your inventory inside the Chimney.

  • Step outside the shop, then go back inside to let the herring cook.

  • Click the Chimney to receive Smoked Herring.

  • Go back outside to the alley.

Alley

  • Give the Smoked Herring from your inventory to the man standing beside the mule.

  • Use the Lime on the mule to paint it white.

  • Go down to the practice range.

Practice Range

  • Give the One-Eyed Troll Head from your inventory to Sir Moak to receive your Knight Permit.

  • Return to the port.

Port

  • Click the upper-left side of the screen to travel to the wilderness.

Chapter 2

Cemetery

  • Move right towards the graveyard area.

  • Take the Old Signpost and the Old Sign above the right grave.

  • Go inside the witch's hut.

Witch's Hut

  • Take the Funnel and the book Marauder Who's Who from the bookcase.

  • Take the Flower Vase on top of the table.

  • Click the Witch to speak with her.

  • Go back outside.

Cemetery

  • Click the left grave in the graveyard to investigate.

  • Return to the witch's hut.

  • Witch's Hut

    • Speak with the witch again.

    • Go back outside.

    Wilderness

    • Use the Marauder Who's Who book from your inventory on the left grave.

    • Take the Diamond on top of Alexander Rose's grave.

    • Go up the hill to the windmill.

    Windmill

    • Click the door of the windmill to step inside.

    • Take the Sack of Wheat to the left of the millstone.

    • Combine the Chain and the Padlock to make the Chain Lasso.

    • Use the Chain Lasso on the hook attached to the loft, then click the chain to climb up.

    • Click the Plank to push it off the platform.

    • Click the bluebird's nest to take the Egg.

    • Go back to the witch's hut.

    Witch's Hut

    • Give Rhonda Ghonos the Old Signpost, the Bluebird's Egg, and the Diamond from your inventory.

    • Return to the windmill.

    Windmill

    • Click the Cat to add it to your inventory.

    • Take the Blue Feathers on the floor of the platform.

    • Use the Sack of Wheat from your inventory on the millstone to make it an Empty Sack.

    • Go back to the witch's hut.

    Witch's Hut

    • Give the witch the Blue Feather's from your inventory to receive the Matrimonial Potion.

    • Go outside, then go north to the capital.

    Capital

    • Use the Parrot from your inventory on the gramophone.

    • Add the Funnel to the Singing Parrot to make it an Amplified Parrot.

    • Use the Amplified Parrot on the Gramophone to swap the two items.

    • Click the guard to speak with him.

    • Go back to the cemetery in the wilderness.

    Cemetery

    • Use the Gramophone from your inventory on the right grave.

    • Combine the Wooden Sword and the Old Sign to make the New Signpost.

    • Place the New Signpost on the right grave.

    • Put the Candles and the Flowerpot on top of the grave.

    • Use the Gramophone to speak with the dead courier again.

    • Go right to the outhouse.

    • Use the Tongs on the outhouse to receive the Royal Stamp.

    • Use the Royal Stamp on your Knight's Permit to make it a Stamped Knight's Permit.

    • Return to the capital.

    Chapter 3

    Capital

    • Give the guard the Stamped Knight's Permit from your inventory to open the gate.

    • Take the Roadkill lying on the ground.

    • Use the Tongs on the vending machine to receive the Trau-Bee bottle.

    • Use the Trau-Bee on the vendor inside the building to the left of the vending machine to receive the Cheesy Knight Costume.

    • Click the warden by the far right building to speak with him.

    Jail Cell

    • Click the warden to speak with him again.

    • Talk to the prisoner sitting on the cot.

    • Click the poster to travel to the tunnel, then go back to your cell.

    • Take the Bread and the Tin Bowl on the shelf.

    • Place the Tin Bowl in front of the mouse hole, then add the Bread to the bowl to make a trap.

    • Click the poster to go inside the tunnel then come back out again.

    • Click the mousetrap to receive the Mouse.

    • Put the Tin Bowl back on the shelf.

    • Click the Warden to speak with him again.

    • Go inside the tunnel once again and then come back to the cell.

    • Click the pallet at the side of the bed to receive the Strip of Cloth.

    • Attach the Strip of Cloth to the Mouse in your inventory to make it a Leashed Mouse.

    • Use the Leashed Mouse on the Mousetrap outside the cell to add it to your inventory.

    • Combine the Mousetrap and the Strip of Cloth to make a Rigged Mousetrap.

    • Use the Rigged Mousetrap on the drain to receive the Chisel.

    • Click the poster to go inside the tunnel.

    Tunnel

    • Use the Chisel from your inventory on the rusty bars of the portcullis.

    • Click the rope to return to the plaza, then go into the building on the far right to go into the jail.

    Jail

    • Click the large sack to the right of the desk to receive all of your taken items.

    • Click the desk drawer to receive the Masterkey.

    • Use the Masterkey on the bars to unlock the cell, then click the bars to open the door.

    • Click Lord Apoash to speak with him, then give him the Matrimonial Potion from your inventory.

    • Go back outside to the plaza.

    Plaza

    • Move left to the tavern building, then click the door to go inside.

    Tavern

    • Take the Butter on the table.

    • Click the bartender to receive the yeast.

    • Click the bench to the right of the table to receive the Gum.

    • Click the sink in the back room to receive the Hair.

    • Return to the jail.

    Jail

    • Combine the Hair and the Gum to make a Fake Mustache.

    • Use the Fake Mustache on Lord Apoash.

    • Give the Roadkill and the Cheesy Knight Costume from your inventory to Lord Apoash to receive Apoash's Rhyme.

    • Go back to the witch's hut in the wilderness.

    Witch's Hut

    • Take the Red Curtain over the window.

    • Take the Broom leaning against the wall.

    • Return to the tavern.

    Tavern

    • Use the Red Curtain from your inventory on the bronco.

    • Take the Horns, Red Curtain, and Saddle that fall to the ground.

    • Go outside to the plaza. Click the flag near the large gate on the far right side and note the symbols.

    • Click the gate to enter the palace.

    Main Hall

    • Click the carvings on the left and right bases of the pillars in this order: Dragon, Horse Head, Sword.

    • Go through the door into the secret room.

    Secret Room

    • Note the painting on the wall is a picture of a vending machine.

    • The serial number to the vending machine was McA-43.

    • Click the top arrow button to the left of the wooden door to set the 1st dial to position 4.

    • Set the 2nd dial to position 3.

    • Click the red button to open another secret door.

    • Go through the door to Secret Room 2.

    Secret Room 2

    • Note the painting on the wall has changed to the gramophone. The serial number on the gramophone is McA-24

    • Set the first dial to position 2.

    • Set the second dial to position 4.

    • Click the red button to open the secret door.

    • Go through the open door to the third secret room.

    Secret Room 3

    • Note that the painting on the wall this time is a picture of a bronco. The serial number to the bronco is McA-32.

    • Set the first dial to position 3.

    • Set the second dial to position 2.

    • Click the red button to open the secret door.

    • Go through the open door to the workshop.

    Workshop

    • Click the two blueprints to read them.

    • Take the Bringa Frame on the desk.

    • Add the Red Curtain from your inventory to the glider.

    • Place the Broom on the glider to use as a stabilizer.

    • Go back to the outside of the windmill in the wilderness.

    Windmill

    • Use the Bringa Frame from your inventory on the millstone leaning on the wall to the right of the entrance door.

    • Add the Wheel, the Horns, and the Saddle from your inventory to the frame to complete the bringa.

    • Go inside the windmill.

    • Use the Empty Sack on the flour at the bottom of the millstone to receive a Sack of Flour.

    • Return to the tavern

    Tavern

    • Use the Sack of Flour from your inventory on the bowl of water on the table by the sink.

    • Add the Yeast to the flour and water in the bowl.

    • Step outside the tavern then go back inside to let the dough rise, then click the bowl to take the Dough.

    • Use the Dough on the oven.

    • Go outside the tavern then back inside again.

    • Use the Tongs on the oven to receive the Bread.

    • Combine the Sword with the Bread in your inventory to make the Slices of Bread.

    • Add the Butter to the Slices of Bread to make Buttered Bread.

    • Use the Buttered Bread on the Cat in your inventory to make the Machina Levitatio (it's troll science!)

    • Return to the workshop.

    Workshop

    • Use the Machina Levitatio from your inventory on the glider.

    • Click the glider to travel to the mountain.

    Chapter 4

    Cliff

    • Use the Sword from your inventory on the broken bridge to receive the Wood.

    • Use the Hammer on the rock at the far left side of the rock wall to receive the Flint.

    • Use the Fishing Pole on the heart shaped rock to reveal the peculiar spot on the ground marked with an X.

    • Place the Wood on top of the peculiar spot.

    • Put Apoash's Rhyme on top of the pile of wood.

    • Use the Flint on the firewood to start a fire, revealing the secret door.

    • Open the secret door with the Masterkey.

    • Go through the open door to the mine.

    Mine

    • Take the Oil on the ground between the two mine shafts.

    • Take the Planks leaning on the wall between the torches.

    • Click the crank by the far right tracks to attach the cable.

    • Click the top right switch to set the cart's path right.

    • Go through the right doorway into the tunnel.

    Tunnel

    • Take the Dirty Rug hanging on the ground over the edge of the pit.

    • Pull the lever above the mine cart to send it moving through the tunnel.

    • Go back to the mine.

    Mine

    • Click the valve next to the left torch.

    • Click the collapsed tunnel to receive the Coal.

    • Return to the tunnel.

    Tunnel

    • Click the switch to set the cart path to the right.

    • Use the Coal from your inventory on the furnace.

    • Add the Oil to the coal inside the furnace.

    • Light the furnace with the Flint.

    • Use the Dirty Rug on the leaky pipe to the right of the furnace,then use the Tongs on the pipe to tighten it.

    • Go back to the mine.

    Mine

    • Click the valve next to the left torch again, note that the hissing has stopped.

    • Return to the tunnel.

    Tunnel

    • Click the lever above the minecart to load it with rocks.

    • Click the lever to the right of the cart to send it down the track.

    • Go back to the mine.

    Mine

    • Take the Crank and the Cable on the ground by the far right track.

    • Click the switch to set the track so that the cart will go to the left.

    • Return to the tunnel.

    Tunnel

    • Click the switch in the middle of the broken track at the very top so that the cart will go left.

    • Use the Tongs on the Bent Rail at the end of the broken track to add it to your inventory.

    • Click the lever to the right of the empty minecart to send it down the track.

    • Click the hole in the rock wall to go to the dragon's den.

    Dragon's Den

    • Click the skeleton to receive the Spearhead.

    • Attach the Spearhead to the Fishing Pole in your inventory to make a Spear.

    • Use the Planks on the railroad tie to make a stand.

    • Use the Bent Rail on the stand to make a crude ballista.

    • Attach the Cable to the crude ballista to make a decent ballista.

    • Use the Crank on the decent ballista to make it a butt-kicking ballista.

    • Arm the ballista with the Spear from your inventory to fire it at the dragon.

    • Click the man inside the dragon to speak with him.

    • Use the Masterkey from your inventory on the door.

    The End!

    35 Comments

    Nick Toldy and the Legend of Dragon Peninsula Walkthrough

    Chapter 1

    Port

    • Click the swordsmith outside the sword shop to speak with him.

    • Click the sleeping sailor on the dock to investigate.

    • Click the doormat in front of the tavern to find the Key.

    • Go back into the alley between the tavern and the barn.

    Alley

    • Take the horseshoes on the ground beside the stables.

    • Use the Key on the chest in front of the tavern back door to receive the Coffee and Padlock.

    • Click the swordsmith backdoor to open it and receive the String.

    • Continue down to the practice range.

    Practice Range

    • Click the man at the desk to speak with him.

    • Give the man the Knight Application Form from your inventory.

    • Take the XXL Leather Armor from the left dummy.

    • Take the Spear from the wooden target.

    • Use the Spear on the right dummy.

    • Take the Wooden Sword and Wooden Arm from the ground.

    • Use the Spear to take the Apple from the tree above the man.

    • Click the Apple in your inventory to reveal the Worm.

    • Return to the stalls in the alley.

    Alley

    • Click the man standing next to the mule to speak with him.

    • Place the Wooden Arm from your inventory into the stove under the pot of cold water.

    • Go inside the swordsmith's shop.

    Swordsmith's Shop

    • Take the Lime next to the pile of sand.

    • Take the Hammer and Tongs leaning against the side of the anvil.

    • Use the Wooden Sword from your inventory on the pile of sand.

    • Use the Spear on the hanging chandelier to knock it down.

    • Take the Candles, Wheel, Chain, and Hook that fall to the ground.

    • Place the Horseshoe on top of the smoldering coal on the furnace.

    • Click the bellows beside the furnace to heat the coals.

    • Use the Tongs to pick up the Sword-Shaped Iron mold in the sand.

    • Put the Sword-Shaped Iron on top of the anvil.

    • Use the Hammer on the crude sword to shape it.

    • Use the Tongs to pick up the Forged Sword.

    • Place the Forged Sword on the smoldering coal on the furnace.

    • Click the bellows to heat the sword again.

    • Pick up the Red-Hot Sword with the Tongs.

    • Put the Red-Hot Sword in the bucket of water.

    • Take the completed Sword out of the Empty Bucket, then click the bucket to add it to your inventory.

    • Go back outside to the alley.

    Alley

    • Put the XXL Leather Armor from your inventory into the pot of boiling water.

    • Return to the port.

    Port

    • Give the Coffee from your inventory to the parrot on the sleeping captain's shoulder.

    • Click the fed Parrot to add it to your inventory.

    • Click the Captain to take his Eyepatch

    • Use the Sword to cut the the rope tied to the docked ship.

    • Click the anchor on the other side of the ship to raise it.

    • Click the sail to move the ship forward.

    • Lower the anchor, then raise it again and take the Troll Head hoisted up with the anchor.

    • Use the Eyepatch on the Troll Head to make it a One-Eyed Troll Head.

    • Attach the String from your inventory to the Spear, add the Hook, then add the Worm to complete the Fishing Pole & Bait.

    • Use the Fishing Pole & Bait on the ocean to the left of the dock to receive a Bucket of Herring.

    • Go back to the alley.

    Alley

    • Click the Pot of Cold Water to receive the Snug Leather Armor.

    • Go inside the swordsmith's shop.

    Swordsmith's Shop

    • Place the Bucket of Herring from your inventory inside the Chimney.

    • Step outside the shop, then go back inside to let the herring cook.

    • Click the Chimney to receive Smoked Herring.

    • Go back outside to the alley.

    Alley

    • Give the Smoked Herring from your inventory to the man standing beside the mule.

    • Use the Lime on the mule to paint it white.

    • Go down to the practice range.

    Practice Range

    • Give the One-Eyed Troll Head from your inventory to Sir Moak to receive your Knight Permit.

    • Return to the port.

    Port

    • Click the upper-left side of the screen to travel to the wilderness.

    Chapter 2

    Cemetery

    • Move right towards the graveyard area.

    • Take the Old Signpost and the Old Sign above the right grave.

    • Go inside the witch's hut.

    Witch's Hut

    • Take the Funnel and the book Marauder Who's Who from the bookcase.

    • Take the Flower Vase on top of the table.

    • Click the Witch to speak with her.

    • Go back outside.

    Cemetery

  • Click the left grave in the graveyard to investigate.

  • Return to the witch's hut.

  • Witch's Hut

    • Speak with the witch again.

    • Go back outside.

    Wilderness

    • Use the Marauder Who's Who book from your inventory on the left grave.

    • Take the Diamond on top of Alexander Rose's grave.

    • Go up the hill to the windmill.

    Windmill

    • Click the door of the windmill to step inside.

    • Take the Sack of Wheat to the left of the millstone.

    • Combine the Chain and the Padlock to make the Chain Lasso.

    • Use the Chain Lasso on the hook attached to the loft, then click the chain to climb up.

    • Click the Plank to push it off the platform.

    • Click the bluebird's nest to take the Egg.

    • Go back to the witch's hut.

    Witch's Hut

    • Give Rhonda Ghonos the Old Signpost, the Bluebird's Egg, and the Diamond from your inventory.

    • Return to the windmill.

    Windmill

    • Click the Cat to add it to your inventory.

    • Take the Blue Feathers on the floor of the platform.

    • Use the Sack of Wheat from your inventory on the millstone to make it an Empty Sack.

    • Go back to the witch's hut.

    Witch's Hut

    • Give the witch the Blue Feather's from your inventory to receive the Matrimonial Potion.

    • Go outside, then go north to the capital.

    Capital

    • Use the Parrot from your inventory on the gramophone.

    • Add the Funnel to the Singing Parrot to make it an Amplified Parrot.

    • Use the Amplified Parrot on the Gramophone to swap the two items.

    • Click the guard to speak with him.

    • Go back to the cemetery in the wilderness.

    Cemetery

    • Use the Gramophone from your inventory on the right grave.

    • Combine the Wooden Sword and the Old Sign to make the New Signpost.

    • Place the New Signpost on the right grave.

    • Put the Candles and the Flowerpot on top of the grave.

    • Use the Gramophone to speak with the dead courier again.

    • Go right to the outhouse.

    • Use the Tongs on the outhouse to receive the Royal Stamp.

    • Use the Royal Stamp on your Knight's Permit to make it a Stamped Knight's Permit.

    • Return to the capital.

    Chapter 3

    Capital

    • Give the guard the Stamped Knight's Permit from your inventory to open the gate.

    • Take the Roadkill lying on the ground.

    • Use the Tongs on the vending machine to receive the Trau-Bee bottle.

    • Use the Trau-Bee on the vendor inside the building to the left of the vending machine to receive the Cheesy Knight Costume.

    • Click the warden by the far right building to speak with him.

    Jail Cell

    • Click the warden to speak with him again.

    • Talk to the prisoner sitting on the cot.

    • Click the poster to travel to the tunnel, then go back to your cell.

    • Take the Bread and the Tin Bowl on the shelf.

    • Place the Tin Bowl in front of the mouse hole, then add the Bread to the bowl to make a trap.

    • Click the poster to go inside the tunnel then come back out again.

    • Click the mousetrap to receive the Mouse.

    • Put the Tin Bowl back on the shelf.

    • Click the Warden to speak with him again.

    • Go inside the tunnel once again and then come back to the cell.

    • Click the pallet at the side of the bed to receive the Strip of Cloth.

    • Attach the Strip of Cloth to the Mouse in your inventory to make it a Leashed Mouse.

    • Use the Leashed Mouse on the Mousetrap outside the cell to add it to your inventory.

    • Combine the Mousetrap and the Strip of Cloth to make a Rigged Mousetrap.

    • Use the Rigged Mousetrap on the drain to receive the Chisel.

    • Click the poster to go inside the tunnel.

    Tunnel

    • Use the Chisel from your inventory on the rusty bars of the portcullis.

    • Click the rope to return to the plaza, then go into the building on the far right to go into the jail.

    Jail

    • Click the large sack to the right of the desk to receive all of your taken items.

    • Click the desk drawer to receive the Masterkey.

    • Use the Masterkey on the bars to unlock the cell, then click the bars to open the door.

    • Click Lord Apoash to speak with him, then give him the Matrimonial Potion from your inventory.

    • Go back outside to the plaza.

    Plaza

    • Move left to the tavern building, then click the door to go inside.

    Tavern

    • Take the Butter on the table.

    • Click the bartender to receive the yeast.

    • Click the bench to the right of the table to receive the Gum.

    • Click the sink in the back room to receive the Hair.

    • Return to the jail.

    Jail

    • Combine the Hair and the Gum to make a Fake Mustache.

    • Use the Fake Mustache on Lord Apoash.

    • Give the Roadkill and the Cheesy Knight Costume from your inventory to Lord Apoash to receive Apoash's Rhyme.

    • Go back to the witch's hut in the wilderness.

    Witch's Hut

    • Take the Red Curtain over the window.

    • Take the Broom leaning against the wall.

    • Return to the tavern.

    Tavern

    • Use the Red Curtain from your inventory on the bronco.

    • Take the Horns, Red Curtain, and Saddle that fall to the ground.

    • Go outside to the plaza. Click the flag near the large gate on the far right side and note the symbols.

    • Click the gate to enter the palace.

    Main Hall

    • Click the carvings on the left and right bases of the pillars in this order: Dragon, Horse Head, Sword.

    • Go through the door into the secret room.

    Secret Room

    • Note the painting on the wall is a picture of a vending machine.

    • The serial number to the vending machine was McA-43.

    • Click the top arrow button to the left of the wooden door to set the 1st dial to position 4.

    • Set the 2nd dial to position 3.

    • Click the red button to open another secret door.

    • Go through the door to Secret Room 2.

    Secret Room 2

    • Note the painting on the wall has changed to the gramophone. The serial number on the gramophone is McA-24

    • Set the first dial to position 2.

    • Set the second dial to position 4.

    • Click the red button to open the secret door.

    • Go through the open door to the third secret room.

    Secret Room 3

    • Note that the painting on the wall this time is a picture of a bronco. The serial number to the bronco is McA-32.

    • Set the first dial to position 3.

    • Set the second dial to position 2.

    • Click the red button to open the secret door.

    • Go through the open door to the workshop.

    Workshop

    • Click the two blueprints to read them.

    • Take the Bringa Frame on the desk.

    • Add the Red Curtain from your inventory to the glider.

    • Place the Broom on the glider to use as a stabilizer.

    • Go back to the outside of the windmill in the wilderness.

    Windmill

    • Use the Bringa Frame from your inventory on the millstone leaning on the wall to the right of the entrance door.

    • Add the Wheel, the Horns, and the Saddle from your inventory to the frame to complete the bringa.

    • Go inside the windmill.

    • Use the Empty Sack on the flour at the bottom of the millstone to receive a Sack of Flour.

    • Return to the tavern

    Tavern

    • Use the Sack of Flour from your inventory on the bowl of water on the table by the sink.

    • Add the Yeast to the flour and water in the bowl.

    • Step outside the tavern then go back inside to let the dough rise, then click the bowl to take the Dough.

    • Use the Dough on the oven.

    • Go outside the tavern then back inside again.

    • Use the Tongs on the oven to receive the Bread.

    • Combine the Sword with the Bread in your inventory to make the Slices of Bread.

    • Add the Butter to the Slices of Bread to make Buttered Bread.

    • Use the Buttered Bread on the Cat in your inventory to make the Machina Levitatio (it's troll science!)

    • Return to the workshop.

    Workshop

    • Use the Machina Levitatio from your inventory on the glider.

    • Click the glider to travel to the mountain.

    Chapter 4

    Cliff

    • Use the Sword from your inventory on the broken bridge to receive the Wood.

    • Use the Hammer on the rock at the far left side of the rock wall to receive the Flint.

    • Use the Fishing Pole on the heart shaped rock to reveal the peculiar spot on the ground marked with an X.

    • Place the Wood on top of the peculiar spot.

    • Put Apoash's Rhyme on top of the pile of wood.

    • Use the Flint on the firewood to start a fire, revealing the secret door.

    • Open the secret door with the Masterkey.

    • Go through the open door to the mine.

    Mine

    • Take the Oil on the ground between the two mine shafts.

    • Take the Planks leaning on the wall between the torches.

    • Click the crank by the far right tracks to attach the cable.

    • Click the top right switch to set the cart's path right.

    • Go through the right doorway into the tunnel.

    Tunnel

    • Take the Dirty Rug hanging on the ground over the edge of the pit.

    • Pull the lever above the mine cart to send it moving through the tunnel.

    • Go back to the mine.

    Mine

    • Click the valve next to the left torch.

    • Click the collapsed tunnel to receive the Coal.

    • Return to the tunnel.

    Tunnel

    • Click the switch to set the cart path to the right.

    • Use the Coal from your inventory on the furnace.

    • Add the Oil to the coal inside the furnace.

    • Light the furnace with the Flint.

    • Use the Dirty Rug on the leaky pipe to the right of the furnace,then use the Tongs on the pipe to tighten it.

    • Go back to the mine.

    Mine

    • Click the valve next to the left torch again, note that the hissing has stopped.

    • Return to the tunnel.

    Tunnel

    • Click the lever above the minecart to load it with rocks.

    • Click the lever to the right of the cart to send it down the track.

    • Go back to the mine.

    Mine

    • Take the Crank and the Cable on the ground by the far right track.

    • Click the switch to set the track so that the cart will go to the left.

    • Return to the tunnel.

    Tunnel

    • Click the switch in the middle of the broken track at the very top so that the cart will go left.

    • Use the Tongs on the Bent Rail at the end of the broken track to add it to your inventory.

    • Click the lever to the right of the empty minecart to send it down the track.

    • Click the hole in the rock wall to go to the dragon's den.

    Dragon's Den

    • Click the skeleton to receive the Spearhead.

    • Attach the Spearhead to the Fishing Pole in your inventory to make a Spear.

    • Use the Planks on the railroad tie to make a stand.

    • Use the Bent Rail on the stand to make a crude ballista.

    • Attach the Cable to the crude ballista to make a decent ballista.

    • Use the Crank on the decent ballista to make it a butt-kicking ballista.

    • Arm the ballista with the Spear from your inventory to fire it at the dragon.

    • Click the man inside the dragon to speak with him.

    • Use the Masterkey from your inventory on the door.

    The End!

    Reply

    This was a pretty fun game, although some of the puzzles were annoying in how strictly they required you to do things in a specific order (and made it look like some objects were completely useless until you got to exactly the right point). I think there was about one completely useless object in the whole game:

    The bench in the tavern

    .

    As a warning, for those who play with the volume off, the ending switches to voice acting only.

    Reply

    This had some good moments, but I thought Morningstar was quite a bit better.

    Reply

    Apple

    ?! I didn't even see it was clickable. Used to that old "put it near the border so people don't notice it" trick, but it's nearly on the transparency of the menu buttons.

    Fun so far. The level of detail in the animation is great.

    Reply

    Where do I find the chain in chapter 2?

    Reply

    Physics fail? Wouldn't more mass give it more momentum? Or maybe they're saying it'll increase friction. Onward with the last bit.

    Reply

    Shudog are you refering to adding a somewhat familiar cat with buttered-bread for a body? :P
    Anyway the game is great and load filled with Monkey Island references.

    Reply
    Patreon Crew SonicLover September 6, 2011 6:45 AM

    I think Shudog was referring to that bit near the end with the mine carts.

    Reply

    Could someone post picture walkthrough concerning

    the mine switches. it was confusing on which to pull and which not to pull, as some said top, some said left, etc and it was unclear which ones to do.

    Any help would be appreciated.

    Reply

    i cant find the hook to make the fishing rod!!

    Reply

    bones

    at the swordsmith shop, use the spear to knock the chandelier down, and after it falls, the candles, wheel, chain, and hook will be there for you to pick up.

    also if anyone out there has time to read my help question above, please give me an answer on this.

    Reply

    This is amazing. :D Definitely one I'd play again.

    Reply

    In addition to the physics fail... BAKING FAIL! You have to dissolve yeast in water first, then add the flour.

    Nice game, but I agree it is annoying in requiring a specific order for combining items or doing actions. I also dislike the walking to and fro - a clickable map would be nice after the first time you arrive at a place- and there were unnecessary long double screens for a single location.

    Reply
    BillyTehKid September 7, 2011 2:08 PM

    I've got to the part where I've given Lord Apoash a

    new mustache and wig

    and been told to

    find him a new outfit

    . But then I got stuck, so eventually looked at the walkthrough to find that

    the witch was suppose to have left her hut. When I go to her hut she's still there, and I can't take the curtain or broom because she says 'hands off'.

    I've spent a long time trying to solve an unsolvable puzzle! Very frustrating. Anybody else get this or have a solution?

    Reply

    Figured out the mine cart puzzle!

    To break open the sealed doorway, the mine cart should be EMPTY, and travel RIGHT, LEFT, LEFT.

    Reply
    Littleghost September 7, 2011 4:46 PM

    Gone over the mine cart puzzle several times and systematically. Do I have to

    bend the rail I got

    or is it simply a matter of every switch properly placed? What am I doing wrong?

    Reply
    Littleghost September 7, 2011 5:08 PM

    Nevermind, POP.

    Reply
    piratemonkey06 September 7, 2011 7:09 PM

    Arrrrrgh!! The stupid game won't let me fix the Pipe by tying the Oily Rug around it!! Any suggestions as to how to get round this or fix it??? It's driving me insane...

    Reply
    piratemonkey06 September 7, 2011 7:12 PM

    OMG never mind, I realised that you have to turn off the Valve before tying it on... >_>

    Reply

    BillyTehKid,

    Have you given the witch everything she needs to make the Matrimonial Potion? "Something old, something new, something borrowed, and something blue".

    Reply

    BillyTehKid,

    If you're still missing the new clothes, have you tried checking out the vending machine? The Trau Bee from that machine is terrible! Complain to the vendor in the building next door, and he'll give you something better in exchange.

    Reply

    Paul,

    Although I can't show you a picture, I will do my best to describe it for you to remove any confusion :)
    There are two Switches and two Levers inside the Tunnel area. The Switches control which track the cart will follow, either left or right. The first Switch is in the middle of the top track. The second Switch is in the middle of the bottom track.

    If you follow the bottom track all the way to the left, you will find the two Levers. The first Lever is on the wall above the mine cart. This Lever fills the cart with rocks. The second Lever is on the ground just to the right of the cart. This lever sends the cart along the track.

    There are also two Switches, a Crank, and a Valve inside the Mine area. The first Switch is on the top track, and the second Switch is on the bottom track. The Valve is in the middle of the pipe on the wall, between the two lit torches. The Crank is on the ground near the split in the bottom track.

    To crash the cart the first time, set the top Switch inside the Mine so that the cart will go right. Make sure the Cable is attached to the track. Go to the Tunnel. Pull the lever on the ground to set the cart moving and Nick Toldy will declare that "The cart's gone--crashed, it sounds like." You'll know you have it right when you can pick up the Coal from the collapsed tunnel inside the mine.

    To crash the cart a second time, set the bottom Switch inside the Tunnel so that the cart will go right. Pull the top Lever to load the cart with rocks. Pull the bottom lever to send the cart down the track. You'll know you've sent it down the right tracks if the cable inside the Mine is broken.

    To crash the cart a third and final time, click the bottom Switch in the Mine to send the cart to the left. Set the top Switch in the Tunnel to the left as well. Pull the bottom Lever to send the empty cart down the track and crashing into the rock wall.

    Reply

    Deli,

    You can find the Chain in the swordsmith's shop. Use the Spear to knock over the chandelier hanging from the ceiling. The Chain will fall to the ground along with the Wheel, the Candles, and the Hook.

    Reply

    Trinn,

    i'm guessing by top and bottomn,you mean the one that is close to the back wall is Top, and the one that is close to you is Bottom?

    By the way,if you press "Print Screen" you can actually take a screenshot of the screen. then open up paint and press CTRL and V at the same times and it'll paste it to the program then save it as jpg or whatever you want. Then you can put the screenshots here.

    Reply
    Kata Evellei September 9, 2011 5:28 PM

    Maybe it's evident for some other players, but I was pretty surprised to see that the game was full of Hungarian puns/references. Nick Toldy is the hero of an epic poem by János Arany, a 19th century poet, and "Rhonda Ghonos" literally means 'Ugly Evil', not to mention the knights' names.

    Reply

    The game was a little bit long.

    I noticed that, after you finish the game, there is a button labeled "sound options" (above the label "sound options") that should really be "replay final scene."

    Reply

    I seem to be stuck escaping from jail...

    I've chiseled through the portcullis and walked to the end of the tunnel. Where is the rope I'm supposed to click on?

    Reply

    chipmunk,

    If you walk all the way to the end of the tunnel, you stop at the bottom of the well. Running vertically down the middle of the whole well is the length of rope. You can click any part of it to climb up to the surface.

    If it's difficult for you to see, just move your cursor around the middle of the well. The mouse will change to a red arrow with the word "Rope" underneath.

    Reply

    Trinn, thank you for the response! I think I must have hit a glitch.

    There's no rope there. :(
    http://img707.imageshack.us/img707/756/picture13xc.png

    I did click on the well a couple times before getting arrested, maybe that caused it somehow.

    If only I'd thought to save sooner...

    Reply

    Chipmunk:

    You need to ask the guard for water before they lower the bucket...he'll want you to put the tin bowl on the little shelf. Then, the rope will be there.

    Reply

    @Anonymous: Oh, thank you! Not a glitch after all - I missed a step.

    Reply

    Where is the OLD SIGNPOST?

    Reply

    Scarlett,

    It may be difficult to see because of the dark scenery, but it's a small wooden sign behind the far right grave in the cemetery.

    Reply
    CatzCradle October 4, 2011 8:05 AM

    @Xheia
    I second that!
    I managed to finish the game and got to the ending movie scene only to discover my sound wasn't working, so I ended up having no idea what was going on in the epilogue scene. Ughhh! So much wasted work for nothing! I would've loved dearly to have a replay ending clip button and know what I missed Dx

    Reply

    Sad to say I didn't really like this game. The complexity of the puzzles wasn't enough the complexity of the gameplay was also annoying with the fun interface. 3/5 :(

    Reply

    ^ Scroll Up | Homepage >

    Leave a comment [top of page]

    Please consider creating a Casual Gameplay account if you're a regular visitor here, as it will allow us to create an even better experience for you. Sign-up here!
    • PLEASE UNDERSTAND SITE POLICIES BEFORE POSTING COMMENTS
    • You may use limited HTML tags for style:
      (a href, b, br/, strong, em, ul, ol, li, code, spoiler)
      HTML tags begin with a less-than sign: < and end with a greater-than sign: >. Always. No exceptions.
    • To post spoilers, please use spoiler tags: <spoiler> example </spoiler>
      If you need help understanding spoiler tags, read the spoiler help.
    • Please Preview your comment before posting, especially when using spoilers!
    • No link dropping, no domains as names; do not spam, and do not advertise! (rel="nofollow" in use)
    chrpa Jayisgames needs your help to continue providing quality content. Click for details Welcome to the Roundup 66 - Retro with four games! After you find the ten monkeys in the chapter, look in the inventory. You will find a...  ...
    chrpa Jayisgames needs your help to continue providing quality content. Click for details Welcome to the Roundup 65 with three games! As mentioned in the previous roundups, only odd-numbered episodes are featured since even-numbered are for Robin Vencel's patrons (the...  ...
    chrpa Jayisgames needs your help to continue providing quality content. Click for details Hi! Weekday Escape and Weekday Puzzle are here! First we have two new cans from tomoLaSiDo and then two small rooms from isotronic. That's all for this...  ...
    6,365 Views
    0 Comments
    chrpa Jayisgames needs your help to continue providing quality content. Click for details Welcome to Mobile Monday! We have another beautiful game from Nicolet and it's a winter game as it should be. Tasuku Yahiro have released another of their...  ...

    HELP Jayisgames.com

    Recent Comments


    Display 5 more comments
    Limit to the last 5 comments

    Game of the week

    
Dark Romance: Vampire Origins Collector's Edition

    Your Favorite Games edit

    add
    Save links to your favorite games here. Use the Favorites editor.

    Monthly Archives