JayisGames.com is now available ad-free!
Jay is Games recommends Cheat Happens with 8,000+ games and 35,000+ trainers!

Device


  • Currently 4.7/5
  • 1
  • 2
  • 3
  • 4
  • 5
Rating: 4.7/5 (308 votes)
Comments (96) | Views (28,232)

Weekday Escape

SonicLoverAh, Kotorinosu. What fiendish escape have you prepared for us this time around? We've played Shadow tag, we've gotten in Shape, we've peered into the Mirror... perhaps now we've got a Device to fiddle with?

Device
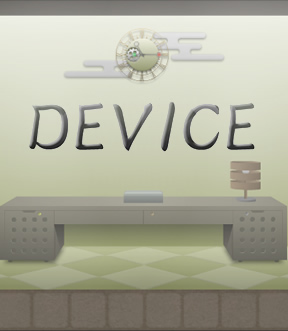
A typical Kotoriscape consists of a handful of well-designed puzzles that follow a specific theme revealed by its title, and Device does not disappoint. There are all kinds of devices to fiddle with in the vaguely Oriental room: a smartphone with a dead battery, a mysteriously fast-running clock, a service robot with three cranks on its head, and many more. As usual, click objects in the environment to examine them further, manipulate them, or pick them up. Navigate by clicking the directional bars at the edge of the screen when they appear, and examine or use items in your inventory with one click.

Logical puzzles, soft and pleasing gradient-filled graphics, and a save feature for when you need a break are also hallmarks of Kotorinosu that stay with us for Device. There's no changing cursor, but there really isn't any pixel-hunting to be done anyhow. Still, Device is slightly harder than previous games in the series; it's not exactly one that can be cruised through without a keen sense of observation and a willingness to try things that might not be fully obviously logical. But that's not a severe downer, and it's a good game nonetheless. One can only wonder what Kotorinosu's next themed escape will be. Sound? Water? Numbers? Well, we'll cross that bridge when we get to it. For now...

Play Device

Walkthrough Guide


(Please allow page to fully load for spoiler tags to be functional.)

Device Walkthrough

  1. Zoom in on the clock. Take note of what time all the hands meet.

  2. Zoom in on the left drawer and open it. Take the cell phone.

  3. Turn right. Zoom in on the banner on the wall and move it. Take the eggish thing.

  4. Note the pattern of dots along the sides of the banner.

  5. Turn around. Place the egg on the middle left shelf. Click the buttons using the sequence from the banner. The darker dot indicates which to press. Click the star when you're done, then click the egg to open it. Take the scroll and Ether medallion.

  6. Turn right. use the key on the scroll to open the right drawer. Take the black handle and the lollipop.

  7. Turn left. Open the bottom of the scroll and take the allen wrench. Combine it with the handle to make it ergonomically sound. Use your tool on that invisible panel to the right of the cat. Pull out the plug. Zoom in on it and note the pattern.

  8. Zoom in on the frame at the top of the wall and use the pattern from the plug to open it. Take the key.

  9. Turn right. Use the key to open the right cabinet. Take the power strip.

  10. Click near the outlet in the left corner. Use the power strip on it to make the connection. Note the symbols on the strip.

  11. Turn right. Use the lollipop as a handle for the device on the left. Input the code from the strip. Note that the symbols are inverted, and the code should match, i.e. flip it over. Take this thing.

  12. Turn right. Open the thing and take the key. Use it on the lock on the round window. Open it and take the wire cutters.

  13. Use your tool on the lever at the bottom and shut off this contraption. Take the white gear.

  14. Use the wire cutters to cut the chain on the scroll. Have a look see. For now, note that the first page is a legend for the contraption and the second explains that gears cannot touch each other in a three-way configuration. Only Eiffel Tower style. Amirite fellas?

  15. Turn around. Take the gear from the clock. Note where each hand has come to rest.

  16. Zoom in on the device on the table. Enter the red, white and green clock hand positions on the corresponding buttons. Enter the number where all hands meet on the black button. Take the abacus.

  17. Turn left. Remember that yellow thing? Turns out it, in conjunction with the cat, is some kind of cell battery charger. Flip your phone over, pull out the battery, place it in the holder, and stick it in the cat. The cat powers up and gives you a 6 color code.

  18. Enter the cat color code on Simon on the lower right shelf. Note that the center button gets pressed after the first 3 buttons and not at the end. Take the doll head and the Bombos medallion.

  19. Turn left. Place your 2 gears into the contraption in order to turn the rightmost gear. Keep in mind that no three gears can touch each other, like the scroll diagrammed. (Hint: put them in the 2 bottom right pegs.) Turn it on.

  20. Turn left. Give the doll back its head. A fan pops up. Note the pattern on the doll: both the shape and which half of it is showing.

  21. Zoom in on the robot butler to the right. Turn the keys on his head according to the pattern from the fan. Watch him take a walk.

  22. For whatever reason, that seemed to charge your battery, so turn right and take it from the cat. Power up your phone and look at the photo. Note the positions of the suits. Look at the cards on the top right shelf and match the suits with the numbers. Remember the order.

  23. Turn around. Click the spinny wheel in the order you just determined and take the matches. Open them and take out the memory card.

  24. Turn to the last page of the scroll and use the matches on it. Note the darkened dots. They correspond to part of the date and time from your cell phone. Dial this number.

  25. You've got mail! Open it and note the codeword.

  26. Put the codeword in the device on the wall and pull the lever. Remember that it's upside down. Take the Quake medallion.

  27. Turn right. Place all three medallions on the box and open it. Take the crystal ball.

  28. Put the memory card into the back of the phone. For whatever reason, that triggers the robot butler to come out with a key on his platter. Take it.

  29. Turn around. Use the new key on the left cabinet. The buttons will pop out. The memory card on your phone contained a video of pacman eating dots, so follow his pattern to open the cabinet. Take the 3rd gear.

  30. Turn around. Power down the contraption and remove the gears. Replace all the gears to power the leftmost gear. Turn it back on and watch the cutscene.

  31. Turn left. Note the pattern on the door under the doll. Match your abacus to line up the empty spaces with the knobs on the door and place it on there. Open it and take the 4th gear.

  32. Turn right. Shut down the contraption. Now you must place the gears to turn both the left and rightmost gears. You can figure it out. Turn it back on. Watch the cutscene. Shut it back down and take all your gears.

  33. Turn left. Use your crystal ball on the top the the box to unlock it. Start placing gears on the left side and it will drop, revealing another white gear and a golden gear. Read the note on the left chain. The gold gear is heavier than a silver, but lighter than 2 silvers.

  34. Get all the white gears out. To do this:

    Take both gears from the right side. Place a silver on the top and the gold in the middle. Remove the visible silver on the left. Take all 5 silver gears, starting with the left side.

  35. Turn right. Place all 5 gears in the contraption in order to turn the topmost gear. Keep in mind that in order to open the exit, it must turn clockwise, as the scroll showed. Pull the lever.

  36. Exit. Well done!

Device Walkthrough

  • You'll start out facing a clock. Zoom in on it and watch the hands spin. The hands will all meet pointing at a specific number; watch until you've figured out what that that number is. (It changes every game.)

  • Back away, then zoom in on the box on the table. It has three colored circles like the clock hands, as well as a black square. Click the black square until it shows the number the clock hands met at.

  • You can't actually solve this box without further information, but the numbers you enter on it won't reset when you back away, so it's good to have the one clue out of the way. Back away.

  • Open the left drawer under the box to get a smartphone. The right drawer is unlocked. Examine the smartphone and try to turn it on, and you'll find the battery is dead. Turn it over, open the back, and remove the battery.

  • Now back away all the way and turn right. There's a lot to look at, but what you want to pay attention to is the scroll. The black and white dots look fairly interesting, no?

  • What you want to pay attention to are the black dots. Read them from top to bottom, and they'll spell out a sequence of lefts and rights. (This, too, changes every game.) Oh, and pick up the red egg behind the scroll.

  • Turn right twice. (You can't do anything at the view with the round door yet.) Zoom in on the brown thing on the middle-left shelf. There's a slot for something, so stick the red egg there.

  • Note that the egg blinks its eyes when you click the buttons. Use the sequence of black circles from the scroll and then press the star on the egg; if you did it right, both buttons should click down.

  • Open the egg and get the red scroll and bronze piece. Turn left to face the round door; beneath it is a locked box with three depressions. Stick the bronze piece where it fits, in the depression on the right.

  • Examine the red scroll. There's a key chained to it. You can't open the scroll, but you can remove the bottom and take the pentagonal rod from it. That'll come in handy later.

  • That key can be used as-is, I bet. It opens the right drawer under the clock, inside of which is a lever handle and a brown thing. The pentagonal rod fits into the brown thing. Now… where are we going to use it?

  • Face the shelves again (turn left). Zoom in on the cat-robot on the ground, then carefully look at the wall to the right of it. You should see the outline of a panel; zoom in on it and you'll see two pentagonal holes.

  • You can unscrew those "holes" with the pentagonal rod and brown piece, which now makes a fine screwdriver. Open the panel and yank out the power cord hidden inside it. Pity it can't reach the outlet…

  • Hey, that's an odd pattern of stripes on the cord. Zoom in on it and you'll see narrow, medium-width, and wide white stripes. Write down the sequence, whatever it may be. (This, too, changes every game.)

  • Input that sequence on the square picture frame above the shelves in the same view by clicking the buttons on the sides. When you finish you should hear a click. Shove the picture aside and take the key.

  • The key goes to the right cabinet in the view with the clock (turn right). Inside you'll find a power strip. Go plug it into the outlet to the left to make the connection between the power cord and the wall.

  • A series of letters should appear on the power strip. Write them down, you'll need them shortly. Now it's time to do something with that lever. Turn right from the clock and zoom in on that funky panel to the left. It's missing a lever, so stick the one you've got into place and yank it.

  • A series of emote faces? How cute. Here's the place to enter that seven-letter code from the power strip. The trick is that you have to enter it upside-down on their mouths; for example, if the code was MVAWUXE, the rightmost face should have an upside-down M, the face to the left of it an upside-down V, and so on.

  • Once they're all set, pull the lever again; if you input it right you should get a silver medallion. Take it and examine it; it opens, letting you have a key. And hey… that hole inside the medallion has a familiar shape…

  • Maybe the smartphone's battery fits in there. It does! Snap it in and close it, then go put it in the belly of the cat robot below the shelves (turn around).

  • Now the cat won't let you take the medallion back, and its collar is blinking a strange sequence of colors. Write that sequence down, and make sure you haven't confused red with pink or blue with green. You'll use it soon.

  • Now back out and zoom on the cylindrical box on the low shelf near the cat. Enter the code you got from the cat's collar, and don't forget to press the bell button in the middle of the sequence (because the cat's bell was in the middle there).

  • It should click when you've got it. Open the lid and take the doll's head and silver piece, then stick the silver piece in the left slot of the box under the round door. Open the round door's padlock with the key while you're there.

  • Open the round door and take the pliers, which you can then use to remove the chain on the red scroll. Give it a read; it seems to tell which gear behind the round door controls what, (scroll left) how to set gears properly, and (scroll left)… a strange picture of a flame. Huh.

  • Zoom in on the lever at the bottom of the round doors. Pentagonal hole? We've seen that shape before. Snap in your little pentagonal screwdriver and shift the lever to stop the gears, then take the silver gear.

  • Back away and turn around. The clock has stopped! Take the silver gear from it, and note which number each color hand is pointing at. Enter those numbers in the corresponding colored circles on the box below, and it should open when you press "OPEN".

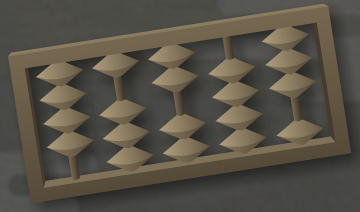
  • Open the box and take the abacus, it'll be useful later. Now do something with that doll head. Stick it on the doll in the center of the view with the scroll and the doll will open a fan.

  • Make a note of the shapes on that fan. They're left and right halves of diamonds, circles, and hexagons. Now zoom out and examine that little clockwork robot to the right of the view. It's time to solve its puzzle.

  • Zoom in on the three cranks on the robot's head. Input the code from the fan from left to right on the cranks, reading the left and right shape halves as left and right turns of the corresponding cranks. For example, if the fan shows the left half of a diamond, turn the crank with the diamond holes to the left.

  • The robot should whiz away when you make the last crank, if you got it right. Go look at the cat again; by now it's finished doing whatever it was doing, so take the medallion back, remove the battery from it, and stick it back in the smartphone.

  • It charged the battery, just as I thought! Now let's see what this smartphone can do. Aw, no Angry Birds… let's see what photos are on it. Click the "PHOTO" icon to see a picture of five cards. Weird.

  • Go look at the right middle shelf in the view with the shelves, and you should see those same five cards. (The picture on the smartphone has to be looked at at an angle.) Match up the suits to the numbers according to the positions of the cards, and you should find a sequence.

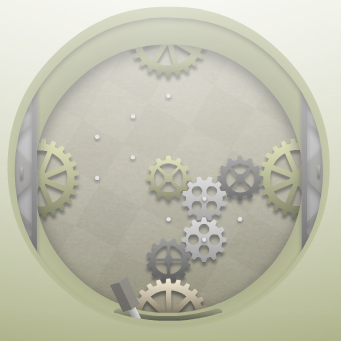
  • Unlike most of the codes so far, this one never changes: club-heart-spade-heart-diamond. But what to do with it? Go back to the round doors and place the two silver gears so they connect the two black gears. (Screenshot)

  • With the gears in place, throw the bottom lever and the gears should turn, turning the large gear on the right. Turn left to face the green scroll and you'll notice that the wheel-of-fortune-type thing to the left of the doll is moving.

  • Zoom in on it. With careful timing, click the arrow above the wheel when it's pointing to the card suits; input the sequence of card suits from two or three points up and a little door should open.

  • Box of matches GET! Examine it and look inside, and take the SD card. We'll use that later. Open the red scroll again and scroll left to the flame picture, then use the box of matches on it to reveal a secret message.

  • Does that look familiar? It looks to me like the way the smartphone displays the time and date, but six circles are blackened. We'll figure out what that means later; examine the smartphone, turn it over, and snap in the memory card.

  • I wonder if that little waiter robot ever came back? Turn to face the round door and you'll see him with a key on his tray. Take it and use it on the left cabinet… oops, maybe this won't be so easy.

  • Examine the smartphone again. Looks like we've got a new video to watch. It appears to be of a Pac-Man lookalike eating fifteen dots in a specific pattern. I bet that's the code for the cabinet door!

  • At the left cabinet door, press the upper right button, then the one to the left of it, then left, left, down, right, down, left, down, right, right, up, up, right, down, down-- and it should unlock. It's the same code every game.

  • Open the cabinet and take the gear. I like solving puzzles simultaneously, so let's figure out the six-black-circle message now. It was a hint to take the day portion of the date, and the hour and minute (24-hour time), and assemble the six-digit number.

  • Do exactly that from the smartphone's time display, then click "Phone" and input those six digits, finishing by clicking the center of the dial to make the call. If you did it right, you'll get an E-mail. "MAXWAVE"? Weird.

  • Go input "MAXWAVE" on the seven faces like you did the other seven-letter code: the right face should have an upside-down M, the face to the left of it an upside-down A, and so on. Pull the lever and you'll get a gold piece.

  • Go set the gold piece in the last slot beneath the round door, and the box will unlock, revealing a glass ball. Weird. Can't do anything with it yet, so let's fuss with the gear arrangement some more.

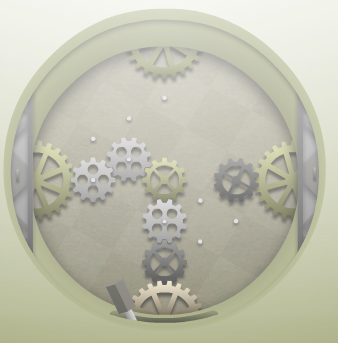
  • This time, connect the bottom black gear to the central gold gear, and that to the gear on the left. (Screenshot) Turn the gears on and the area below the doll in the view with the scroll will rise, revealing a compartment.

  • Go zoom in on that compartment. I think that abacus would do some good here. Examine the abacus and move the beads up and down until the empty spots match the protrusions on the compartment door (screenshot), then snap the abacus into place.

  • You'll get one more gear for your troubles. Go to the round door again, turn the gears off if you haven't already, and rearrange the gears again. This time you want to maintain the connection between the center gear and the left gear, but make the connection from bottom to middle with one more gear. (Screenshot)

  • With all that in place, turn the gears on again, and the doll with the fan should descend into the floor, revealing a cabinet. Turn the gears off again and take all the silver gears back; you'll need them.

  • Put the glass ball in the hole in the top of the cabinet to unlock it. Inside you'll find a balance puzzle. Your goal is to walk away with all the gears, but you can only access all the gears on the lighter side and the top gear on the heavier side.

  • Put three gears on the left side, then take the silver gear from the right side and move it to the top of the same side. Then take the silver gear visible on the left, followed by the other two gears on that side, and lastly take the last silver gear back.

  • Now go put the five silver gears into the round compartment so they connect the bottom gear with the top in an S shape. (Screenshot) It's important you use the extra gear because the top gear only works if turned the right way.

  • With that done, throw the gear power switch one more time and watch your exit manifest itself to you!

96 Comments

Wow. I have a phone/pad/thing which I took a battery out of. And I put a pink owl thing on a pedestal. I must be overlooking clues as to what to do with something, or else I've missed a clickable spot, because I'm already lost.

Reply

Hrm... wall scroll...

Reply

I'm confused by the clock puzzle.

I see the box on the table, and I see that the three circles on said box correspond to the hands on the clock. I also see that they all line up at 8, however I have no clue what the other three numbers should be.

Am I missing something that I need to solve this?

Reply

Nerdypants

You have to stop the clock first.

Reply

My clock lines up at 3, so I don't think that number is significant.
I have

"Owl" device placed and solved.
Used its contents to remove a panel next to the Kitty.
Table drawer opened.
And there's some banding on the end of the power cable which won't reach the socket.
Oh and the red ball-ended lever placed in the wall revealing another puzzle

Reply

lankyduke:

Any hints (hint only, please) for the owl? I'm hitting a wall.

Reply

For the star puzzle (owl thing):


I used the left side of the wall scroll clue. It's wbbwbbbwbw.

Reply

So far I'm stuck with

an abacus, 2 white gears, uncharged cellphone and an open scroll. What I do know is ...

that the 2 gears can be use to get the heart club spade diamond wheel running. Yet I have no idea in what order should I be pressing them in. I keep getting to feeling there should be more white gears. Also the mysterious numbers puzzle on top of the shelf haven't been used. Nor did the cat do anything when I put in the dollar (with key taken out). I have no idea what the abacus is used for.

Any ideas?

Reply

Power of posting. How did I miss that before?

Reply

One hint for an easy-to-miss location.

Look at the wall near the cat.

Reply

K'

The bands on the power cord correspond to the knobs on the funny grey square picture above the shelves.

I'm stuck on the card-suit puzzle too.

Reply

lankydude, about the panel next to the kitty:

Did you just use the pentagonal rod, or did you combine that with something else? Because I have that rod and I can't seem to open the panel, even though the holes on the panel are pentagonal as well.

Reply

@ lankyduke

If you have gotten the key to the cabinet to the right. Then there should be an extension cord that hints to the red ball-ended lever happy face puzzle

Reply

@ nerdypants

You should leave the clock aside until you are able to stop the gears from running.

Reply
xotreblemaker September 28, 2011 12:54 AM

help with the lever puzzle:

i found the code on the power strip, but it doesn't seem to work forwards or backwards. anyone else have any issues?

Reply

@ nerdypants For the pentagon rod

you need to combine it with a pentagon looking holder to make a screwdriver, in the drawer, in order to open the panel beside the kitty

Sorry for always posting one second behind.

Reply

Thanks, K'. I guess I got some puzzling to do...

Reply

@ K

Any hints on what to do after

Pulling the cord out of the wall

Reply

@ wlangford

The cord has strange markings on it that could used on one of the puzzles in the room

the strange picture hanging with 3 buttons facing the kitty wall

Reply

Hi, first time catching a live game!

The battery goes in the coin thing, which then goes in the cat, but now cat won't let go of battery

Reply

Progress!

You can take the battery out of the phone

and put it in the yellow thing

and charge it with the cat

Reply

@k

you can put the battery from the phone in the oval

Reply

yup I got it ! Thank you!
Now I'm solving the

burned scroll puzzle and the big gear

Reply

Something I've noticed, but I haven't been able to employ yet:

When the clock is in motion, it always stays in motion, and seems to always move at a regular pace, even when looking away from it. However...

Whenever the clock is stopped, the hands always point to the same three numbers, regardless of the timing of when you stop the clock. In fact, it seems the hands never line up in that particular way whenever the clock is in motion. However, I've tried putting this combination into the box on the desk, but it doesn't seem to work (even cycling through all 12 possibilities with that black dial on the left). So there's that, but I don't know what to do with it yet.

Reply

Look to the sides of the white paper that you pick you the Red doll.

Reply

And out! Wow, great one.

Walkthrough to follow.

Reply

Heh. Power of Posting.

Turns out I had one of my numbers wrong. This is why I usually stay away from escape games!

Reply

Wow, that was a fantastic escape. Nice and long, puzzles not too complicated....I can go to bed happy.

Reply

Took awhile for me to get through it, but after I got past my first issue when I thought I needed a clue, everything else eventually followed. A very satisfying escape.

Reply

Any hints on the cat/flower puzzle?

I have the blinking collar and I know the cards with numbers are related to it somehow... just not sure what the connection is here

Reply
infeliciter September 28, 2011 1:37 AM

For those who are confused by the cat coin

look at the shape of this inside of the coin, does it look familiar?

looks like inside the phone

insert the battery into the coin.

Reply

There appears to be an unfortunate bug with this game. Whenever I zoom out, no matter what I'm looking at, a strange sound is played (sounds like the turning of a gear) and is then replayed every three seconds. Every time I zoom out, another sound cycle overlaps with the previous one, until it turns into a cacophony of crunching sounds not unlike pulverizing a crowbar between a set of gears. Has anyone else experienced this?

Reply

I'm out ^-^ !
That was fun =D The hardest part was

Not knowing you can take out the cellphone battery and putting it in the kitty.

The rest fell into place =)

Reply

colorblind cat code please!

Reply
oxygenarian September 28, 2011 1:52 AM

@Palmer

There's not much to do with the cards here.

Mind the relation between

the cat and the flower

anything that looks familiar here?

Reply

@Yarrr

Yes, I'm hitting the same problem. The more I navigate around, the more sounds accumulate until there is a constant stuttering noise.

I basically have to play the game on mute so I don't go crazy.

I'm using Firefox.

[Make sure you have the latest Flash Player installed. I'm using Firefox (v7.0) on Mac OS X with Flash Player (v.10.3.183.10) and all the sounds work perfectly. -Jay]

Reply

For people that are colourblind

If 1 being the top petal, count clockwise

5-3-2-bell-3-1-2

Reply

Okay, I'm stuck again.

I have the phone, the scroll, and four gears. I assume I need another gear, since the ones I have seem to not want to move that top gear in the wall. The scroll tells me something about the date and time on my phone maybe? I have no idea what it means at the moment.

Reply

@ nerdypants

Yes if you burned the scroll it should hint about the date and time. You can use those correct numbers to make a phone call ( Hint: 6 digit number, Number differs from person to person) Did you get the abacus?

Reply
oxygenarian September 28, 2011 2:04 AM

@K'

Everyone gets a different combination actually

Reply

Well, this was(is) great - I thought I was stuck a bunch of times, but I managed to figure out everything. Except...

All I've got left is the cell (used all four functions), the scroll, four gears, and the glass ball. I seem to need one more gear to open the EXIT, and I suspect it's inside the doll's head, but I'm stumped on how to get it open. I've tried calling the abacus number and sticking the glass ball everywhere, but no dice.

Reply

@ oxygenarian
Ahh, I didn't know that even the colour combinations are different from person to person. Thanks for telling =)

Maybe this game should put a warning for colour blind pople =\
Sorry JIGuest =(

Reply

so, I think I'm stuck at the very end
[spoiler]I have 4 gears and a clear ball, and no idea what to do with the ball. [/spoiler]

Reply

Okay, so not getting it.

I see "WW/BB BB:BB:WW" on the scroll (W being a white dot and B being a black one). The first is my date, the second is my time. I tried moving the date's numbers over to the time side and got 28:28:09. Did not work.

I tried taking the actual time, but moving the first two numbers from the date over to the second spot on the time, and got 01:09:09. Did not work.

What am I missing? Am I supposed to be using the numbers from the date, the numbers from the time, or both? I'm missing something obvious, aren't I?

Thanks for the help anyway, K'. I think I'm just slow tonight.

Reply

@nerdypants

Thats quite alright =) Make sure your computer clock is set to a non 24 hour clock so that WW/BB BB:BB:WW code Should only include the date, hour, minute. Also make sure that your computer clock is in sync with the cellphone since the minute can change at anytime. Once you figured the 6 digits, press the call button.

Reply

Device Walkthrough

  1. Zoom in on the clock. Take note of what time all the hands meet.

  2. Zoom in on the left drawer and open it. Take the cell phone.

  3. Turn right. Zoom in on the banner on the wall and move it. Take the eggish thing.

  4. Note the pattern of dots along the sides of the banner.

  5. Turn around. Place the egg on the middle left shelf. Click the buttons using the sequence from the banner. The darker dot indicates which to press. Click the star when you're done, then click the egg to open it. Take the scroll and Ether medallion.

  6. Turn right. use the key on the scroll to open the right drawer. Take the black handle and the lollipop.

  7. Turn left. Open the bottom of the scroll and take the allen wrench. Combine it with the handle to make it ergonomically sound. Use your tool on that invisible panel to the right of the cat. Pull out the plug. Zoom in on it and note the pattern.

  8. Zoom in on the frame at the top of the wall and use the pattern from the plug to open it. Take the key.

  9. Turn right. Use the key to open the right cabinet. Take the power strip.

  10. Click near the outlet in the left corner. Use the power strip on it to make the connection. Note the symbols on the strip.

  11. Turn right. Use the lollipop as a handle for the device on the left. Input the code from the strip. Note that the symbols are inverted, and the code should match, i.e. flip it over. Take this thing.

  12. Turn right. Open the thing and take the key. Use it on the lock on the round window. Open it and take the wire cutters.

  13. Use your tool on the lever at the bottom and shut off this contraption. Take the white gear.

  14. Use the wire cutters to cut the chain on the scroll. Have a look see. For now, note that the first page is a legend for the contraption and the second explains that gears cannot touch each other in a three-way configuration. Only Eiffel Tower style. Amirite fellas?

  15. Turn around. Take the gear from the clock. Note where each hand has come to rest.

  16. Zoom in on the device on the table. Enter the red, white and green clock hand positions on the corresponding buttons. Enter the number where all hands meet on the black button. Take the abacus.

  17. Turn left. Remember that yellow thing? Turns out it, in conjunction with the cat, is some kind of cell battery charger. Flip your phone over, pull out the battery, place it in the holder, and stick it in the cat. The cat powers up and gives you a 6 color code.

  18. Enter the cat color code on Simon on the lower right shelf. Note that the center button gets pressed after the first 3 buttons and not at the end. Take the doll head and the Bombos medallion.

  19. Turn left. Place your 2 gears into the contraption in order to turn the rightmost gear. Keep in mind that no three gears can touch each other, like the scroll diagrammed. (Hint: put them in the 2 bottom right pegs.) Turn it on.

  20. Turn left. Give the doll back its head. A fan pops up. Note the pattern on the doll: both the shape and which half of it is showing.

  21. Zoom in on the robot butler to the right. Turn the keys on his head according to the pattern from the fan. Watch him take a walk.

  22. For whatever reason, that seemed to charge your battery, so turn right and take it from the cat. Power up your phone and look at the photo. Note the positions of the suits. Look at the cards on the top right shelf and match the suits with the numbers. Remember the order.

  23. Turn around. Click the spinny wheel in the order you just determined and take the matches. Open them and take out the memory card.

  24. Turn to the last page of the scroll and use the matches on it. Note the darkened dots. They correspond to part of the date and time from your cell phone. Dial this number.

  25. You've got mail! Open it and note the codeword.

  26. Put the codeword in the device on the wall and pull the lever. Remember that it's upside down. Take the Quake medallion.

  27. Turn right. Place all three medallions on the box and open it. Take the crystal ball.

  28. Put the memory card into the back of the phone. For whatever reason, that triggers the robot butler to come out with a key on his platter. Take it.

  29. Turn around. Use the new key on the left cabinet. The buttons will pop out. The memory card on your phone contained a video of pacman eating dots, so follow his pattern to open the cabinet. Take the 3rd gear.

  30. Turn around. Power down the contraption and remove the gears. Replace all the gears to power the leftmost gear. Turn it back on and watch the cutscene.

  31. Turn left. Note the pattern on the door under the doll. Match your abacus to line up the empty spaces with the knobs on the door and place it on there. Open it and take the 4th gear.

  32. Turn right. Shut down the contraption. Now you must place the gears to turn both the left and rightmost gears. You can figure it out. Turn it back on. Watch the cutscene. Shut it back down and take all your gears.

  33. Turn left. Use your crystal ball on the top the the box to unlock it. Start placing gears on the left side and it will drop, revealing another white gear and a golden gear. Read the note on the left chain. The gold gear is heavier than a silver, but lighter than 2 silvers.

  34. Get all the white gears out. To do this:

    Take both gears from the right side. Place a silver on the top and the gold in the middle. Remove the visible silver on the left. Take all 5 silver gears, starting with the left side.

  35. Turn right. Place all 5 gears in the contraption in order to turn the topmost gear. Keep in mind that in order to open the exit, it must turn clockwise, as the scroll showed. Pull the lever.

  36. Exit. Well done!

Reply

So, I have the scroll, abacus and phone. Cat's collar is flashing, but I can't find a logical connection between the colors on the collar and the flower-box. Likewise, I assume the number cards are connected to the abacus (probably wrong) but can't find a connection there either. Nothing else seems apparent until I figure out the cat puzzle.

Reply

@K'
Your CPU clock should have no bearing on the game. You shouldn't need to make sure of anything on it. Just

dial the number that corresponds to the black dots from the scroll. 6 digits. In the order they appear. Don't move anything around. So enter the 2 numbers corresponding to the month (I think; the last 2 of the date.) and the 4 for the hour and minute. Then press call.

No need to overcomplicate. :-D

Reply

Items in inventory:

Cell phone, battery, scroll w/ key chained to it, owl thing (used), pentagonal rod from inside scroll, AND NO CLUE WHAT TO DO NOW.

AAAARGH!! D:

Reply

Never mind, POP goes the weasel.

How was I supposed to know I didn't need to remove the key to use it first? O_o;

Reply

its not an 'owl thing' its a Daruma

Reply

This was definitely one of the most difficult escape games I've ever played!

Reply
BillyTehKid September 28, 2011 4:00 AM

I'm stuck on the card shape puzzle (heart, club etc).

The position of the card on the phone dont seem to match the position of the cards on the shelf exactly. Is this randomised for each new game or is there one answer that someone could tell me?

Reply

I just got through the game with the help of the walkthrough, but I have one question.

What is the purpose of the moon shape in the scroll?

Reply

@ ThemePark

The moon shape on the scroll was eluding to the clock on the wall which the gear taken out. That cresent shape would form once the gear has taken out. Overall, the fan, cresent moon clock and the spinning suits were all part of the same gear mechanics needed to operated/figure things.

Reply

help with the plug pattern pls.
The pattern has white and black strips of various sizes. I make it (starting with white) 3323331414233. Must I press 3 times the white knob if the pattern shows white 3?

Reply

Excellent walkthrough, DAM! I used it when I got really stuck and I appreciate that you didn't just give it away.

Reply
MirrorImage September 28, 2011 8:59 AM

Cannot get the robot to move.... the walkthrough did not help. I need a spoiler.

Reply

I had that same sound problem, plus a bug where the gears would sometimes keep turning even when off. And sometimes I couldn't back up out of the gear window view. I had to save and restart a few times.

Reply

@MirrorImage:

The robot has 3 keys on his head, each with different shaped holes: square, circle and hexagon. The doll's fan shows a pattern of shapes. Each shape is half of one of the keyhole shapes. Follow the pattern, left to right, by determining which shape: square, circle or hexagon, and which side: left or right. Click the corresponding key on the corresponding side. So if your code was

( )

You would click circle key-left side, square key-left side, circle-right, square-right, circle-right. I couldn't find a key that looked like half a hexagon.

Reply
MirrorImage September 28, 2011 10:11 AM

Thanks DAM...you must know that I did that 50 times and it didn't work... until you said it. There's something to POP, for real, isn't there?

Reply

Medallion help?

I am missing the middle medallion -- I have the other two. I don't recall where I got them, but I have checked all the medallion locations in the walkthrough. I think that it was supposed to be with the doll's head in the 'simon' (flower-petal) box, but the head was the only thing in there.

Is this a bug? If so it's a very frustrating one.

Reply

Nevermind! I didn't realize

that there was a second code to enter into the smiley-box on the wall

Medallion frustration fixed :)

Reply

Ok, I've got the card suit wheel turning, but the order the card picture gives doesn't seem to work...

Reply

awesome game

too bad there was no special ending for escaping with the gold gear in your inventory
(whitch is totally possible)

Reply

@Ruka

Combine it with the cards on the right shelf.

Reply

@DAM yeah, I'd tried that. It worked backwards of the pic... why? Because that's the way every hint in this game is...

Reply

confused on:

Power Strip. It says whatever it is do it inverted or upside down. For instance mine says EUMVOAW. i did those letters upside down left to right and it didn't work. Is it supposed to be not only inverted, but whatever is at the end,is at the beginning first? like as W is the last letter,should i start with W upside down on the left and move backwards from there?

By the way the walkthroughs in the last few games have been only semi-helpful. In the past, if the clues around the room said "2899" then the walkthrough would say "put 2899 as the code" no one is doing that lately and it's throwing me off and stuck a lot more often. Please try and wrote walkthroughs like that more often, please. We'll have less confused people in here if you do. Thanks.

Reply

The card suit dial doesn't seem to be working for me? Now that I got it turning, it turns whether the gears on the wall are turned on or not - sometimes fast, sometimes slow. I tried all the combinations of card order and picture on the phone - backwards, forwards, etc and nothing happens. Any hints?

Reply
Escapefromme September 28, 2011 11:58 AM

I am trying to put in the mail hint. But it won't take it. Did anyone have the same problem? I know it is upside down. I tried it many ways anyway. And... nothing... Can anyone help?

Reply

Sorry but i can't get the:

cards puzzle. I tried several different combination. could someone please post the exact solution?

Reply

Totally stuck. Wasn't sure how to open the flower based on the cat's necklace, so I had to come here and see what I was missing. Turns out I had the right approach, but since we all get different combinations, there is no single answer. Using the colors as I see them, the flower puzzle doesn't work and I can't get it open. Until someone can tell me how to get past this, I can't move. Can anyone help?

Reply

@johkur

You need to click the bell where it would fit.

Reply

@JIGuest

Already did that. Still does not work with the color sequence I'm seeing on the cat.

Reply

OK for some I can't get the egg to open, I use the sequence from the scroll, but it won't open. I don't know what I'm doing wrong.

Reply

Nevermind, I was trying to use the whole thing.

Reply

Problem solved.

Kind of hard to tell green from blue on those tiny little lights.

Reply

For those stuck on the disc with the card suits

click on the arrow above the disc, not the disc itself

Reply

soniclover, thanks for the neater walkthrough. i guess the hard part was

the spinning suits. I thought i clicked them correctly but i guess it's all in the timing i guess. By the way speaking of the suits, i don't think that it's the same every time. I just played it again and i got a different arrangement.

Reply

can not get the card wheel to turn, any spesifics as to where i should click?

Reply

I'm stuck on the wheels- I only collected two and now I can't leave the screen- the navigation bar isn't taking me anywhere. The game hasn't frozen as I can still play with the wheels- just not move anywhere else.

Reply

Just figuring that the cell phone can be flipped, and then pixel-hunting to flip it is by far the worst part of this game. Maybe some of the color-distinctions for color blind persons. I had problems with having to click in sequence, but that was just my mouse.

Still rather reminiscent of Neutral and a bit of Akarika but really starting to come into their own with this one. Brilliant.

Reply
Raf the french October 1, 2011 1:41 PM

Fantastic game ! Congratulations Kotorinosou, you did a very smart game with nice graphics. Everything is logical and beautiful. 5/5 for me Waiting for the next one.

Raf

Reply
awfulperson October 1, 2011 4:08 PM

Now THAT was a five star game. Beautifully rendered, difficult puzzles and LOTS of them, logical problems and solutions. You know it's a good one when you sit on the edge of "I need a hint" throughout the game, and are just *barely* able to avoid indulging. :)

Reply

He Jay, the URL has changed.

[Thanks, fixed! -Jay]

Reply

Fantastic escape game. I love the way it all is controlled by (and comes back to) the central clockworks - very clever and elegant.

My only niggle is the way

the robot is connected to the phone charging, and especially getting the video clue from the memory card,

which seems somewhat less beautifully logical than the rest of the game.

Other than that: Escape games don't get a lot better than this one.

Reply

Did the golden gear have any real purpose? Were you even supposed to be able to get it? It disappeared from my inventory once I put the other five in and pulled the lever.

Reply

For those who are stuck at the power cable and photo frame:

Try to input only the white ones.

Reply
MtDewed April 2, 2014 4:40 PM

My date on the cell phone was blank. So I couldn't go on. It was turned on and the time was working.

Reply
Patreon VIP abfdrumz July 28, 2014 1:47 AM

Same here, replaying just now. All of the digits showed up when I first looked at the phone, but in later viewings they were blank until that part of the time changed (so only seconds showed up immediately, then minutes if I waited, then presumably hours and so on). Wonder if it's a new bug? It definitely confused me at first, though realizing that the phone time matched my local time allowed me to reconstruct the correct number.

Reply

OHHHH NOOOO!!
It looks like Kotorinosu is no more??
:(
I have tried all of the game links and even the main homepage is just.......gone!
I hope it is temporary because his games are GREAT!

Reply

link to this game is dead.

Reply

Looks like Koturinosu's homepage has moved since the game was first posted here.

Here's a link to the game on Koturinosu's website.

http://kotorinosu.net/game/device

(JiG staff: Please verify the website and update links to game.)

Reply

^ Scroll Up | Homepage >

Leave a comment [top of page]

Please consider creating a Casual Gameplay account if you're a regular visitor here, as it will allow us to create an even better experience for you. Sign-up here!
  • PLEASE UNDERSTAND SITE POLICIES BEFORE POSTING COMMENTS
  • You may use limited HTML tags for style:
    (a href, b, br/, strong, em, ul, ol, li, code, spoiler)
    HTML tags begin with a less-than sign: < and end with a greater-than sign: >. Always. No exceptions.
  • To post spoilers, please use spoiler tags: <spoiler> example </spoiler>
    If you need help understanding spoiler tags, read the spoiler help.
  • Please Preview your comment before posting, especially when using spoilers!
  • No link dropping, no domains as names; do not spam, and do not advertise! (rel="nofollow" in use)
chrpa Jayisgames needs your help to continue providing quality content. Click for details Welcome to the Roundup 66 - Retro with four games! After you find the ten monkeys in the chapter, look in the inventory. You will find a...  ...
chrpa Jayisgames needs your help to continue providing quality content. Click for details Welcome to the Roundup 65 with three games! As mentioned in the previous roundups, only odd-numbered episodes are featured since even-numbered are for Robin Vencel's patrons (the...  ...
chrpa Jayisgames needs your help to continue providing quality content. Click for details Hi! Weekday Escape and Weekday Puzzle are here! First we have two new cans from tomoLaSiDo and then two small rooms from isotronic. That's all for this...  ...
6,365 Views
0 Comments
chrpa Jayisgames needs your help to continue providing quality content. Click for details Welcome to Mobile Monday! We have another beautiful game from Nicolet and it's a winter game as it should be. Tasuku Yahiro have released another of their...  ...

HELP Jayisgames.com

Recent Comments


Display 5 more comments
Limit to the last 5 comments

Game of the week


Dark Romance: Vampire Origins Collector's Edition

Your Favorite Games edit

add
Save links to your favorite games here. Use the Favorites editor.

Monthly Archives