JayisGames.com is now available ad-free!
Jay is Games recommends Cheat Happens with 8,000+ games and 35,000+ trainers!

Synapsis 2


  • Currently 4.4/5
  • 1
  • 2
  • 3
  • 4
  • 5
Rating: 4.4/5 (153 votes)
Comments (28) | Views (24,446)

BradSynapsis 2
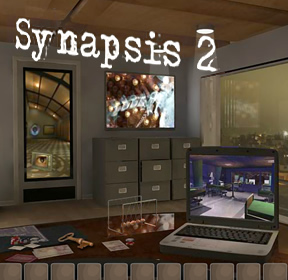
Something has happened. You don't know exactly what, but you know that this place doesn't seem right. This place where the doors don't have hinges or knobs and passing through one feels like you're passing through space and time. No, it doesn't seem quite right, but some things seem...familiar. Such is the strange and wonderful world served up to you by RobotJAM and Rob Donkin in Synapsis 2.

Synapsis 2 is the equally mindbending point-and-click adventure game sequel to the original, Synapsis. You are David Carter, a man who is trapped, maybe inside of his own head, maybe he's between places or maybe he just took a wrong turn somewhere. Either way, he's looking for a way out and to do that you'll have to guide him through a variety of puzzles. The mouse is all you will need to move from place to place, manipulate the environment, pick up and use items.

For a game that's so deliciously weird, the puzzles make sense. There will be times when you scratch your head and a few might cause a little frustration, but for the most part you won't be wondering why you're doing something. The relatively low difficulty of the game means that some players will be able to breeze through Synapsis 2. This is a little disappointing as you'll just want to luxuriate in the unique world and explore more of it, however it also means the game doesn't give itself a chance to get old.

Synapsis 2 is a beautiful looking game. The rooms are varied in appearance and atmosphere and each has their own sounds and music. The whole feel of the game is like a mixture between Twin Peaks' Black Lodge and the introduction to The Twilight Zone ("a place of sight and sound...a wondrous land whose boundaries are that of imagination"). There are plenty of games that are weird, this is one of the few games that I would label as surreal. it's an artfully constructed mixture of the mundane and the bizarre with a story where the confusion is part of the fun and what you see is more important than anything that could be said.

If you're looking for an adventure game that truly takes you to a unique world or you're a fan of film makers like David Lynch of Alejandro Jodorowsky, then you should definitely check out the Synapsis games. It might not take you long to get through Synapsis 2, but the sights and sounds will leave you begging for more.

Play Synapsis 2

Walkthrough Guide


(Please allow page to fully load for spoiler tags to be functional.)

Synapsis 2 Walkthrough: A Guide to Escaping Oneself

  1. At the end of the beginning cutscene, you'll be in an office. The name of this room is Work. Pick up the key towards the left end of the desk, stick it in your inventory, and head into the "window" in the wall to the left.

  2. You're now in The Hub. You can tackle these rooms in a few different orders, but let's start with the door on the far left: Childhood.

  3. Open the window the bird is behind, then pick up the worm on the floor (it's in the spotlight of the same window) and stick it in the cage.

  4. Pick up the crank handle that falls and put it on the can-shaped object on the floor-- it's actually a jack-in-the-box of sorts. Take the hammer.

  5. Stick that hammer in the hand of the puppet in the puppet show booth and it'll reveal a skeleton. Take the quarter-circle from its hand, and also be sure to grab that helmet at its feet. Now you can leave.

  6. Well, THAT was a trip. And it's nowhere near over yet. Now pick the door on the far right-- the one to Void.

  7. Grab the Post-it note from the safe and inventorize it, then click it again to read it. Okay, but there's nowhere to input that... until you poke the power button in the bottom middle of the screen.

  8. Hey, a keyboard! But it wants a passcode. Well, use the hint from the note: with A=1, B=2, the string of numbers on the note translate to "SESAME". That's the pass, so enter it by clicking on the letters and confirm it with the lower-right key (enter).

  9. Okay, now it wants a load command. Try the word that was in all caps on the note: MANUAL. A book appears! Pick it up and read it just like you did the note.

  10. ...The manual's all gibberish, including the words in the margins, but those are just scrambled. The four words are PLANT, SHIELD, TABLE, and GLOBE. Enter them on the keyboard one by one.

  11. You now have four more objects. Take the shield (it'll be useful later) and note the numbers on the other three things. Read them from left to right and they're the code for the safe. Input them and open 'er up!

  12. Ooh, another room. "The Past"? Interesting. Not much you can do here yet, but open the red blinds and take the pendulum from the grandfather clock, then open the door in the back and check out that room.

  13. "The Present". Doesn't look very pleasant. Take the wrench from the floor and the mirror from the wall, then head back to The Past via the same door that brought you here.

  14. Back in The Past, stick the mirror on the wall on the same place it was in The Present, then use the wrench to turn the valve nearby to stop the dripping water. That should make our robot's future much less grim.

  15. Return to The Present and observe the good deed you've done. Take the quarter-circle, then head back to The Hub through the Void.

  16. Next stop, the second door on the left, War. Inside this room, take the clock from the wall on the right and the shoulder plate from the floor on the left.

  17. Take the document next to the enigma machine in the foreground, then look at it. Approach this same enigma machine and use it to decode the three gibberish words on the document. Just "type" the words and they'll be translated.

  18. Now go to the big map on the far wall, find the three Post-it notes that display the translated names when moused over, and click on them to add airplane icons. If you add an icon to the wrong place, click again to remove it.

  19. Once they're all correct, you'll receive an interesting scene and another quarter-circle. Skedaddle and return to the Hub; it's time to tackle our last wing. Second door on the right.

  20. Welcome to Reflection. The suit of armor on the right doesn't have a few things his partner does. Give it the shoulder plate, the helmet, and the shield... but it still needs a sword.

  21. Use the key you picked up at the beginning on the chest in the foreground to find the missing sword, then put it in place to open the door. Take the clock front from the table on the left before proceeding.

  22. Time. Put the three clock faces you've picked up in the clocks identical to the ones you took them from. The rectangular face goes on the rectangular thing in front of the window, the round pendulum on the grandfather clock's face, and the big round clock goes on the hook on the right wall.

  23. You now have access to three pairs of arrows. Each one controls a different ring in the contraption in the center. You want to connect each 1 to the center of the clock, and each 0 to a dark circle endpoint. Focus on finding the arrangement that connects every digit to the center or to an endpoint, then rotate all the rings together until they properly reflect the 0's and 1's. See an image of a solution (thanks, Ruufy!):

  24. Once you've solved the puzzle, you'll have your last quarter-circle. Go back to The Hub and approach that portal-thing at the end of the hall, then stick all the quarter-circles in it. Game complete... I think...

28 Comments

Patreon Crew SonicLover July 25, 2011 6:31 PM

Well, this was... quite a trip. Gimme a sec, I'll walkthrough it.

Reply
Cyberjar88 July 25, 2011 6:34 PM

I can't believe they made a sequel... I guess I'd better set aside five hours for this one...

Reply
Patreon Crew SonicLover July 25, 2011 7:12 PM

Synapsis 2 Walkthrough: A Guide to Escaping Oneself

  1. At the end of the beginning cutscene, you'll be in an office. The name of this room is Work. Pick up the key towards the left end of the desk, stick it in your inventory, and head into the "window" in the wall to the left.

  2. You're now in The Hub. You can tackle these rooms in a few different orders, but let's start with the door on the far left: Childhood.

  3. Open the window the bird is behind, then pick up the worm on the floor (it's in the spotlight of the same window) and stick it in the cage.

  4. Pick up the crank handle that falls and put it on the can-shaped object on the floor-- it's actually a jack-in-the-box of sorts. Take the hammer.

  5. Stick that hammer in the hand of the puppet in the puppet show booth and it'll reveal a skeleton. Take the quarter-circle from its hand, and also be sure to grab that helmet at its feet. Now you can leave.

  6. Well, THAT was a trip. And it's nowhere near over yet. Now pick the door on the far right-- the one to Void.

  7. Grab the Post-it note from the safe and inventorize it, then click it again to read it. Okay, but there's nowhere to input that... until you poke the power button in the bottom middle of the screen.

  8. Hey, a keyboard! But it wants a passcode. Well, use the hint from the note: with A=1, B=2, the string of numbers on the note translate to "SESAME". That's the pass, so enter it by clicking on the letters and confirm it with the lower-right key (enter).

  9. Okay, now it wants a load command. Try the word that was in all caps on the note: MANUAL. A book appears! Pick it up and read it just like you did the note.

  10. ...The manual's all gibberish, including the words in the margins, but those are just scrambled. The four words are PLANT, SHIELD, TABLE, and GLOBE. Enter them on the keyboard one by one.

  11. You now have four more objects. Take the shield (it'll be useful later) and note the numbers on the other three things. Read them from left to right and they're the code for the safe. Input them and open 'er up!

  12. Ooh, another room. "The Past"? Interesting. Not much you can do here yet, but open the red blinds and take the pendulum from the grandfather clock, then open the door in the back and check out that room.

  13. "The Present". Doesn't look very pleasant. Take the wrench from the floor and the mirror from the wall, then head back to The Past via the same door that brought you here.

  14. Back in The Past, stick the mirror on the wall on the same place it was in The Present, then use the wrench to turn the valve nearby to stop the dripping water. That should make our robot's future much less grim.

  15. Return to The Present and observe the good deed you've done. Take the quarter-circle, then head back to The Hub through the Void.

  16. Next stop, the second door on the left, War. Inside this room, take the clock from the wall on the right and the shoulder plate from the floor on the left.

  17. Take the document next to the enigma machine in the foreground, then look at it. Approach this same enigma machine and use it to decode the three gibberish words on the document. Just "type" the words and they'll be translated.

  18. Now go to the big map on the far wall, find the three Post-it notes that display the translated names when moused over, and click on them to add airplane icons. If you add an icon to the wrong place, click again to remove it.

  19. Once they're all correct, you'll receive an interesting scene and another quarter-circle. Skedaddle and return to the Hub; it's time to tackle our last wing. Second door on the right.

  20. Welcome to Reflection. The suit of armor on the right doesn't have a few things his partner does. Give it the shoulder plate, the helmet, and the shield... but it still needs a sword.

  21. Use the key you picked up at the beginning on the chest in the foreground to find the missing sword, then put it in place to open the door. Take the clock front from the table on the left before proceeding.

  22. Time. Put the three clock faces you've picked up in the clocks identical to the ones you took them from. The rectangular face goes on the rectangular thing in front of the window, the round pendulum on the grandfather clock's face, and the big round clock goes on the hook on the right wall.

  23. You now have access to three pairs of arrows. Each one controls a different ring in the contraption in the center. You want to connect each 1 to the center of the clock, and each 0 to a dark circle endpoint. Focus on finding the arrangement that connects every digit to the center or to an endpoint, then rotate all the rings together until they properly reflect the 0's and 1's. See an image of a solution (thanks, Ruufy!):

  24. Once you've solved the puzzle, you'll have your last quarter-circle. Go back to The Hub and approach that portal-thing at the end of the hall, then stick all the quarter-circles in it. Game complete... I think...

Reply

Holy cow, I was just looking for the first game earlier today, and now I find a sequel?

Glad to see this one was just as trippy as the last, and still not quite difficult enough to need SonicLover's walkthrough (sorry man!)

Reply

Good heavens... I, just, what? Okay... I played the original Synapsis and was happy to see a sequel. Until I played it. Fun game, nice touch of difficulty, but WAY WAY WAY weirder. But, whats with the end? Very weird/confusing.

Reply

Every bit as weird as the first one, and I mean that as a compliment. I was happy to find that the annoying pixel-hunting from the first one has been taken care of, and the only puzzle that really stumped me is that of the story itself... Hopefully there'll be another sequel to make things clearer, or in the very least to confuse us a tad more!

Reply

The ending made me think "Are you my mummy?"

Reply
Anonymous July 25, 2011 9:22 PM

It was good to see a continuation to the weird ending of the first, but it seems there is no end to your madness.

Reply
Anonymous July 25, 2011 10:38 PM

The developer/s say there will be a third and final game sometime.

Reply
Anonymous July 26, 2011 12:39 AM

Could be a bug...

Double checked the w/t, but couldn't find the bottom left quarter circle

Reply
pillpill July 26, 2011 2:41 AM

Slight discrepancy on the last segment of the walkthrough about the final puzzle:

the part about the final puzzle, where you have to line up the 1's and 0's-

"You want to connect each 1 to the central clock, and each 0 to a dark circle endpoint."

you need not line up the 0's to anything- all you need to focus on is lining up the 1's to the center. In fact, I found it impossible to line up the 0's to the circles AND the 1's to the center at the same time, it was either or. =)

Reply
neurotic July 26, 2011 3:29 AM

Actually...

the manual book isn't all gibberish, I took about an hour and a half to decode the binary numbers, it says :
"this is the void it is a virtual reality simulation, I am your helper David type in your commands and I will do your bidding."
Seriously, I think the one and half hour I put in might actually be worth it.

Reply

awesomeeeeee

Reply

I can't seem to

Do the clock puzzle in the Time room. I lined up the 1's to the center, and nothing happened. I also can't find how to move all the rings together.

Reply

I actually hope that they make a third one!

I love these games! :D

Reply

that last puzzle is difficult.

I tried for over 10 minutes, and i can't understand what to do. oh well

Reply

For the time puzzle,

see an image of a solution:

Reply
MtDewed July 26, 2011 2:20 PM

Thanks ruufy : )

Reply

another one! eeee!

Reply
shadowmax July 26, 2011 11:26 PM

I needed a walkthrough on the first one if I recall correctly. This one seemed fairly straightforward. Maybe it was the lack of pixel hunting. Or maybe my head is just in a weirder place these days.

Nice Dr. Who ref Tenzhi :)

Reply
Danaroth July 27, 2011 2:30 AM

There is actually a much easier way to solve the last puzzle:

Just look at the position of the circles from outside the door, before entering the room itself; that actually shows how the 2 external circles should be placed. It's then easy to brute force the solution for the last one in the middle.

Reply

great game, not terribly challenging though. spent most of my time copying the binary by hand to translate it (waste of time). Otherwise really fun. took maybe 45 mins or around there. very cool. though a longer game wouldve been nice. Thanks!

Reply

I'd love to play this game when I'm stoned (the first one, too.). I bet it's even trippier.

Reply

ummmmm werd ending lol

Reply

neurotic - that's awesome!

Reply

SO stuck on Time puzzle. Can ONLY move the middle circle (after place square clock which moves) and nothing else. not sure what to do w/ grandfather clock either. :(

Reply

i couldn't find the last quarter piece either. very frustrating. i did everything it said, and i rechecked every room, it's not anywhere. i still have the mirror even though i tried to place it in the past (or present, i can't remember)
i'm stuck and annoyed with this one
the first one was so much harder, but easier at the same time

Reply

We're going on a trip in our favorite rocketship.

Reply

^ Scroll Up | Homepage >

Leave a comment [top of page]

Please consider creating a Casual Gameplay account if you're a regular visitor here, as it will allow us to create an even better experience for you. Sign-up here!
  • PLEASE UNDERSTAND SITE POLICIES BEFORE POSTING COMMENTS
  • You may use limited HTML tags for style:
    (a href, b, br/, strong, em, ul, ol, li, code, spoiler)
    HTML tags begin with a less-than sign: < and end with a greater-than sign: >. Always. No exceptions.
  • To post spoilers, please use spoiler tags: <spoiler> example </spoiler>
    If you need help understanding spoiler tags, read the spoiler help.
  • Please Preview your comment before posting, especially when using spoilers!
  • No link dropping, no domains as names; do not spam, and do not advertise! (rel="nofollow" in use)
chrpa Jayisgames needs your help to continue providing quality content. Click for details Welcome to the Roundup 66 - Retro with four games! After you find the ten monkeys in the chapter, look in the inventory. You will find a...  ...
chrpa Jayisgames needs your help to continue providing quality content. Click for details Welcome to the Roundup 65 with three games! As mentioned in the previous roundups, only odd-numbered episodes are featured since even-numbered are for Robin Vencel's patrons (the...  ...
chrpa Jayisgames needs your help to continue providing quality content. Click for details Hi! Weekday Escape and Weekday Puzzle are here! First we have two new cans from tomoLaSiDo and then two small rooms from isotronic. That's all for this...  ...
6,365 Views
0 Comments
chrpa Jayisgames needs your help to continue providing quality content. Click for details Welcome to Mobile Monday! We have another beautiful game from Nicolet and it's a winter game as it should be. Tasuku Yahiro have released another of their...  ...

HELP Jayisgames.com

Recent Comments


Display 5 more comments
Limit to the last 5 comments

Game of the week


Dark Romance: Vampire Origins Collector's Edition

Your Favorite Games edit

add
Save links to your favorite games here. Use the Favorites editor.

Monthly Archives