

![]()
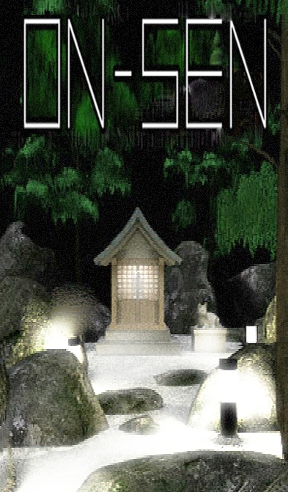 Those who have never played escape games might imagine being locked in some room, unable to exit before piecing together a series of cryptic clues as the makings of a frantic horror movie. Yet here comes 58 Works with the ultimate in relaxing accommodations: On-Sen, the halcyon hot spring waters in which to recompose and let worries wash away. In Japan, the onsen are often exclusive, most with restrictions and requisites for entry, a place many would look forward to visiting and might never want to leave. Nevertheless, to escape-the-room is the objective and so onward through the onsen we go.
Follow the on-screen arrows to explore your surroundings, looking for "Doubtful spots" to click on and investigate further. Along with some clues to help you along, a cursor that changes from an arrow to a hand will signal when an item or area should be explored in more depth. This makes exploration intuitive and effortless. Inventory items are within easy reach, needing only a simple click to examine, use or combine. Like some real onsen, this game is quiet and without music, although an occasional chime sounds when a key item is found.
 Analysis: 58 works is well known here at Casual Gameplay for its masterful escapes replete with logical puzzles and lush environments; remember Cottage and Kalaquli? Like its peers, every scene in On-Sen is picturesque, beguiling, and very peaceful, so it makes sense that the puzzles would be equally accessible, not too strenuous or taxing. Also following suit, On-Sen has a number of rooms to explore and discovering each adds more joy to the gaming experience. While finally unlocking a door only to enter a new puzzle situation could be considered torture in the wrong scenario, here it becomes a happy mini-reward for sleuthing done well.
On-Sen's puzzles are few and uncomplicated but they do fit seamlessly into the atmosphere of the game and that quality is one of On-Sen's great strengths. Its weaknesses include an ordinarily preferred feature: the changing cursor. If not for that visual clue, almost like a spoiler, exploration would require more attention to detail and thus necessitating a more meditative approach to gameplay. Have you ever grumbled while pixel-hunting through a Mild Escape by Tesshi-e? Well, here's an instance when that non-compliant cursor would be a blessing.
If you're good with puzzles or are a regular room-escape player, your departure from this onsen might seem abrupt and very disappointing. Being used to longer or more challenging 58 Works titles, just as you might expect a new area to escape, "Congratulations" is dancing across the screen. While it may seem too abbreviated, the visit to On-Sen is still very gratifying; the only reason to complain the game is short or easy is because it provides the kind of enjoyment you want to savor. Yet given the choice between nothing or only a little, most of us will be happy with a little. Overall, On-Sen is a pleasure to experience, even if it is only a quick dip rather than a long soak.
Thanks to Cyberjar88 and Nicop for sending this one in!


Walkthrough Guide
(Please allow page to fully load for spoiler tags to be functional.)
On-Sen Escape Walkthrough
First Room Puzzles - The Hot Springs
Taking in your surroundings, you see some figures on the left side of the fence but they're too scuffed up to read. Also notice a place on the right side of the fence where a code might go. Perhaps the two sides are related. Speaking of two sides, there's a solitary lion statue and an empty dais across from him on either side of the locked gates. That may be something you can fix later. Take one final look around, snapping a mental snapshot of all in the scene.
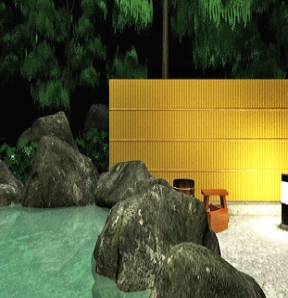
Turn left: before you are some rocks along the edge of the onsen (hot springs). You probably can't help but notice a shiny object glinting in the water . . . reach right out and grab it. A Key. Now click to zoom in closer on the barrel-like object and stools. Out of the corner of your eye you see something; pick it up: Paint Brush. Looking through the stacks of round wooden trays, you'll stumble across another item: Scrub Brush.
Zoom out and turn left again: now you're looking straight-on at the onsen pool. The umbrella seems to beckon so head toward it. There's a can stuck in the rafters, but you can't reach it yet. Make note to return when you have a helpful tool.
Back up, turn left once more: a red object catches your eye yet is also out of reach (land of giants or just very robust winds?) Let's focus on the table. Hmmm, five darkened rectangles. It looks a lot like something else in these surroundings. Perhaps you noticed when you first arrived?
Look at the windows above the gate. Some are dark, some are lit.
Once you enter the proper code, grab the Thermometer and back up again.
Onsens are heated by underground volcanic passages and that makes you wonder: just how hot are these waters? Highlight the thermometer in your inventory and use it to test the water; you get your answer . . .
43:50 degrees celsius. View this number by clicking on "+" by the thermometer to examine it more closely.
Let's see if you're ready to solve some codes.
First, dip the scrub brush in the water to wet it then re-approach the left side of the on sen enclosure's walls. Using the brush to clean it, the figures are revealed.
The number 3 is changed into a 3E shape.
Keeping that in mind, go back to the right side of the fence . When you initially try to enter the code, nothing happens so you lean against the light stand to reconsider. Well, there you are! Now you can enter the correct numbers. Something in your inventory should have four numbers on it.
The temperature of 43:50 will do just nicely. Don't worry about knowing what the letters should look like, though. Just click 4 times on the first spot to the left, 3 in the next, 5 in the second to last, and leave the last spot alone.
With the proper code, a secret panel in the fence opens up. Go on in.
Second Room Puzzles - Meditation Temple
Moving on from here proves difficult: it's dark out there. Fish the key out of your pocket and open the lockbox. Press the red button and everything lights up. Gorgeous! Nab the blue Grabber Pole before going forward.
Locked inside a small building, you can just glimpse the missing lion statue, currently not accessible. A polished white lynx wearing a red scarf steals the scene. When you explore it, you come across another handy tool: Flathead Screwdriver. The other lynx statue looks neglected. Nothing in your inventory seems to help, though, so back up two times to return to the onsen.
Remembering the red scarf, you go back to the trees. At first the blue grabber pole won't reach . . . select "+" sign on the pole to magnify it in your inventory; next, click on the right end to extend the pole, making it much longer. Now you can reach the Red Scarf.
Back under the umbrella, a simple click of the grabber pole obtains the Paint Can . Magnify the paint can in your inventory. Use the flathead screwdriver to open the can and dip the paint brush right in. You're ready now to go back to the lynx.
Returning to the meditation spot, use the paint on the lynx then add the scarf. Now you can take the lion statue back to its dais by the onsen gates.
Place the lion statue to the left of the locked gates and they open, revealing a third room. Enter it.
Third Room Puzzles - Wash Room & Lockers
When you first enter, you're facing a wall with two "doubtful spots" and another locked door. Nothing you can do here yet, so turn left. Red is the color of the day and a strange red octopus-like object is clinging to the ceiling. Well, you have a tool for reaching that. Use the pole to take the "Sticky Star" Octopus. Also in plain sight are a series of arrows. They might mean something so remember them.
Turn around again until you see another stack of round wooden trays. Move closer to riffle through them. Each one has a number or two inside. That also seems to be a clue so take careful note of where they are and what they tell you. In the bottom tray, get the Blue Orb .
Turn left twice and approach the left panel . It's hard to get a grip on it…something that's sticky would help, though . . .
Using the red octopus you found stuck on the ceiling, pull off the panel. Next, use the blue orb in the empty spot and another panel opens.
Take the Round Shape. Back up.
Have another look at that panel on the floor. On the other side appears to be a clue, but it's also too dirty to read. You know what to do here . . . revealing another clue.
(Use the scrub brush to clean it off.) There is a symbol in the corner that looks like a 7 but it's different somehow.
Write it all down on a small scrap of paper to examine further then back up.
Turn to the right and move up to the left lockers. Every door will open except the middle. Each door has a symbol on it. Look familiar?
Turn the scrap of paper around under your clue matches up with a symbol on the locker doors; now you know how to open the middle door . . .
Open the doors in this order: Start at the door at bottom left corner: go up to the one above it; up once more to the top left corner; then middle top door; top right door; middle door far right; bottom right door; bottom middle door; then finally the center door. (If you're having trouble, remember that you must first clean the panel and view the clue before the game will allow a solution).
. . . Take the Star Shape .
Head over to the right side lockers . This time you can only open the left middle door and right middle door. Left side. Right side. A recurring theme in this escape. When you get it open, you'll have the last piece needed to complete the last puzzle: the Plus Shape . If you need help, consider the arrows . . .
Remember that the arrows are probably a mirror image . . .
left - right - left - right - right.
Back up from the lockers, turn left. Move in on the right panel. You have all the information you need to open this one as well. It has three slats, one over the other, above a larger section. Consider where else you saw three things stacked one over the other.
In the round wooden trays (look like a barrel) stacked by the door, the top level said "1:5", the middle was "2:4" and the bottom was "3". Click the panels in that order.
top, middle, bottom, middle, top.
When you open this panel, you'll see three places for the three shapes. A button below each shape seems to indicate a desired color but the blue dot seems odd. Pull it off.
Back away and turn left toward the sinks. Each sink has a different color. (From left to right: white--yellow--blue--red.) Your task is to dip each shape in the correct colors so they'll fit in their niche.
Star in red = red. Round in yellow + blue = green. Plus in red + blue + yellow = grey.
You're now ready to leave the onsen. Take one last dip, if you wish, and prepare to go.
Final Puzzle - Leaving the Onsen
To open the last door, you'll need to open the right side panel again, so press the slats in the correct order again . . .
top, middle, bottom, middle, top.
Place the colored shapes in their proper spots . . .
Red star on left, green round shape in middle, grey plus shape on the right. (Remember: you must pull away the fake blue dot before putting the grey plus shape in its place.)
Congratulations! You're out. After a relaxing soak in the onsen, perhaps you're hungry . . . ?
On-Sen "easter egg"
After you've entered the correct light/dark pattern in the table by the onsen pool, check the windows again . . .
They're all lit up, so light up all the rectangles on the table. The drawer opens for a nice hidden extra! :)
Posted by: elle |
July 6, 2011 10:51 AM
|
July 6, 2011 10:51 AM