

Maestro: Music of Death
Platform: Mac, Windows
![]() Certain things are only funny when they happen to someone else, like taking a big gulp of spoiled milk, or faceplanting immediately after yelling "Hey, watch this!" or getting trapped within a plague ridden town that's slowly sapping the life out of its inhabitants. Maestro: Music of Death is a new horror hidden-object adventure from ERS Game Studio where you are once again called in as a "paranormal expert" (are you sure they have a right person?) to solve a strange mystery near Paris. You know, the sort of mystery that tends to wind up with you a dried and dessicated corpse in a ghost town somewhere? Those are my favourites.
Certain things are only funny when they happen to someone else, like taking a big gulp of spoiled milk, or faceplanting immediately after yelling "Hey, watch this!" or getting trapped within a plague ridden town that's slowly sapping the life out of its inhabitants. Maestro: Music of Death is a new horror hidden-object adventure from ERS Game Studio where you are once again called in as a "paranormal expert" (are you sure they have a right person?) to solve a strange mystery near Paris. You know, the sort of mystery that tends to wind up with you a dried and dessicated corpse in a ghost town somewhere? Those are my favourites.
 Your investigation appears to be off to a rocky start when the guards at the city limits refuse to let you pass. Some sort of plague, they say, and they're not willing to let anyone pass; not you, and certainly not the distraught woman who begs you to find her daughter who got left behind with her governess. Of course, they're soon not in any position to stop you, and as you begin to search the city you get a sneaking suspicion that this "plague" may not be natural. (Gee, what tipped you off? The crying clouds of damned phantoms? You're so smart.) Gameplay is your typical point-and-click affair, although players who don't enjoy hidden-object hunting that much may be put off by just how many of them there are. Find clues, solve puzzles, and eliminate the source of the plague before you become just another dead beat. HA! Dead beat! Geddit?... well, uh, 'cause the game is "Music of Death", and... beat, like a note, and... um... oh, forget it.
Analysis: While it's nice to play a feel-good, family-friendly hidden-object game once in a while, usually all I really need to feel good about my casual game purchases is a theater full of emaciated corpses. That's not so hard to provide, right? (Then why won't any developers return my messages?!) Scary sells, and nobody seems to know this better than ERS Game Studios, whose last batch of games have been a string of creepy-cool titles. Maestro: Music of Death is another solid addition to their roster. It boasts a weird, over-the-top story that's rich with unusual environments, all rendered with fantastic artwork and attention to visual detail that makes them look and feel much more in-depth and animated.
 As much as there is to like about Maestro, however, there are minor annoyances. You'll have to backtrack and repeat hidden-object scenes more than usual, and some of the items you need to track down are, frankly, more than a little superfluous; I really need to get a specific item to get rid of a small pile of leaves? Really? I can't just, like... brush them away with my hands? Certain sound effects are repeated over and over again ad nauseum, and chances are even if you found the wispy ghosts and annoying, gasping sigh they give scary the first time, you won't the next seventy-five times it happens, over and over each time you enter particular areas.
Of course, none of these are game breaking issues; they're just mostly minor complaints, and shouldn't prevent you from checking out what really is a genuinely top-notch game. It's a unique mystery set in a location that's a lot of fun to explore. ERS Game Studio have really outdone themselves in crafting a series of environments that have an otherworldly feel, and while the story isn't quite as front and center as some of their other recent releases, it still makes for a very engrossing experience. While most of you probably won't find the difficulty level to be very challenging, admittedly not expects or even wants their games to be hard, and if what you do want is a beautifully made game with an intriguing plot and a room full of corpses, Maestro: Music of Death is definitely for you, and I heartily recommend you check out the demo.
A Collector's Edition is also available. It contains a bonus chapter to play, wallpapers, strategy guide, and more. Remember that Big Fish Game Club Members pay only $13.99 for Collector's Editions (or 2 club credits), and collector's editions count 3 card punches of 6 total needed for a free game.
![]() Windows:
Windows:
Download the demo
Get the full version
Also available: Collector's Edition
![]() Mac OS X:
Mac OS X:
Download the demo
Get the full version
Also available: Collector's Edition


Walkthrough Guide
(Please allow page to fully load for spoiler tags to be functional.)
Maestro: Music of Death - Walkthrough
General
You may choose between Normal and Expert Mode - In normal Mode hint and skip button will charge faster, active scenes will be shown by sparkling.
You may use hints as well in search scenes as also in normal scenes.
Red written objects in search scenes are either hidden (open closets, door....) or need an activity like combining two objects.
The search scenes are random except the inventory objects.
Also the red-texted objects are random, in that you may have them the first time visiting this location while others will have them the second time.
When your cursor changes into a magnifier you should have a closer look or start a conversation.
When your cursor changes into a hand you can pick something up or interaction is needed.
List of multi part objects
Locket (3)
Spoiler 1
Spoiler 15
Spoiler 29
Nameplate (4 parts)
Spoiler 5
Spoiler 12
Spoiler 15
Spoiler 20
Music instruments (3)
Trumpet: Spoiler 26
Bass: Spoiler 28
Violin: Spoiler 29
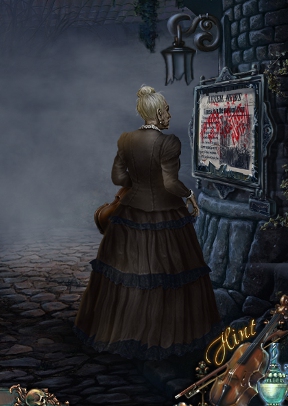
1. At the Bridge
Click the violin on the ground - this is your hint.
Talk to the soldier in front of the guard house to learn that you are not allowed to enter the town.
Grab the rope at the side wall of the guard house.
Zoom in on the board on the right side and use the rope at the hook.
Hook with rope are going back into your inventory
Screenshot
Go left downstairs and talk with the woman.
She will give you a locket (1/3).
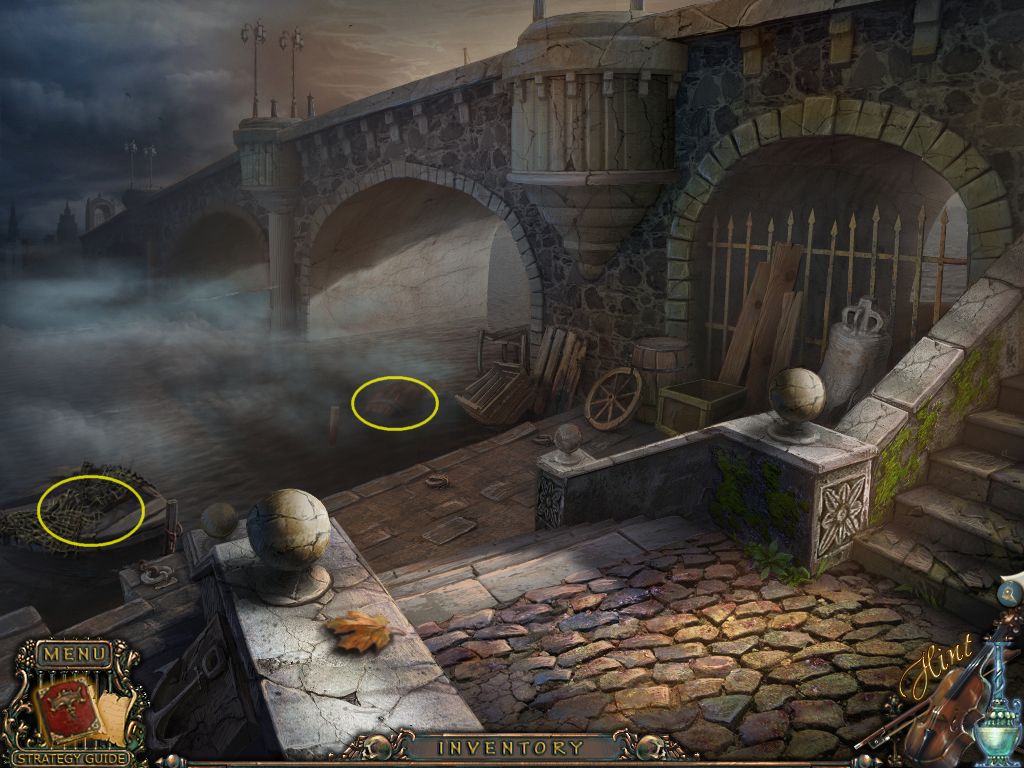
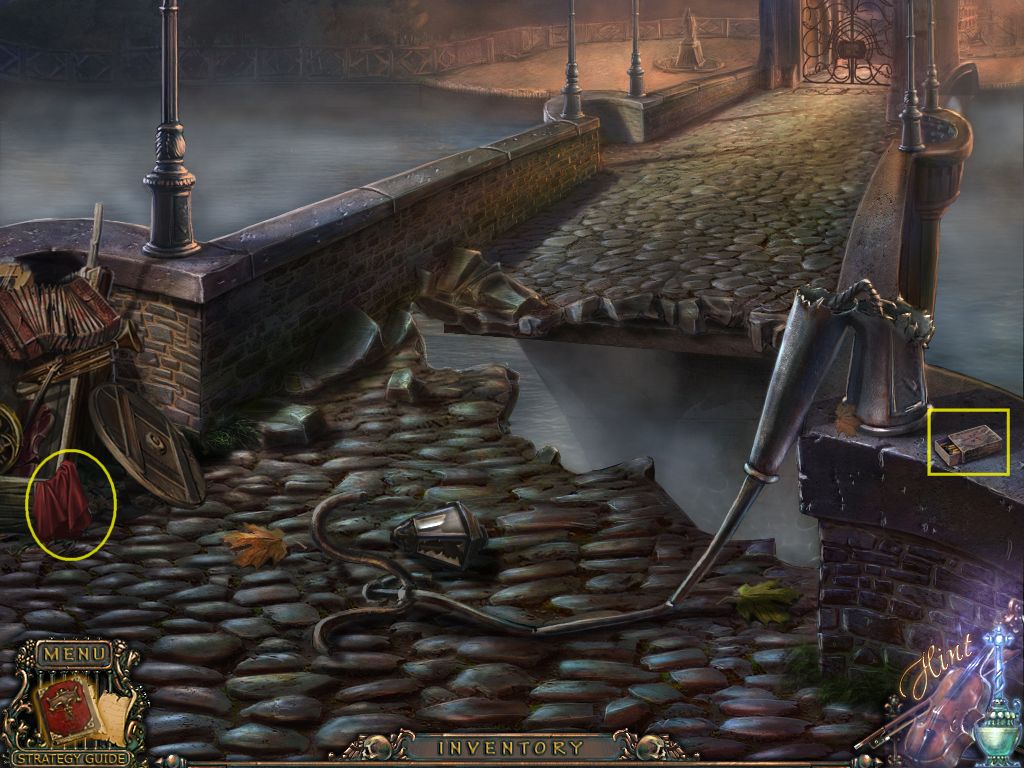
Play the search scene to obtain a crowbar.
Click the cloth and the newspaper to find red-texted objects.
Use the hook with rope on the barrel in the water.
Open the barrel with the crowbar to find a ruby.
Zoom in on the net in the lower left corner to learn that you will need a cutting tool.
Screenshot
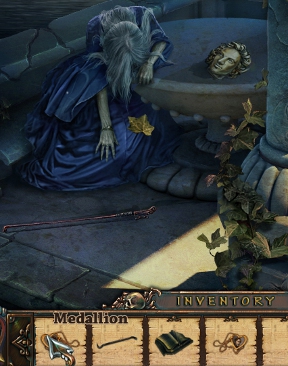
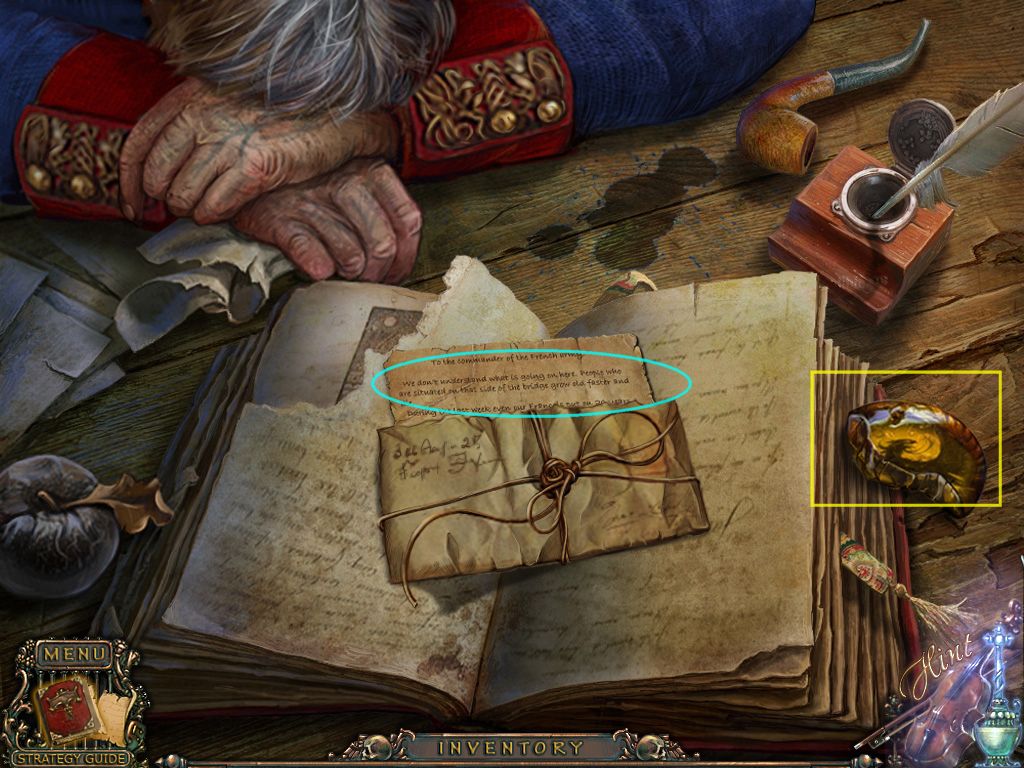
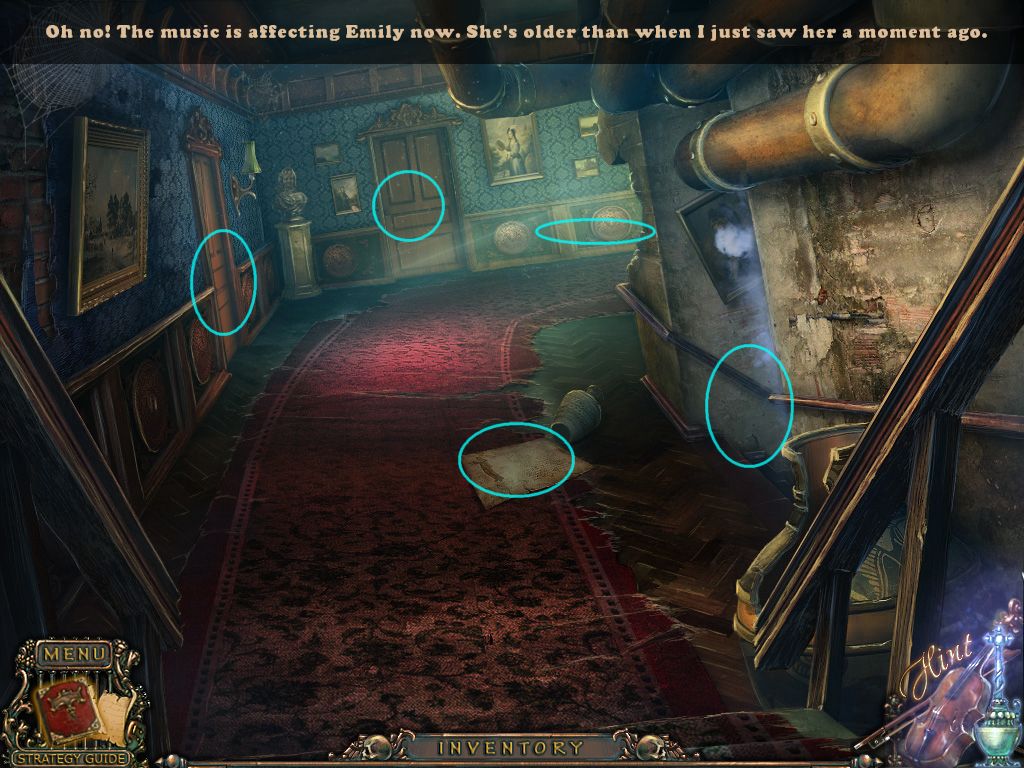
Go upstairs to see that the soldiers are dead and aged in a few seconds.
Zoom in on the table and click the note.
Grab the yellow medallion part (1/2) right next to the book.
Screenshot
Grab the red/white striped board and go forward.
2. Town Gate
Grab the matches, low right corner.
Click the red cloth low right side to find a part of a shield (1/2).
Screenshot
Place the board (Spoiler 1) over the abyss and go forward.
Zoom in on the lion at the bottom of the left column and place the ruby (Spoiler 1) into the empty eye spot and take the knife out of its mouth.
Go back and down to the water.
Zoom in on the net on the low left side and use the knife to cut the rope.
Grab the golden lily.
Play the search scene to obtain tweezers.
Get the pen by the tambourine on the left and draw along the line on the bell.
Return to the town gate.
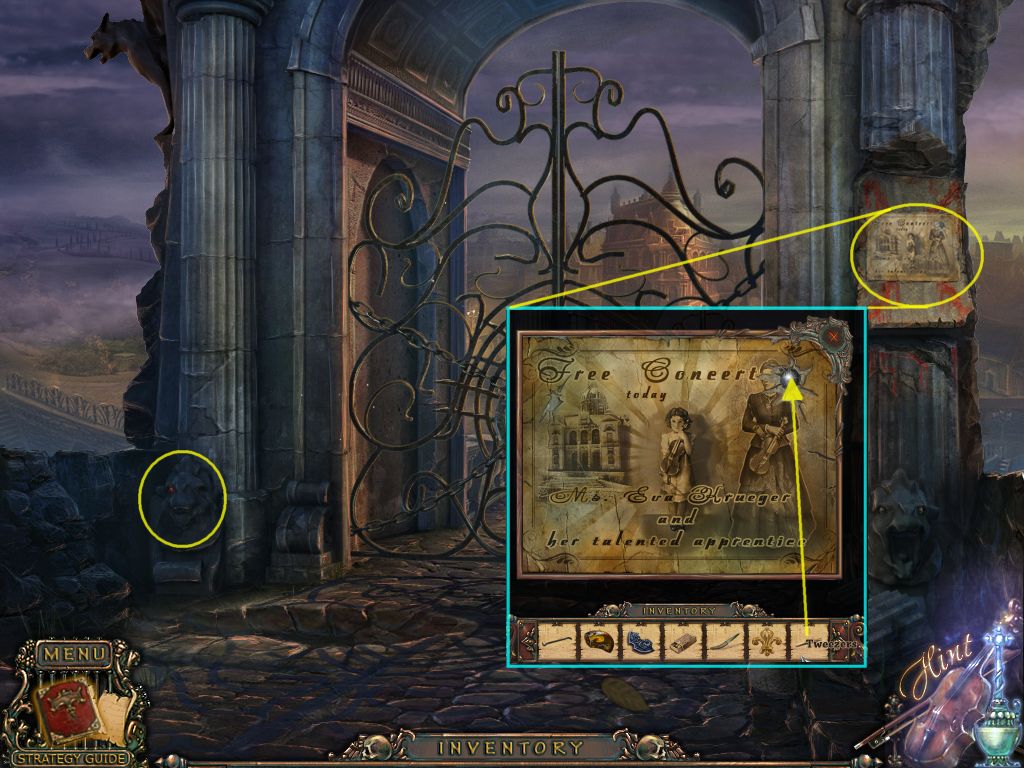
Zoom in on the poster on the right column and use the tweezers to remove the silver bullet.
Screenshot
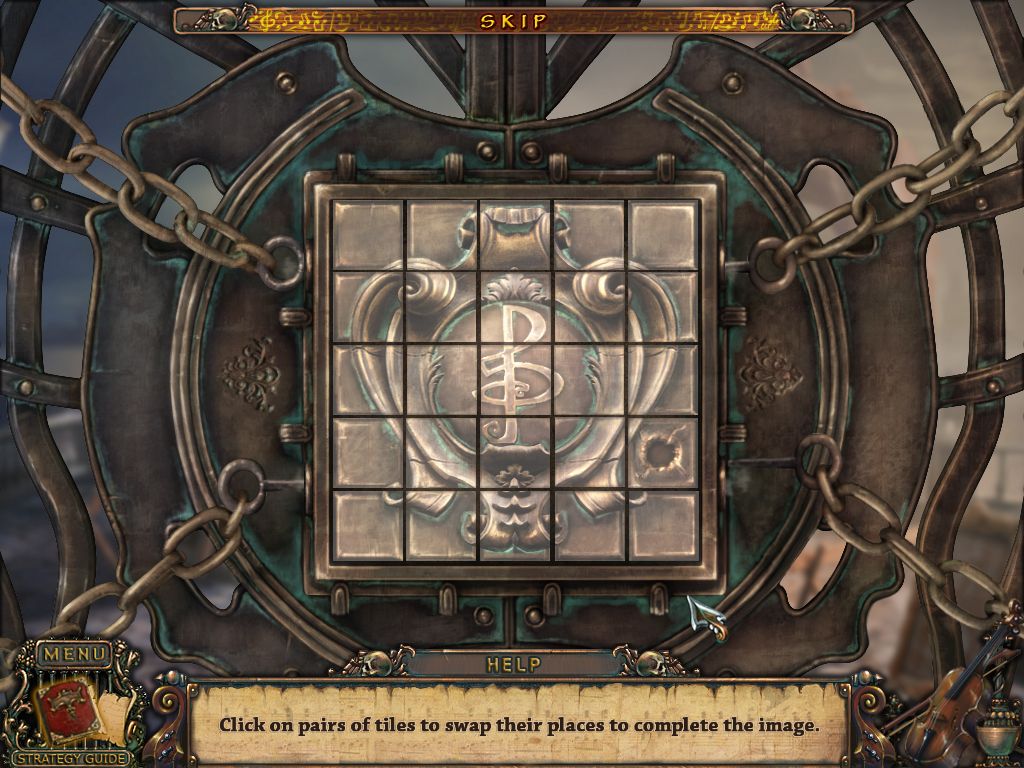
Zoom in on the gate lock and place the lily to activate a mini game.
Click two tiles to swap places. The one in the middle is already on the right place and has a light color. Each correctly placed tile will lock as well.
Screenshot
The gate opens - go forward.
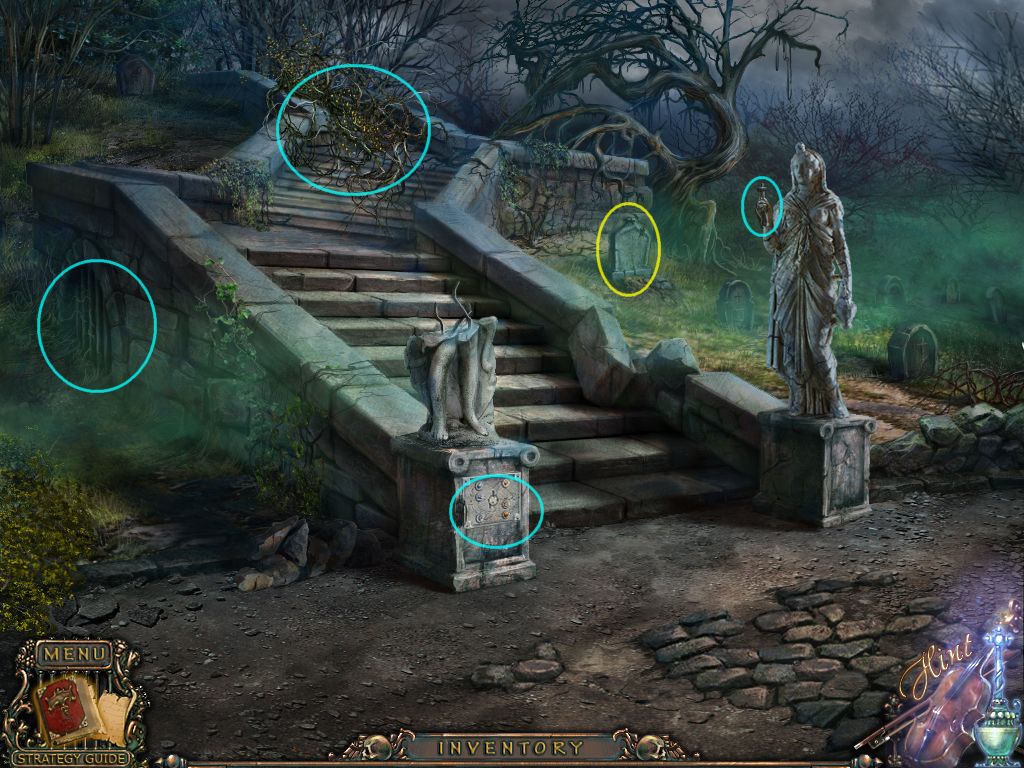
3. Behind Town Gates - left side
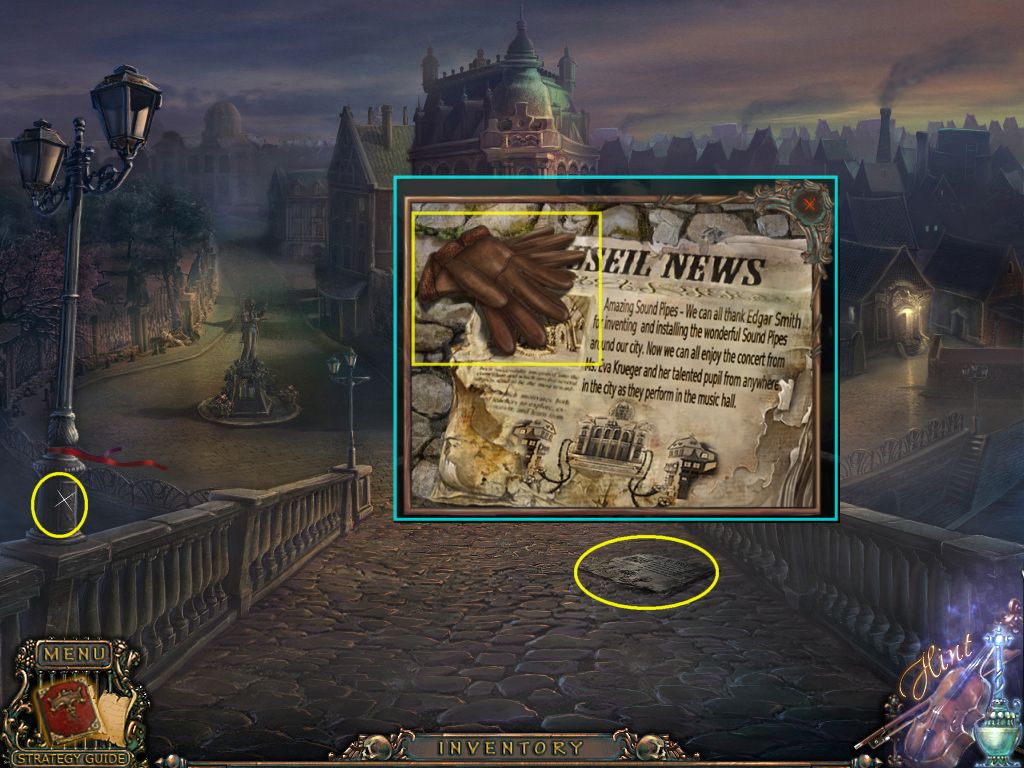
Zoom in on the newspaper, grab the gloves and read the text.
Click the active spot at the bottom of the lantern on the right side.
Screenshot
Go to the left.
Click the old lady behind the statue to make her go away.
Click the statue to learn that a name plate is missing. Click the flower pot left next to it to learn that some might be buried here.
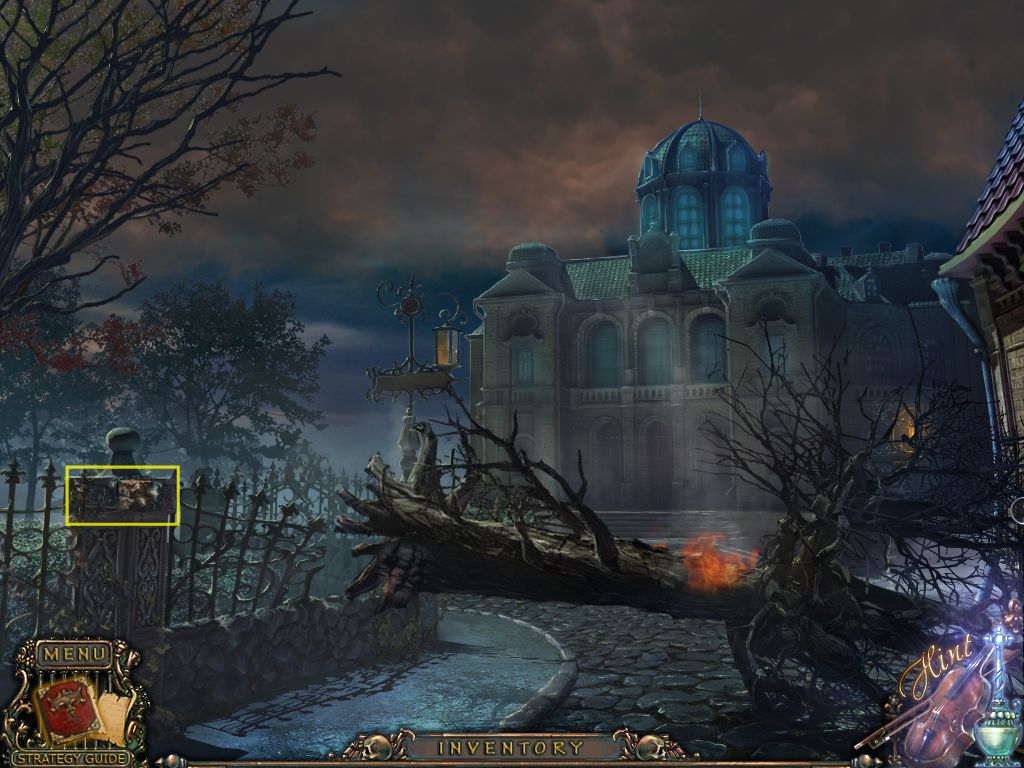
Go forward and click the now burning tree to learn that you need something to extinguish the fire.
Grab the brick on the left side of the fence.
Screenshot
Go one step back and zoom in on the garden entrance on the left.
Play the search scene (the brush is inside the lantern) to obtain the brush.
Zoom in on the coat of arms spot on the fence to learn that two pieces are missing.
The entrance sign is missing two letters. Go back twice and then to the right.
4. Behind Town Gates - right side
Zoom in on the left window next to the door and use the brick (Spoiler 3) to smash it.
Grab the part of the medallion (2/2)
Screenshot
Zoom in on the barrel on the right side.
Place the brush (Spoiler 3) into the glue.
Place both medallion fragments (Spoiler 1 and here) on the barrel.
Use the brush with glue on the left part and put the right part on it.
Take the complete medallion.
Screenshot
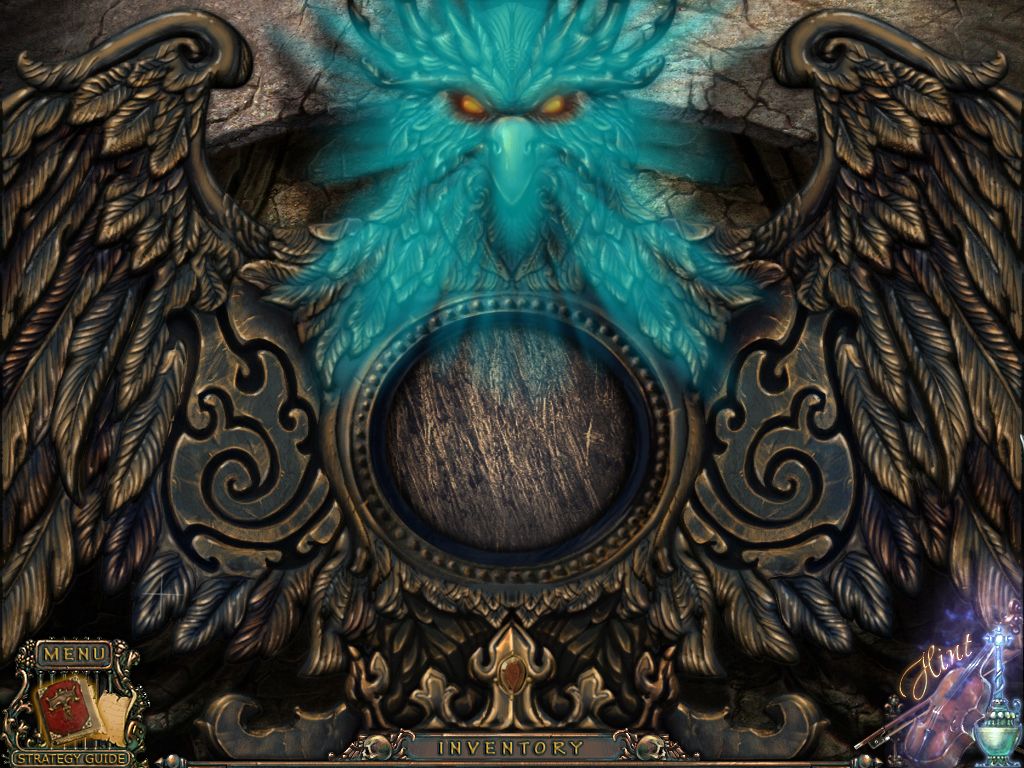
Zoom in on the eagle above the door and place the medallion into the empty spot to activate a mini game.
You will need to replace the feathers. Click a feather to pick it up and place it back, right click to turn it around.
Screenshot
When you are done, the door will open.
5. Blacksmith
Play the search scene to obtain a wrench.
Light the candle with the match on the left to get a burning candle
Click the crank to find the other red-texted objects.
Click the knight's helmet left next to the door and take the emerald.
Take the poker on the stairs to the right, next to the knight.
Click the box on the right table to learn that something is missing.
Screenshot
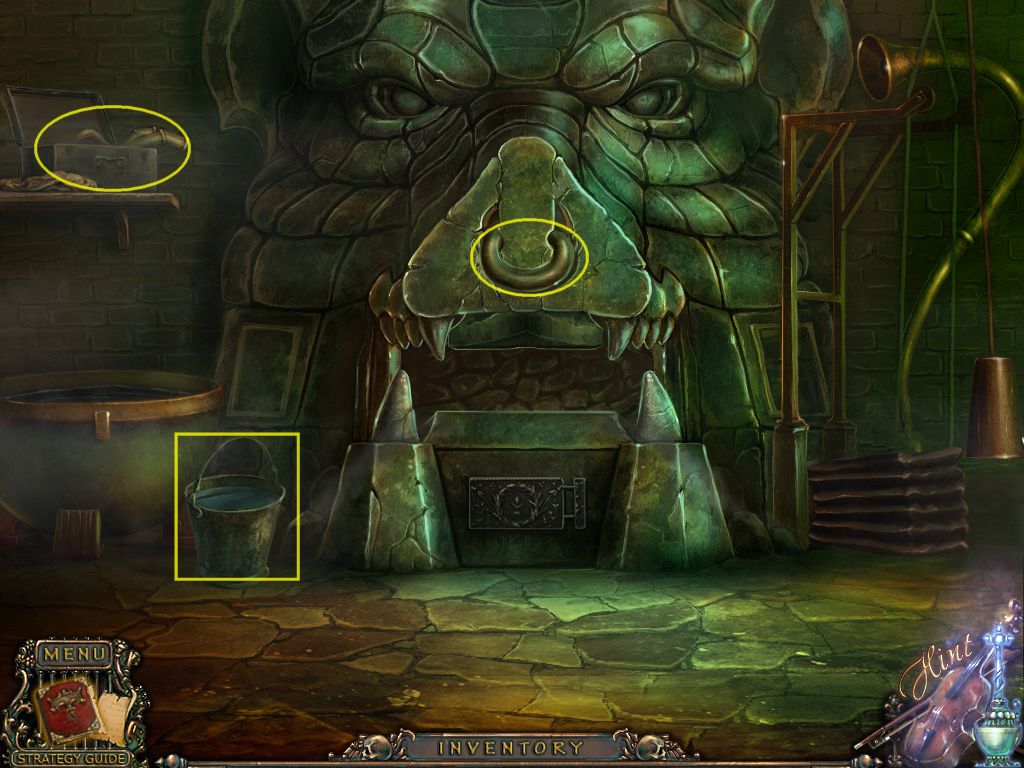
Zoom in on the forge on the right side.
Click the box on the shelf and take the lampshade.
Grab the water bucket.
Screenshot
Click the nose ring and mold comes out.
Use the glove (Spoiler 3) to open the forge and the poker to get a part of the nameplate (1/4)out of the fire.
Click again to learn that you will need more coal to forge.
Exit the forge and go back 1x.
6. Clean the way to the Theater
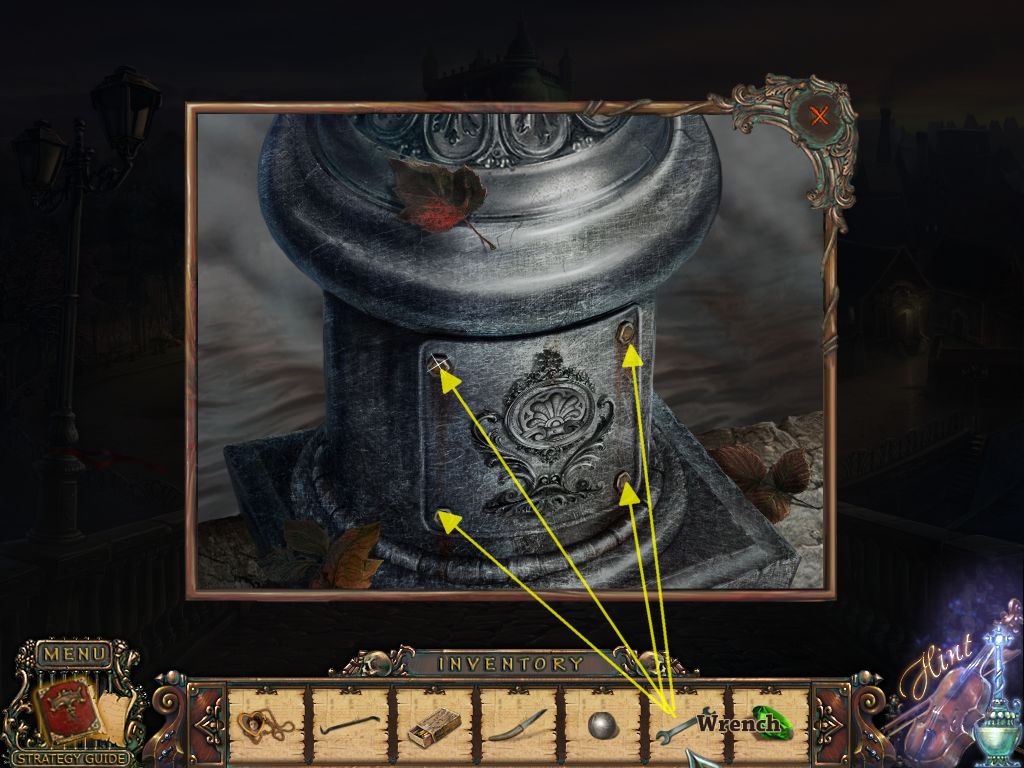
Click the lamp post on the right side of the place right behind the town gate.
Use the wrench (Spoiler 5) to remove the screws (you will need to click each screw).
Screenshot
Take the letter K from the compartment.
Go left twice to play the search scene at the garden entrance and obtain a saw.
The note can be found behind the fan.
Go back once and then forward.
Use the bucket with water (Spoiler 5) to extinguish the burning tree. The empty bucket goes into your inventory.
Use the saw to get a rid of the tree.
Go forward twice
7. Theater
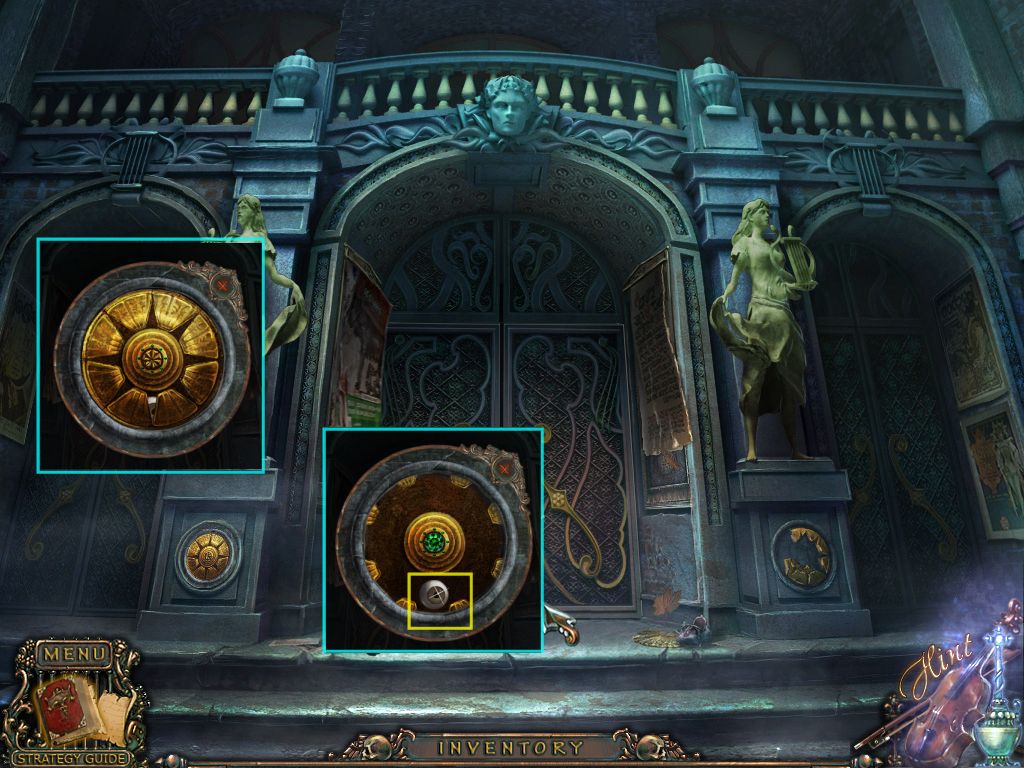
When you are standing in front of the theater door, zoom in on the bottom column decoration on the left side and place the emerald (Spoiler 5).
An eye (1/2) appears; take it.
Screenshot
Click the door to learn that some parts are missing.
Go back 1x and then right.
Click the old lady to make her disappear.
Play the search scene to obtain a shovel. The coin can be found in the purse on the right side.
Click the announcement board on the right and read the text.
A handle is missing on the right side.
Click the leaf heap in the back to learn that you need something to remove the heaps.
Return to the place behind the town gates and go right to the Blacksmith.
8. Enter the Theater
You are in front of the Blacksmith.
Zoom in on the coal heap and place the empty bucket (Spoiler 6) and the shovel (Spoiler 7) next to it.
Use the shovel to fill the bucket with coal and take it into your inventory.
Enter the Blacksmith and zoom in on the forge.
Open the oven and fill it with the coal.
Place the silver bullet (Spoiler 2) into the the mold.
A silver note will go into your inventory.
Exit the house and go back to the Theater (1x back, 3x forward).
Zoom in on the door to activate a mini game.
Place the silver note from your inventory. Your goal is to bring the notes into the right position.
Clicking the lever on the right side will highlight one note after the other.
A green light means that the note is at the right place.
A yellow light means that the note needs to be one higher or one lower.
A red light means that the position is not right at all.
Clicking the notes will move them one place up or down. When you are at the bottom of the line, the note will go back the way with the next click.
Screenshot
The door opens.
9. Theater, first visit
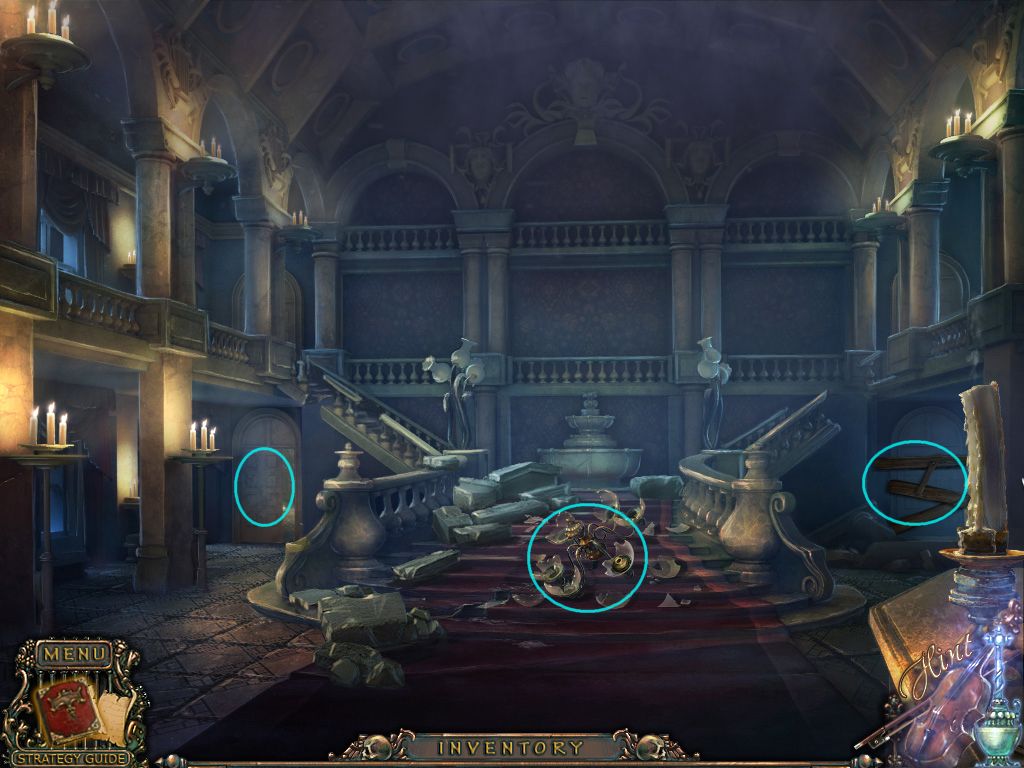
Enter the Theater.
Click the broken lamp on the floor to learn that you need a tool to remove a needed part from it.
Go through the open door on the left.
Screenshot
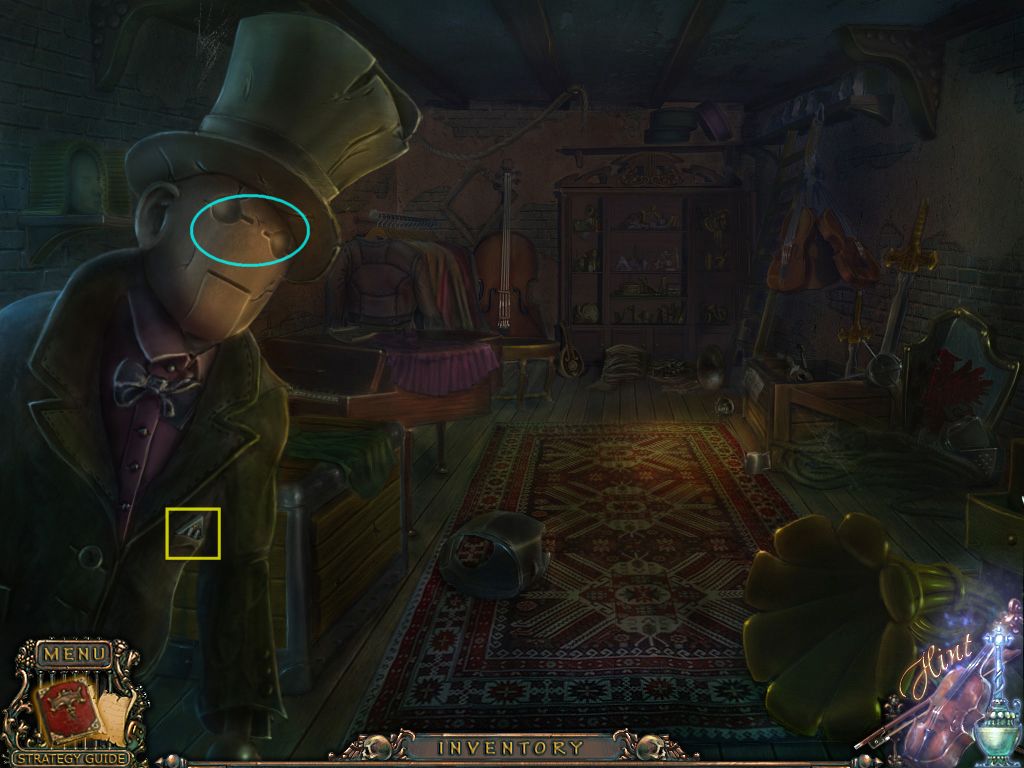
Click the wooden man on the right to learn that he is missing two eyes.
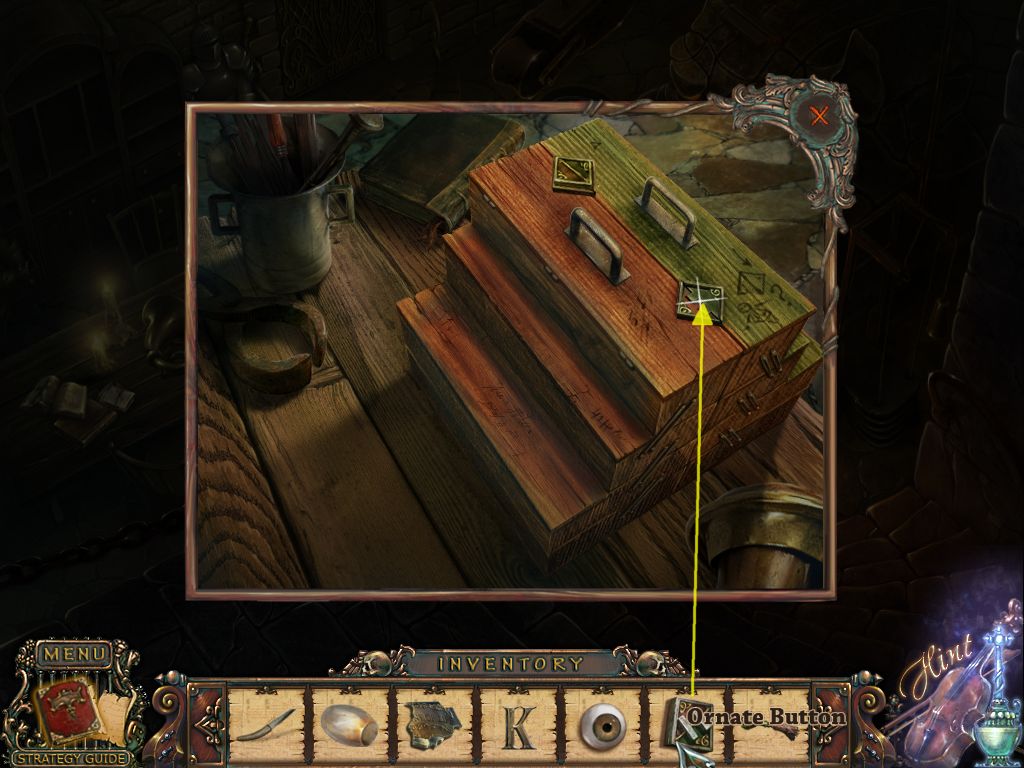
Get the decorated button out of the jacket pocket.
Screenshot
Use the crowbar (Spoiler 1) to remove the boards from the door on the right.
You will need to remove the boards one by one; the topmost board is always the next one to remove.
Click the music stand inside the room to learn that a part of the music sheet is missing.
10. Repairing the Oil Lamp
Leave the Theater and return to the Blacksmith.
Play the search scene to obtain a wick.
Click the handle of the box to find red-texted objects.
Zoom in on the box on the table to the right.
Place the decorated button (Spoiler 9) and the box will open.
Grab the screwdriver.
Screenshot
Return to the Theater.
Zoom in on the broken lamp and use the screwdriver to remove all screws.
The oil tank goes into your inventory.
Screenshot
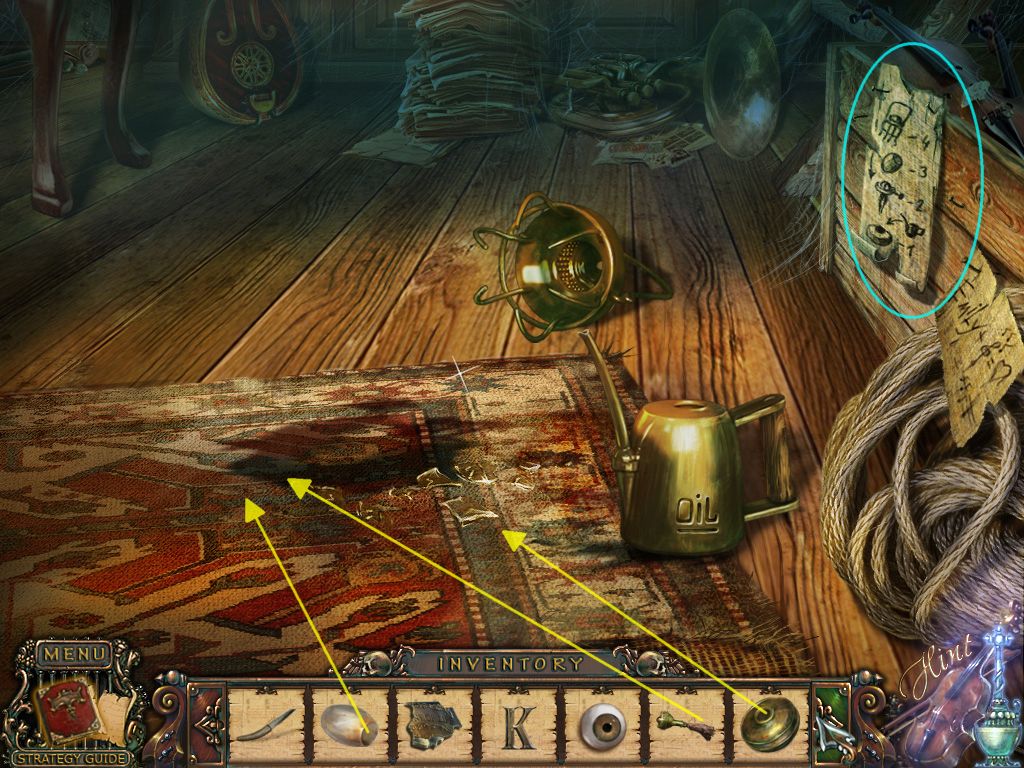
Go through the left door and click the active spot on the far right.
Place the lamp shade (Spoiler 5), the wick and oil tank on the ground.
Use the scheme on the right to learn how to repair the lamp.
Fill the oil tank with oil.
Put the wick into the tank.
Place the lamp shade.
Repair the top with the handle.
Use the matches (Spoiler 2) to light the lamp.
Screenshot
You now can see a search scene. Find all objects to obtain a broom.
To get the red swallow, use the the red brush on the swallow on the bass.
11. Playing the Flute
Leave the Theater and go right.
Play the search scene to obtain a rose (to be found inside the bread).
Zoom in on the leaf heap and use the broom (Spoiler 8) to wipe them away.
Get the handle. You will have to come back for the locks later.
Go one step back and zoom in on the board on the right side.
Place the handle and use the arrows to open the board cover.
An eye (2/2) appears; take it.
Go back to the Theater and through the left door.
Place both eyes (Spoiler 7 and here) into the empty eye spots of the wooden figure.
His mouth opens - take the part of the music sheet.
Play the now active search scene to obtain a trowel.
To find the unicorn, use the feather at the drum on the right side.
Go back four times and zoom in on the flower pot to the left, next to the huge statue on the main street.
Use the trowel to obtain the letter M.
Exit the close up and go to the left.
Zoom in on the sign and place the missing letters (Spoiler 6 and here).
Grab the flute.
Return to the Theater and enter the room on the right side.
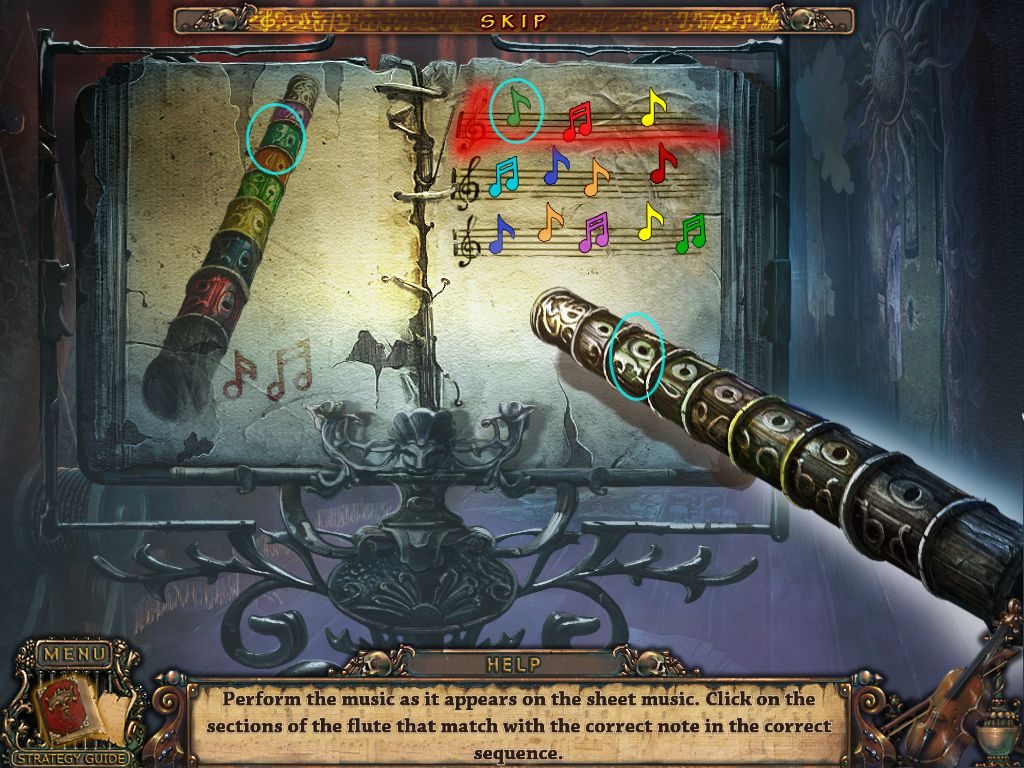
Place the music sheet and then flute on the music stand to activate a mini game. Your goal is to repeat the notes on the sheet.
The active note will move a little and the right note will have the same color on the flute as on the sheet.
The drawing on the left will show you the correct hole to click.
A correctly played note will fly away.
Screenshot
Now the curtain on the left will raise.
12. Opening the 5-lock-hatch
Click the audience and get the key ring out of the pocket in the close up.
Exit the close up. Now a search scene is active at the piano.
Find all objects to obtain a part of a name plate (2/4).
The pocket watch can be found inside the book, the marbles in the pouch on the lower left.
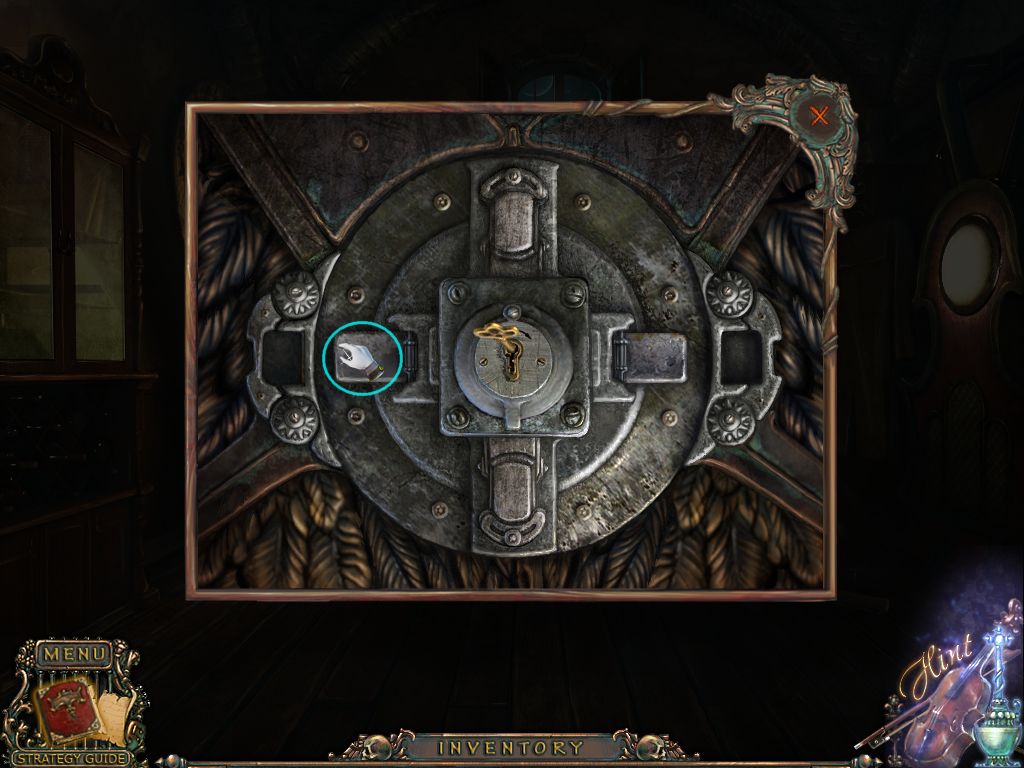
Exit the Theater and go right.
Zoom in on the hatch and place the keys onto the hatch.
You have seven keys for five locks so you will have to try out which keys goes where.
A key will only fit into the right lock.
Open the door and go down.
Click the web on the left to learn that you need some to get rid of it.
Click the barrel to learn that something is missing.
Click the bottle on the shelf on the right side to learn that you need a corkscrew.
One of the floor boards is standing a bit higher.
Use the crowbar (Spoiler 1) with it and you will find a shield fragment (2/2).
Screenshot
Go back to the statue and then left.
13. In the Park
Zoom in on the plate at the park entrance and place the 2 shield fragments (Spoiler 2 and 12).
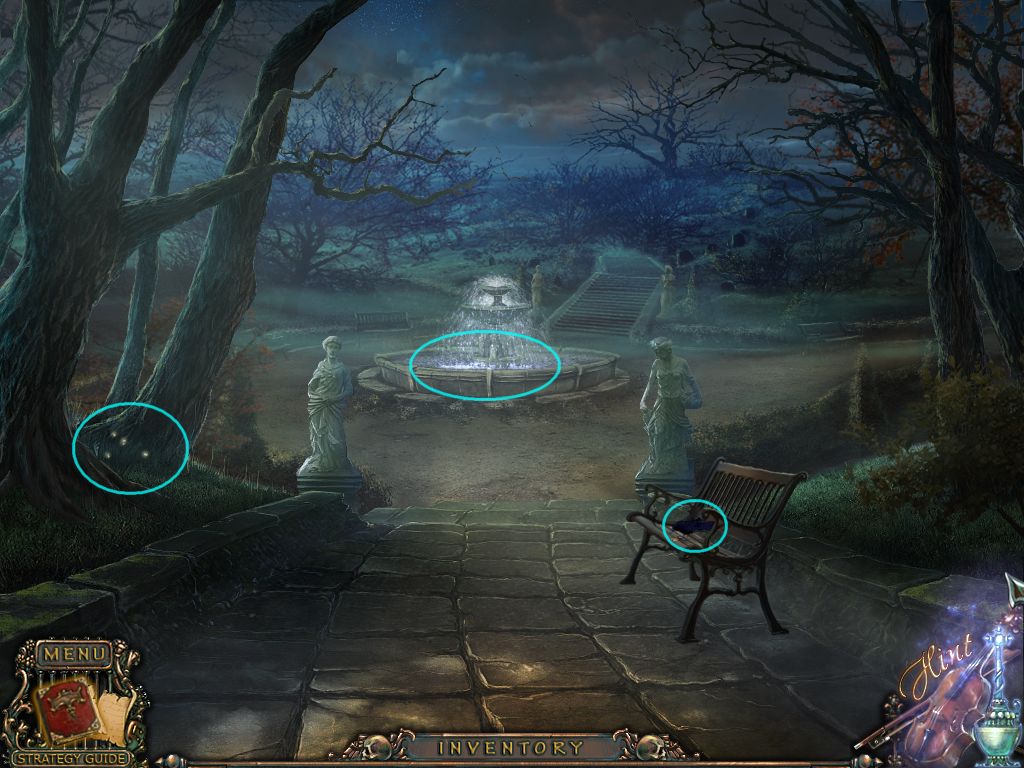
Zoom in on the lower parts of the trees on the left to learn that you need a valve.
The crow on the bench needs something to eat.
Click the fountain to learn that you have to turn off the water first.
Screenshot
Go to the right and play the search scene to obtain a saw.
Click the bird house to find the bird.
On the left you can see a boat, but you still will need to find tools. The device in the middle also is missing parts.
For the telescope you will need a coin.
Go 1x back an then forward to the grave yard.
Use the saw to cut through the grid and grab the brush.
The left statue is missing a part at the bottom, the right statue is supposed to have a torch.
Get the violin from the gravestones in the far back.
You can't go forward as bushes are blocking the path.
Screenshot
Exit the Park, go forward and to the right, then down into the vault.
14. Turn off the water in the fountain
Go right when you are in front of the theater and down into the vault.
Use the brush (Spoiler 13) to remove the webs on the right side and grab the sun.
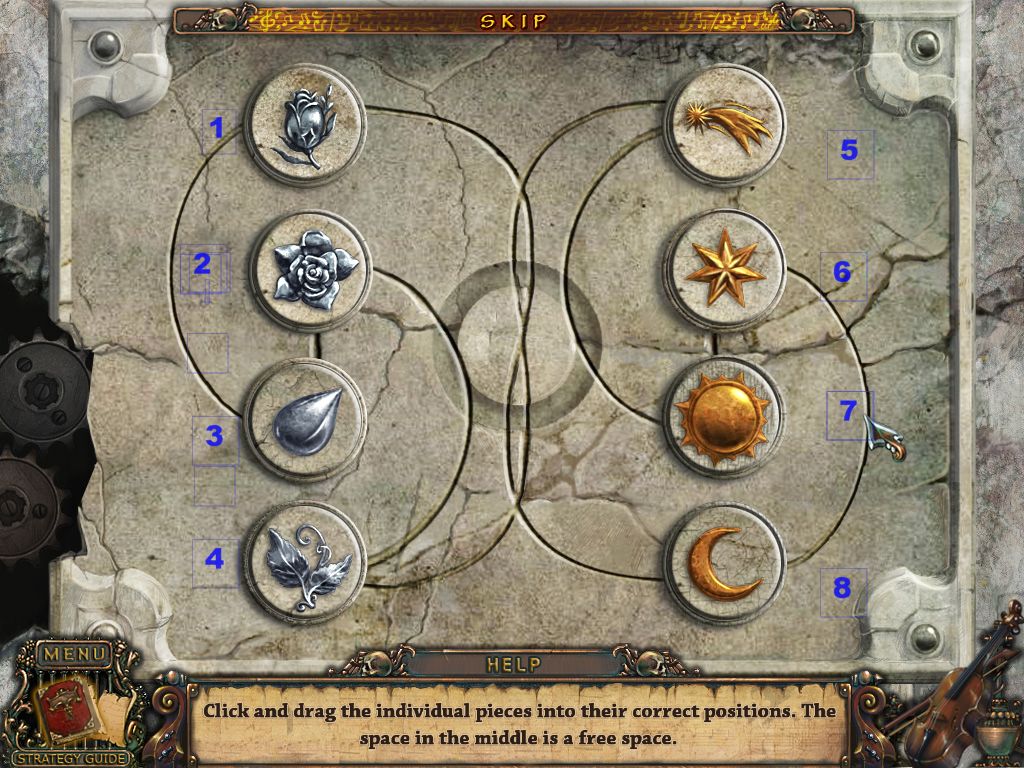
Return to the park and go to the graveyard.
Zoom in on the bottom of the left statue and place the rose (Spoiler 11) and the sun into the empty slots to activate a mini game. Your goal is to move the buttons to their correct positions according to the picture underneath.
Buttons can only move along the lines into a free spot.
You want to use the empty spot in the middle - it will be free at the end.
There are several solutions possible. Please look at the screenshot to follow our solution:
Left side - 1 to the middle - 3 to the top - 2 down - 4 on the second spot from top and now the one in the middle down.
Right side - 5 to the middle - 7 to the top, 6 down, - 4 on the second spot from top, middle one down, 5 in the middle, 7 to the top, 6 down, 8 on the second spot from the top, middle down.
Screenshot
Get the valve out of the now-opened compartment.
Go one step back and zoom in on the faucet at the bottom of the tree on the left.
Place the valve and click it.
Now that the water is off, a search scene appears. Find all objects to obtain a top of torch.
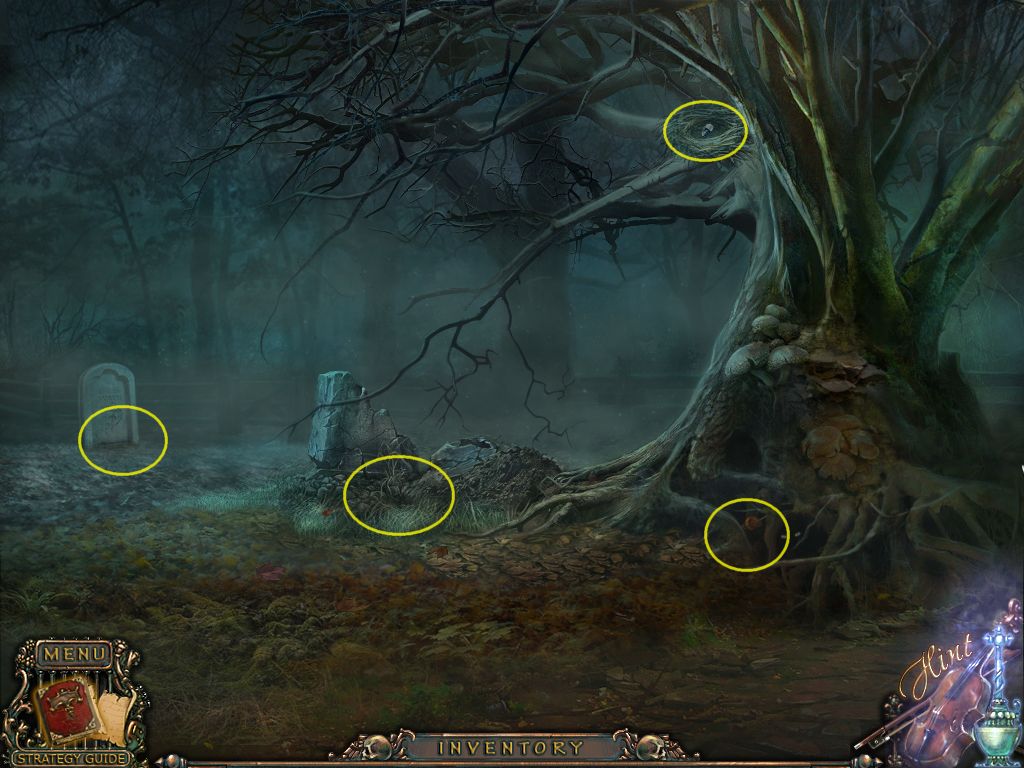
15. Using the Telescope/ unchaining the Boat
Go forward to the statues and give the right statue the top of the torch (Spoiler 14).
Use the matches (Spoiler 2) to light the torch and take the burning torch into your inventory.
Use the torch to burn down the bushes on top of the stairs and go forward.
Grab the locket (2/3) from the grave stone on the far left.
There is a hotspot at the stone ruins in the middle of the scene - take the part of the name plate (3/4).
For the chest you will need a skull.
Zoom in on the bird's nest on the tree to obtain a skull.
At the roots of the tree low right you can find a cookie.
Screenshot
Use the skull to open the chest and get the piano.
Go back to the bench.
If you haven't done yet: click the coin on the bench guarded by the crow, to learn that the crow wants something to eat.
Give the cookie to the crow and take the coin.
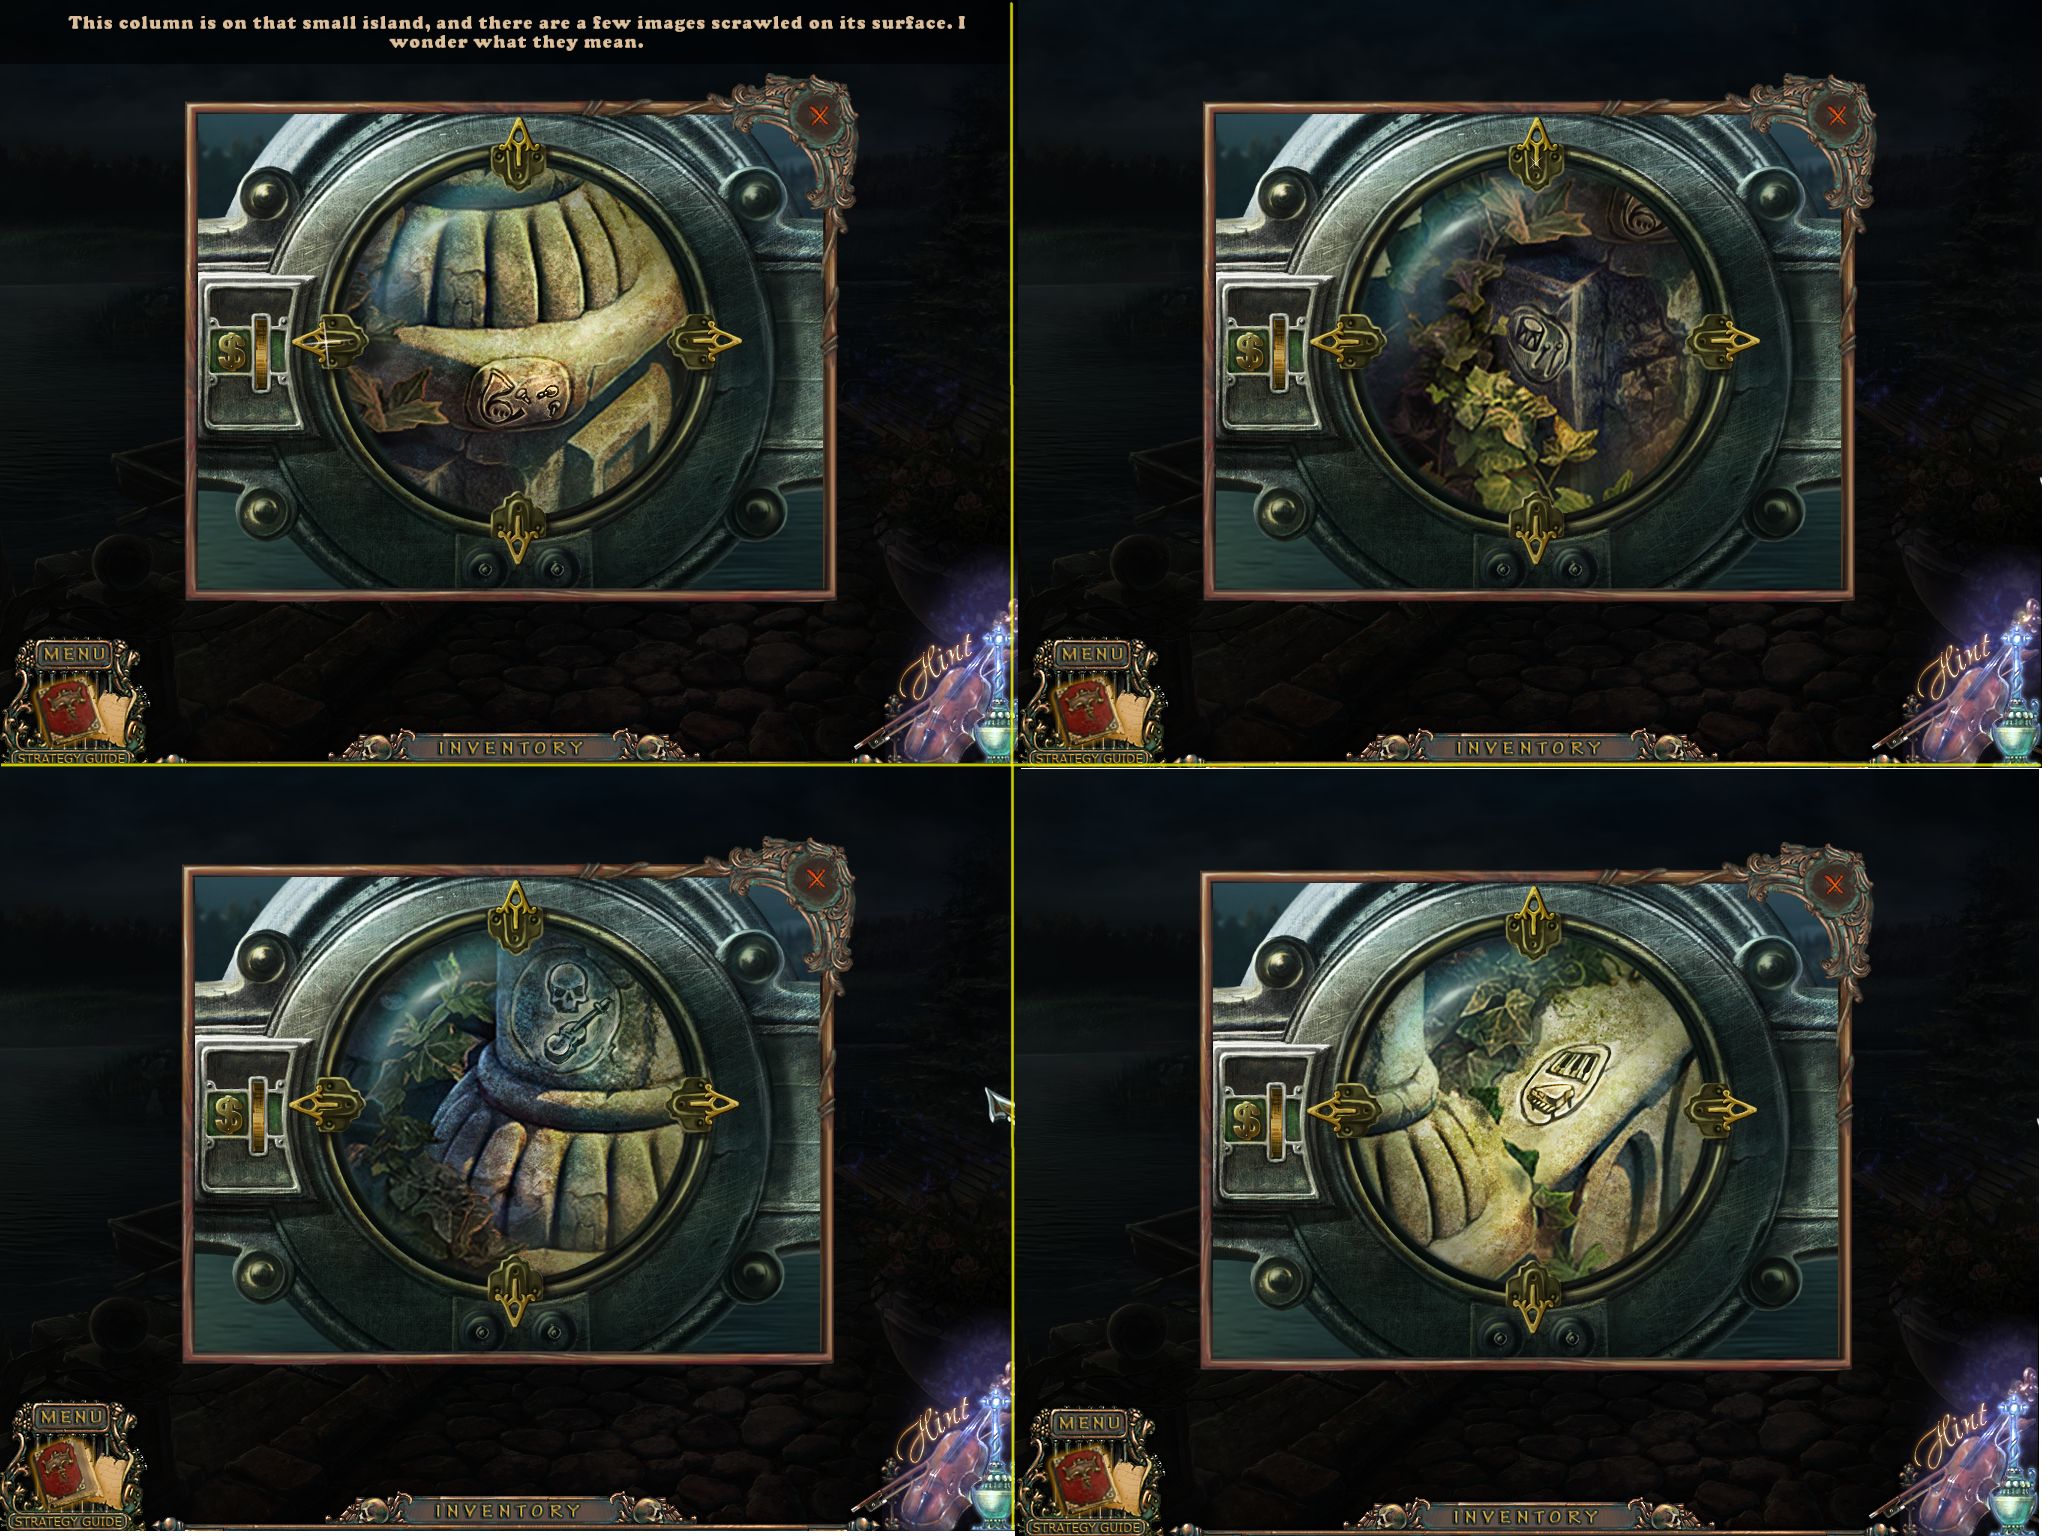
Go to the right and zoom in on the telescope.
Put the coin into the coin slot.
Use the arrows to move the picture and look at the symbols.
All four symbols will be copied into your journal.
Screenshot
The bench now contains a search scene.
Use the knife to engrave the heart in front of the bench.
A trumpet will go into your inventory.
Zoom in on the boat chain and place the violin (Spoiler 13), piano and trumpet (this Spoiler).
Now place the symbols as shown in the telescope (and your journal). The chain opens.
Click the boat and go forward to the island.
Recognize the dead body, then take the violin bow and the mask.
Learn that there is something hidden underneath the poison ivy.
Leave the island.
16. The Catacomb (through the vault)
Leave the Park, go forward, then right and enter the vault.
Zoom in on the barrel and place the mask (Spoiler 15) to activate a mini game.
The 7 symbols have to be brought into the right time line. Clicking two symbols will make them swap places.
The correct order is:
Note - music sheet - music stand - violin - musician - theater - bouquet.
Screenshot
The barrel will open - go forward.
Learn that you need to turn off the steam before you can go to the right.
Open the door in the middle to find out that you can't read the message well.
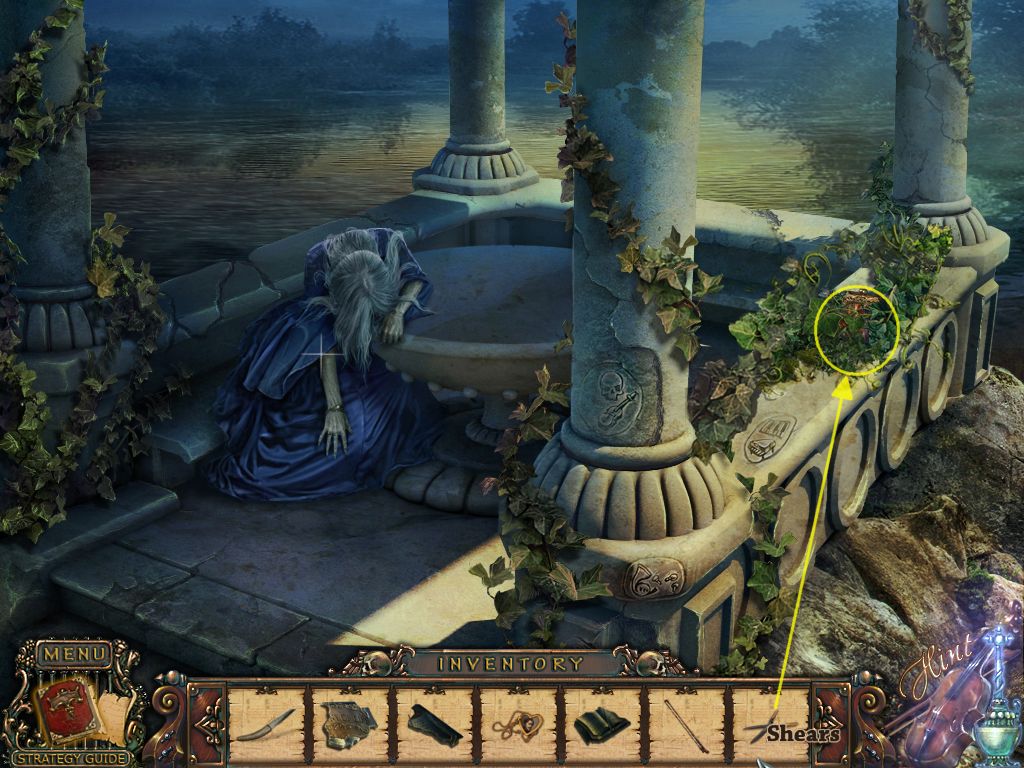
Go to the left and play the search scene to obtain the garden shears (which can be found behind the blanket).
Click the machine on the left to learn that you need a pressure gauge to turn off the steam.
Leave the catacombs for now and go back to the Statue on the main street, left into the Park and use the boat to reach the island.
17. Turning off the steam in the Catacombs
First go to the island and remove the poison ivy on the right side of the gazebo with the garden shears (Spoiler 16) and get the chalk out of the purse.
Screenshot
Leave the island and play the search scene at the fountain to obtain the pressure gauge.
Enter through the barrel and zoom in on the open door (open them if you haven't done it yet).
Use the chalk to make the note visible - click to copy the note into your journal.
Go to the left and play the search scene.
The candle is hidden behind the metal cover on top.
Find all objects to obtain a corkscrew.
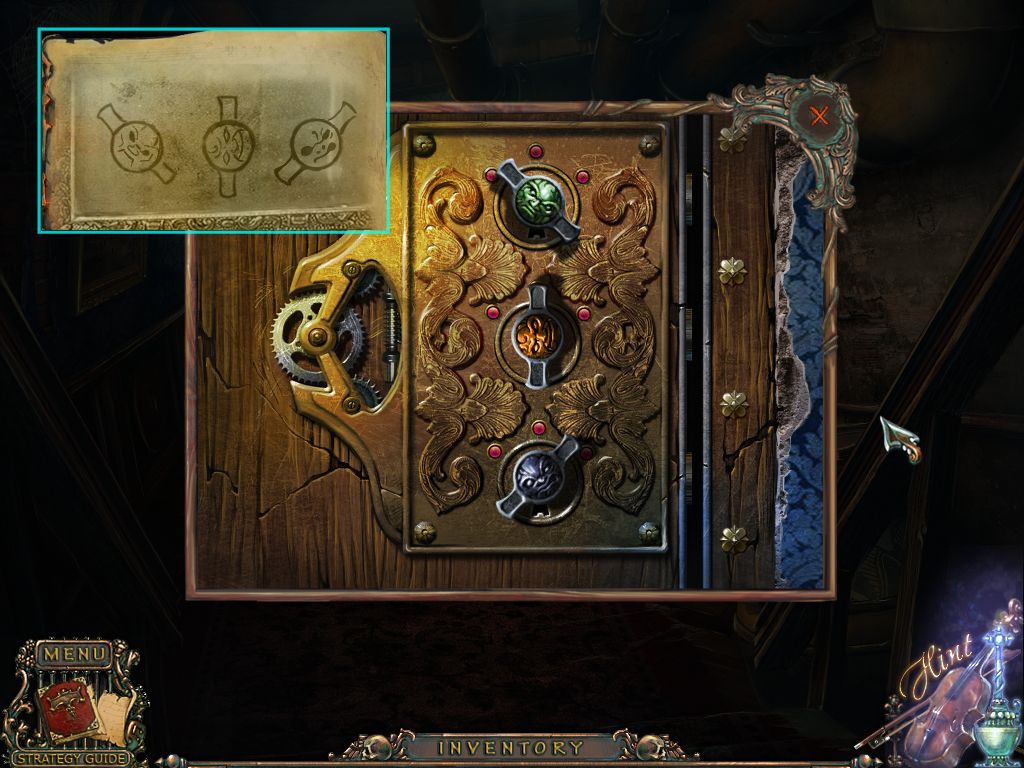
Zoom in on the machine and place the pressure gauge to activate a mini game. Your goal is to bring the blue and red valve into the right position.
The note you just found is your clue.
A circle means 5 (2+3) and a triangle 1 (2+1+13-5=11)
The red valve shows a circle marking, the blue one a triangle.
Adjust the red valve to 5 and the blue one to 1.
Screenshot
You turned off the steam.
18. Way through the catacombs/Music tubes
The steam is gone now. Go back 2x and use the corkscrew (Spoiler 17) with the bottle on the shelf, right side.
Take the bottle and the handle you can now see on the shelf.
Zoom in on the bottle and pour the fluid out.
Take the trumpet parts.
Go forward and to the right.
Click all five musicians to learn what they need.
Give the violin bow (Spoiler 15) to the musician on the left.
One musician needs the handle (Spoiler 17) from your inventory.
The one with the trumpet needs the trumpet parts from your inventory.
Go forwards through the open door.
Recognize the key on the left you cannot reach yet.
Click the bars on the right to learn that you need a key.
Screenshot
Go forwards.
19. Back part of the Town
Play the search scene on the left to obtain a red glass shard.
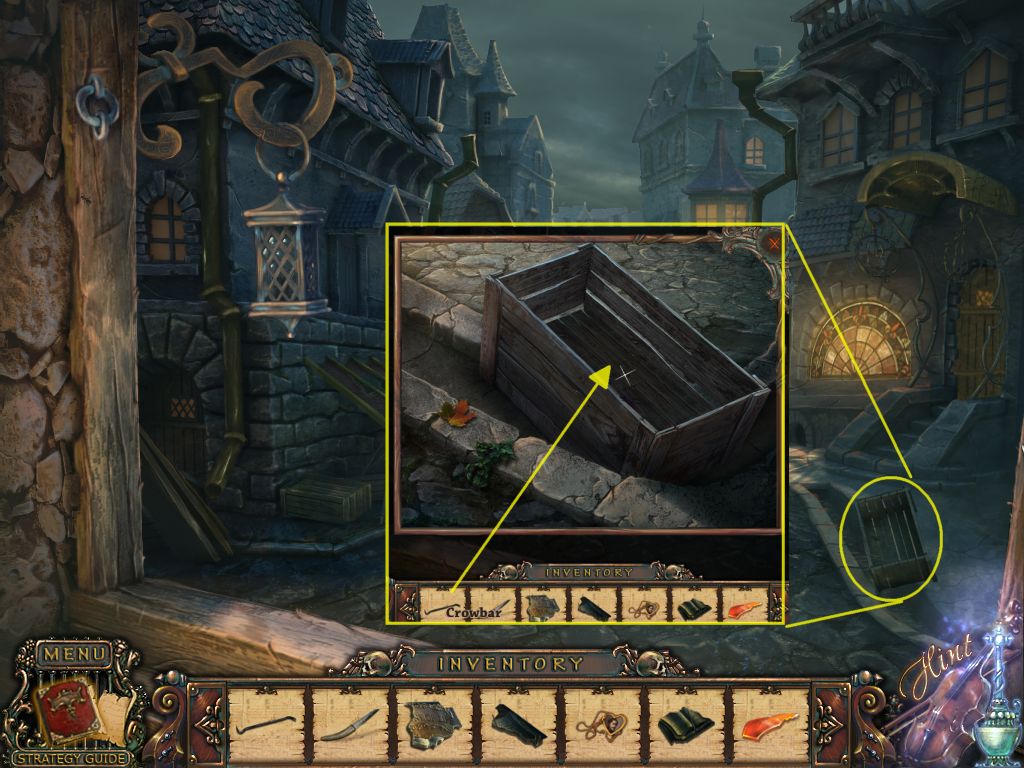
You will find it by clicking the top crate on the left.
Use the crowbar (Spoiler 1) to open the crate on the right side and take boards and a part of a door knocker (1/2).
Screenshot
The door on the right needs a door knocker.
Go forward 2x.
Click the ladder on the left to learn that it needs to be repaired.
The plate left next to the door is missing a note.
Note that the name of the family is "Smith".
Zoom in on the mailbox, click the cover and take the part of a door knocker (2/2).
Screenshot
Go back 2x and use the door knocker on the door to the right.
Enter the house.
20. Workshop
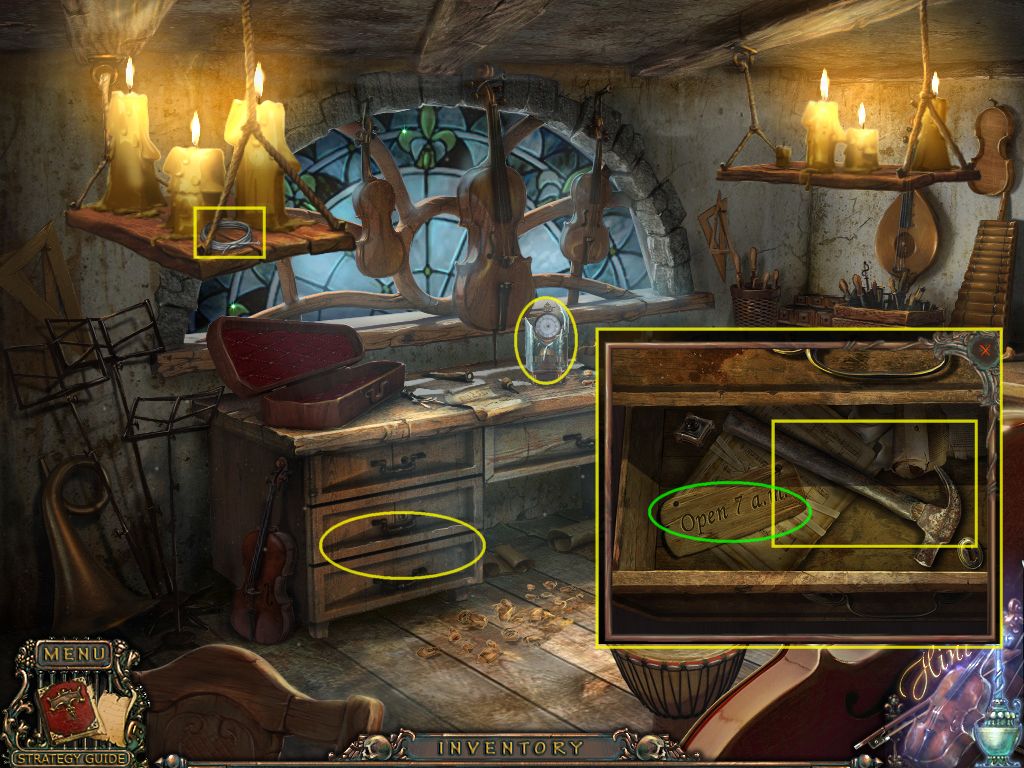
Click the clock on the desk to learn that clock hands are missing.
Open the middle drawer on the desk's left side and take the hammer.
Recognize the time on the little wooden plate: 7:00.
Grab the cello strings from the board top left (where the candles are standing on).
Screenshot
Go 3x back and give the last musician the cello stings.
A pedestal with an urn appears. Use the hammer to break it.
Grab the clock hands and a part of a name plate (4/4).
Go forwards and play the search scene.
Find all objects to obtain a magnet.
The lamp can be lit with the matches.
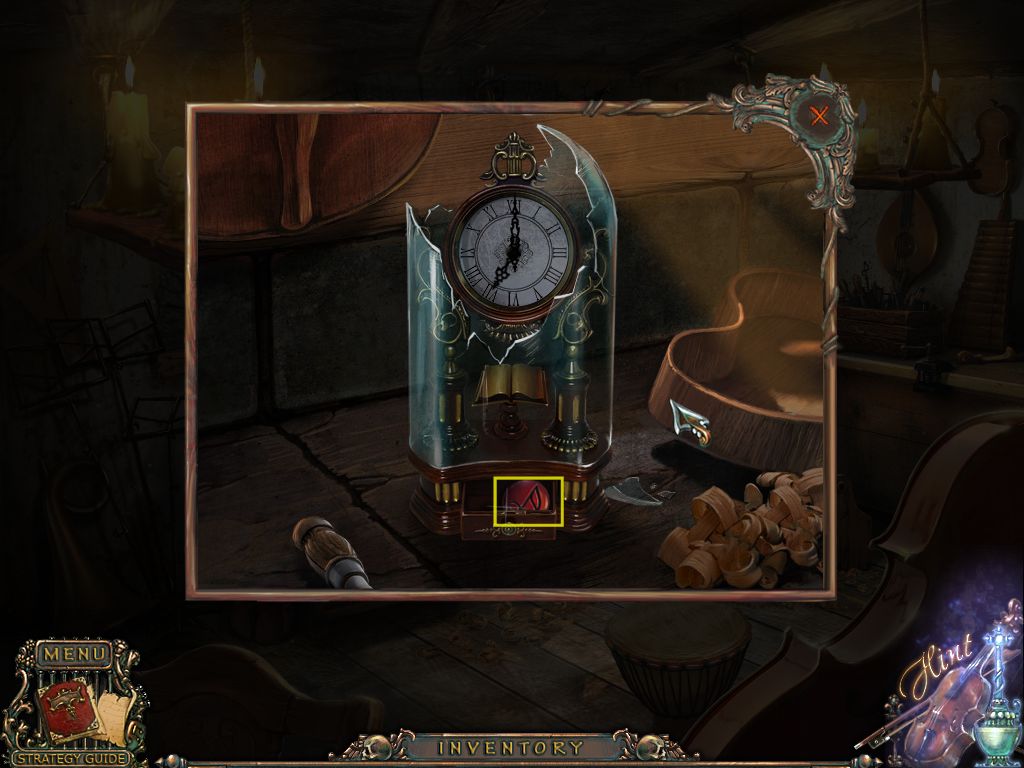
Enter the workshop and place the clock hands at the clock on the desk.
Turn the clock hands so that they show 7:00.
A compartment opens - take the note-button.
Screenshot
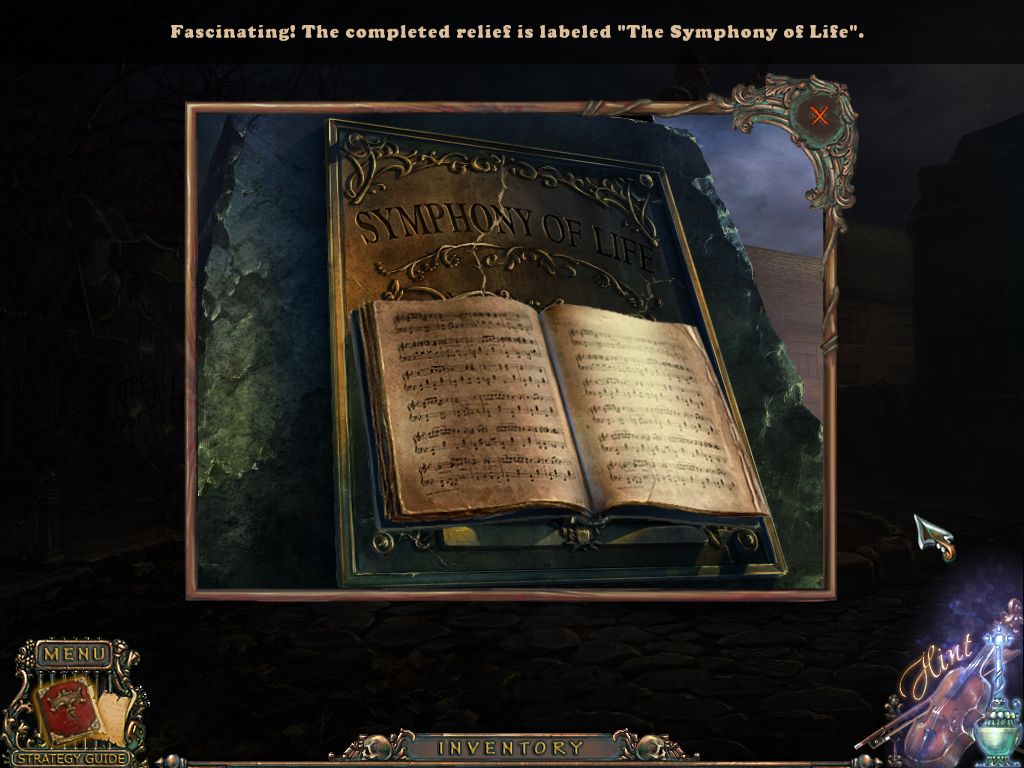
21. Symphony of Life
As you have the all parts of the name plate now, go back to the Statue on the main street.
Zoom in on the statue and use the knife (Spoiler 2) to remove the ivy.
Place the four name plate parts (Spoiler 5, Spoiler 12, Spoiler 15, Spoiler 20).
Take the Symphony of Life.
Screenshot
22. House of the Smith Family
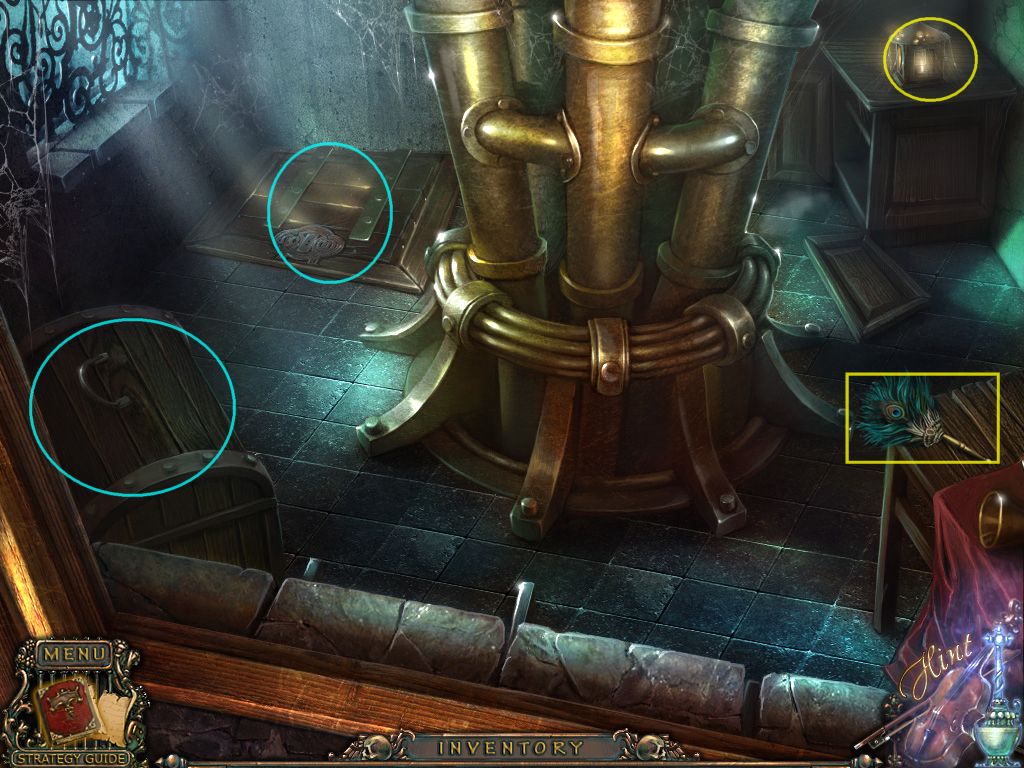
Go back into the catacombs and zoom in on the tubes on the left.
Get the skull key with the help of the magnet (Spoiler 20)
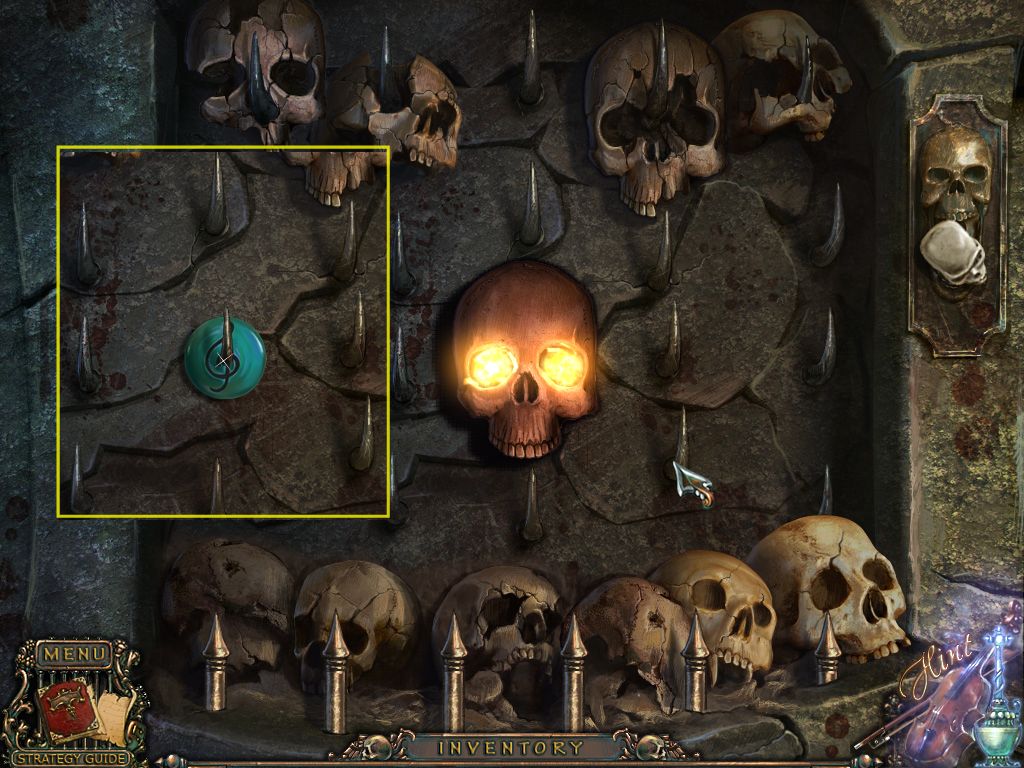
Zoom in on the bars on the right and use the skull key to open the lock and activate a mini game.
Click the similar skulls; they will disappear.
Click the one remaining skull to find a note button.
Screenshot
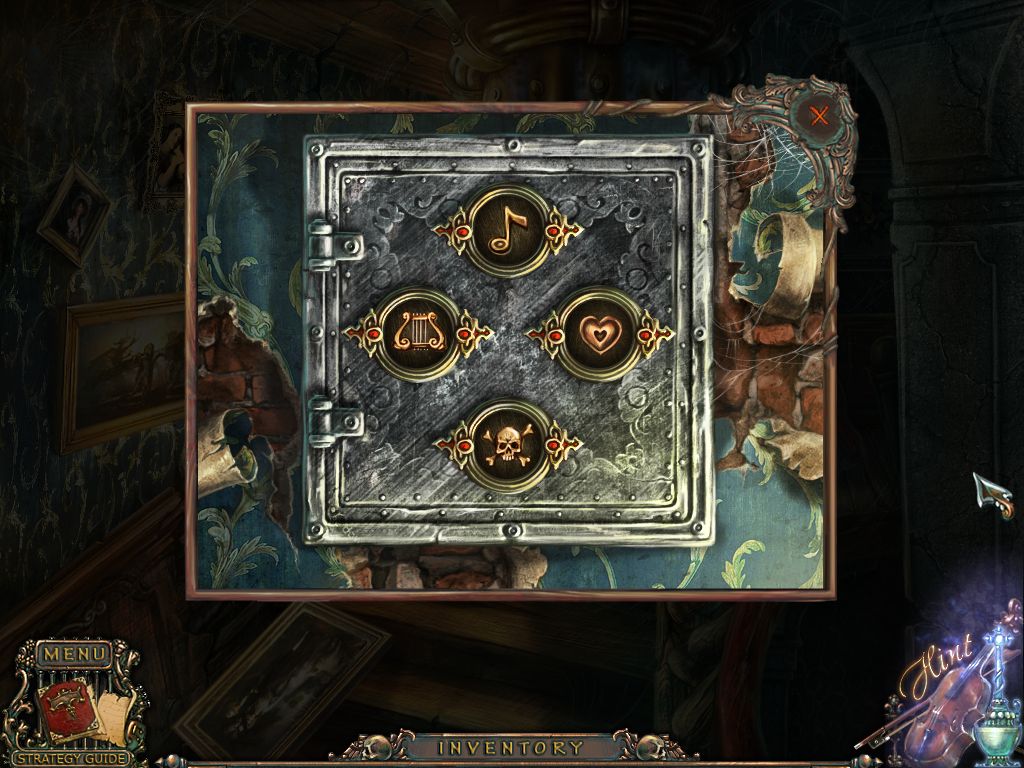
3x forward and zoom in on the plate on the left side of the Smith house.
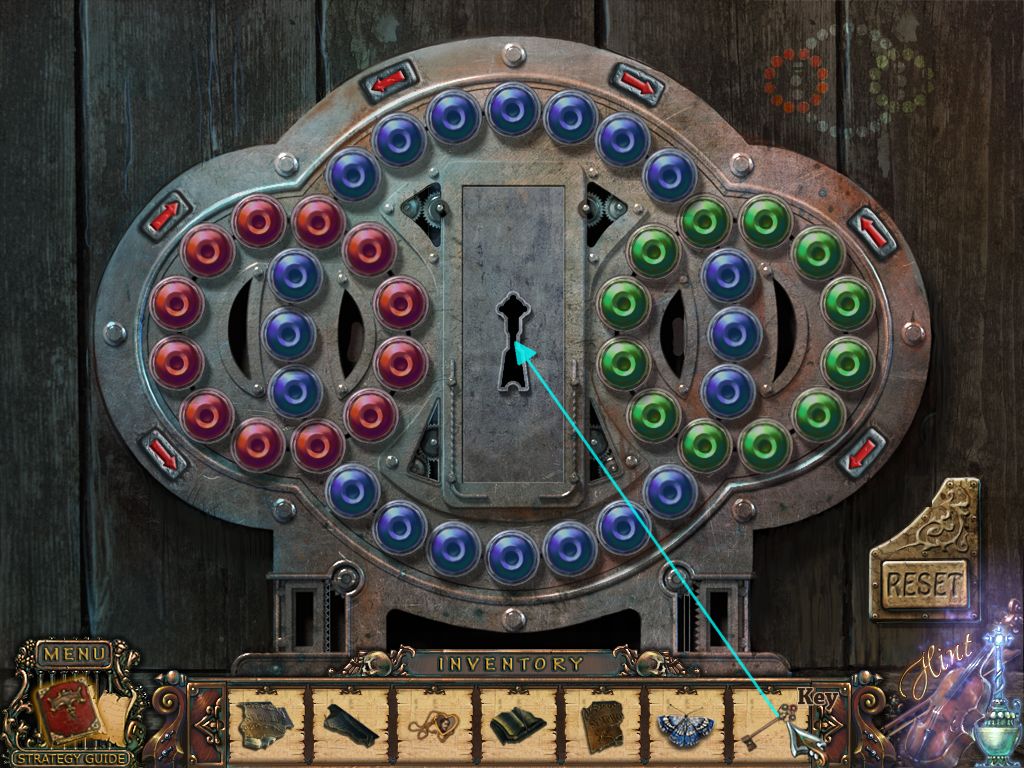
Place the two note-buttons (Spoiler 22 and here) to activate a mini game.
All buttons have to show notes.
Clicking one button will affect other buttons as well.
Please see screenshot for one of the possible solutions.
Screenshot
When you are done the door will open - enter the house.
23. How to reach the Roof
Click the girl to make her go away.
Play the search scene to obtain a ruler.
Click the left statue at the stairs to learn that she should hold something.
Click the door in the back to learn that you need a key.
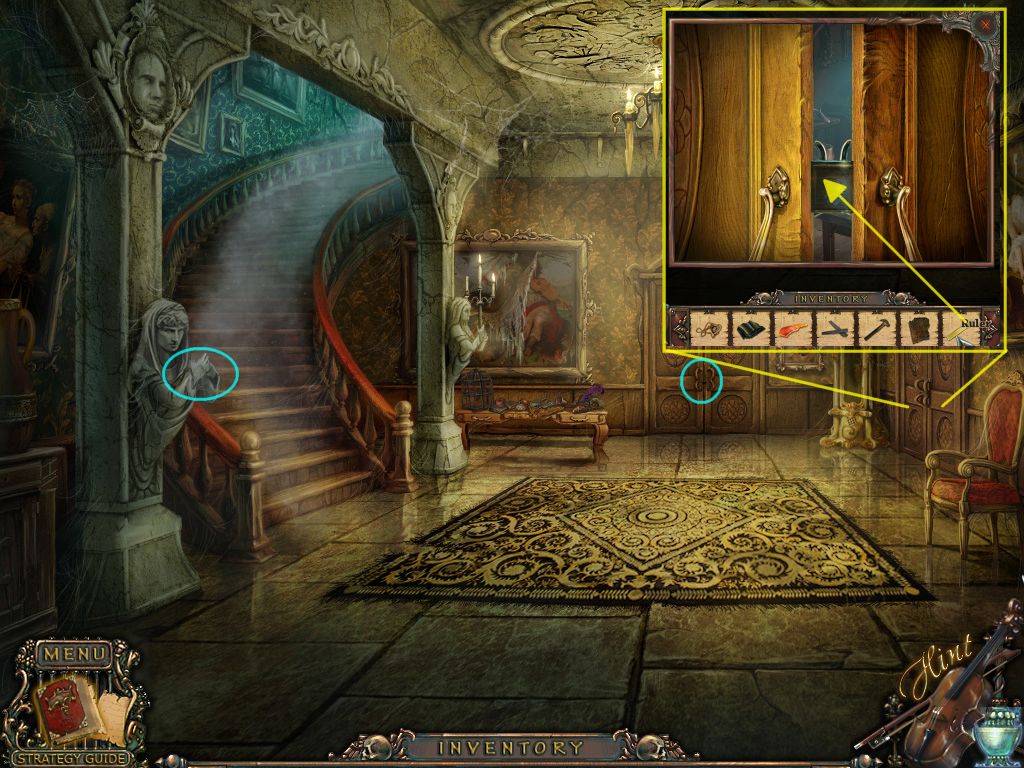
Zoom in on the door to the right and use the ruler to raise the latch.
Enter the kitchen.
Screenshot
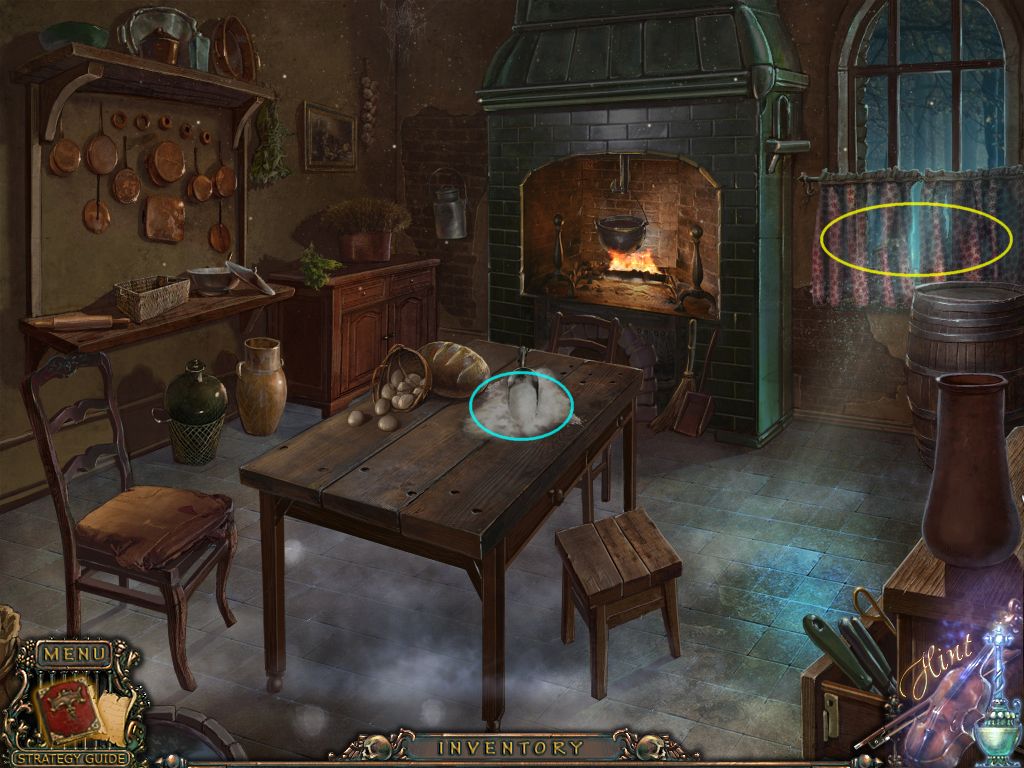
Note the spilled flour on the table.
Click the curtains on the window on the right side to find a candle holder.
Screenshot
Return to the Hall and give the statue the candle holder.
Her mouth will open - grab the nails.
You will need to repair the ladder now, so exit the house.
24. On the Roof
Zoom in on the ladder on the left side of the Smith house and place the board (Spoiler 19), followed by the nails (Spoiler 23). Fix the nails with the hammer (Spoiler 20). You want to click each nail for this.
Climb up to the roof.
Play the search scene to obtain a blue glass shard - use the scissors with the blue pouch on the left to find the shard.
Take the green glass shard out of the rain gutter.
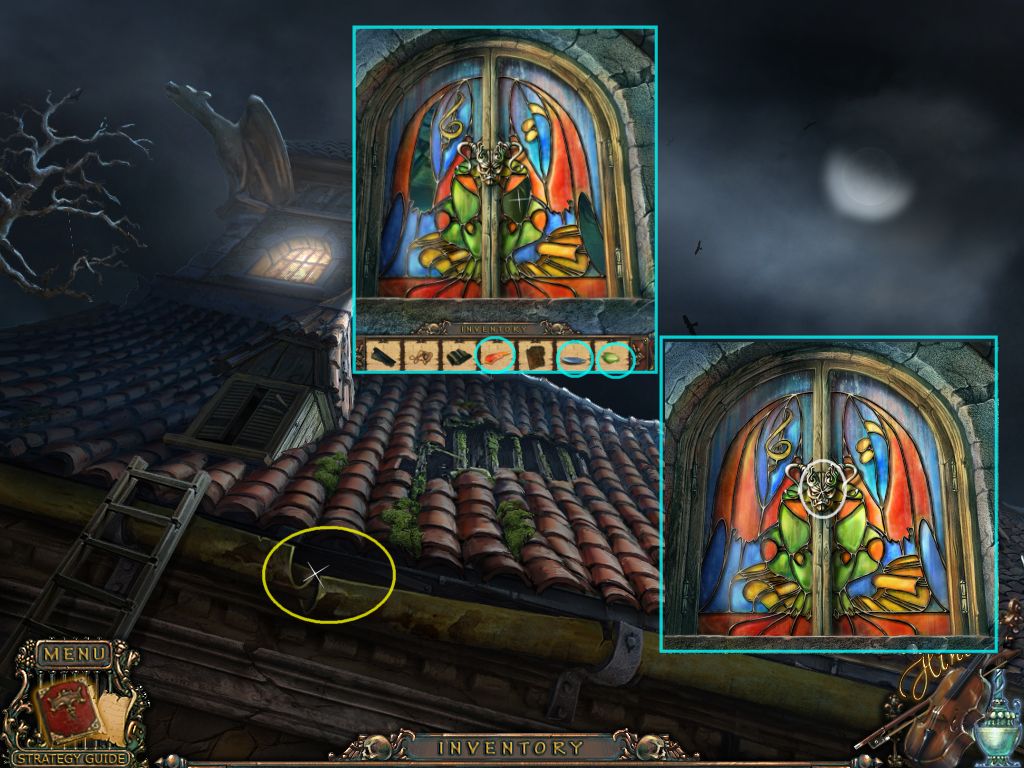
Zoom in on the lighted window on top and place the 3 shards (Spoiler 19 and here).
Click the handle and look into the window.
Screenshot
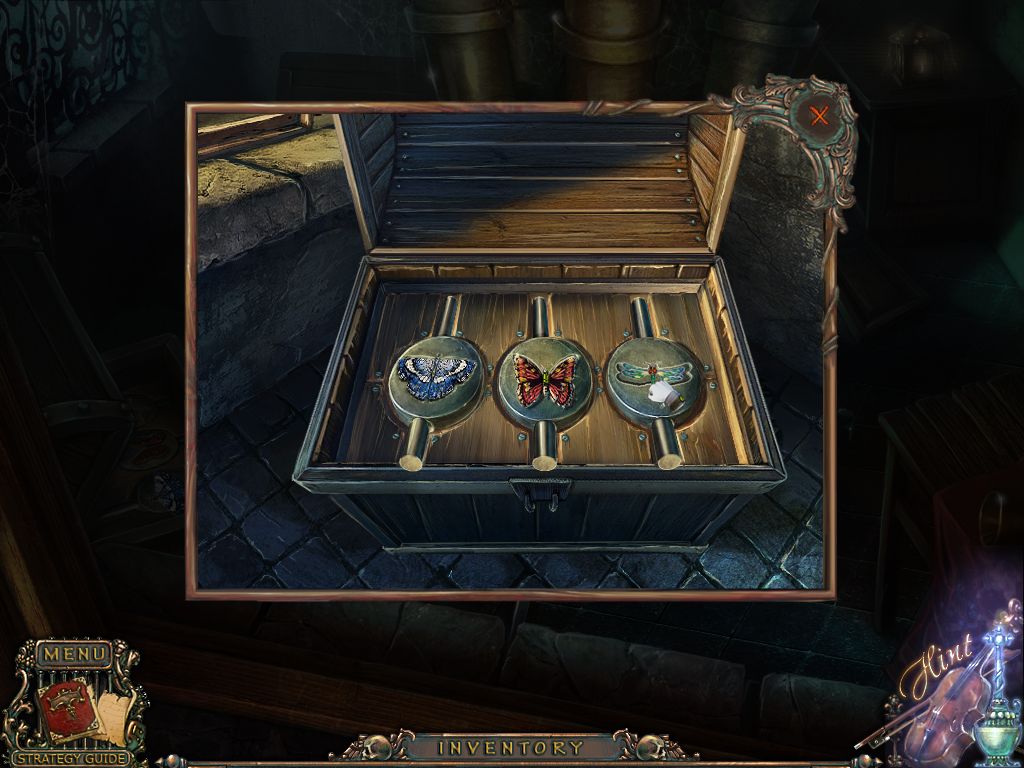
Zoom in on the chest on the left to learn that you missing a moth, a butterfly and a dragon fly.
The trapdoor on the far left is also missing something.
Grab the moth on the far right and take the feather duster from the chair in the low right corner.
Screenshot
Go back into the house.
25. Smith house - inside
Enter the kitchen and use the feather duster (Spoiler 24) to remove the flour on the table.
Three symbols appear; click them to get a copy into your journal.
Leave the kitchen and use the stairs.
Read the note on the column on the right side.
Click the painting on the far left to reveal a safe.
Screenshot
Zoom in on the safe and use the arrows to change the buttons to the code from the kitchen table.
Screenshot
Get the seal ring out of the open safe.
Go down and play the re-active search scene to obtain a window handle.
Use the seal ring to open the door in the back and enter the room.
Click the bird statue on the far left. It is a safe, but you need a key.
The picture scraps on the desk are missing a piece.
Use the window handle to open the window above the desk.
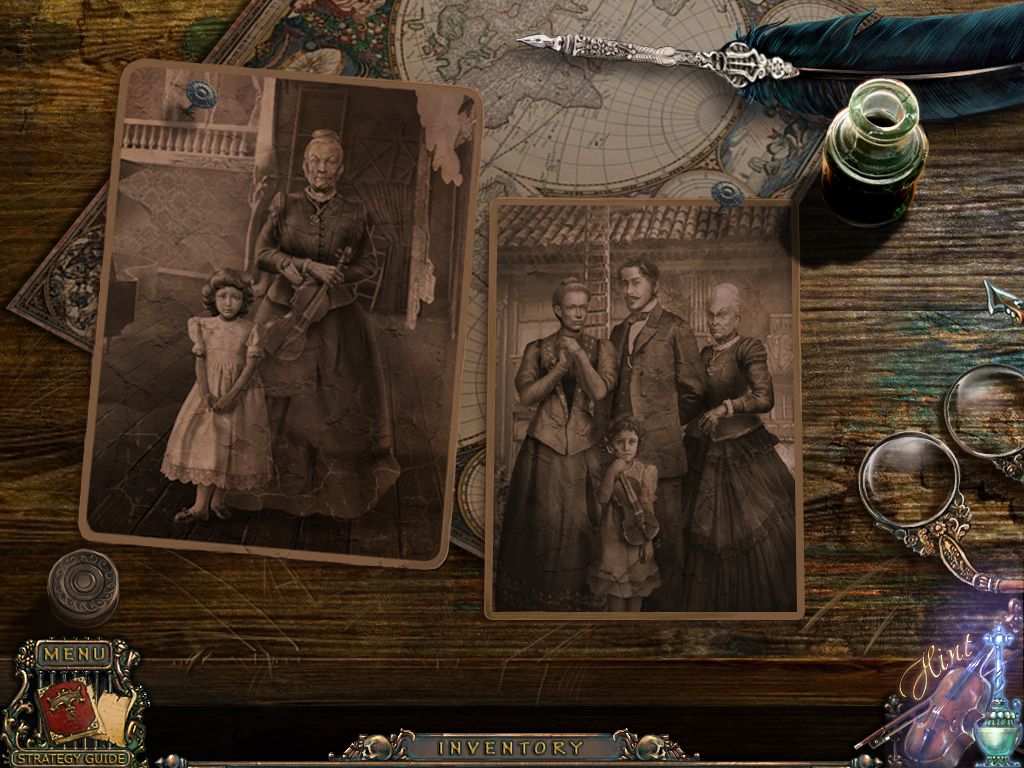
Screenshot
Click the handle again and grab the missing part of a photo.
Zoom in on the desk, put the part you just found on the desk and assemble two pictures.
Right click will turn the pieces - a correctly placed piece will lock.
Screenshot
You will find a key.
Use the key to open the safe at the bird statue.
Click the latches to open and grab the red button.
Screenshot
Exit the house and return to the Roof.
26. Smith House - upper floor
To reach the upper floor, climb up to the roof (ladder outside of the house).
Play the hidden object scene - use the arrow on the heart pillow to create the wounded heart.
A key will go into your inventory.
Zoom in on the upper window and then on the trapdoor on the far left.
Place the missing red button (Spoiler 25) to activate a mini game. Your goal is to create three colored circles.
Red on the left, green on the right and the big circle is blue.
Use the arrows to move the circles around.
The starting position is random - the reset function will give you the possibility to start all over.
When you are done you can use the key to unlock the trap door.
Screenshot
Go down. You are now on the upper floor of the Smith house.
Read the note on the floor on the right side. The drawing of the trumpet player will be copied into your journal.
The door on the far left is locked with a code lock.
There are two ways to the right - far right and at the low right side (painting).
Screenshot
27. Bathroom/Emily's Room
When you are on the upper floor, go far right.
Play the search scene in the bathroom to obtain a doll's head.
Use the red thread to create a red sea star.
Click the brown blanket to learn that the faucet needs a valve.
Go back and use the lower right way into Emily's room.
Zoom in on the doll on the bed and put the doll's head on - you will receive a valve for this.
Click the little table to learn that some is missing for the mini game.
Return to the bathroom and play the search scene to obtain a dragon fly.
Paint the crown with the brush to find the golden crown.
Use the valve with the faucet and click again to make water steam.
Click the symbols appearing on the mirror - they will be copied into your journal.
Go back once and use this code open the door on the left.
Screenshot
28. Way to the Basement
After opening the lock on the left door in the upper hall, enter the bedroom and play the search scene to obtain a butterfly.
Click the curtain to find the red-texted items.
Go back twice and zoom in on the chest on the low left side.
Place the moth (Spoiler 24), the dragon fly (Spoiler 27) and the butterfly.
Screenshot
The chest will open - grab the rope ladder.
Go back through the trap door and use the rope ladder on the right side.
Climb down.
Play the search scene to find a key.
Click the note on the ground - the drawing of the bass player will be copied into your journal.
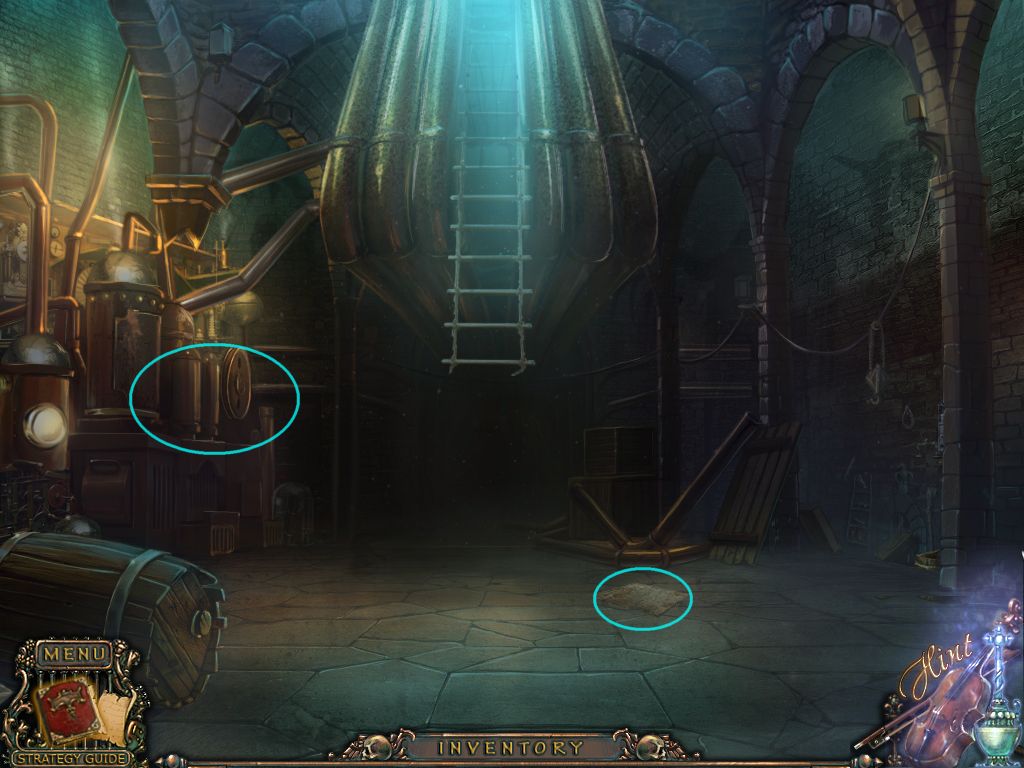
The part below the rope ladder is to dark; you will need more light.
Click the generator on the left to learn that a bulb, a belt and a crank are needed.
Screenshot
Climb up.
29. The last locket
Enter the bedroom on the left side.
Play the search scene to obtain a bulb (open the violin case to find red-texted objects).
Zoom in on the dresser and take the crank.
Screenshot
Outside the search scene you can open the violin case with the key (Spoiler 28) from your inventory.
You will find another note with the drawing of a violin player, which will be copied into your journal.
Leave the room and enter Emily's room on the lower right side.
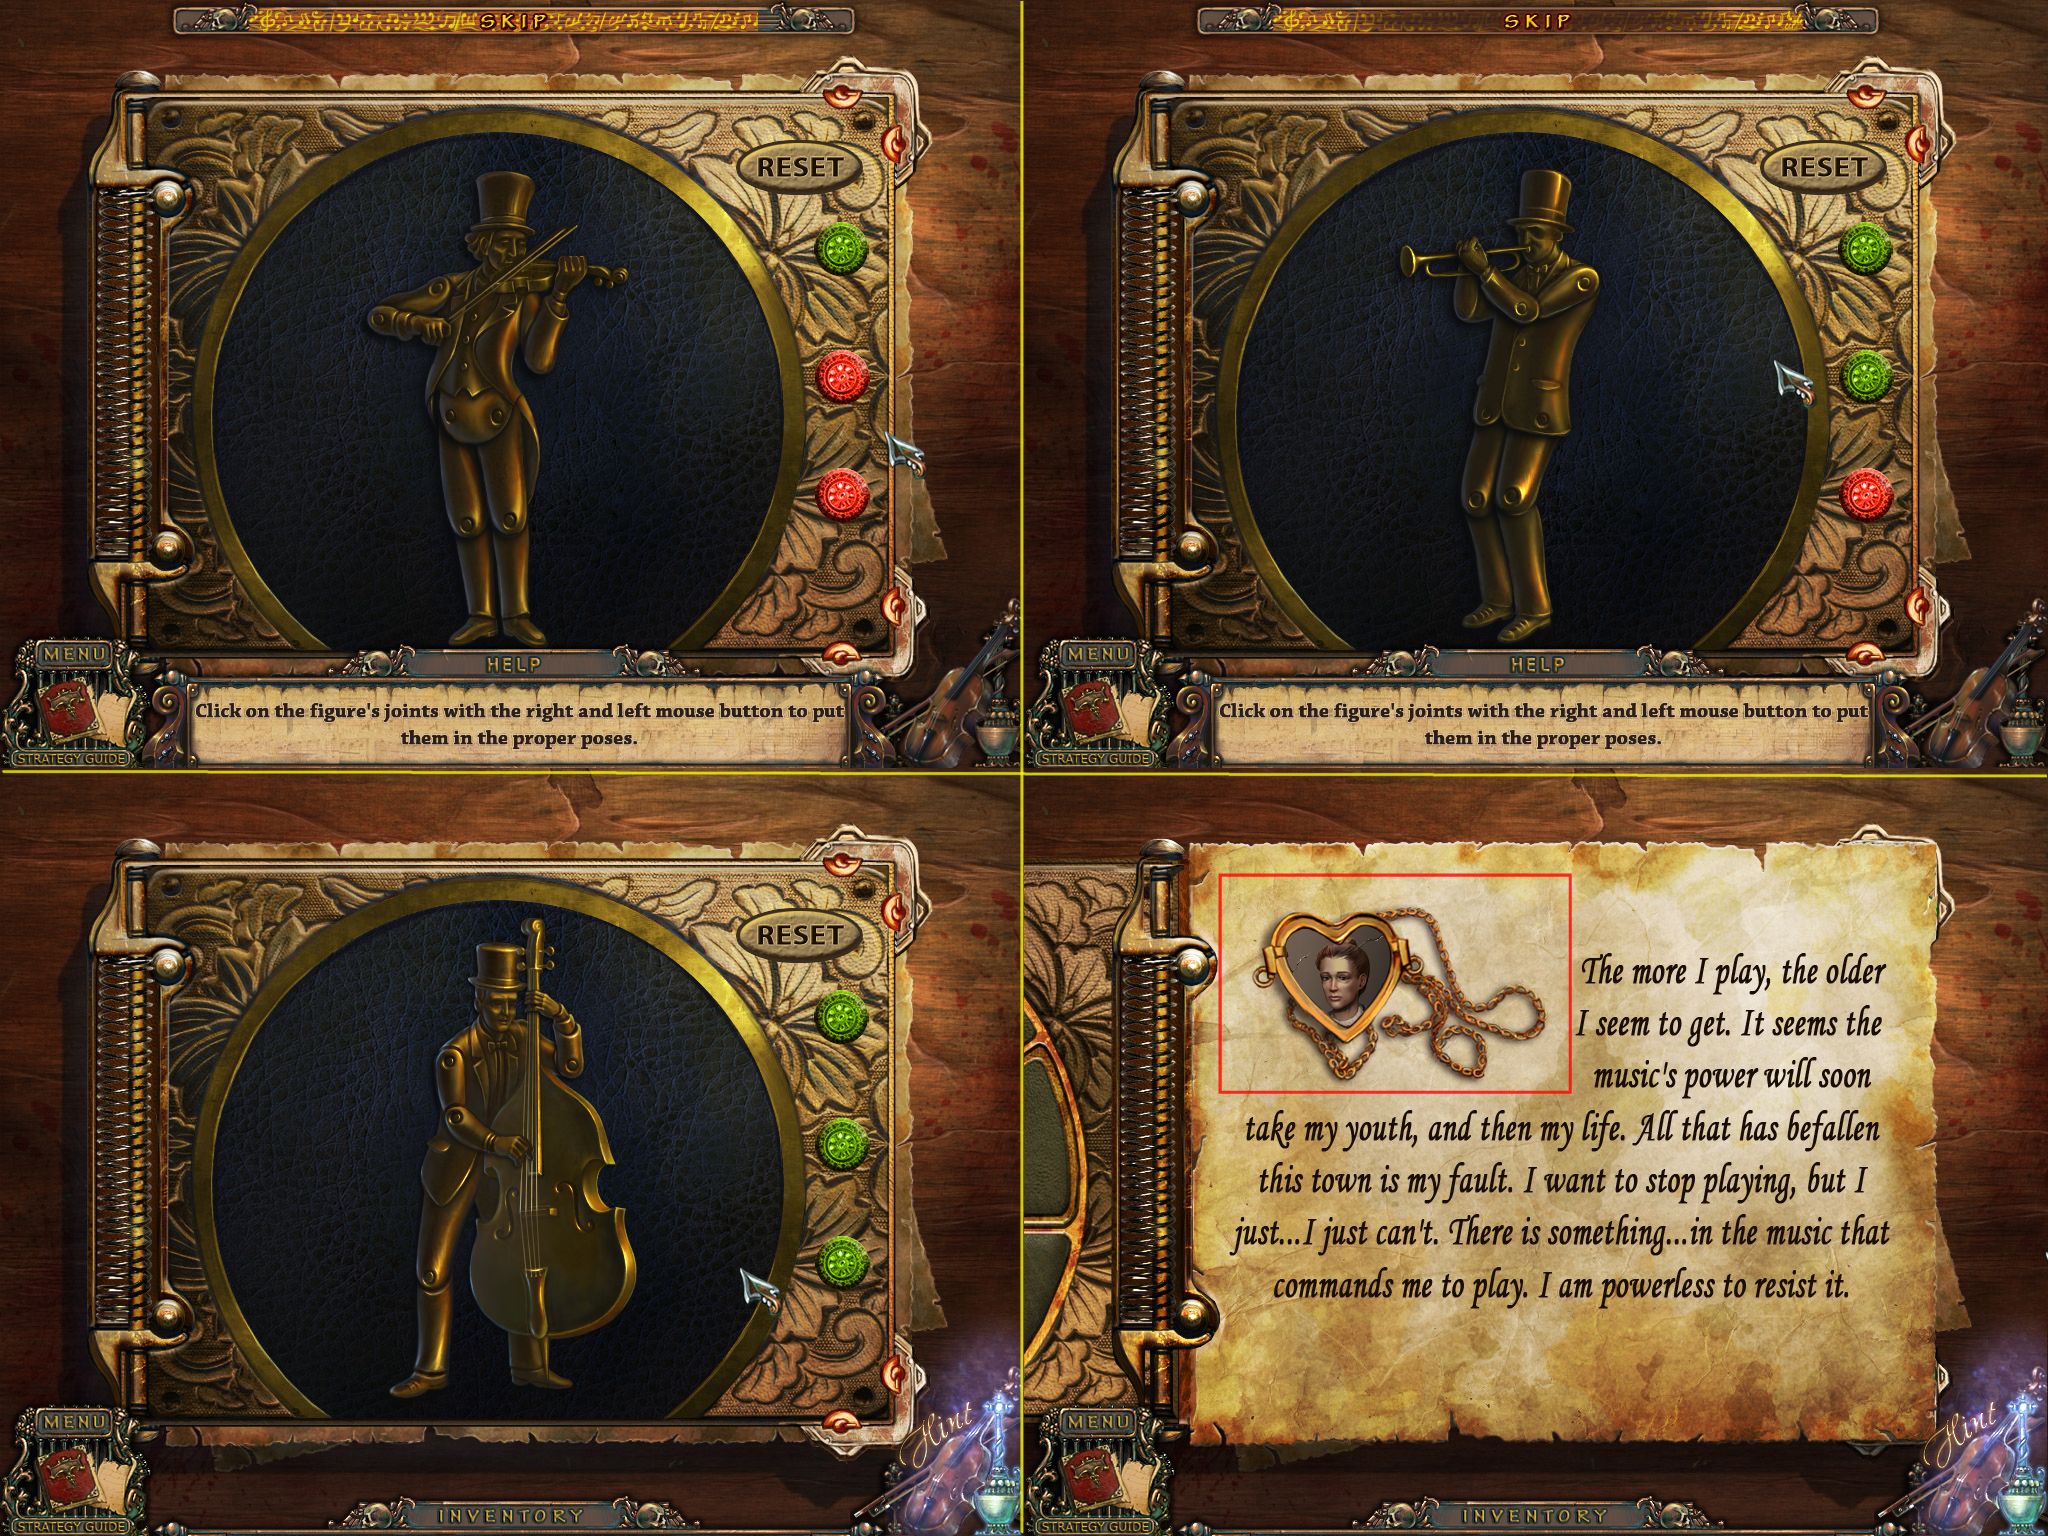
Zoom in on the table in the back - the mini game will only be activated when you have found the three notes with drawings (Spoiler 26, Spoiler 28 and here).
Your goal is to assemble the dolls the same way as the notes show.
To move the limbs click the little screws.
Screenshot
When all players are in their correct position you can grab the locket (3/3)
Exit the room.
30. Finale
Use the ladder rope and play the search scene.
Use hammer and chisel on the stone to get the golden eagle.
Find all objects to obtain a belt.
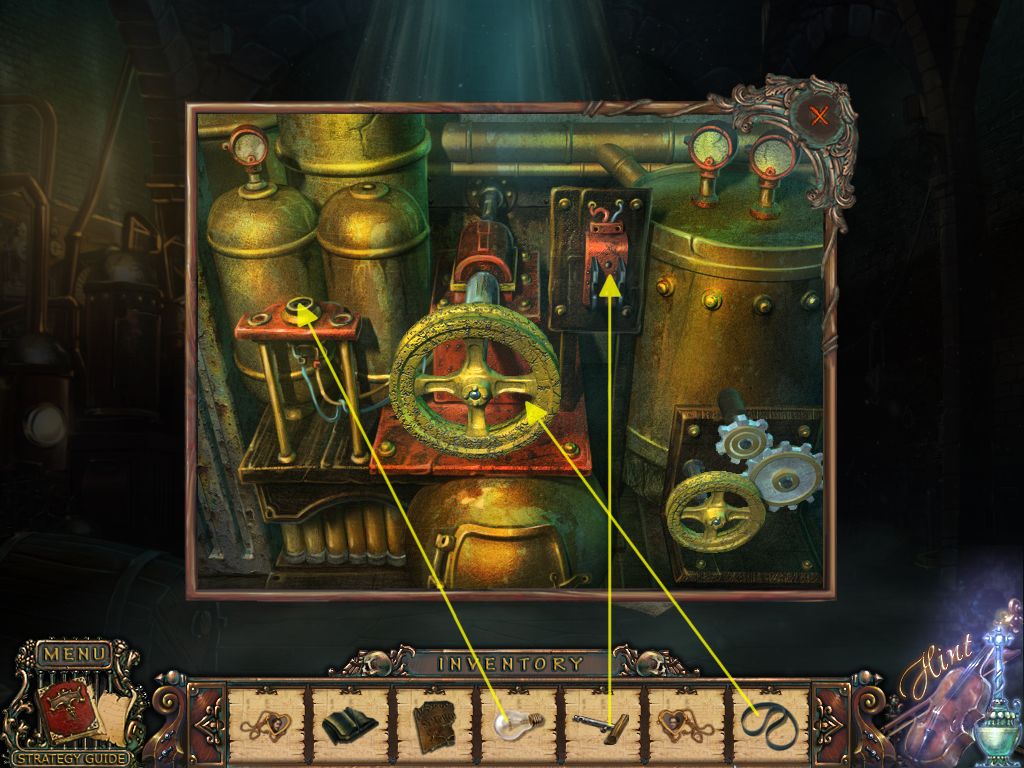
Zoom in on the generator on the left side and place the bulb, crank (Spoiler 29) and the belt.
Screenshot
Click the crank; you now have light.
Zoom in on the active spot below the rope ladder and place the three lockets (Spoiler 1, Spoiler 15, Spoiler 29) to activate a mini game.
Using the arrows, you will need to reassemble the pictures.
The starting position are random.
Screenshot
Go forward.
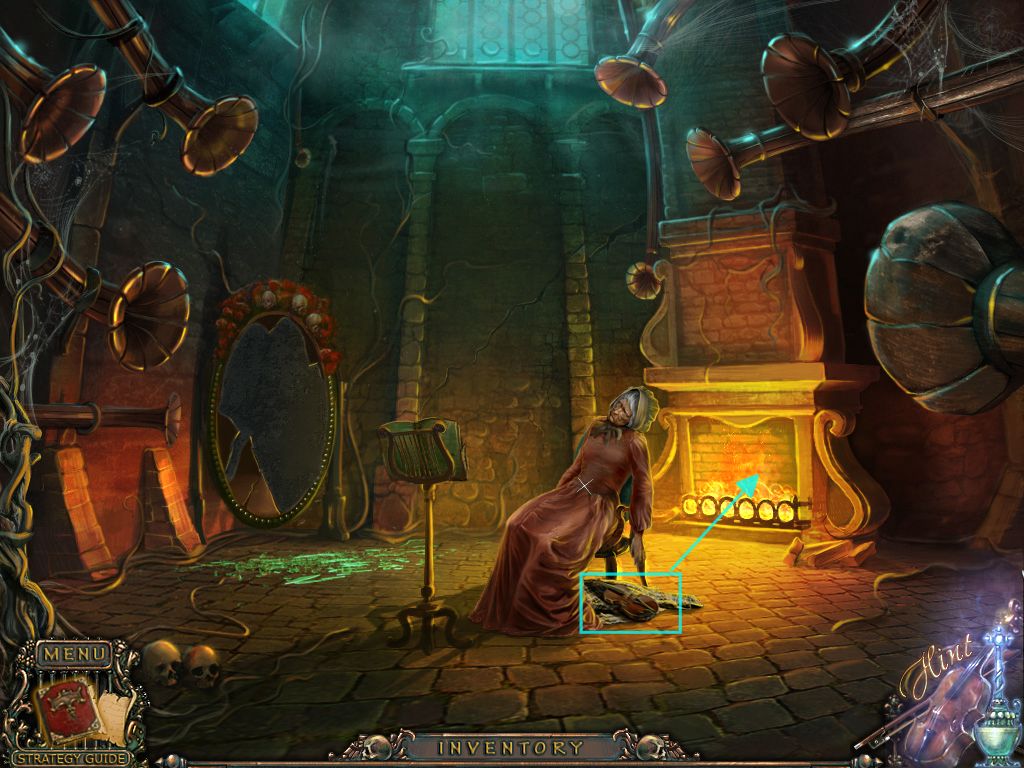
Smash the mirror in the far left with the crowbar (Spoiler 1).
Zoom in on the music stand and place the Symphony of Life (Spoiler 21).
Grab the violin and burn it in the fire place.
Screenshot
Watch the END!
Posted by: Kayleigh |
March 6, 2011 1:23 PM
|
March 6, 2011 1:23 PM