

Orient Express Night

![]() Ah, the Orient Express, doesn't that conjure up images of mystery and intrigue? Depending upon your generation it might evoke a long forgotten glamour, a fleeing vampire, a kicking spy fight, or a dastardly murder (quick, name those novels or movies). For over 100 years the Orient Express has meant a certain luxury in train travel, the rich and famous in their fabulous clothes embarking to places exotic and far away. Orient Express Night by Tomatea is a room escape that tries to evoke that glamor and mystery at a time when they were at their height, during the '20s and '30s, when the rich and fabulous still traveled first class, but first class on the most luxurious train running.
Ah, the Orient Express, doesn't that conjure up images of mystery and intrigue? Depending upon your generation it might evoke a long forgotten glamour, a fleeing vampire, a kicking spy fight, or a dastardly murder (quick, name those novels or movies). For over 100 years the Orient Express has meant a certain luxury in train travel, the rich and famous in their fabulous clothes embarking to places exotic and far away. Orient Express Night by Tomatea is a room escape that tries to evoke that glamor and mystery at a time when they were at their height, during the '20s and '30s, when the rich and fabulous still traveled first class, but first class on the most luxurious train running.
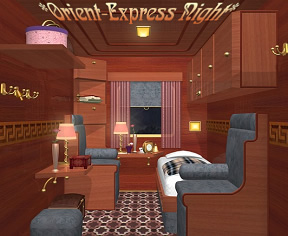 As the game opens on the first scene in a stateroom you see immediately what set the Orient Express apart. The fabulous wood paneling, the rich appointments, everything screams first class. Hopefully though, unlike in "Murder on the Orient Express" this is not the prelude to finding a body. Maybe. The second thing you'll notice is the roaring '20s jazzy soundtrack, further evoking a long bygone era. Eventually you may even notice that you are locked into said stateroom. Now we're talking! Explore the area and solve some puzzles and you'll make it out into...well, more of the Orient Express. This is not a simple single room scenario we're talking here. More exploration may be involved.
Navigation is simple if a little tricky to get used to at first. Turning right or left will turn you completely around 180 degrees, rather than the usual 90 degree turn. Navigation bars appear at the sides and bottom of the screen as necessary to show where you can go when the cursor is hovered around. Click on items to see them in close up and a simple back bar at the bottom of the screen will return you to your original position. It's all pretty simple and intuitive. The main problem you may encounter with this navigation is the same problem you will probably have with the entire game. It is the bane of the room escapers' existence, the foul and terrible thing that strikes fear in the heart of escapers everywhere! Yes, brace yourself, pixel hunting ahead. The lack of a changing cursor can sometimes mar what is otherwise quite an enjoyable experience.
Other controls are simple and easy to master. Click on an object in your inventory to use it, pretty standard. The game even gives us a nice orange ring around the object to show that it is highlighted, which shows up fantastically against the dark background of the inventory section. Unfortunately, pulling up an item for close up is not so intuitive. When you click on an object in your inventory or even hover the cursor over it a small icon will appear in the upper right of the object. However, this little icon is pretty dark, and fades against that dark inventory background, so you might have to squint to see it. The only other control you might find is a "music" button which is handy for muting the jazz age repeating clip when it becomes annoying, probably about 3 minutes into the game. A save feature would have been nice, but is not included.
That's not to say that there's not a lot of enjoyment to be had with Orient Express Night. There's some fun object finding, some challenging puzzles, and the use of combined objects that you expect from a decent room escape. Add in the atmosphere and the visuals and you have one fun ride, destination Istanbul (or a place more enigmatic).


Walkthrough Guide
(Please allow page to fully load for spoiler tags to be functional.)
Walkthrough
Orient Express Night
First Bedroom
1.
Zoom in on corner shelf and then get the RAZOR from on top of a book.
2.
Zoom in on top shelf on left side of room to get the purple HAT from a hat box.
3.
Use the razor on the hat to get a BRONZE KEY.
4.
Zoom in on the trunk (lower left side of the room) and get TILE #1 of 9.
5.
Zoom in on the cupboards on the right side of the room. In the left cupboard, get TILE #2.
Notice that the middle cupboard needs a four-letter code. Keep your eyes out for a clue.
6.
Zoom in on shelf near bed. Get the GOLD WIND-UP KEY from the back of the alarm clock.
7.
Zoom on left side of the chair (at end of the bed). Get a SLIP of PAPER.
That paper provides a clue to use later.
8.
Use the bronze key on the wooden box on table (with flower vase). Get the SPECTACLES from inside the box.
9.
Now follow the clue from the slip of paper...
It shows the order in which you should click the gold buttons inside the box.
bottom left, bottom right, top left, top right, bottom left
Get the HAIR PIN.
10.
Use the hair pin to pick on the lock on the door to exit this room.
Hallway
11.
Zoom in on middle window. Get TILE #3.
(Notice also that this window is smudged. It might mean something later on).
12.
Go down the hall, turn right...
Use the hairpin again to enter the next room.
Second Bedroom
13.
Look inside the closet to find TILE #4.
14.
Pick up matches from the shelf by the bed.
15.
Use the razor to scratch off the top of the earl grey tea box. Get a clue.
16.
Use the code from the tea box to pen a briefcase that's on the floor (right side of the room).
The code won't work? Try looking at it another way...
5061
Get TILE #5.
Notice that there is a train track on the floor by the closet. Doesn't seem to be anything we can do with that now. So exit this room until later.
Dining Car
17.
Enter the dining car and go to the bar area at the end of the room.
Get TILE #6 from behind the bar.
Notice that there is a 9-square grid here and a door that won't open.
18.
Back up. From this perspective, you'll see TILE #7 on a table to your right. Pick it up then back out again.
19.
While facing the door of the dining car, zoom in on the middle table on the left side. Pick up TILE #8.
20.
Open menu. Use spectacles to read the menu. One part of the menu seems to be highlighted...
"Filet and Gulf Shrimp".... 27.45.
You need a 4-letter code back in the first bedroom. Maybe this is a clue?
The price and the letters of the menu item provide the answer...
2nd letter.... 7th letter...etc.
i-n-e-t
Leave the dining car and go back to the first bedroom.
Return to First Bedroom
21.
Back in the first bedroom, zoom back on the middle cupboard. Enter the code found in the dining car.
From the menu item's name and price.
i-n-e-t
22.
Get the TRAIN and TILE #9.
Now you have everything you need from this room. Take the train back to the second bedroom...
Return to Second Bedroom
23.
Put the wind-up key into the train. Then, put the train on the track... the train will go and trigger the doors to the train station to open. Pick up the SCREWDRIVER.
Now you have everything you need from this room. You also have all 9 of the TILES. Someplace on this train is a place to put those 9 tiles.
Back to the dining car!
The Dining Car...Again
24.
Go back behind the bar area of the dining car.
Use the matches to light the tea warmer.
25.
Place all 9 tiles on the grid. Arrange them in the correct order.
A picture of a train
26.
Get the TEA POT from the now open bar door. Place the tea pot on the tea warmer. Back up and leave the bar area for a moment.
27.
Turn around to face the bar area again and get the now HOT TEA POT.
You now have everything you need from this room. Time to return to a dirty window...
Back in the Hallway
28.
Use the hot tea pot on the smudged window in the hallway. A clue is revealed. Take note of the position of the large dots.
Seems you've done all you can in this train. Head for the last room...the train exit.
Train Exit
At the opposite end of the hallway from the dining car is the train exit room.
This last room has a poster advertising Bath as a superb vacation destination. Notice it is also screwed closed.
29.
Use the screwdriver to open the panel behind the poster.
30.
Use the clue from the hallway window.
top-middle-top-bottom-middle
Press the button.
31.
Get the TRAIN DOOR KEY from inside the panel.
Turn left. Use the key on the X-shaped knob.
That's the end of this ride.
The End! :)
Posted by: elle |
January 26, 2011 2:09 AM
|
January 26, 2011 2:09 AM
Orient Express Night Walkthrough
General Information
This is not a one room escape, so don't be surprised when you get out of the stateroom.
Remember to try using objects on each other as well as on things in the rooms.
To pull an object into close up click on the upper right corner of the object in the inventory.
$27.45 is a pretty decent price for Filet and Gulf Shrimp.
Good luck!
First Stateroom Exploration
You begin in the first stateroom. There is a pink hatbox with a purple top on a shelf on the top left.
Click on the hatbox for a close up.
Once the hatbox is in close up click on the top to open it and take the object inside (hat).
Back up.
On the floor to the left is what looks like an ottoman and a chest. Click on the chest for a close up.
Open the chest and take the first tile. Back up.
On a shelf above the chest is a lamp, a vase, and a small wooden box. Click on the box for a close up.
In close up you will notice that the box needs a key. Back up.
At the back of the stateroom, to the left of the window, is a series of drawers and a shelf with what looks like a book on it. Click on the shelf for a close up.
In the close up you will notice a small item sitting on top of the book on the left side. Take it (straight razor). Back up.
Underneath the window is a shelf with a lamp, vase, and a clock sitting on it. Click on the shelf for a close up.
Once you are in close up click on the clock and you will get a view of the back of the clock. Take the wind-up key from the back of the clock.
Back up.
On the right, above the bed, are a series of cabinets just below the ceiling. Click on the cabinets for a close up.
The right cabinet is empty. The left cabinet has a second tile piece (take it). The middle cabinet needs a four letter code.
Back up.
Click at the foot of the bed, between the bed and the chair for a close up.
Once in close up you will see a piece of paper on the floor between the bed and the chair. Take the paper.
Pull up the paper from your inventory and click on it to open it. A clue!
Back up.
Time to get out of this confined space!
First Stateroom Escape
Pull up the hat from your inventory.
Click on the hat and it will turn over. Notice the dotted line on the inside hatband?
Use the straight razor on the line and you will get a key. Take the key.
Click on the small wooden box on the left shelf for a close up.
Use the key to open the box and take the glasses.
Don't back up, look closely at the inside of the box.
Note the four brass buttons on the inside of the box, each in a corner?
Now it's time to use the clue from the note.
The note clue gives you the order in which to push the buttons. Starting at the lower left corner, then lower right corner, upper left corner, upper right corner, and finally the lower left corner (5 clicks).
If you enter the code correctly you will get a new object, a hatpin.
Take the hatpin and back up.
Turn right (or left) to see the door.
Use the hatpin on the lock to open the door.
Welcome to the corridor!
The Corridor (Facing the Dining Car)
You are in the corridor of the train car. There are more staterooms to your right, windows to your left, and a door ahead that shows the blue chairs of the dining car.
Look at the windows to the left. One of the window shades is drawn all the way down. Click on it for a close up.
Once the window is in close up, click on the shade to open it and take the third tile.
Notice that something is smudged on the glass. Shame we can't read it yet.
Back up.
Click on the door ahead to move towards the dining car.
You are now just outside the door to the dining car. To your right is a stateroom door, use the hatpin on the lock to open it.
The Second Stateroom Exploration
This stateroom has no shelf on the upper left, and a blue tie hanging on the hook on the right.
On the floor on the left is a small wooden object, click on it for a close up.
Looks like train tracks for a toy train. Back up.
Click on the large wardrobe on the left for a close up (the closet).
Open the right door and take the fourth tile. Back up.
Click on the floor on the right, by the base of the bed, and you will see a briefcase that needs a four digit code. Back up.
Click on the shelf below the window for a close up. Take the book of matches.
The Second Stateroom Puzzle Solving (Part 1)
You should still be in a close up of the shelf below the window.
Notice the box of earl gray tea?
Use the straight razor on the box and you will uncover a number.
The number looks like 1905, but look closely, if you read it from the other side of the box (turn the box 180 degrees in your mind) it can also read as 5061.
Back up.
Click on the briefcase at the foot of the bed.
Use the code 5061 on the briefcase.
Once you've entered the code click the button below the numbers to open the briefcase.
Take the fifth tile and back up.
Turn right (or left) to see the door and open the door.
You should now be back in the corridor, this time looking down at the opposite side.
The Dining Car
Turn right (or left) to face the dining car door (you can see the blue chairs through the window).
Click on the door to enter the dining car.
Click on the middle table on the right for a close up.
There on the table you will find the sixth tile. You will also see a brown square. Click on the square.
Oh, it's the menu cover. Now you can see the menu. At least, you could if your eyes were better.
Use the glasses on the menu and you will see the dinner special: Filet and Gulf Shrimp for 27.45.
Close down the menu and back up (don't forget to take the sixth tile first).
At the end of the dining car is what looks like a bar. Click on the bar for a close up.
Click behind the bar to see what's behind.
On a shelf on the left behind the bar you will find the seventh tile.
You will also see a cabinet in the middle, and a 3 x 3 grid.
Back up to leave the bar.
Now that you are facing back the way you came you will see the eighth tile sitting on a table to your right. Take it.
Click on the doors to go forward.
Go forward once more to the end of the corridor.
Click on the stateroom door to your left. This will take you back to the first Stateroom.
The First Stateroom Redux
Time to open that four letter coded cabinet.
Click on the cabinets on the upper right, then click on the center cabinet to bring up the code lock.
The clue for this was found on the menu in the dining car.
The menu showed Filet and Gulf Shrimp and the price of 27.45.
The code is the 2nd, 7th, 4th, and 5th letters of Filet and Gulf Shrimp, I N E T.
After you've entered the code click on the button beneath the letters to open the cabinet.
Take the toy train and the ninth (and last) tile.
Back up.
Turn right (or left) and go out the door to the corridor.
The Corridor (More Exploration)
You should be facing the dining car at the far end of the corridor.
Turn right (or left) to face the other way, and you will be right in front of a door to another car.
Click on the door to go through.
In front of you is what looks like a poster, but there are hinges on the left and screws holding it down on the right. A wall safe!
Turn left.
Looks like this might be the door out, but it looks like it needs an oddly shaped key.
Turn left.
Go through the door back to the main corridor, then click on the dining car doors to move forward.
The Second Stateroom Redux
Click on the stateroom door to your right to go back into the second stateroom.
Click on that object on the floor to the left, the toy train tracks.
Pull up the toy train from your inventory.
While the train is in close up click on it to turn it around. Notice the hole in the back wheel when the train is facing left?
Place the windup key from the clock into the hole in the wheel. Close down the train.
Now use the train on the tracks and it will go forward, opening the doors.
Inside the doors is a screwdriver, take it.
Back up.
Turn right (or left) to face the door, then go through the door to the corridor.
The Dining Car Puzzle Solving
If you are not facing the dining car, turn right (or left) to face the dining car door.
Click on the door to enter the dining car.
Click on the bar at the back of the car, then click again to go behind the bar.
Take your nine tiles and place them on the 3 x 3 grid. Now you have a simple puzzle to complete.
Click on two tiles to switch their places. You are trying to create an etching of a train.
Once you've solved the train puzzle the cabinet below will unlock.
Click on the cabinet to open it and take the tea kettle.
Time to make steam!
Use the matches on the Bunsen burner on the left of the bar.
Once you have a flame put the kettle on the burner and back up.
You should be facing back the way you came. Turn right (or left) to face the bar again and notice that the kettle is steaming.
Take the kettle, turn around, and go forward to the door to the corridor.
Getting Out
You should now be in the corridor facing back towards the first stateroom.
Click on the window on the right where you put up the shade (it will be the fourth one on the right, counting from closest to you).
Once the window is in close up use the steaming kettle on it to find a code.
This looks like a series of large and small dots. Notice the positions of the large dots, from left to right: top of the column, middle of the column, top of the column, bottom of the column, and middle of the column.
Back up.
Go forward down the corridor then through the doors to the poster (wall safe).
Use the screwdriver to remove the screws and open the safe.
Now you are faced with a series of five knobs and a button to the far right.
Put the knobs into the same position as seen on the window, from left to right: top, middle, top, bottom, middle.
Once the knobs are in position click on the button on the right.
A panel will open, revealing the weird key.
Take the key and turn left.
Use the key on the cross-shaped keyhole and you are out!
Posted by: grinnyp |
January 26, 2011 2:43 AM
|
January 26, 2011 2:43 AM