


![]() If there's one thing that flash games have taught us, it's that monkeys hate balloons. Bloons 2 continues to reinforce this, wait...Bloons 2? Hasn't this already come out? Let's see... so far in the Bloons series we've seen five player packs, two sequels, but none of them called Bloons 2, four tower defense games, a match-3 game, a side-scrolling shoot-'em-up and a ton of other iterations, but not Bloons 2. If the Grand Theft Auto games can get crazy with their numbering, certainly Bloons can, too. You can do whatever you want when your original game has been played over a billion times. Yup, billion, with a 'b.' We're talking one thousand millions. So, three years and two fat fistfuls of related games later, how does Ninja Kiwi make Bloons 2 stand out?
If there's one thing that flash games have taught us, it's that monkeys hate balloons. Bloons 2 continues to reinforce this, wait...Bloons 2? Hasn't this already come out? Let's see... so far in the Bloons series we've seen five player packs, two sequels, but none of them called Bloons 2, four tower defense games, a match-3 game, a side-scrolling shoot-'em-up and a ton of other iterations, but not Bloons 2. If the Grand Theft Auto games can get crazy with their numbering, certainly Bloons can, too. You can do whatever you want when your original game has been played over a billion times. Yup, billion, with a 'b.' We're talking one thousand millions. So, three years and two fat fistfuls of related games later, how does Ninja Kiwi make Bloons 2 stand out?
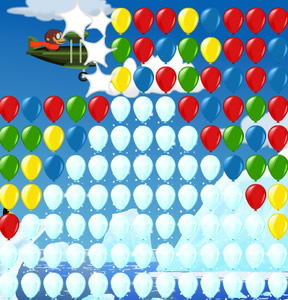
 Well, first they don't try to fix what's not broken. You're still a monkey who is bent on popping balloons (here to for referred to as "bloons") and you'll still do that by using your mouse. Aim your dart where you want it to go, then hold down your left mouse button. An arrow representing the power of your shot will grow, then shrink, then grow again and so on until you get the right amount of oomph you want, then release the mouse button and watch her fly. It's a simple system that anyone can grasp and helps suck players in. It doesn't hurt that popping balloons is so darn gratifying.
But what's new? Well, longtime players will notice a bunch of new bloons on this go round, along with the return of some familiar ones. This time you'll get to call in planes and guide bees to aid you in your bloon popping. Watch out, because not all the new bloons are helpful. Keep an eye out for the bloom bloons. Once you pop it, one bloon becomes seven. Then there's the camo bloons which have the habit of hiding from you.
The graphics have been given some polish. Your monkey looks cleaner and cuter. The sound has also been pumped up. Each area has it's own music and whether you like them will depend on personal preference. No matter what the variety and effort is nice and I think everyone can dig on the jaunty world map music.
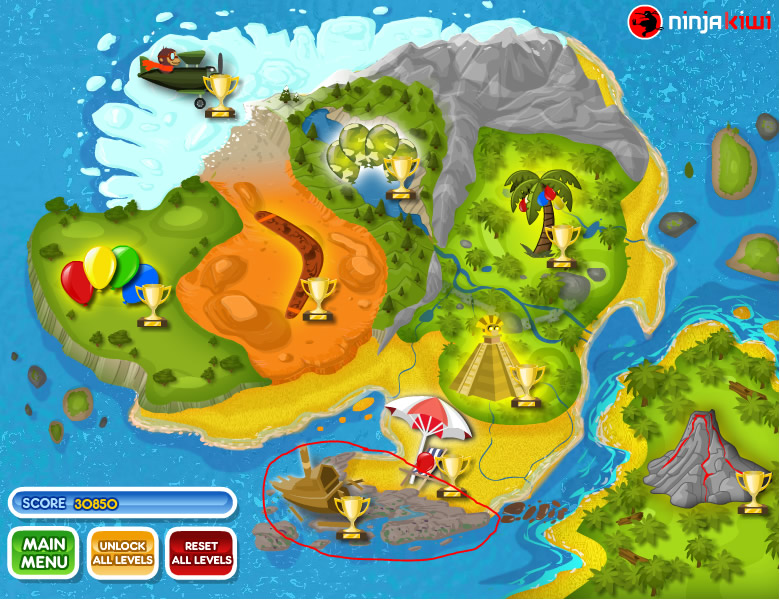
Hm? World map? Areas? Oh, that's right. Bloons 2 is split up into different areas, each with it's own theme, both in terms of the general look of the levels and in the challenges they present. There are eight areas, each with 12 levels. They're all connected by a very nice looking world map. There are even rewards for clearing an area, after each one you'll be given a level destroying super monkey and an item that shows you how to clear the level.
 Analysis: It's hard to screw up a winning formula like Bloons, so it's no surprise that Bloons 2 is a great game. If you were a fan of the previous Bloons games everything you liked before returns and in bigger amounts. If you're new to the series the game does a pretty good job of getting you used to the swing of the Bloons thing without any previous training needed.
The level design is as clever as ever. The two hallmarks of Bloons level design are in full force. The easier Rube goldberg-esque levels that are mostly just there to give you something neat to watch are especially cool this time around thanks to all the new bloons. On the flip side, the challenging levels are plentiful and they become very tricky in later levels. In fact, Bloons 2 might get too hard in the later levels, some of which are sure to induce vicious bouts of hair pulling and head banging. It's hard to say if the difficulty of the levels is a good or bad thing. On the one hand, after 60 levels, shouldn't a game become noticeably more difficult and won't fans of the series want to put their skills to the test? On the other, rage quitting doesn't make people think fondly of a game and it's discouraging when you're cruising along and then suddenly you run headlong into a seemingly impassable roadblock. Each player may react differently to the challenge and thankfully the level clearing and solving rewards can help you get you off a particularly harsh level if you want to.
All of the new additions are a lot of fun. Most of the new bloons will keep you on your toes, you'll have to actually take control of them to get your popping done. The controls for the bees and, to a lesser extent, the planes could use a little tweaking, but as it is they're pretty good. The new bloons you don't control, like the anti-gravity bloons, add a little twist to the gameplay. Naturally, the enemy bloons aren't as much fun and there's not as many of them, but they still add to the challenge. The super monkeys and solution showing rewards are a very helpful addition. Though, it gets a little frustrating when you find yourself without them and you wished you would've saved them. This is made worse when you accidentally click their buttons and you're sent to the Mochi Store, it feels like the game is rubbing it in your face just a little. Still, they'll help you out a lot and you'll be glad for their inclusion.
Bloons 2 continues the high standard of quality the series has established. It looks and sounds good, there's a lot of fun new stuff to experiment with and those who want a challenge will definitely find it here. In the later levels, you'll probably find yourself getting pretty frustrated, especially for the levels that leave no room for error, but it feels like an accomplishment when you finally figure it out. If you're a fan of puzzle games or just the Bloons series in general, you're in for a real treat.


Walkthrough Guide
(Please allow page to fully load for spoiler tags to be functional.)
Bloons Complete Walkthrough
The Popping Fields
Welcome Back
As a first level this won't give you too much trouble. Send a couple max power shots through the base of the 2 and a couple medium powered shots along the curves at the top. There's a lot of ways to do this, though, just try to take out as many bloons as you can with each shot.
Right n Left
Even easier. Send one dart through any of the pink pin bloons on each side. They'll take care of the rest.
On The Move
A little bit tougher. You'll want to use shots that are slightly less than medium powered. Start by placing your cursor near the upper left corner of the outside ring of bloons and shoot a dart through that outer ring. A good shot will take out a bunch of bloons from that ring and a few from the inner rings as it drops. With each shot move your aim to the upper left corner of the next ring. As you make more holes in the rings you'll want to wait for them to move so that you can take out the most bloons at one time.
Timing
Very easy. As a row moves past the opening shoot a dart as close to the middle of the row as possible. Do the same for the next row.
Supplies
Send a dart at the pin bloon in the little box below your monkey. From here you can do almost anything to reach the goal. One way near the upper left corner, just to the side of the space in between the first and second row and send soft arcs through the rows. Make sure you move down to the next available row with each shot. Once you get about halfway down you might want to focus your attention back up top and take out some of the clusters that are left over.
Layer Upon Layer
A new bloon is introduce: the speckled bloon. Speckled bloons have more bloons instead them. Green speckled bloons have pink speckled bloons and the pinks one have yellow ones. Don't worry, yellow is as far down as it goes and even if another bloon emerges popped speckled bloons count toward your goal. Ignore the pink stacks and focus on the rectangular section of bloons. Start in the upper left corner and send fairly high powered shots through the rows. To take out almost a full row in a straight shot put your cursor on the second or third bloon at the top and move your aim to the right as move down a level. Halfway down go back up and clear those three rows. You have plenty of darts so you'll have no problem clearing this level.
Triple the Fun.
Send a dart straight down below you to the triple dart bloon. Triple dart bloons do just as advertised, instead of shooting one dart you'll shoot three. The amount of them makes this level cake. Don't put too much power behind your shots, that way the spread of the darts won't be too wide and you won't accidentally lose one. Also make sure that you hit at least one triple dart bloon with each shot. Other than that just dart the biggest clusters you can and concentrate on the green and pink speckled bloons.
Out of the Box
That tan barrier in front of you is breakable. Shoot a dart at the middle block of it to disintegrate it. Then just send a dart through the opening and hit a pin bloon. They'll do the rest.
Bees Knees
Another new bloon! That black and yellow striped bloon is a bee bloon. When you hit it, four bees will come out and they'll follow your cursor. Maneuver them up inside that rectangle and the bees will pop any bloon they come in contact with. Make sure you hit the pin bloons and keep your bees away from the sides of the rectangle.
Out of the Blocks
Hit the bee bloon and guide your friends along the bottom hitting the bloons. Make sure you don't hit any of the steel blocks or your bees will die.
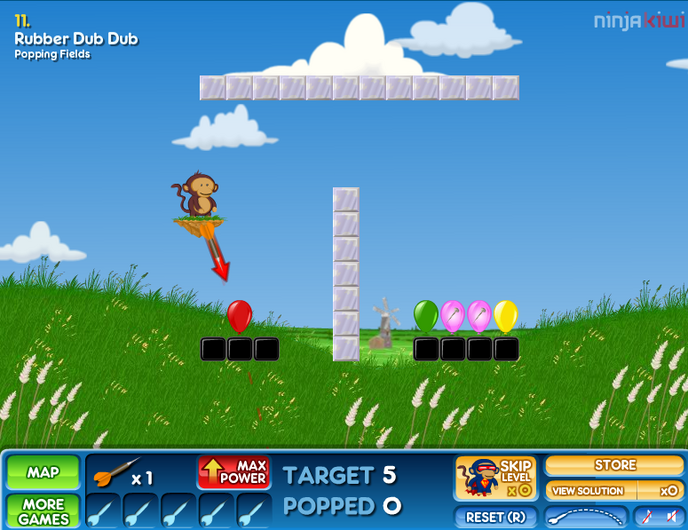
Rubber Dub Dub
Aim at the left side of the middle black rubber block. Hold down the left mouse button for about a second then release. Your dart should bounce and hit one of the pin bloons. Screenshot
Hunting Tacks
Aim your cursor a little bit above the middle of the left hand gap. The most important thing to remember is not to put too much power behind your shots. You want your shot to arc up and hit either the slanted rubber on the side or the flat rubber barriers. Ideally, you should be able to take out 13-20 bloons with each shot with the help of bounces. Just make sure you hit at least one pin bloon with each shot.
Bloon Dunes
Entombed
These tan blocks aren't as brittle as the ones before, it'll take two shots to disintegrate them. First, clear the fourth and fifth blocks from the bottom. Then, send two higher powered shot through the opening to take out most of the bloons in the first and second rows. Finally, arc a weak shot through the opening to take out some of the bloons in the lower left corner.
Bloon Angling
There are a lot of ways to complete this level. Just send max power shots toward the middle of the slanted surfaces and you should beat it no problem.
Hive Mind
Hit the spiked ball bloon, it'll open up the two bee bloons. Guide your bees around the oval made of tan blocks popping the bloons as you go. Once you've popped all the bee bloons just plow through the side of the oval and pop all the bloons inside.
Happy Field
And now we have a new bloon, let's call it the bloom bloon. When you pop it, the single bloon turns into seven. Now, for the level it doesn't matter where you start, just try to pop at least one bloom bloon and one bee bloon with the same dart. Once you have some bees work your way around popping the blooms and other bee bloons. Remember, your bees have a limited life span so you might want to give priority to refreshing your bees.
Bloomers
Aim for that middle bee bloon. A medium powered shot can arc and pop a few bloons but that's not necessary. Guide your bees toward the top bee bloon, but on your way cut into the bloon cluster. Take your bees back to the cluster and concentrate on the bloom bloons. Once those are mostly gone move to the next cluster and take out as many bloons as you can before your bees expire. Pop the remaining bee bloon and move them toward the right hand cluster, cleaning up what's left of the left hand cluster. You should be able to reach the target before your bees die.
Perished Rubber
These aren't your previous level's rubber blocks. These ones disintegrate after you hit them. Fire a little bit more than medium powered shot at the middle block, aim your shot towards the top part of that block. Then, fire a medium powered shot, aimed at the same spot as your first shot, through the opening to take out the bloons on the right side.
Bounce Drill
Aim directly below you, power up your shot as little as possible and shoot. Your dart will do the rest.
Reservoirs
Place your cursor to the right of the last black rubber block that makes up the roof of the top chamber. Leave a space that's about equal to one and a half of those black rubber blocks. Fire a medium powered shot. Your dart should take out all the bloons and all but one of the breakable rubber blocks. Fire a dart through the narrow tunnel that also leads to the first chamber to clear that last block. Finally, fire a max powered dart through that tunnel, it'll bounce and clear the bloons in the lower chamber.
Ranga Range
The boomerang bloon isn't new, but it's the first time we're encountering it in this game. Popping it gives you a boomerang which does what all boomerangs do: comes back at you. The boomerangs path is dependent on how hard you throw it. Now, aim at the top right corner of the figure eight just slightly right of the gap between the yellow and red bloons. Make your shot almost max power and you'll pop the ‘rang bloon along with a few others. Next, move your cursor down and to the left, place it under the last steel block on left and let loose another almost max powered shot. Next, aim right at the boomerang bloon near where you just aimed and give your shot the same power. Do the same with the last boomerang bloon.
Diamond Mine
Move your cursor to the bottom right cluster, between the red bloon on the left side and the pin bloon in the center. With an almost max power shot you should be able to take out two clusters. Now place your cursor to the far right, a small space away from the edge of the screen in the middle of the two cluster farthest to the right. Fire another almost max powered shot. You should be able to clear two more clusters. Move your cursor up a few inches so it's about half an inch diagonal from the space in between the blue bloons. Slide it down so it's again diagonal from the space in between the blue bloons but closer. Max power, another cluster down. Aim above the remaining cluster and a max powered shot should take it down.
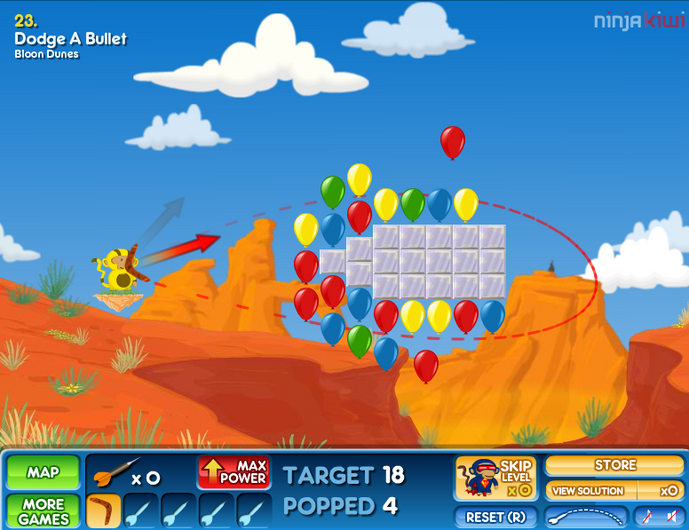
Dodge a Bullet
Pop the boomerang bloon. A weak shot can hit the ‘rang and take out a decent amount of bloons. Next, place your cursor a little to the right of the middle of the top two arcs of bloons. Power up for about a second and your boomerang should put your over the target amount. Screenshot
Cactus Jack
There's a lot of ways you can get through this. I suggest starting at the top and popping a few of the boomerang bloons. >From there work your way down using medium powered shots and paying attention to the other boomerang bloons and bloom bloons. If you keep the path of the boomerangs tight and keep replenishing them you shouldn't have much trouble.
Frosty Fun
Icy Cookie
Re-introducing the ice bloon. When you hit them they'll freeze whatever's around them and frozen bloons will cause you quite a few problems. Now, place your cursor in the gap in the lower left of the top half of the circle, make sure it's a little right of center. Fire two powerful shot through this area to clear nearly two rows of bloons. Move your aim slightly above the second bloon to the left. Send two shots that are a bit over medium powered along the top arc. Aim towards the center of the lower half and fire a few powerful shots to reach your target.
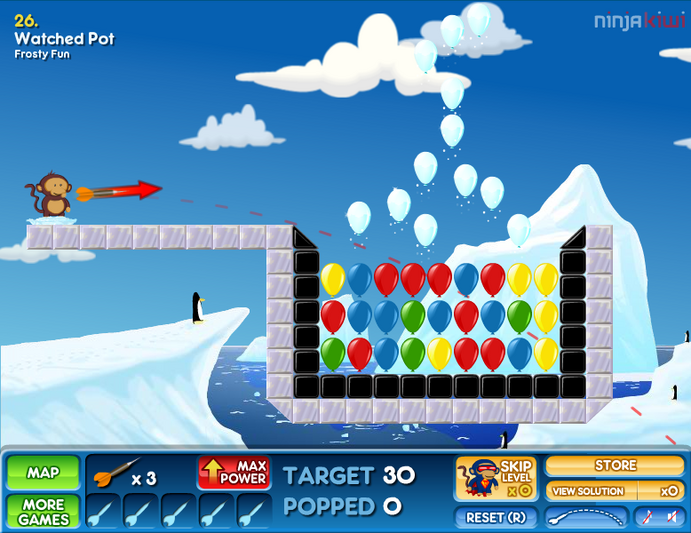
Watched Pot
What you'll want to try to do is slide your dart under that ice bloon on the bottom left. How powerful your shot should be will depend on where you aim, but a medium shot should do well. If you don't hit the ice bloon the rubber should help bounce your dart close to the target and you can use your remaining darts to take out the ice bloons to reach your goal. Even if you do hit the ice bloon and get some frozen bloons as long as you only hit one you should be fine, though you'll need to pop more of the ice bloons. Screenshot
Bounce Spike Bounce
Aim a slightly more than medium powered shot just barely above the space in between the second and third bloons from the left. If you hit all the spike ball bloons they'll take care of everything for you.
Delayed Charge
Wait for the star bloons to come close and pop them one after the other. Now, just pop one of the bomb bloons and enjoy the fireworks.
Bloomin' Box
Wait for the bloom bloons to move to the upper right corner of the box, then arc a dart through the ice bloon to the star and triple dart bloons. If you cut it too close and free the bloom bloons restart. Otherwise, wait until the bloom bloons are in front of the gap closest to you and hit both of them with one dart. Use your triple dart to clean up the bloons that bloomed. Screenshot
Return Flight
New bloon! Those bullseye bloons allow you to summon airplanes and that's just what you're going to do. Fire a dart through either set of bullseye bloons then click to start the plane summoning process. A green sliding arrow will appear on one side of the screen, if you want to switch it over to the other side, just move your cursor to other side of the screen. Pick a side and click when the arrow is pointing to the second row from the top or bottom. Your plane should be able to clear out three rows. Fly through the remaining row, then fly though some rows in the chamber you haven't cleared. Pop the other set of bullseye bloons to replenish your planes. Oh and don't try to send your plane through a wall, if it hits anything that's not a bloon it'll explode.
Arctic Explorer
Pop the bullseye bloon, then send your plane through the second row from the top. This should cleanly shave your target amount off the top.
Operation
Pop the spike bloon above the star bloon. Then pop the one above the bomb. Now, pop the spike bloon the farthest to the left and, finally, the last remaining spike bloon.
Up
Oh, so soon a new bloon! Let's call these anti-grav bloons because they'll make your darts go up instead of down. Pop the anti-grav bloon then fire a dart anywhere as long as it hit's a pin bloon.
Robo Chain
Pop the bomb bloon and wait. When it's time break the tan block below you, then send a dart down to the remaining bloon.
Eyeliner
Aim just above the second bloon from the left in the top arc, give it a little bit of power and you should hit every bloon in the arc. Make sure you hit that anti-grav bloon. Repeat the process for the lower arc.
Crushed Petals
Wait for the bloom bloons to move under the spike ball bloons. Fire a dart at the line of bloon but don't hit all of them, just pop a few in the front, then let the others come closer and do the same to them. Next, fire a dart at one of the bomb bloons, the spikes will take care of the rest.
Sneak Peaks
Crouching Monkey Hidden Balloon
A new bloon: the camo bloon. These bloons will disappear every so often and even if you know where they are you can't hit what you can't see. With this level, you'll just have to do a little precision shooting and pop all the bloons.
Quick Defrost
Pop the bullseye bloon and send you plane through the spiked ball bloons. Next, pop the bomb bloons one by one to take out the frozen bloons.
Stealth Plane
Pop the bullseye bloon. You'll want to attack from the left and aim for the middle. Make sure you don't send the plane until a few rows are visible.
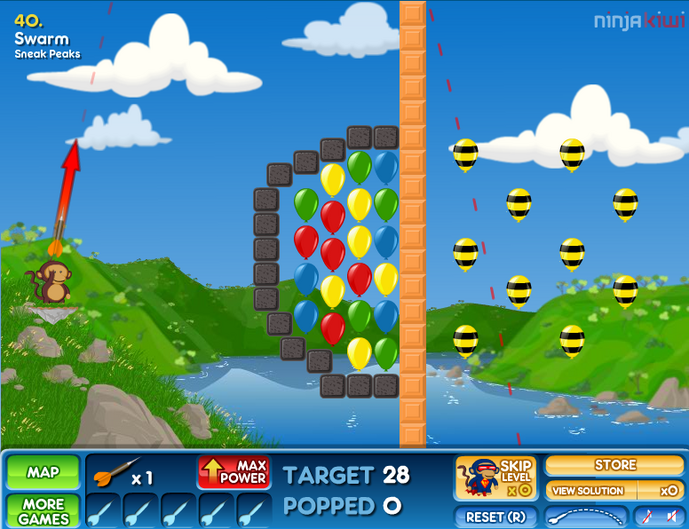
Swarm
With a max power shot launch a dart over the wall and hit one of the bee bloons. From there you can go right through the wall to pop the bloons or you can hit the bloons Screenshot
2fer
Shoot up to pop the triple dart bloon, be sure to angle your shot a little so your dart will go off to one of the bloon cluster and do some popping for you. Shoot your triple darts straight up. These darts, plus what your first one did should be enough to reach the target.
Quantum Tunneling
There's two ways to go about this. The easiest way is to go through the side, just keep hitting blocks to clear a path toward the bloons. The harder way is to go through from the top. It'll take a few shots to find the right angle, but once you do just keep hammering the area until you break through. With 60 darts you shouldn't have too much of a problem breaking through.
Air Traffic
Pop the bullseye bloon. It doesn't matter where you take out the middle or the top chamber first, just don't go for the bottom until last. Make sure you're sending the plane from the right side and you're aiming for the middle. You can miss one row of bloons and still reach the target.
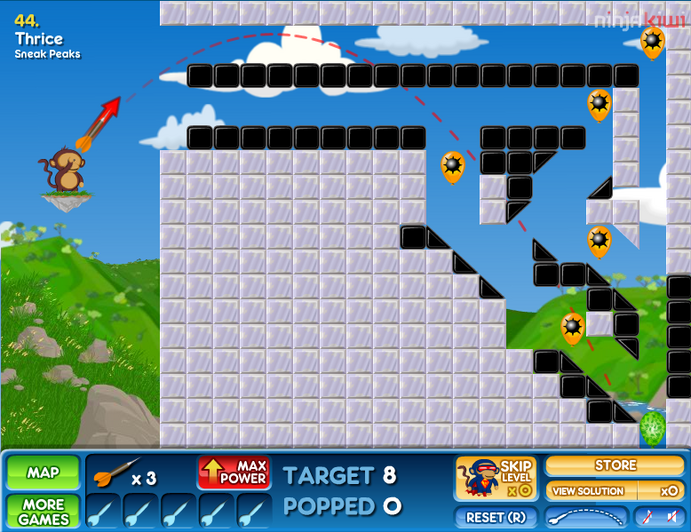
Thrice
The first shot will be a little tricky, you'll want to aim slightly diagonally one block's space from the last block on the top row of rubber blocks. Don't give it too much power and your dart should bounce through the tunnel and hit the spiked ball bloon. Next, send a fairly powerful shot through the lower tunnel to hit another spiked ball bloon. Finally, a less powerful shot angled slightly higher will hit the last spiked ball bloon. Screenshot
Bloon Bloon Go Boom
Fire your dart at the top spiked ball bloon on the right so that it also hits the star bloon. Turn to the left and fire your dart so that it hit's the bottom bloon and the star bloon. Take out the last spiked ball bloon and you should reach your target.
Tricknical
Aim about one block's space above the second rubber block from the left. A medium powered shot should pop the bullseye bloon and clear the row of bloons above the ice bloons. Send the plane through the gap on the left at the spiked ball bloon. The ball will end up hitting the bee bloon in the upper left, so maneuver the bees over to the bloom bloon, just watch the sides.
Quicksand
Aim directly above yourself, barely power your shot and let go. Your dart should pop a pin bloon and bounce on the disintegrating rubber to let the spiked balls reach the bombs.
Pesky Plane
First, fire your darts at the blocks above the gap on the left side. Disintegrate two of the blocks, then first your last dart at pin bloon below you. Use your extra darts to clear the block above the gap you widened then send your plane in through the opening.
Rubber Jungle
Robot Smash
Fire your first dart through the row of spiked ball bloons. After the second or third row of breakable blocks is gone fire a low powered shot at the pin bloon the farthest to the right of the left set of bloons. It should bounce off the blocks and hit a pin bloon in the right set.
In Stitches
Aim for the anti-grav bloon with a very slightly angled and very weak shot. Screenshot
Busy Bees
First, place your cursor about one block's space above the corner steel block on the top left. A medium powered shot should arc your dart right into the pin bloon at the center of the far right bloon cluster. Next, pop the bee bloon when it's closest to the cluster to the right and send them through the pin bloon of that cluster.. Quickly plow through the tan wall, pop the speckled bloon, go through the other side and pop the remaining pin bloon. You'll have to be very quick and it might take you a few tries.
Safe Cracker
Pop the boomerang bloon and make sure it's angled just right so that it also pops the layer of regular bloons above the ice bloons. Throw your boomerang with a nice bit of power so it loops around, pops the other boomerang bloon and sets off the bomb bloons. With the same power and a slightly lower angle you should be able to throw your boomerang and pop all the ice bloons.
Key Hole
First, pop the triple dart bloon. First directly above you with very low power and you should be able to pop two of the star bloons. Target the two middle destructible rubber blocks, you should also be able to pop another star bloon with the rebound. After you've made an opening, fire a dart through and try to hit the pin bloons on the other side. The upper section is relatively easy to get too, but to hit the lower you have to have your dart's trajectory changed slightly by scraping one of the rubber blocks.
Trimmin
Start but aiming above you and slowly popping bloons as they pass above you. Make sure not to hit the ice bloons. Get as many as you can, but make sure you save a dart to fire at the pin bloon, it'll take out the ice bloons and you'll reach your target.
The B Team
Let the moving bee bloons get close to the stationary ones. Once or two has moved past the still one pop the ones in front of you and plow through the wall. Pop a few bloons but stay close to the opening so you can pop the rest of the bee bloons. Pop the bomb bloons and clean up whatever more you need to reach the target.
Test Tube Pilot
Pop the bullseye bloon. Time it with the camo bloons reappearance and send your plane at the spiked ball bloon.
Whack a Bloon
Send an almost max powered dart at the top middle bloon when it pops out. With a good arc it'll take out another bloon. From there, just make precision shots to clean up the rest.
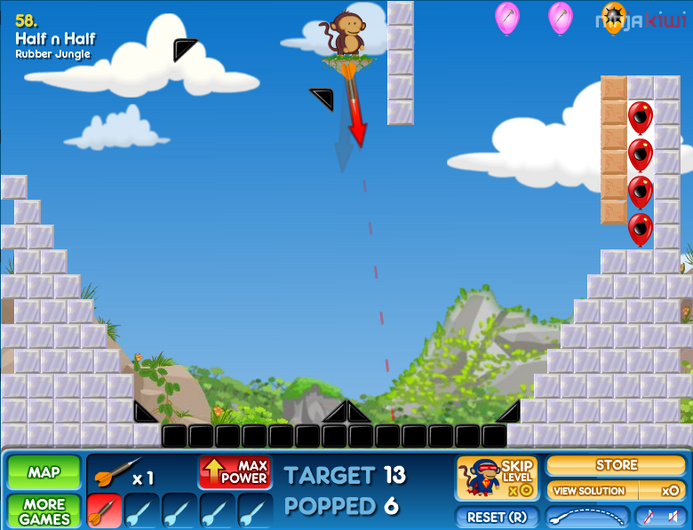
Half n Half
Aim down and slightly to the left and send a max powered shot towards the star bloon. The dart will bounce and take out the bloons on the left. Move your cursor to the right and put it near the second block to the right of the black rubber pyramid. Shoot a medium powered dart that hit's a pin bloon. Now your cursor very slightly to the right, give it a little more power and you'll hit the bombs. Screenshot Screenshot 2
Upstairs Downstairs
Fire a slightly less than medium shot at the anti-grav bloon below you. You want to hit it so it takes out one of the ice bloons in each of the two clusters and also hitting the two clusters containing pin bloons.
Patrol
This one's mostly about timing. Hit the anti-grav and the bee bloons with one shot. Send your bees through the breakable barrier and hit the spiked ball bloon. If you timed it right, the ball will shoot up and pop the two columns of bloons.
The Temple of Bloon
Bee Hive
Pop the bee bloon with a soft shot that arcs, bounces off the rubber and hits the bloom bloon. Plow your bees into the side of the hive to reach the triple dart bloon. Use the darts to take out the newly bloomed bloons.
Spring Blossom
First you'll want to hit some of the bloom bloons that aren't right next to the bomb bloons. They'll bloom and when you do set off the bombs the explosion will take a good chunk out of them. After the bombs have done their work fire soft arcs around the edge and through thicker parts of the cluster.
Bloon Bunker
One good strong shot into the tunnel will take out a lot of the bloons. To get to the bloons locked away by the destructible rubber blocks, just aim inside the mouth of the tunnel, close to the top and send a couple weak shots in.
Blocked Drain
There's a few ways to beat this level. Here's just one of them: Aim for the star bloon below you. You'll want to give your shot enough power to bounce over and hit the tan breakable block in the very middle. Try not to hit the spiked ball bloons above it. Until right now, arc a dart through the row of spiked ball bloons. Sometimes you'll get some lucky bounces and the spiked balls will clear the block in front of the gap and go down and pop the pin bloon. If not, you'll have to either bounce or arc a bloon through the gap.
Straitjacket Fits
The best way to get through this one is just experimentation since there's so many ways it can go. Fire enough darts in enough directions and eventually you'll reach your target.
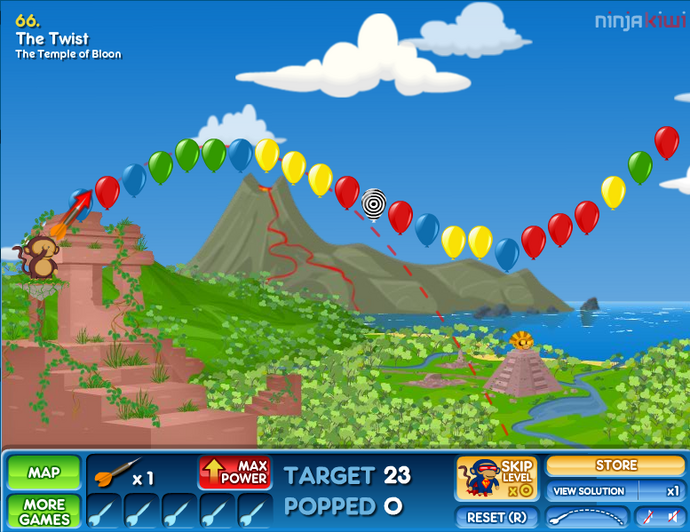
The Twist
This one's pretty tricky. Basically, you have to arc your dart perfectly along the curve of the bloons so it comes down on the anti-grav bloon and goes back up perfectly. It's hard to describe the correct way to do it, so you might want to just check out the angle in the picture. You might have to adjust the angle slightly Screenshot
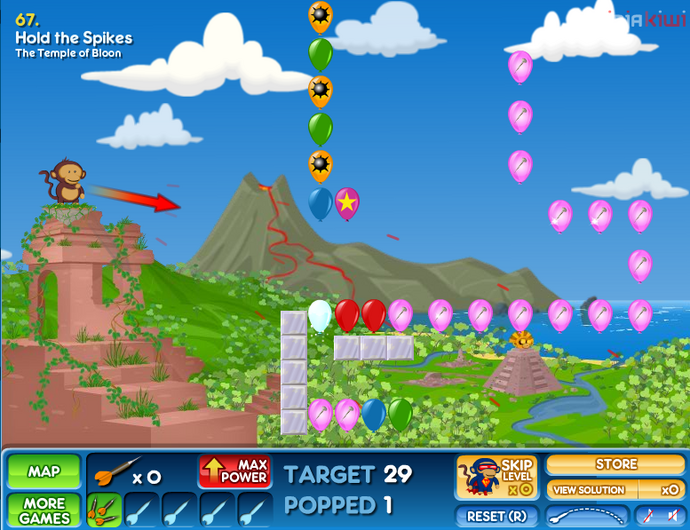
Hold the Spikes
Pop the triple dart bloon. Fire them under the spiked ball bloons, make sure you hit the pin bloons and the star bloon. The pins should take care of the ice bloon. From there, hit the top spiked ball bloon. Screenshot
Frozen Link
Pop the bomb bloon that's surrounded by ice bloons on the right. Swing your aim around to the bomb bloon surrounded by ice bloons above you with the spiked ball bloon to the right. Hit the bomb. The spiked abll should hit the ice bloons, bounce off the frozen speckled bloons and hit the bomb bloon.
Hypnosilliness
Pop the spiked ball bloon in the upper right corner that's directly under the pin bloon.
Descent
Just keep arcing your dart through the gap. Vary the power and the angle every couple of shots and it shouldn't take long for your darts to bounce their way to the target amount.
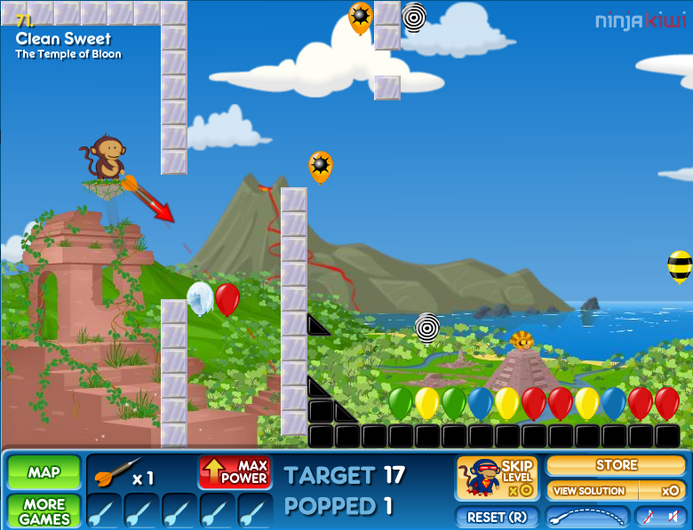
Clean Sweet
First, you'll want to hit the ice bloon below you. If you pop it as soon as you can, the moving bloons should be frozen close to the position you need. After you pop the ice bloon, swing your aim over and bounce a dart off the frozen bloon. It should hit the spiked ball bloon and send it into the bee bloon. Guide the bees to the anti-grav bloon, then into the spiked ball bloon. Screenshot
Spots
To start, you'll want to bounce two darts off the top two of the column of breakable rubber blocks so that they take out the two bomb clusters to your left. A somewhat powerful shot to the top block should reach the cluster on the left and a barely powered shot to the second should hit the one on the right. It's okay if you hit any of the other blocks as long as the top two are gone. After that, pop the spiked ball bloon, but make sure you don't hit the speckled bloon with your dart. After the speckled bloon has been frozen, bounce a dart off of it so that it hits one of the pin bloons to the left.
Crazy Coast
Simultaneity
Aim above your head, angled slightly to the left or right. Fire, then quickly angle in the opposite direction and fire again. This level is mostly about timing, so it might take a few tries.
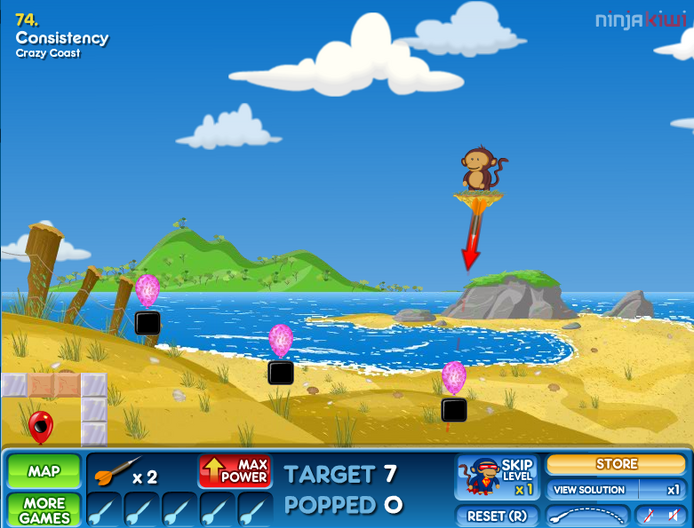
Consistency
This one seems easy, but it's pretty tricky. You have to bounce a dart one the three rubber blocks, then make the exact same shot again so the dart can hit the bomb bloon. Use the outline of your previous shot to help. Screenshot
The Gauntlet
Once again, it's all about timing. Pop the bullseye bloon and send the plane through the two rows. Keep an eye on the bomb bloons, they'll end your flight.
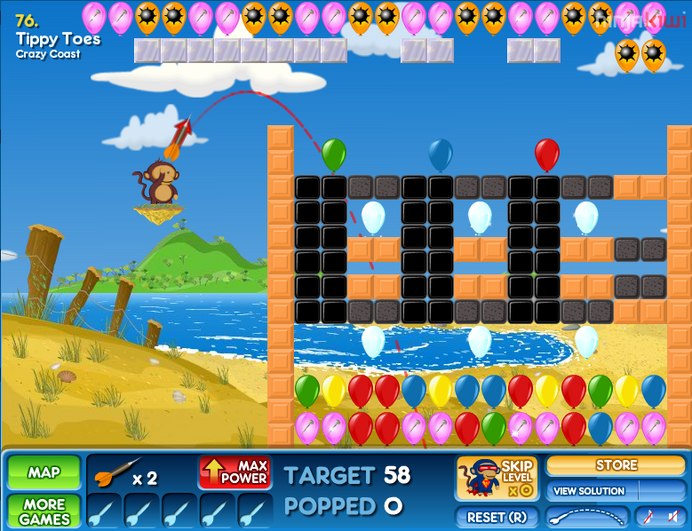
Tippy Toes
Launch a dart in a soft arc over the barrier so it hits the three bloons on the rubber blocks. If your dart hits any of the destructible rubber blocks before the third bloon is popped then restart. After those three are gone and your dart cracks a tan block after the third bloon, swing your aim around to the pin bloon and pop it. Screenshot
Crazy Owl
Start off by arcing a dart through the top two rows of bloons. Next, pop the boomerang bloon below you on the left side of the owl. Throw your boomerang around the tan brick blockade in the center so it takes out a bunch of bloons and, more importantly, hit's the the other boomerang bloon. Throw this boomerang wherever you can take out the most bloons. You should have three darts remaining, use these to clear up whatever else you need to reach the goal.
Infiltrate
Start off by popping the bullseye bloon, make sure your dart bounces off the rubber block and hits the bee bloon. Quickly guide your pieces up the cross made of tan blocks. If you don't clear all five, restart the level. Send your plane through the tunnel and pop all the pin bloons. Fire shot that's a bit more than medium powered in the split in the two rubber blocks. Your shot should bounce into the lower chamber and take out most of the bloons. Next, shoot a max power shot in a wide arc above you so it lands in the upper chamber.
Backtrack
You'll have to be quick with this one. Send a soft arc through the star bloon, angled so it bounces down towards the pin bloons. Immediately after you do that fire a very weak dart at the anti-grav bloon below you. If you were quick enough, your first dart will come back up and bounce toward the remaining bloon cluster.
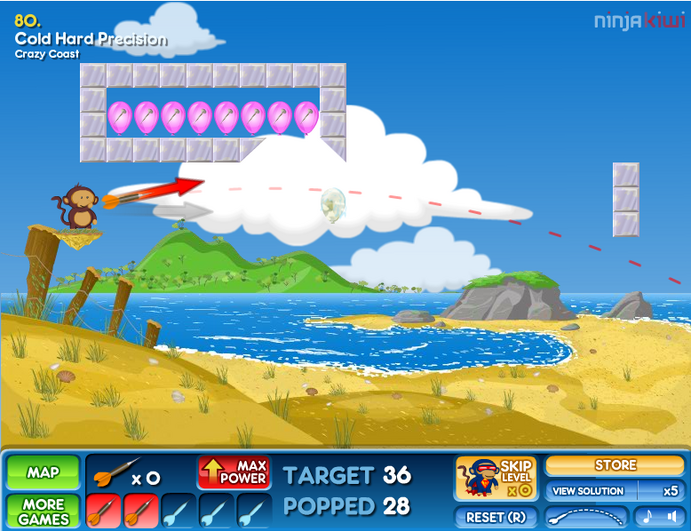
Cold Hard Precision
Shoot down at the pin bloons to pick up the bullseye and star bloons. Now, you're going to send your plane at those two rows of bloons, BUT this time you want to miss the camo bloon. If you hit it, you'll have to restart. Once those two rows are clear, pop the ice bloon while the camo bloon is visible. A frozen camo bloon can still disappear, so keep that in mind. When it's visible, bank a shot off the camo bloon into the pin bloons. You'll want to try to hit the curve as close to the top of the bloon without hitting the top of the bloon. Screenshot
Division
Send a dart through the bomb bloon in the top right cluster. Begin to guide your bees toward the bloons on the top of the divide to your left. When you notice that the bees from the bee bloon from the bottom right cluster as catching up, adjust yourself so that they'll go to the bloons on the bottom of the divide. Guide both sets of bees to the pin bloons.
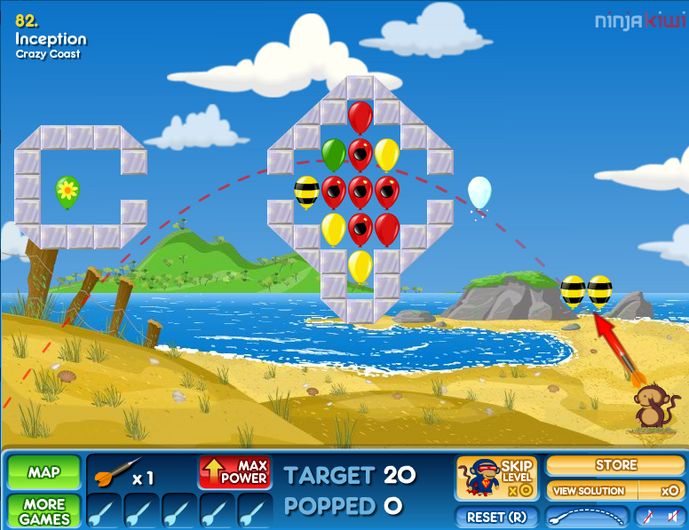
Inception
Arc your dart through the left bee bloon so that it slides past the ice bloon and hit the bomb bloon. There is a way you can hit the ice bloon and still clear the cluster, but 9 times out of 10 your dart will just bounce off the frozen bloon. Use your bees to pop the other bee bloon, then hurry over the the bloom bloon on the far left. Squeeze through the opening and pop as many of the bloons that bloom. You won't need all of them, though. Screenshot
Clear Skies
This is going to take you a few tries. Pop both bullseye bloons. Move your cursor to the left and get a good feel for the point where the plane guide arrow switches from one side to another. Send your first plane in the from the left, making sure it takes out all three rows. Right after you send the first plane, make the quick switch and immediately send another plane from the right.
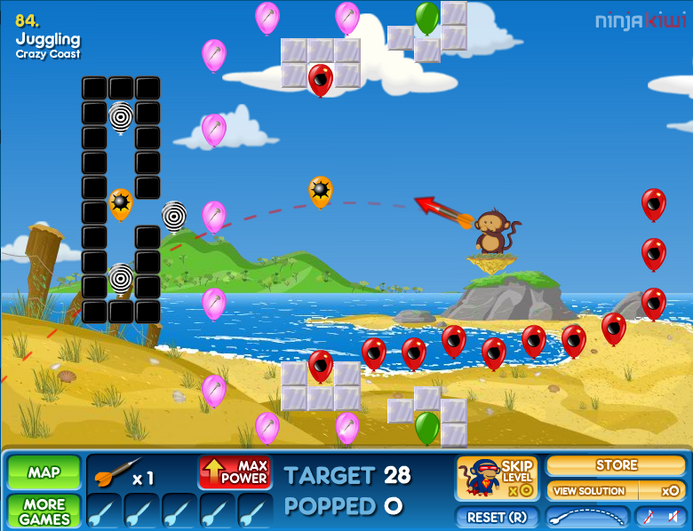
Juggling
Send your dart in a soft arc through the spiked ball bloon to your left. Make sure the dart also goes through the pin bloon, hits a rubber block and bounces back to hit the arc of bomb bloons under you. The rest will take care of itself. Screenshot
Magma Mountain
Birdies
Fire a decently powerful shot at the bottom rubber block on the right side so that the bounces and pops one of the pin bloons. Next, arc a dart onto the slanted rubber block. You'll have to hit the spiked ball bloon on the way up or down and you have to angle your shot so it bounces to the right and hits the remaining bomb cluster.
Mountain Pass
One dart, one bloon. See that slanted steel edge on the top of the tunnel leading to the chamber you're in? Imagine there's a block above it and point your cursor at the spot where the middle of the block would be. Power up and let 'er fly. Use the screenshot to help you gauge the power and the angle. Screenshot
Runway
Pop the bullseye bloon. Way for the pin bloons to get into position where when they pop they'll send pins at all the bloons, except the ice ones. Send your plane through them when they're in place. Don't bring up the plane guidance arrow until the last second because you're likely to miss your moment waiting for the arrow to go back to the center. The screenshot shows you the position of the bloons just before you should send in your plane. Screenshot
Catcombs
Pop the bomb bloon to your right. Swing your aim down to the anti-grav bloon below you and pop it. Two things to keep in mind: first, you'll want to make it a fairly straight shot so that the dart will get lifted up to the pin bloons above you. Second, you'll want to do this fast enough so the spiked balls that get release will float up to the top, but not so fast that they don't have time to pop a pin bloon and take out the cluster below. next, pop the bomb bloon to your left. Finally, arc a dart up and under the remaining bloon cluster.
Quick Draw
Arc a dart over the barrier to your right so that it the spiked ball bloon in the corner. Quickly swing your aim to your left at the first green bloon. As soon as the pins pop the star bloon, fire and pop the green. Repeat this process for the next star and green bloon. Be very, very quick. Another tip, don't hold down the mouse button in anticipation, you won't go into firing mode, you'll just sit there as your bloons freeze.
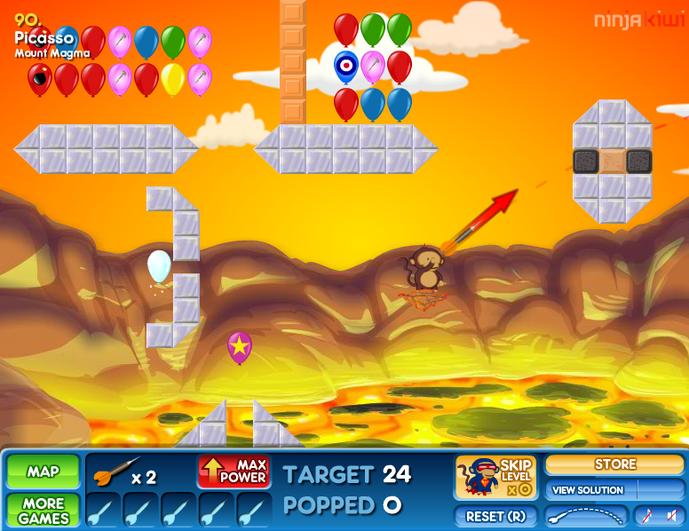
Picasso
Start by bouncing a dart off the rubber block to your right so that it arcs up and hits the pin bloon. Next, send your plane crashing into the ice bloon on the far left, but time it so that it freezes the start bloon. Finally, bounce a dart up and into the pin bloons at the end of the remaining cluster. Screenshot
Daisy Chain
Wait for the first bloom bloon to come over the the anti-grav bloon right below you on the bottom row. Fire a barely powered shot through both. If you did it correctly, your dart with zig and zag down the line blooming the bloom bloon and popping the anti-gravs. It should hit the bullseye bloon, then you can send a plane through and clean everything up.
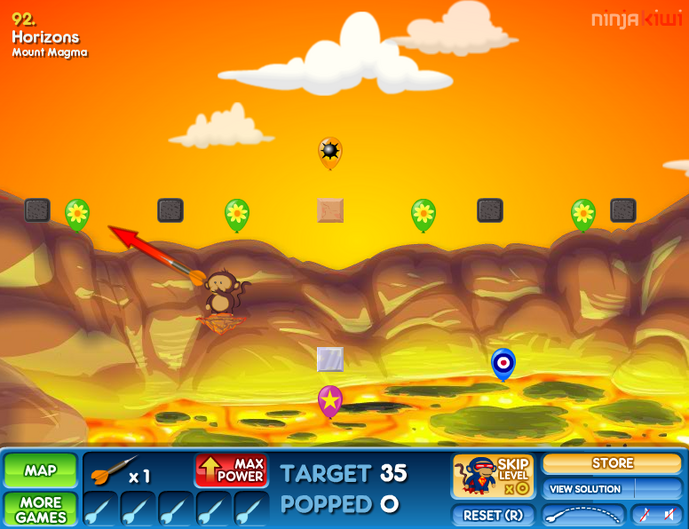
Horizons
Aim to your left and send a fairly powerful dart through the last bloom bloon on the left. Arc it so it bounces and also pops the spiked ball bloon, the last bloom bloon on the right, bounces off that rubber block and down to the star bloon below you. Now, pop the remaining bloom bloon on the right with a similarly powered shot, but angled lowered so it bounces and hits the last one on the left then goes down to hit the bullseye bloon. Use the plane to clean up the recently bloomed bloons. Screenshot 1 Screenshot 2
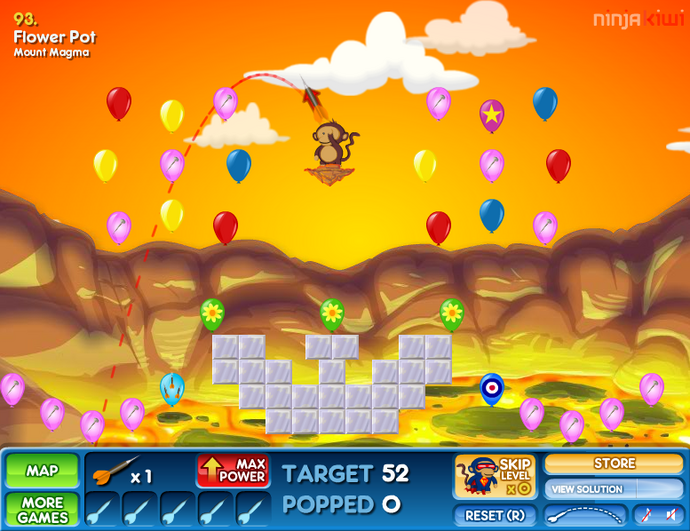
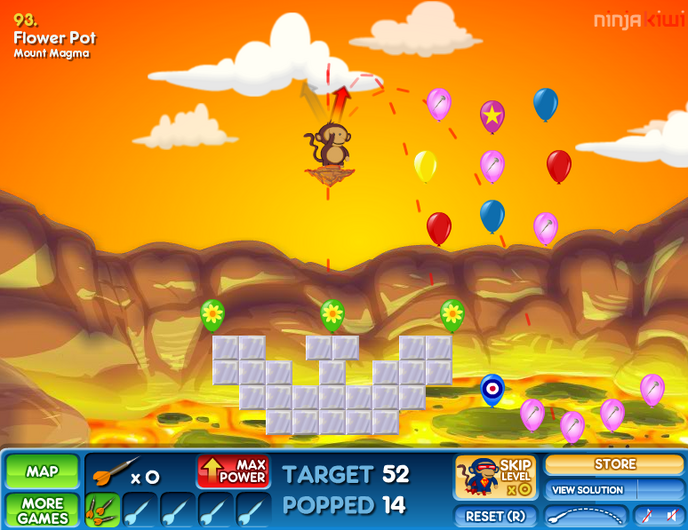
Flower Pot
Start by sending a somewhat weak, soft arc through the center pin bloon in the cluster to your left. Next, aim directly above you then move the pointer a little to the right. If it were a clock it'd be pointing to the two or three minute mark. Shoot your triple dart shot so that one hits the top pin bloon in the cluster and the other two hit the center and right bloom bloon. Use your last dart to pop the last remaining bloom bloon, then send the plane through the bloomed bloons to finish the level. Screenshot 1 Screenshot 2
Pop 'Em All
Just like the level name says, you've got to pop every bloon. Your best bet will be to use a soft arc at the top and powerful straight shots between rows, ones that take out both rows at the same time.
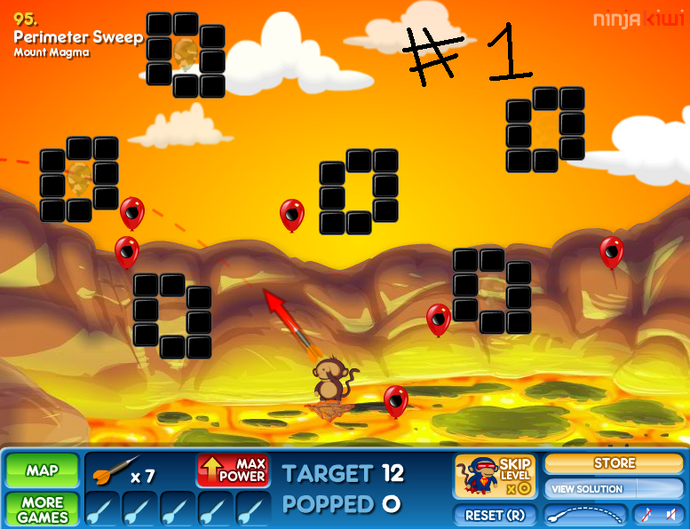
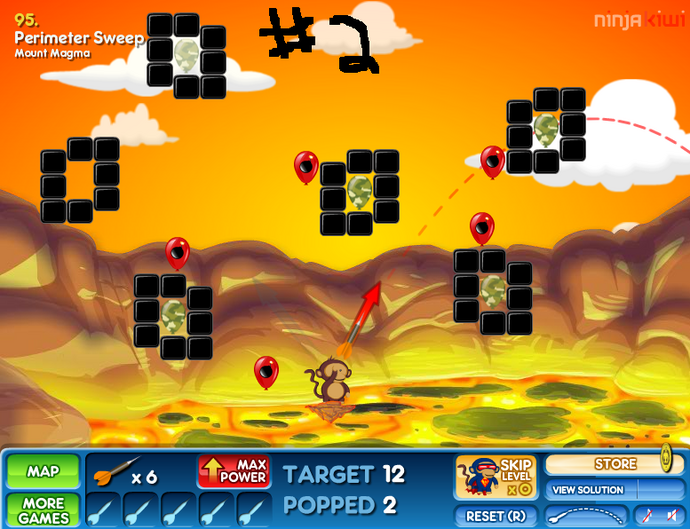
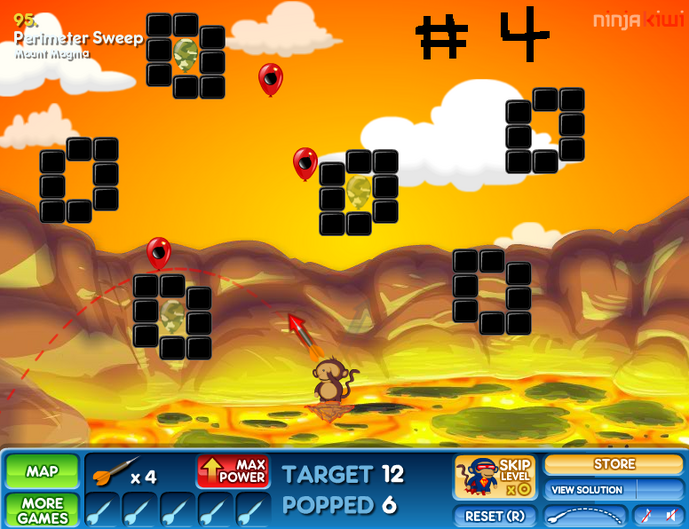
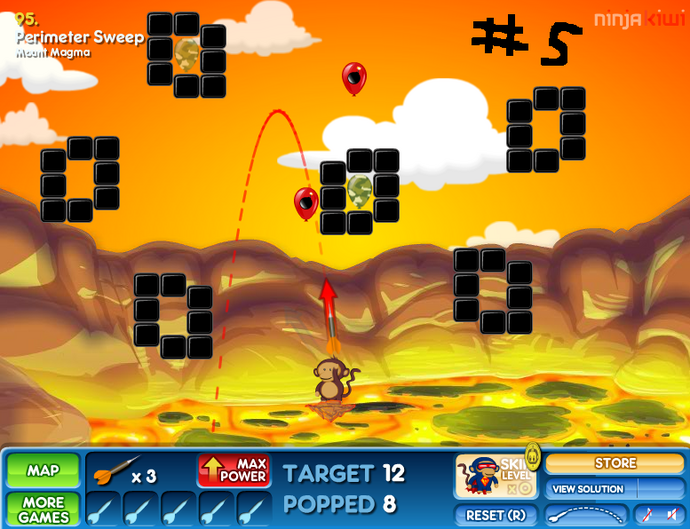
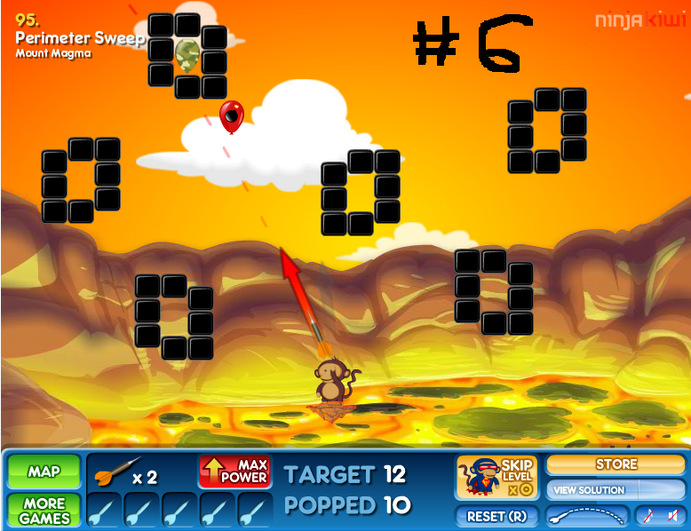
Perimeter Sweep
This one is very tricky. It's all about precision and two kinds of timing, timing the position of the bomb bloons and timing it so the camo bloons are visible. To make things tougher, some of the bomb bloons will float away after awhile. This one's hard to explain, so I've included screenshots of all six shots you need to make so you can see the position of the bombs and the angles you'll need. Most of the images show the moment before you should fire. Screenshot 1 Screenshot 2 Screenshot 3 Screenshot 4 Screenshot 5 Screenshot 6
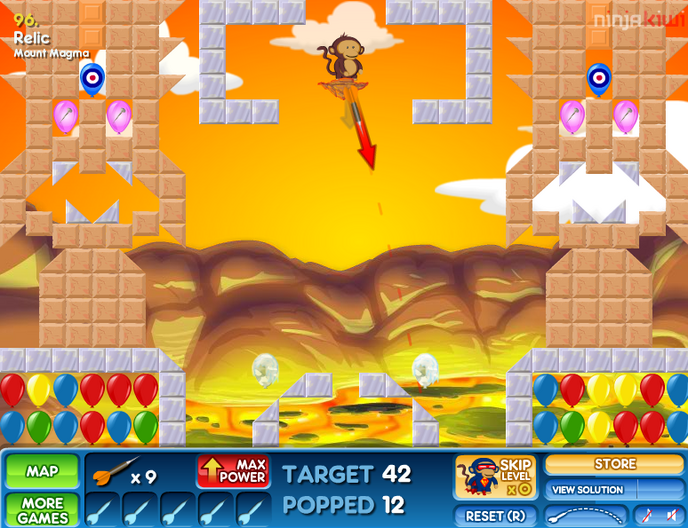
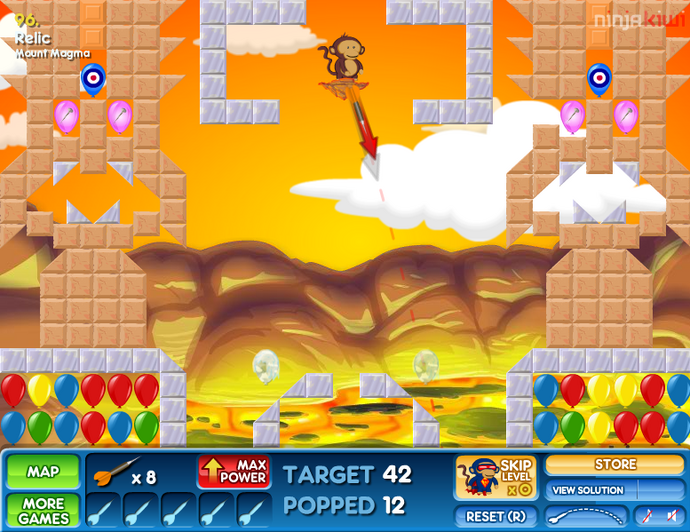
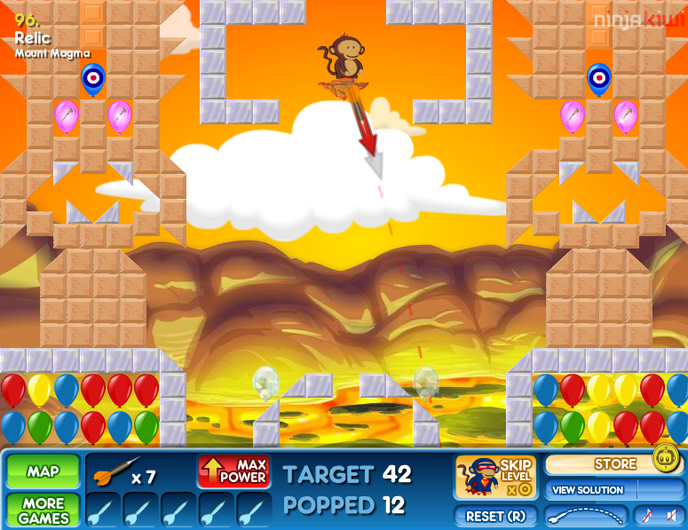
Relic
We've made it! First, as the camo bloons are starting to disappear as they're moving past the first speckled bloon, fire directly downward, nothing too strong. You want the dart to bounce down to the pin bloon below. Your camo bloons should be frozen near the slanted steel blocks. Now, you'll want to bounce a dart or two off one of the frozen bloons to the tan blocks guarding the pin bloon. If you're starting with the the bloon on the left, go for the pin bloon on the left, if you're doing the one on the right, aim for the right. Make a big enough opening for you to get a dart to the pin bloon. It'll pop the bullseye bloon, now send your plane into one of the bloon filled chambers at the bottom of the screen. Repeat this process for the other side. The screens will show you the angles and power levels, they'll apply to both sides. And that's how you do that! Screenshot 1 Screenshot 2 Screenshot 3
Thanks to Brad for writing up the walkthrough :D
Posted by: Kero |
September 24, 2010 1:31 AM
|
September 24, 2010 1:31 AM