

Secrets of the Dragon Wheel
Platform: Mac, Windows
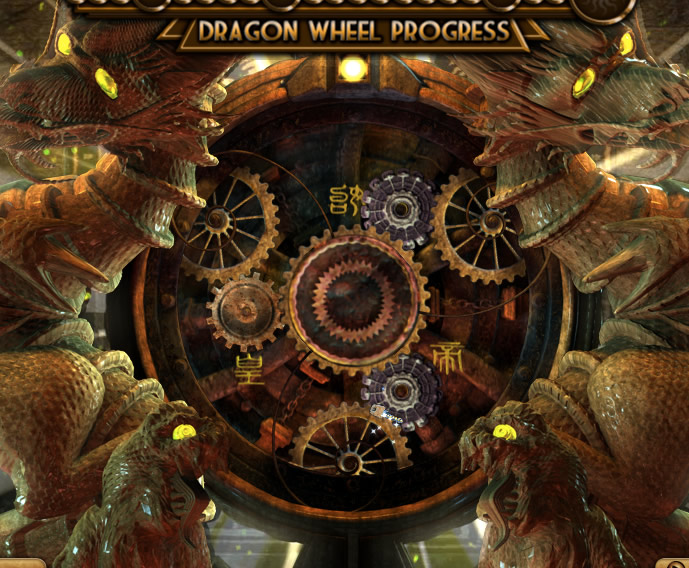
![]() In Empress of the Deep, Silverback took gamers to a gorgeous and mysterious undersea world. Now they're back with a new hidden object adventure, Secrets of the Dragon Wheel, featuring the plucky Epiphany O'Day in a quest which evokes the pulp fiction style of classic film serials. Can you keep the Dragon Wheel from falling into the clutches of the one who killed your mentor?
In Empress of the Deep, Silverback took gamers to a gorgeous and mysterious undersea world. Now they're back with a new hidden object adventure, Secrets of the Dragon Wheel, featuring the plucky Epiphany O'Day in a quest which evokes the pulp fiction style of classic film serials. Can you keep the Dragon Wheel from falling into the clutches of the one who killed your mentor?
 As you travel around trying to solve the mystery, you can click on some objects sitting around to add them to your inventory. Other objects are obtained through hidden object scenes, where you will be given a list of objects to find in a certain scene. When you complete the scene, you'll get at least one of the objects placed into your inventory. Through your investigations you'll get clues for how to use inventory items. Sometimes to move forward you must solve a puzzle, such as the reoccurring Persuasion mini-game where you must find a path that crosses over every square in the correct order.
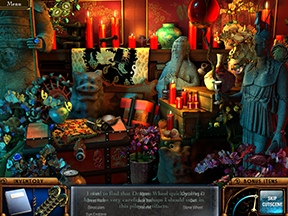
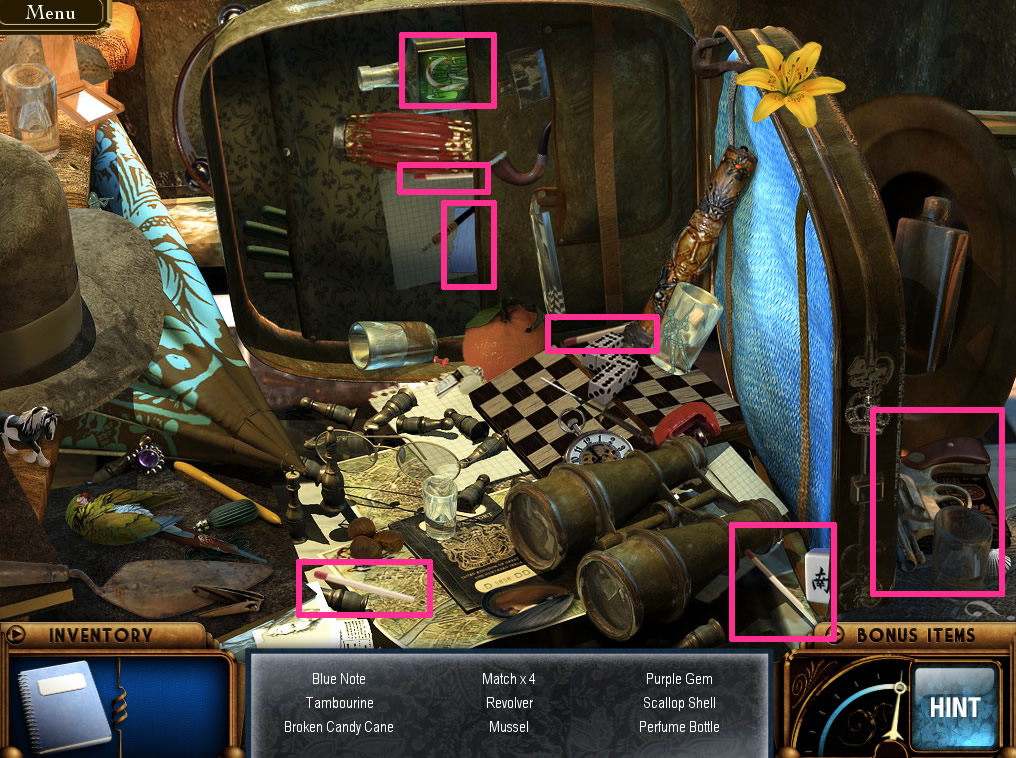
Analysis: Let me make it perfectly clear: the story is a goofy romp, from its candy cane toting villain, to a shrunken winged man in a bird cage, to accents out of Hogan's Heroes and Hawaii 5-0, to "improvised blowtorches", to the hilarity of the heroine's saying out loud "Nothing that a little feminine persuasion can't fix." (Seriously, she says that MORE THAN ONCE.) However, the beautiful art is far from goofy. Every scene is full of intricate little details. You can practically smell the mustiness of an antique shop emanating from your screen. It makes the hidden object finding a joy. A pair of binoculars won't be the same old stock art; instead, while clearly identifiable as a pair of binoculars, it'll be done in a lovely vivid red cloisonné.
Since I actually speak Chinese, have lived in Taiwan, and take a keen interest in the culture and history of the Sinosphere, you might think the inaccuracies of this game would have me pulling my hair out. Shouldn't I be irritated that no one pronounces even a single Chinese word correctly in the entire game, not even the Chinese people? On the contrary, it didn't bother me at all, because it's just another way that this game is about as true to real life as Werewolf Women of the SS. The game breaks suspension of disbelief so gleefully that it crosses the line twice, back around to enjoyment.
 Although the voice acting is campy, it's well-written camp, if that makes sense, and practically everything is voiced. The sound effects also add to the game's immersion. For example, on a train, you don't get that kind of constantly repeating short "YOU'RE ON A TRAIN! YOU'RE ON A TRAIN!" rattling sound effect that can drive you nuts in some other games. Instead, the atmospheric sounds are subtle and effective. A low rumble gets louder, than softer, then a sudden clanking as if the train is turning a corner, then silence for a time, then perhaps a chime as if the train is going through a crossing. Add in the game's music, and it's a recipe for total absorption in the scene.
The game features frequent inventory puzzles, with a fantastic user interface which makes keeping clues, objects and ideas straight a breeze. The hints recharge fast and are useful not only in the hidden object scenes, but also in trying to solve mini-games and puzzles, and sometimes simply in hinting where you ought to look next. No hidden object scene is repeated more than twice.
Although the game definitely doesn't take itself seriously, it's clear that serious effort went in to making this game. It's another great game from Silverback, and one that fans of the HOG genre won't want to miss.
![]() Windows:
Windows:
Download the demo
Get the full version
![]() Mac OS X:
Mac OS X:
Download the demo
Get the full version


Walkthrough Guide
(Please allow page to fully load for spoiler tags to be functional.)
CANDY CANE LOCATIONS:
I'm putting these all here, in a separate comment, rather than in the main walkthrough, for two reasons.
#1: This way you can check easily which ones you have and still need. I do warn in the main walkthrough when you are about to leave an area permanently and lose the opportunity to get candy canes. The candy canes are totally optional.
#2: Based on the arrangement of the canes, it appears that there are 14 candy canes to find total, however I only found 13, and diligent Googling has so far uncovered no one who has found more than 13. (The Gamezebo walkthrough claims to have 14, but it doesn't, it only has 13 if you actually go through and count.) If you know where to find more canes, please let me know! I will delete/edit this comment if I find any more.
The first three must be found before getting on the Imperial Majestic.
#10 must be found before leaving the village.
All the others, as far as I can work out, can be found at any time up until just before the end.
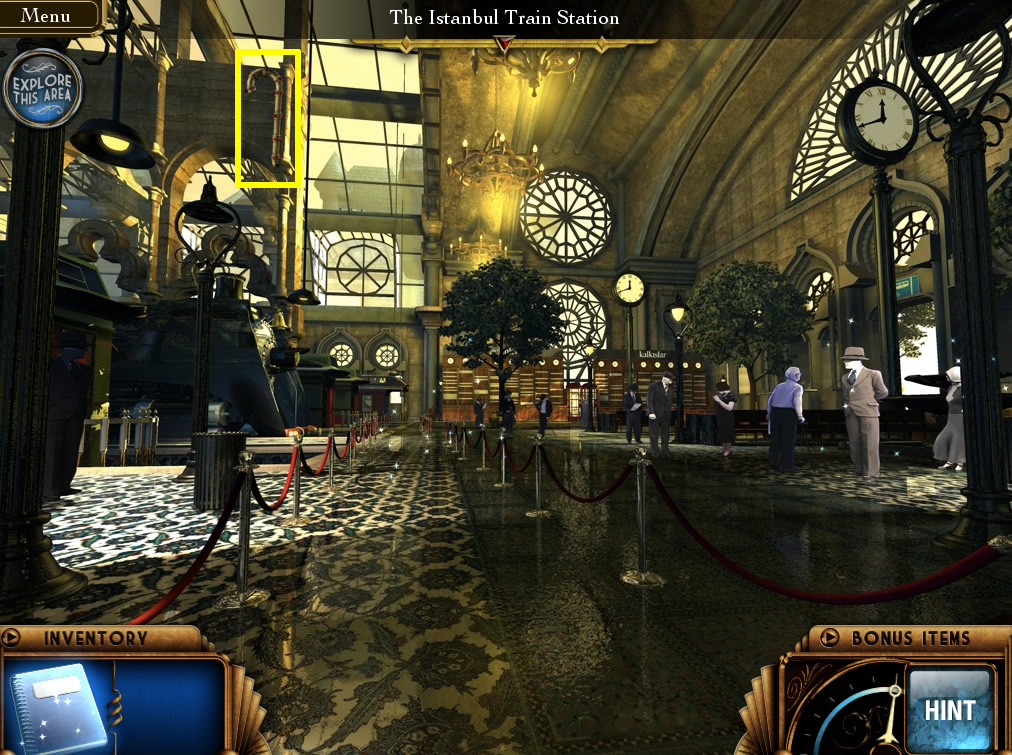
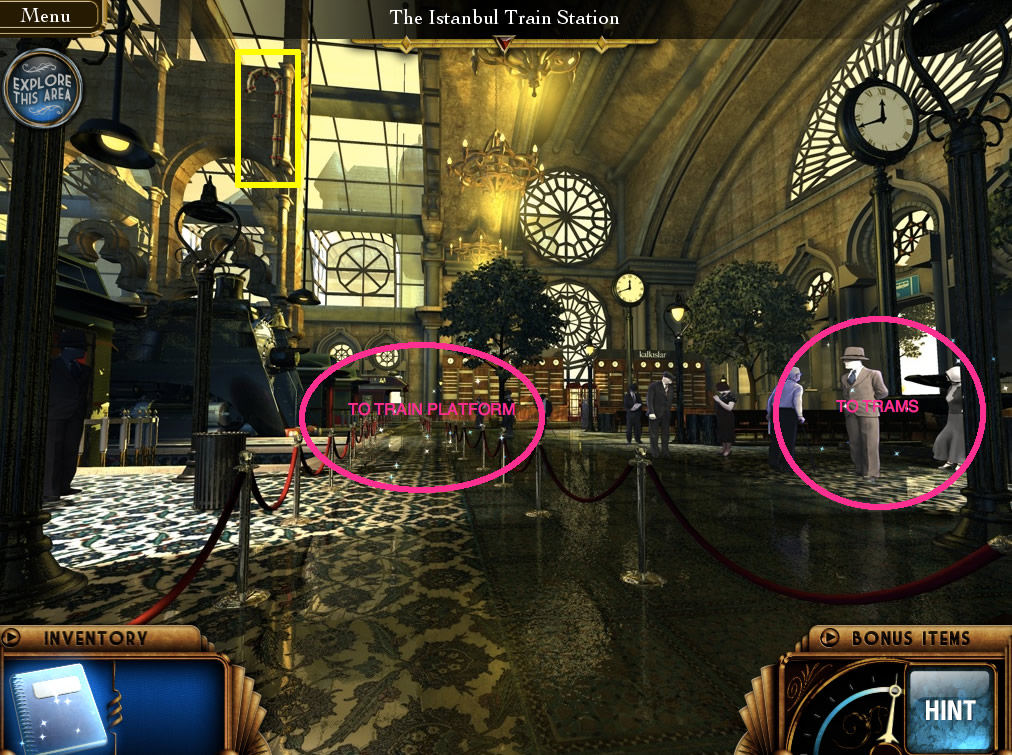
Istanbul Station, main area. Upper left, attached to a pillar. Screenshot.
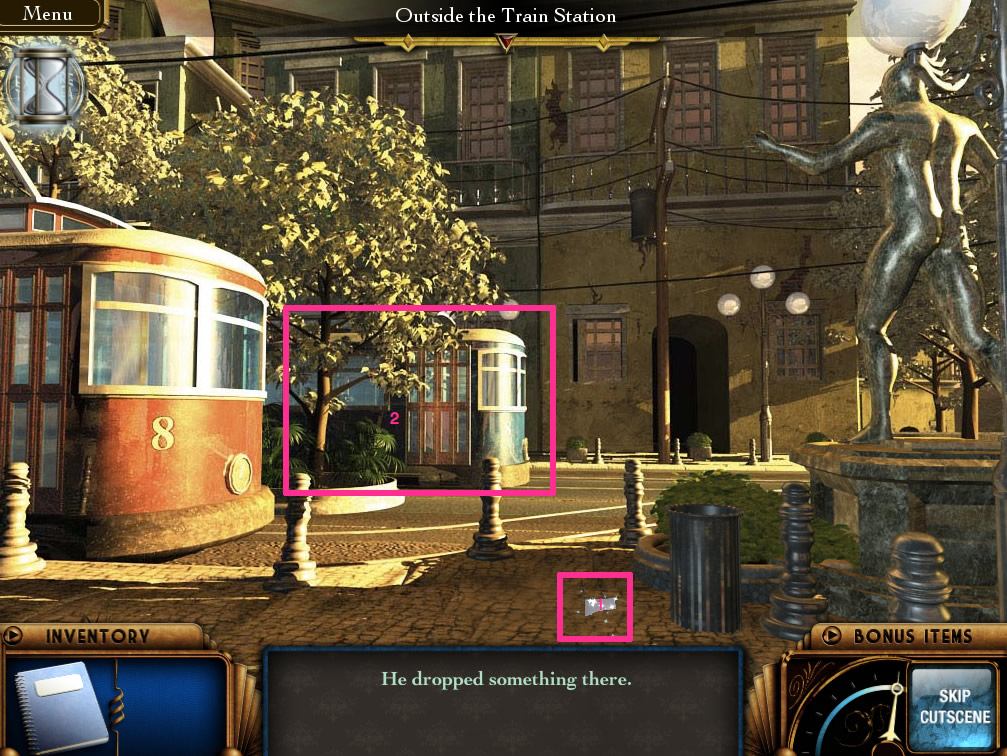
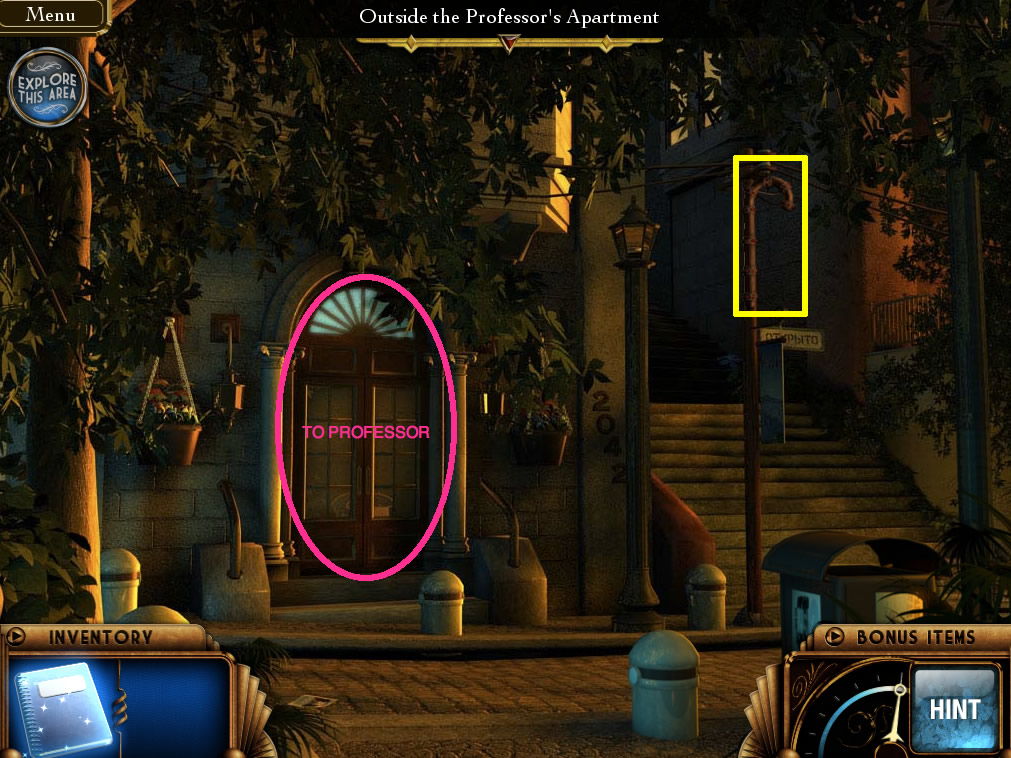
Outside the professor's apartment. Attached to the streetlight. Screenshot.
Bazaar, storefront. Over the head of the man. Screenshot.
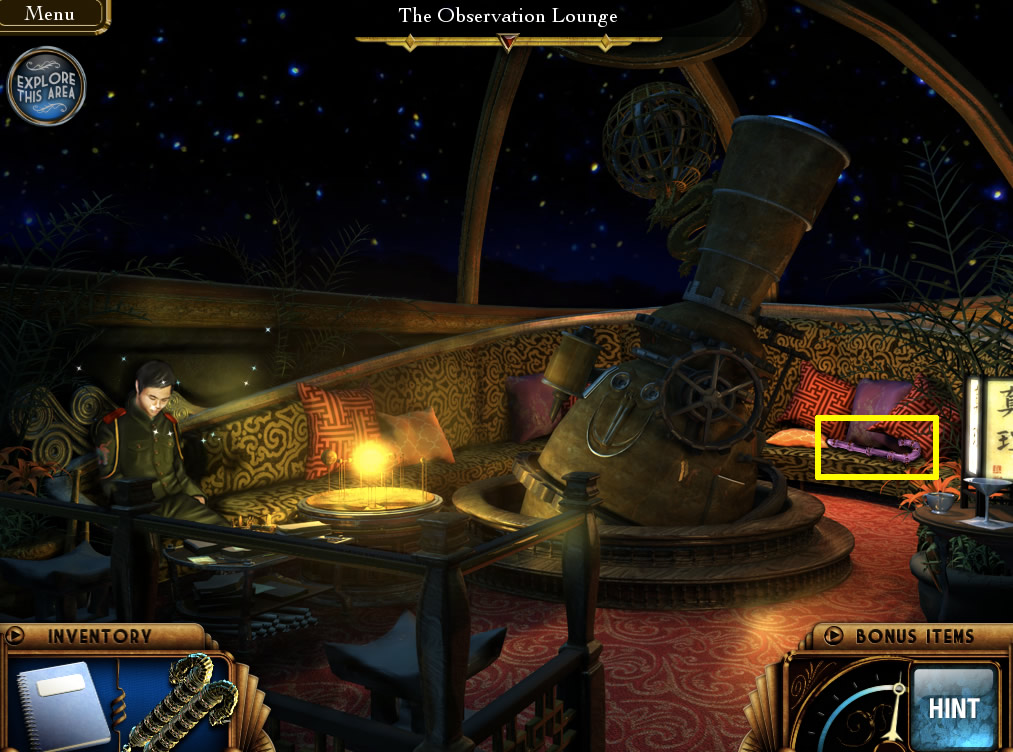
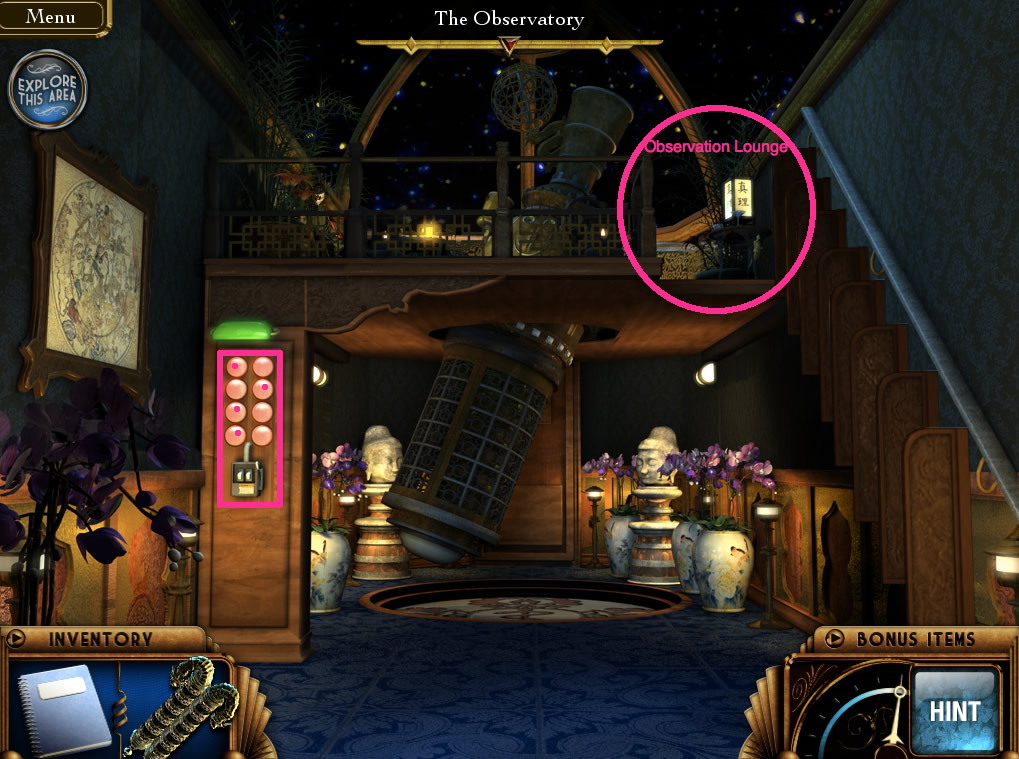
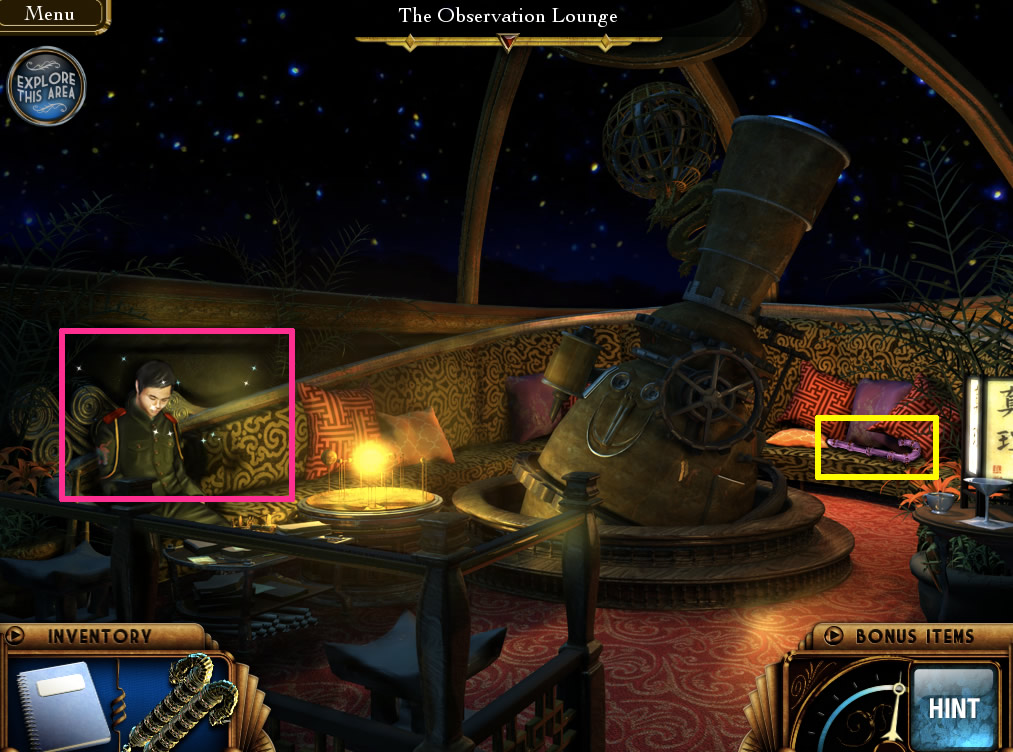
Observation Lounge, on the sofa, to the right of the telescope. Screenshot.
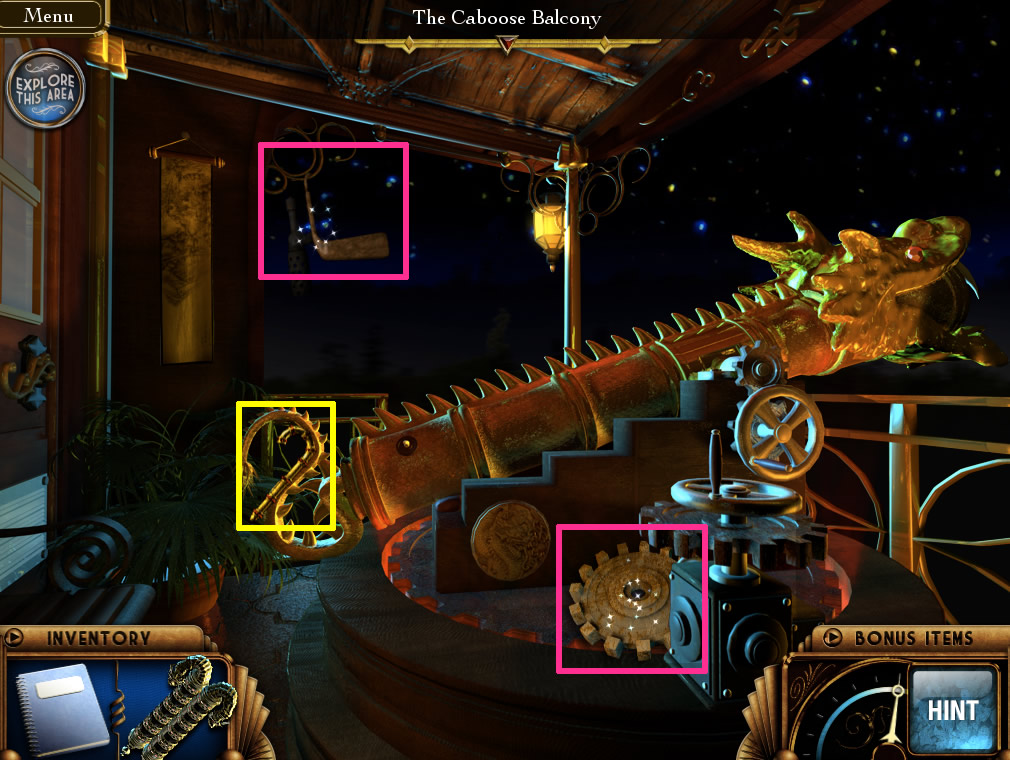
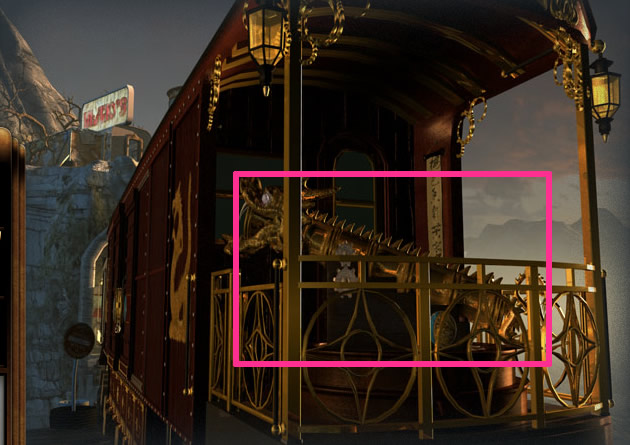
The Caboose Balcony, on the tail of the dragon cannon. Screenshot.
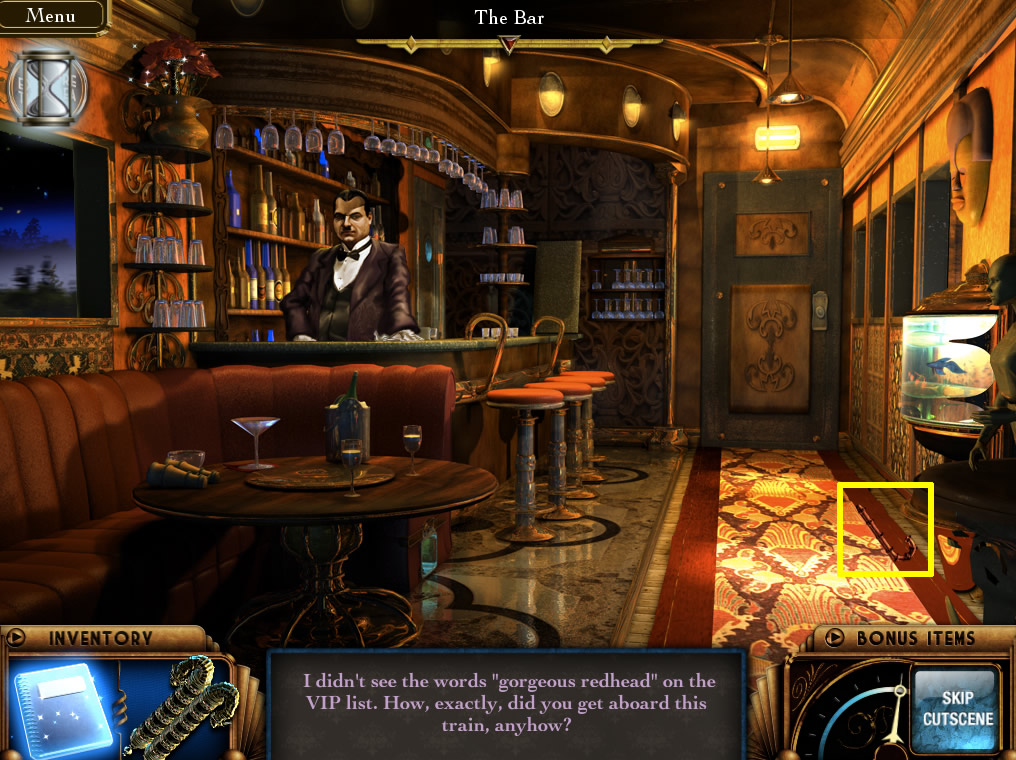
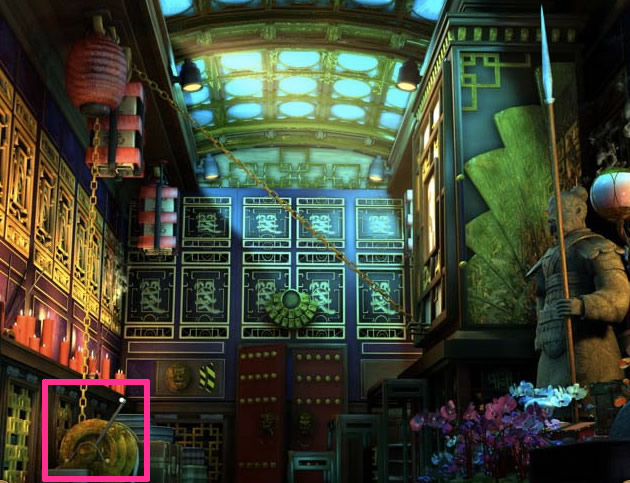
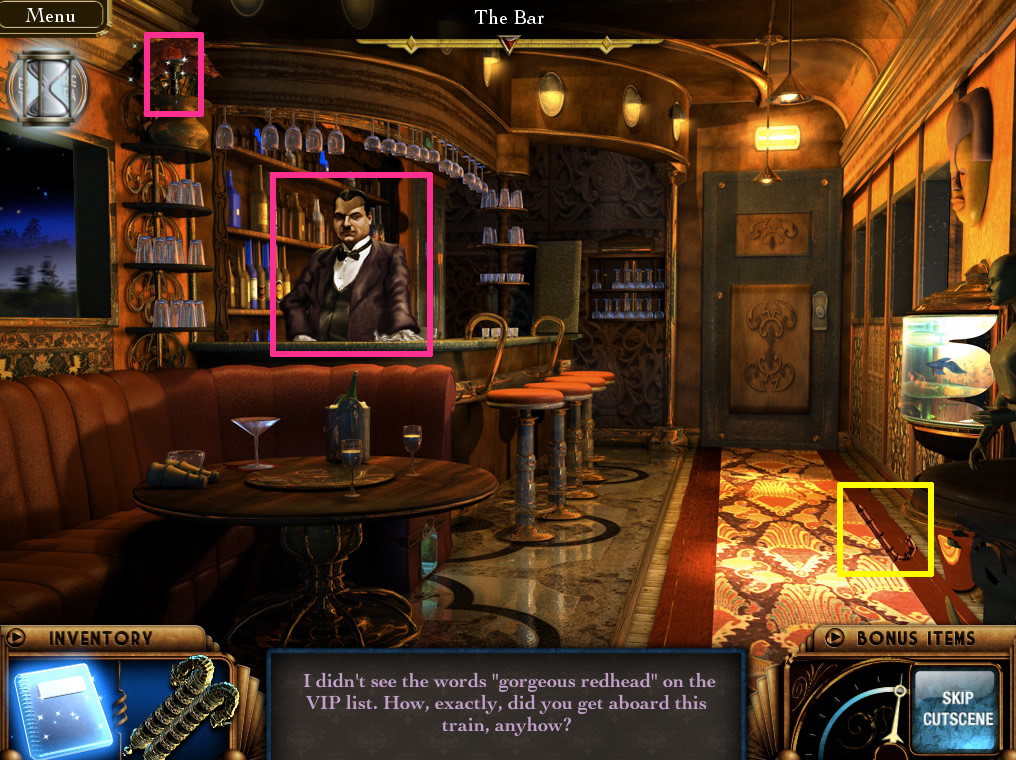
The bar, on the carpet below the fishtank. Screenshot.
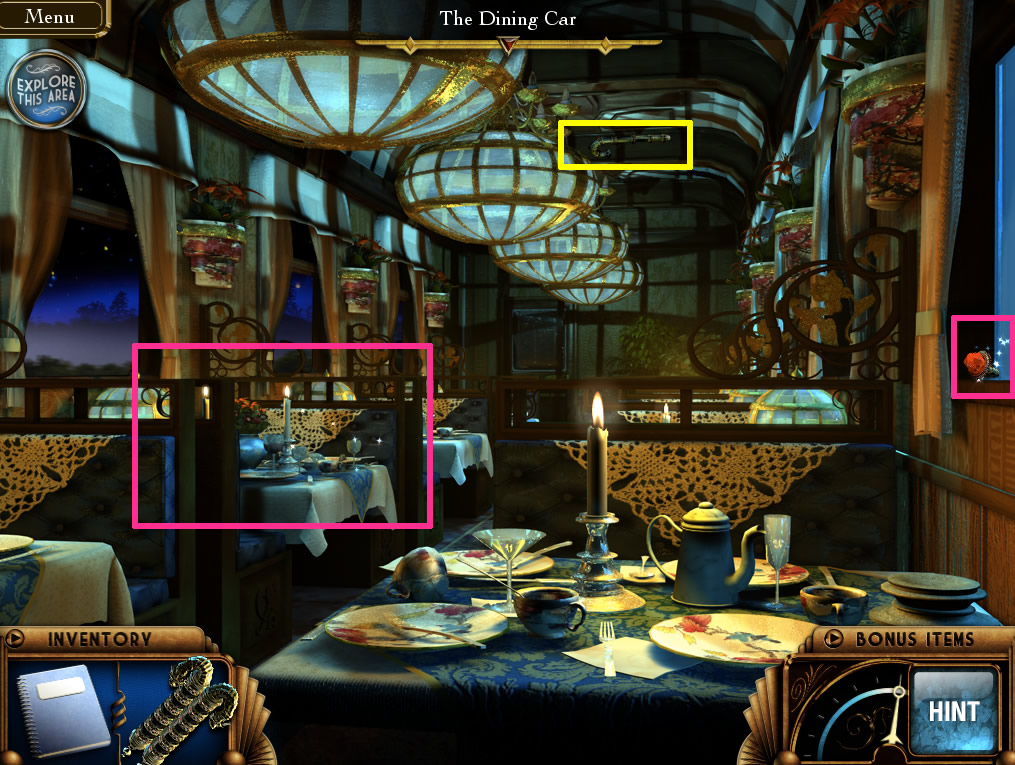
The Dining Car, on the ceiling. Screenshot.
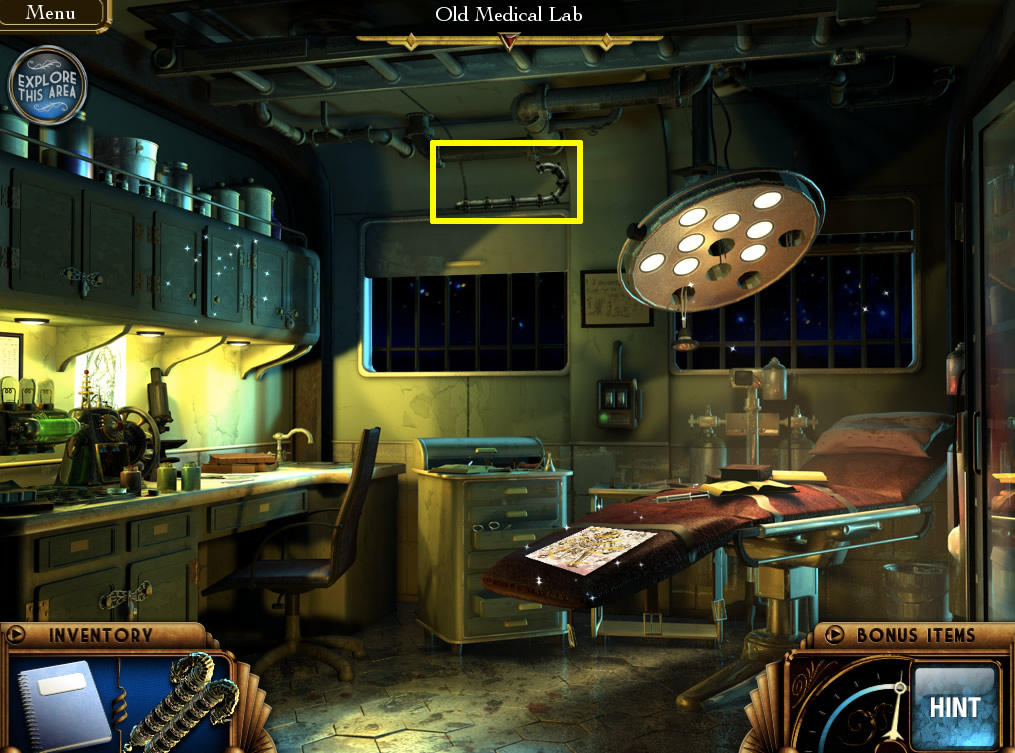
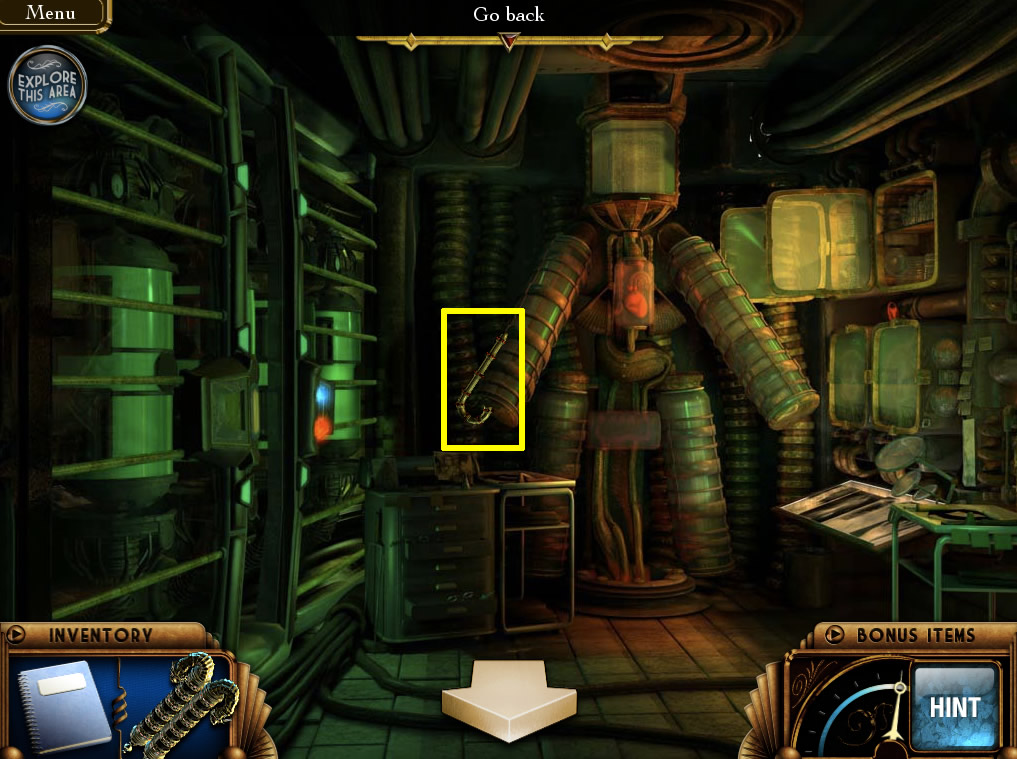
The Lab, on the ceiling. Screenshot.
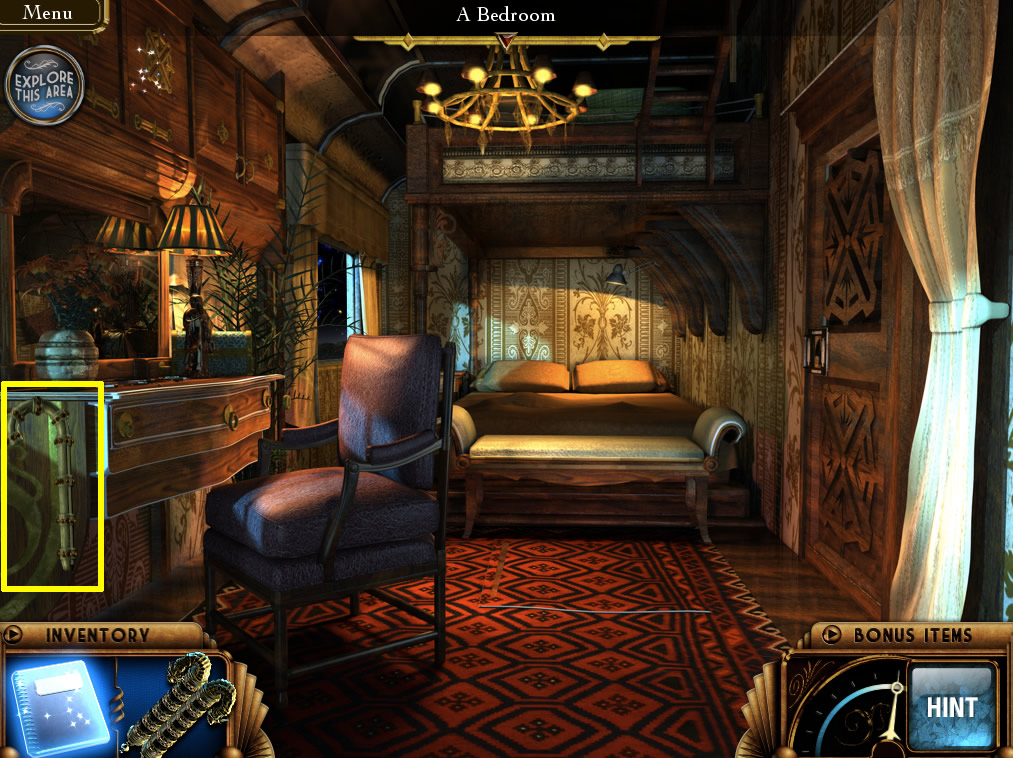
In the Bedroom, on the left front edge of the desk. Screenshot.
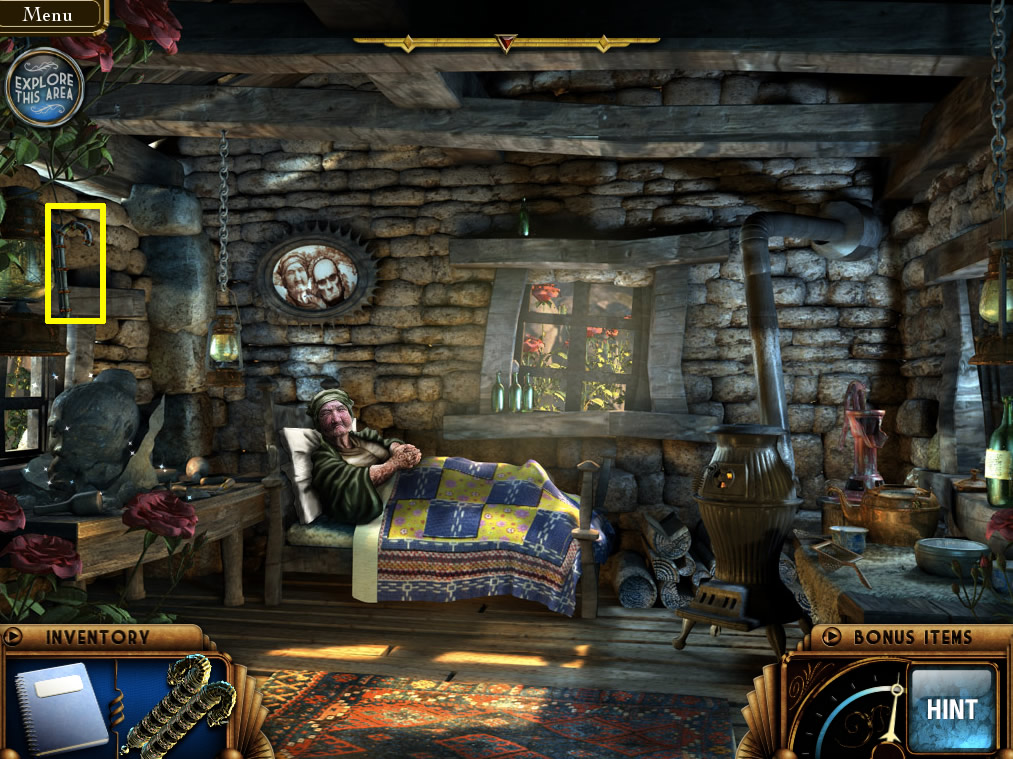
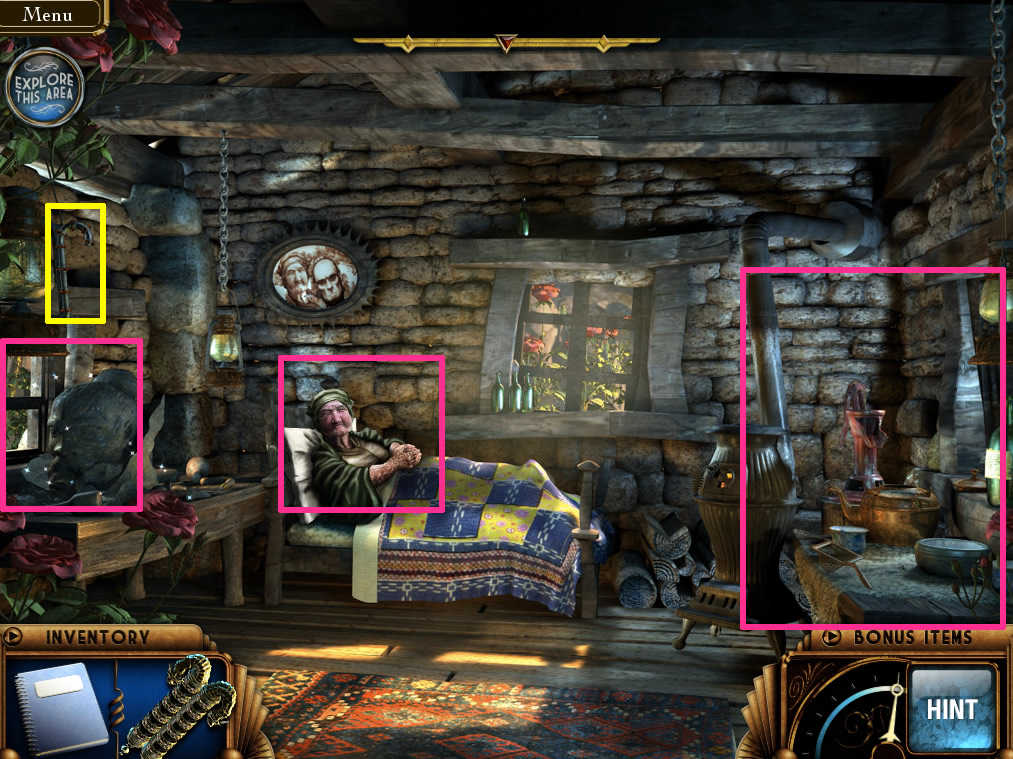
Nonna's hut. On the left side along the stone pillar, above where the little soldier is. Screenshot.
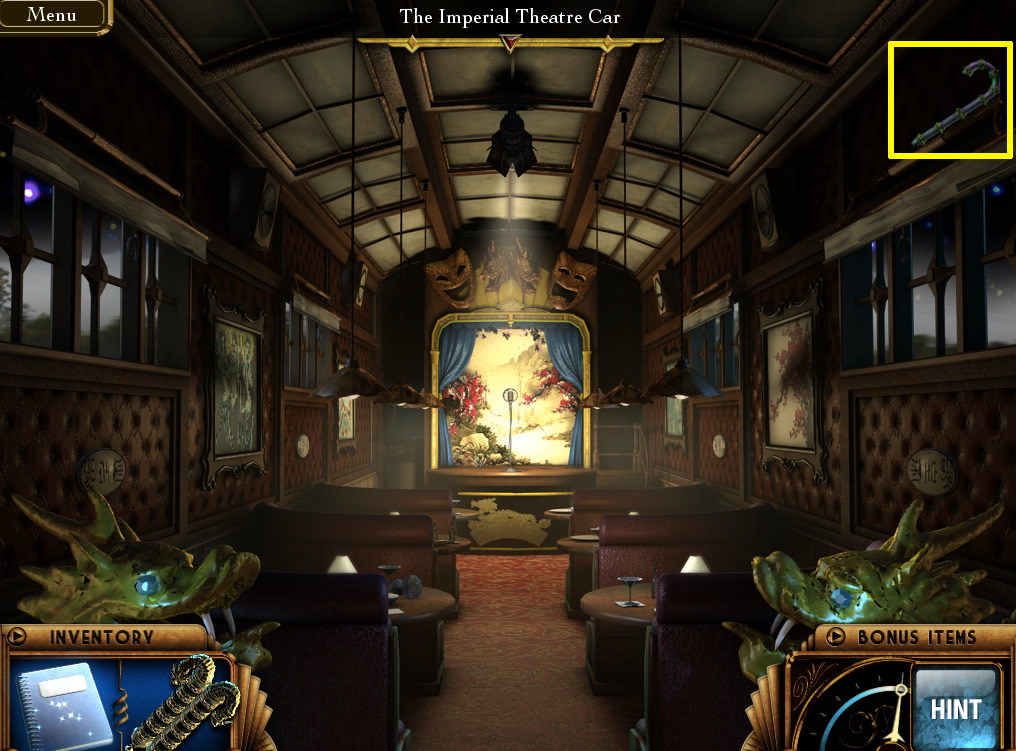
The Theatre Car. Above the right hand front window. Screenshot.
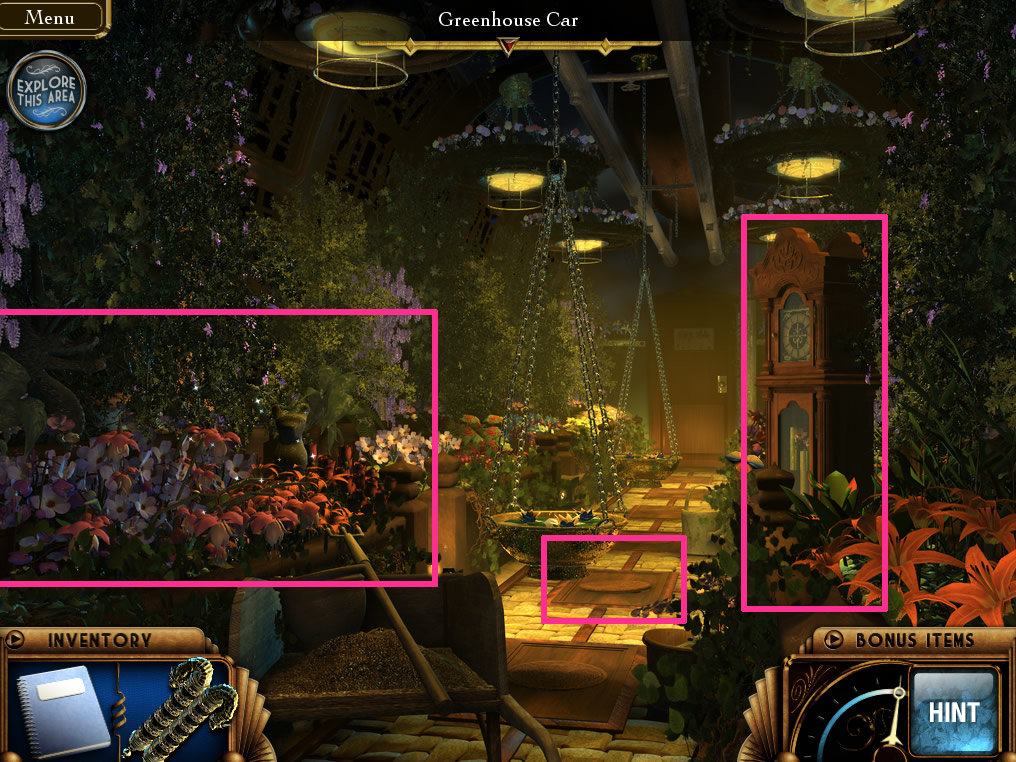
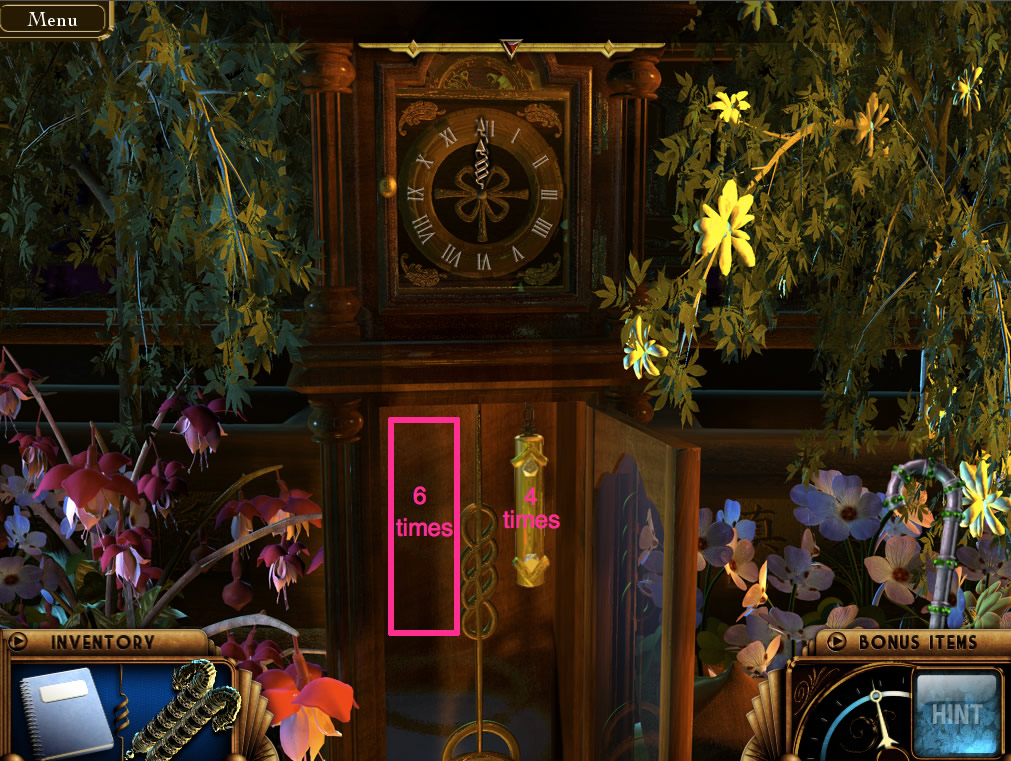
The Greenhouse Car. Zoom in on the grandfather clock, on the right side. Screenshot.
The Secret Chamber, in the left door, in the center. Screenshot.
Posted by: joye |
July 19, 2010 12:41 AM
|
July 19, 2010 12:41 AM
SECRETS OF THE DRAGON WHEEL WALKTHROUGH:
General Tips:
Sparkling and shining mean "CLICK ME".
Your mouse will change when it rolls over anything you can click on (outside of hidden object scenes.)
Hints can be used in hidden object scenes to find items, in puzzles for a clue, in puzzles to skip, and in the rest of the game for a hint as to where you should go next. The hint meter recharges fast (less than half a minute), so don't hestitate to use it!
Although clicking too fast theoretically will briefly disable the cursor, in practice you have to really go to town before it does. So don't hestitate to click a little randomly. This only applies to hidden object scenes; outside of them, there is no random click penalty at all.
The game is only semi-linear. I gave what I think is the quickest and easiest order to do things, with the least backtracking, but you can do many things in a different order.
You can skip cutscenes, usually by clicking on the hint button. Most dialog is treated as a cutscene by the game.
NB: This walkthrough does not show the locations of the random objects, as they change for every game. It does show the locations of the inventory items. The walkthrough also assumes that you know to pick up the inventory items at the end (just click on them). If you're stuck, remember to use your hints! Hints recharge very fast!
Please look at the Candy Cane walkthrough (in its own comment) for the bonus items. Bonus items are marked in yellow in screenshots in the main walkthrough, however the main walkthrough does not specifically mention them.
Chapter 1:
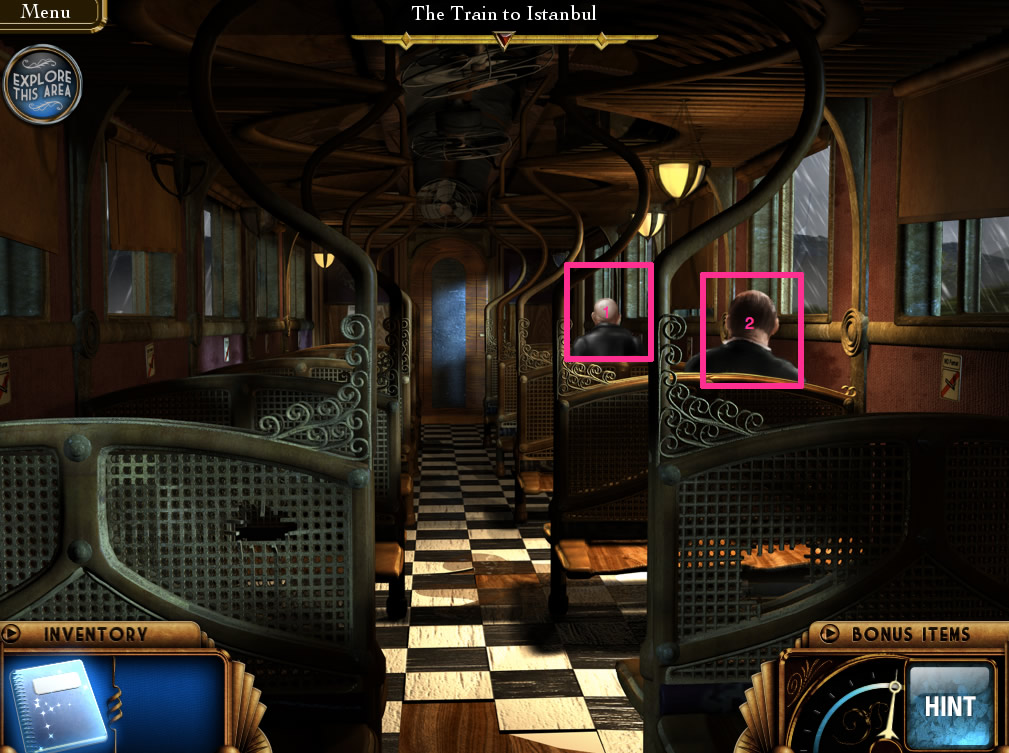
Train to Istanbul:
Main area screenshot.
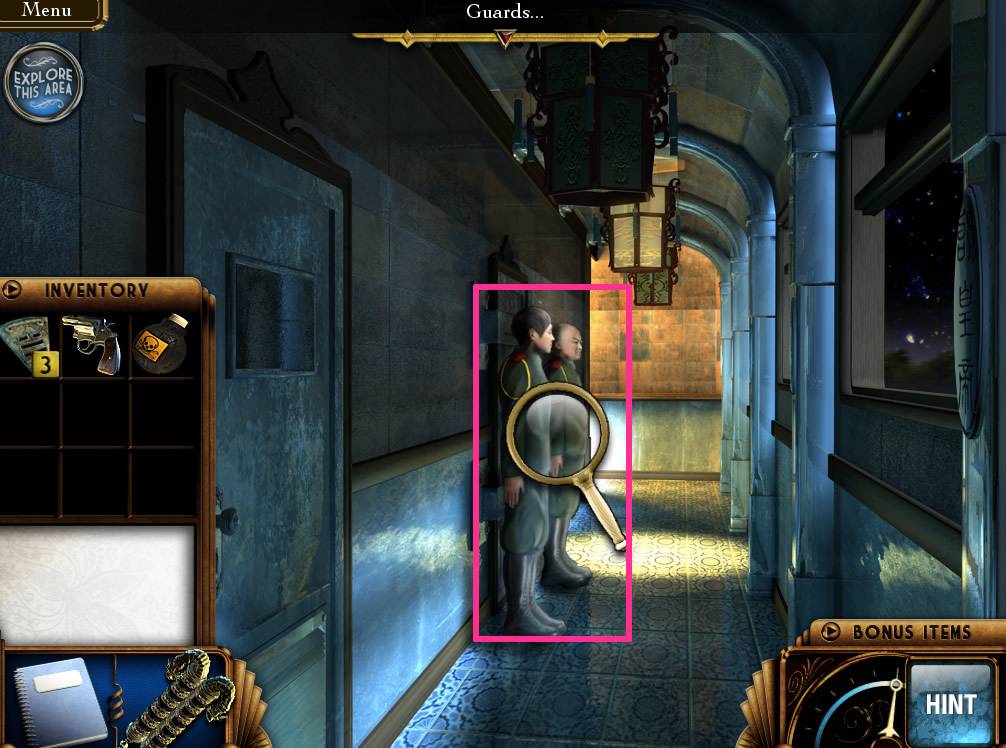
Click on the man sitting on the right, farthest away from you.
Click on the other man sitting on the right. When the scene zooms in, click on him again. Screenshot.
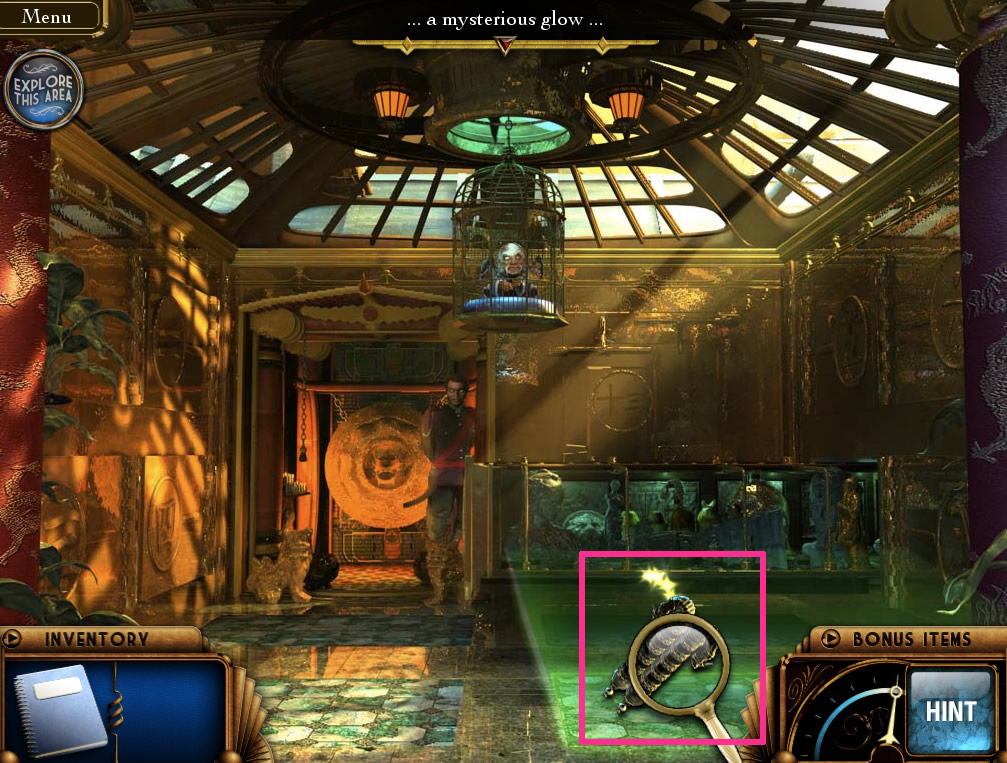
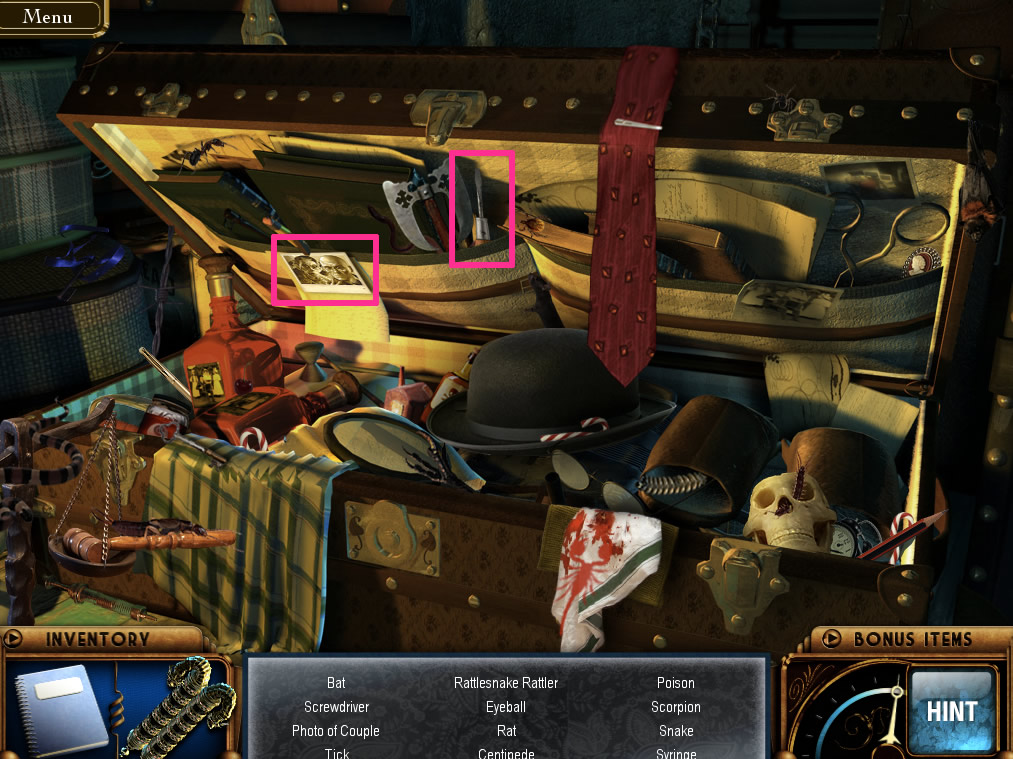
Click on the sparkling suitcase for a hidden object scene. Screenshot. The inventory items are a broken candy cane, a blue note, 4 matches, and a revolver.
Back out.
Chapter 2:
Instanbul Station:
Main area screenshot.
Click the center of the screen (a forward arrow will appear) to go to the platform. Screenshot.
Click on the guard if you wish.
Click on the vending machines in the back right.
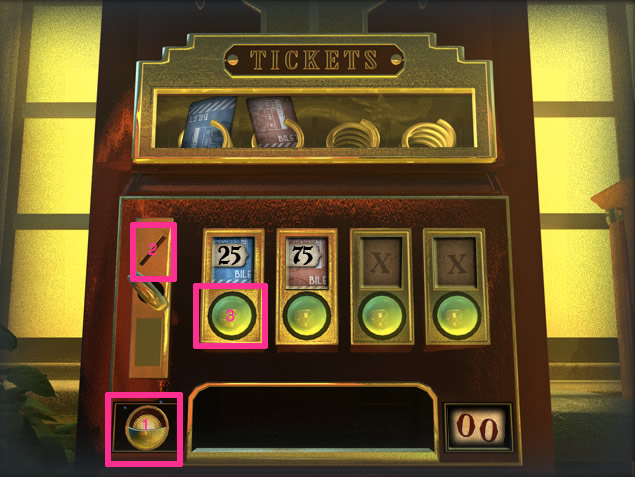
Click on the left vending machine. Screenshot.
Click the coin in the lower left.
Use the coin from your inventory in the slot of the vending machine.
Click the blue ticket button and get your ticket. Screenshot.
Back out twice to the main station area and then go right.
There is a sparkling paper on the ground. Click it. Screenshot.
Click on the blue train to go to the professor's apartment.
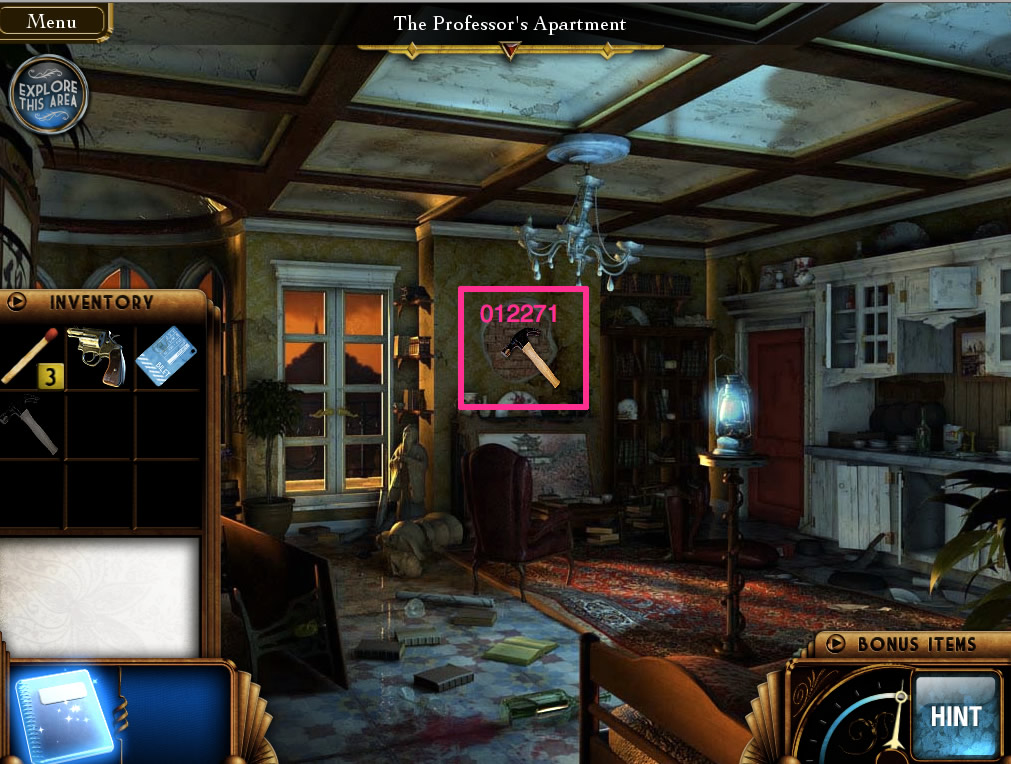
Professor's Apartment:
Main area.
Click on the door of the apartment to zoom in, and again to enter.
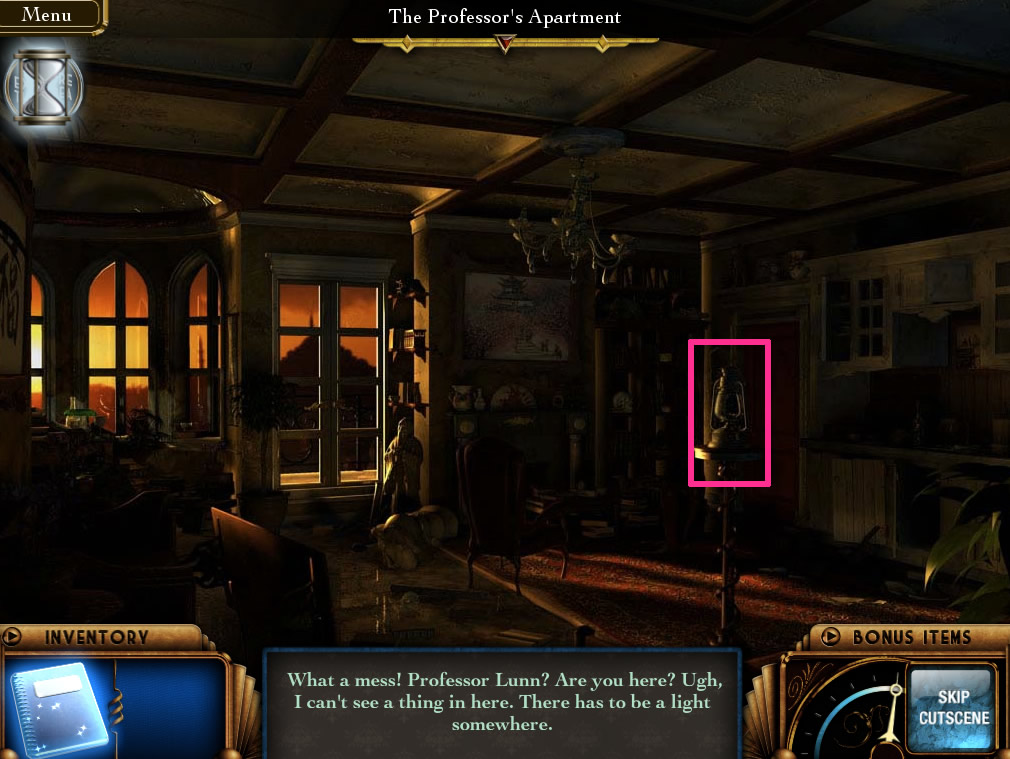
Inside the apartment.
Open your inventory. Use a match on the lantern in the center right.
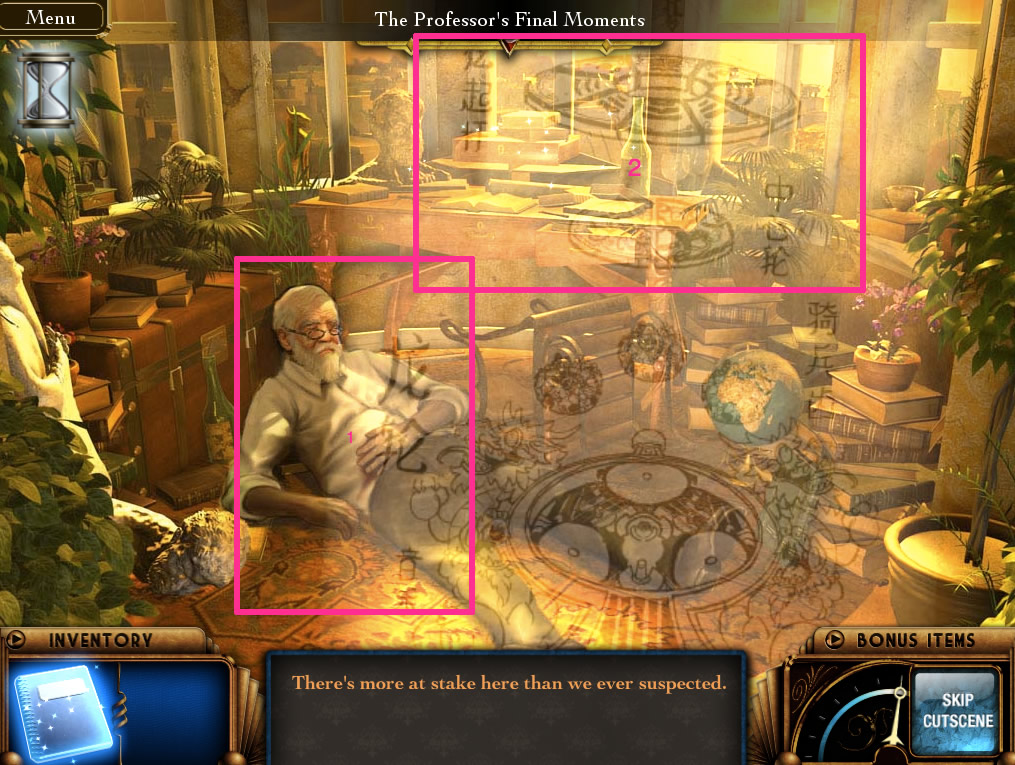
Click on the professor on the left for some plot exposition. Screenshot.
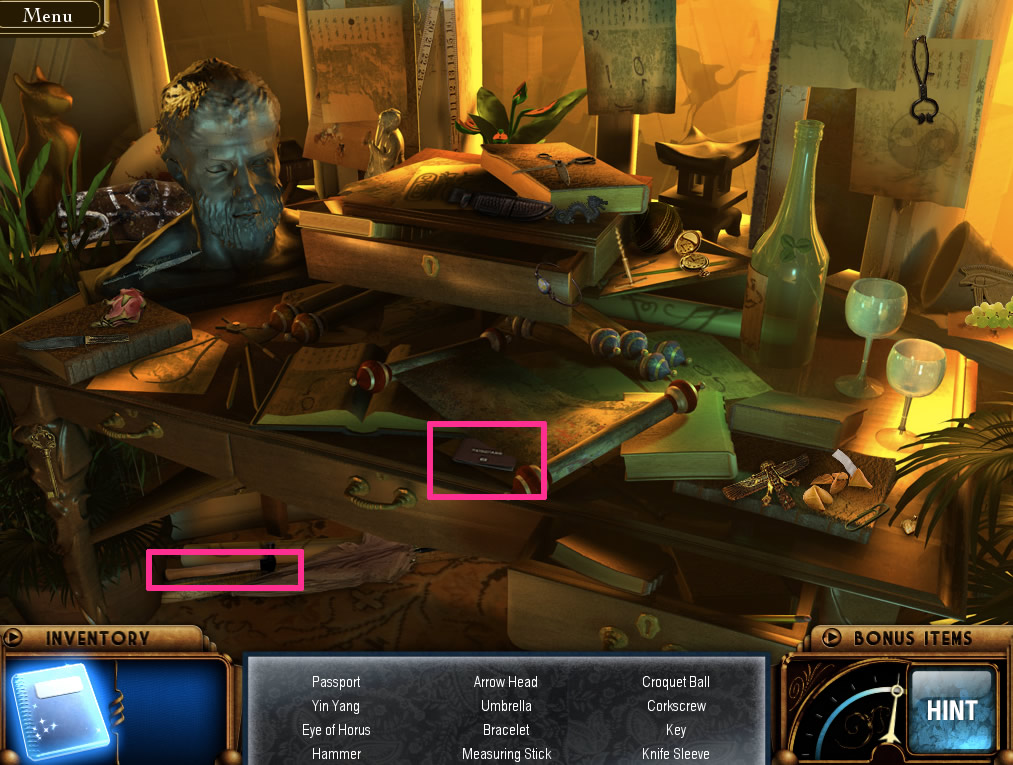
When the cutscene is over, click the top of the table for a hidden object scene. The two inventory items are a passport and a hammer. Screenshot.
Back out to the main room. Screenshot.
Click the painting over the fireplace.
Use the hammer from the inventory on the place where the painting was.
Click on the safe.
The combination of the lock is the professor's birthday, which is found in the passport, which has been put in your notebook. The combination is under a spoiler here if you don't want to read your notebook.
012271.
Then click to open the safe.
Inside the safe.
Click on the loose change and the business card.
Go back to the train station.
Train Station:
Go back to the vending machine where you bought the blue ticket.
Use the coins from your inventory in the slot.
Buy a red ticket.
Go back to where you got on the blue train and get on the red train.
Bazaar:
Main area.
Click to enter Chang's Storefront. Screenshot.
Click on the sparkling table for a hidden object scene. You must find 12 masks. The locations of the masks are random.
When completed, click on the table again to see a tablecloth. You have to trace the pattern from the business card (in your notebook).
There is no way to trace the wrong pattern, so this one is easy. Just click and drag. Screenshot.
Click when you finish to go inside the store.
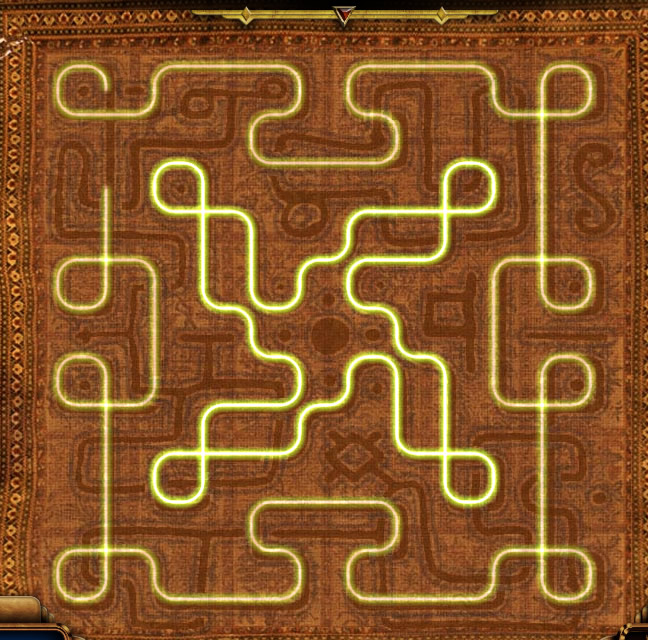
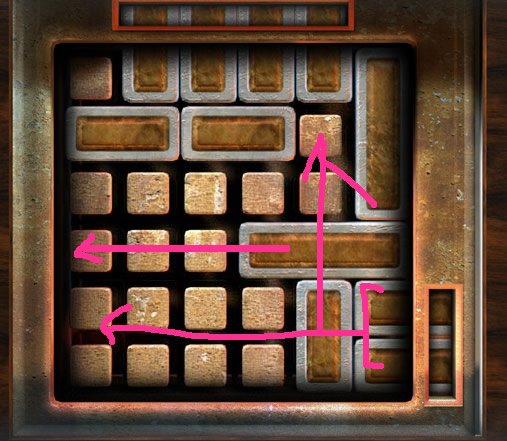
You have to win the Persuasion mini-game to get Huang on your side. You must go over every single square, and you must go over the numbered squares in order. You can go up, down, left, right, or diagonally, but squares disappear when clicked on. There is more than one solution, but here is one possible one.
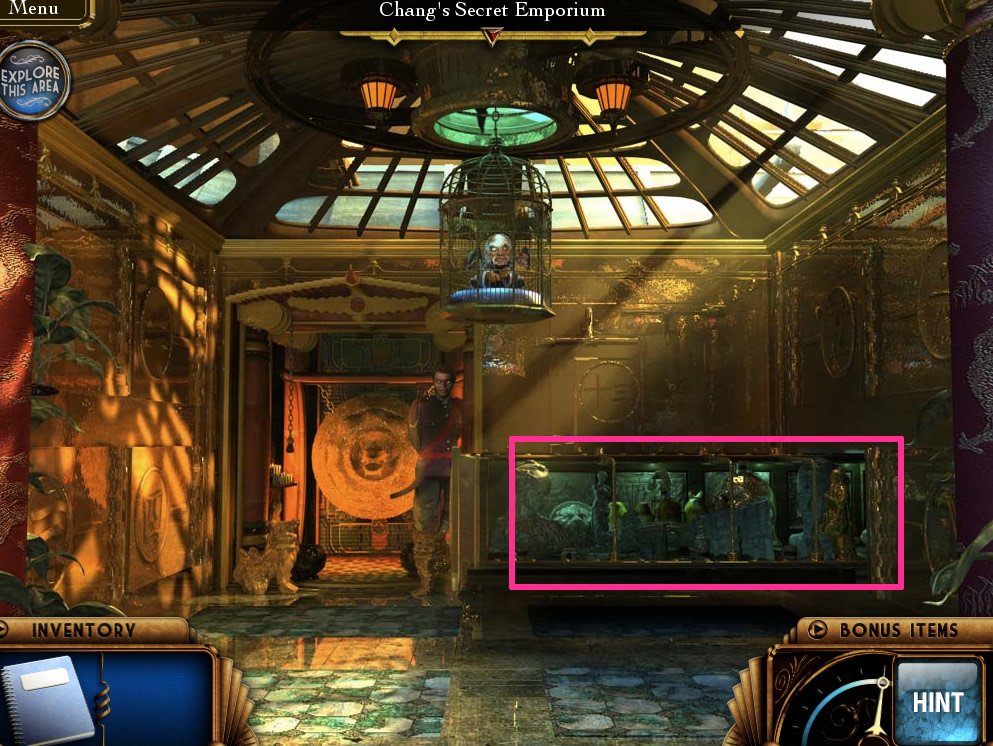
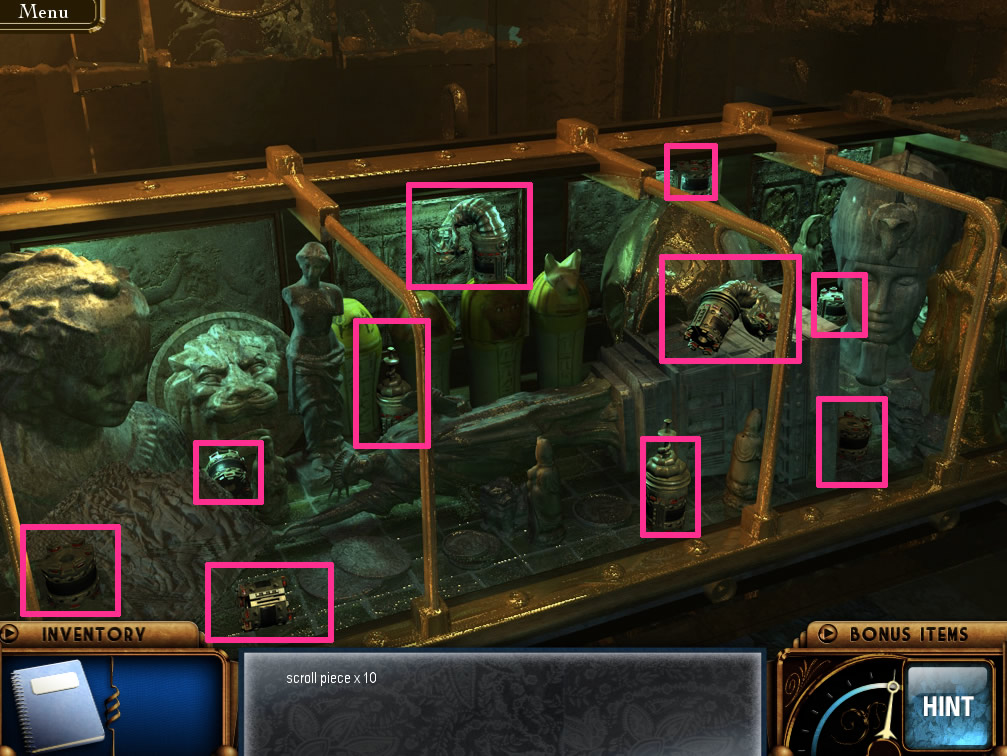
Go through the cutscene, and then click the green box in the lower right. Screenshot. You must find 10 scroll pieces. Screenshot.
Click on Chang for an assembly puzzle. You must rearrange the pieces so that adjacent shapes match. The leftmost pieces and the rightmost pieces do not move, so swap around the other pieces to match up with them. Here's what it looks like almost done (just two left to swap, marked).
When you finish the puzzle, you will gain the Scroll of Songs. It will be in the lower left of your screen, and as you find jade pieces, it will contain clues to puzzle solutions. It will also occasionally hover over something and activate it, which is what it's doing now. Screenshot. Screenshot.
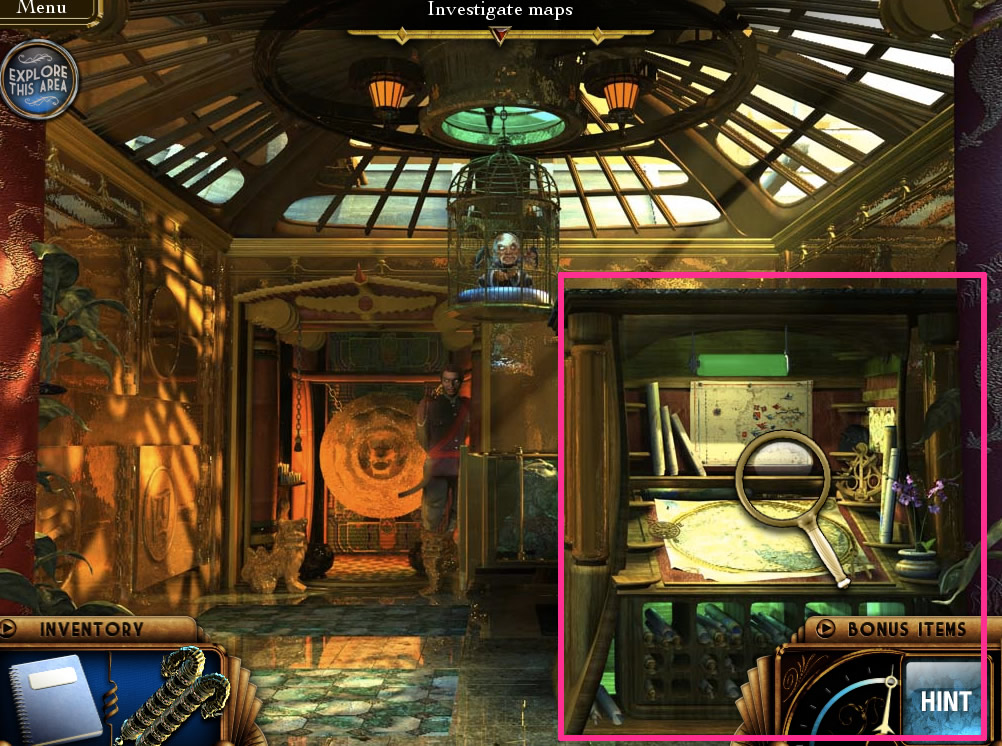
Click on the area where the scroll highlights. Then click on the desk that comes up.
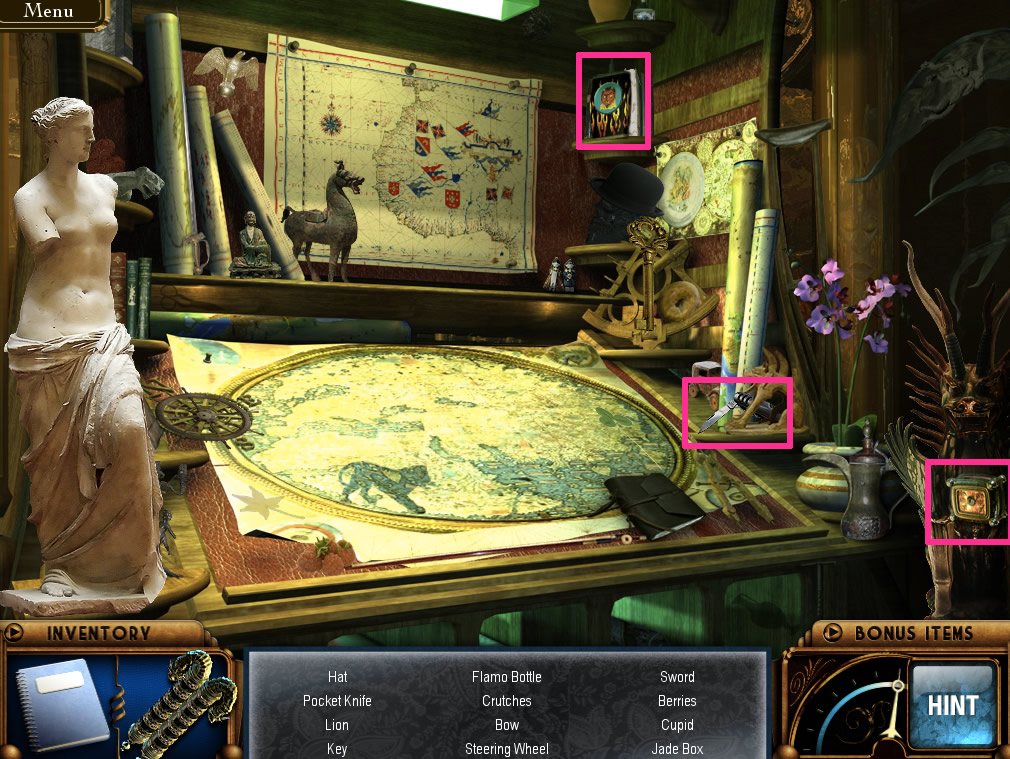
In the hidden object scene, find the "flamo" bottle, the pocket knife, and a Jade Box. Screenshot.
When you find the Jade Box, it will come to the center of your screen, and by clicking on it you will take a Jade Symbol. This will happen every time you find a jade box.
When you finish the scene, the Jade Symbol will go into the Scroll of Songs.
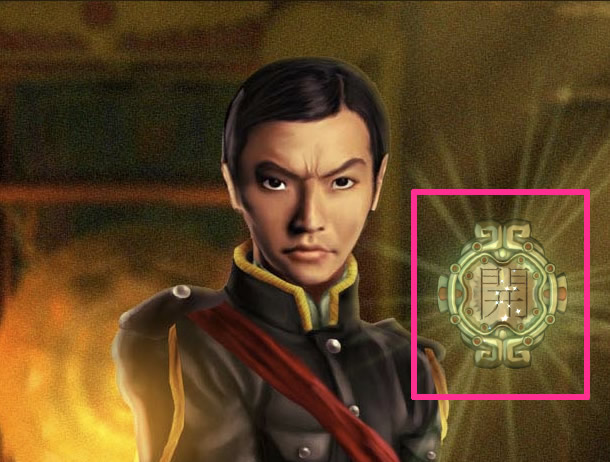
Take the Chinese character glyph from Huang. Screenshot.
You will be warped to the train station.
Train Station:
Go back to the vending machine area.
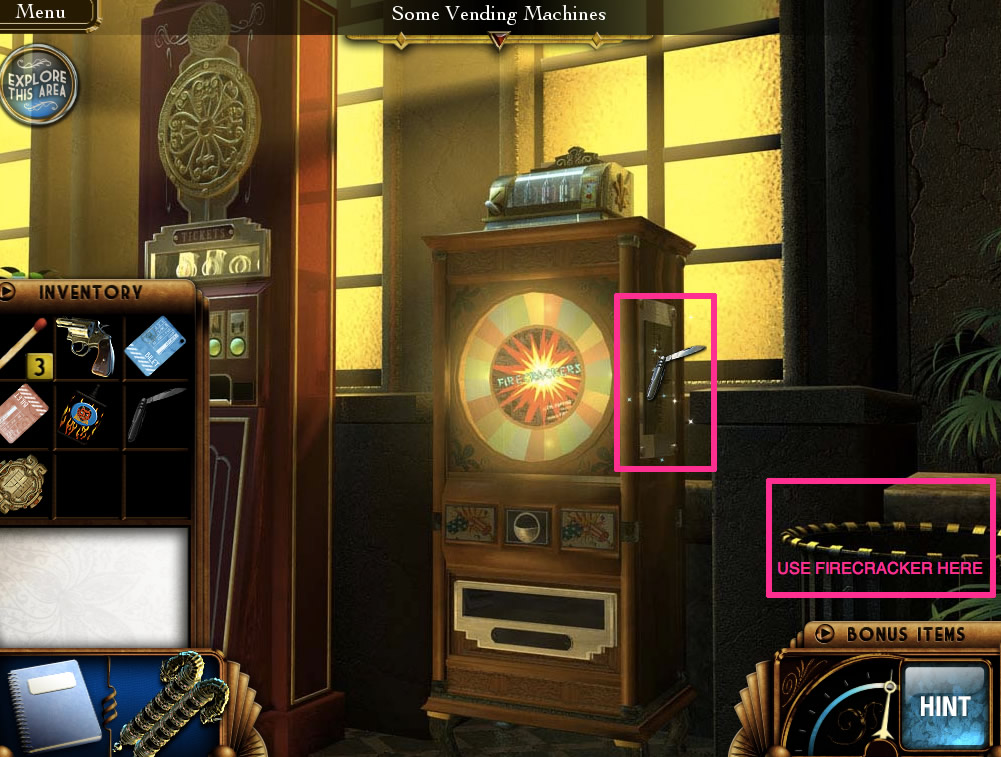
This time, use the pocket knife from your inventory on the panel on the right side of the Firecracker dispenser. Screenshot.
Once you open the panel, click on it for a puzzle.
You must remove every fuse. You can only click on lit fuses. After clicking on a fuse, you can click on the next fuse in a horizontal or vertical line. There is more than one solution, but here is one.
Take the Firecracker.
Put the firecracker in the trash can in the right side of the vending machine screen.
Light the firecracker with a match.
CANDY CANE CHECK: Have you gotten candy canes 1-3? You will not be able to come back to this area once you leave it. Check the candy cane list. This is a totally optional bonus item hunt and doesn't affect the main game at all, so you can skip it if you want.
Go to the train area. The guard will be distracted by the firecracker. Screenshot.
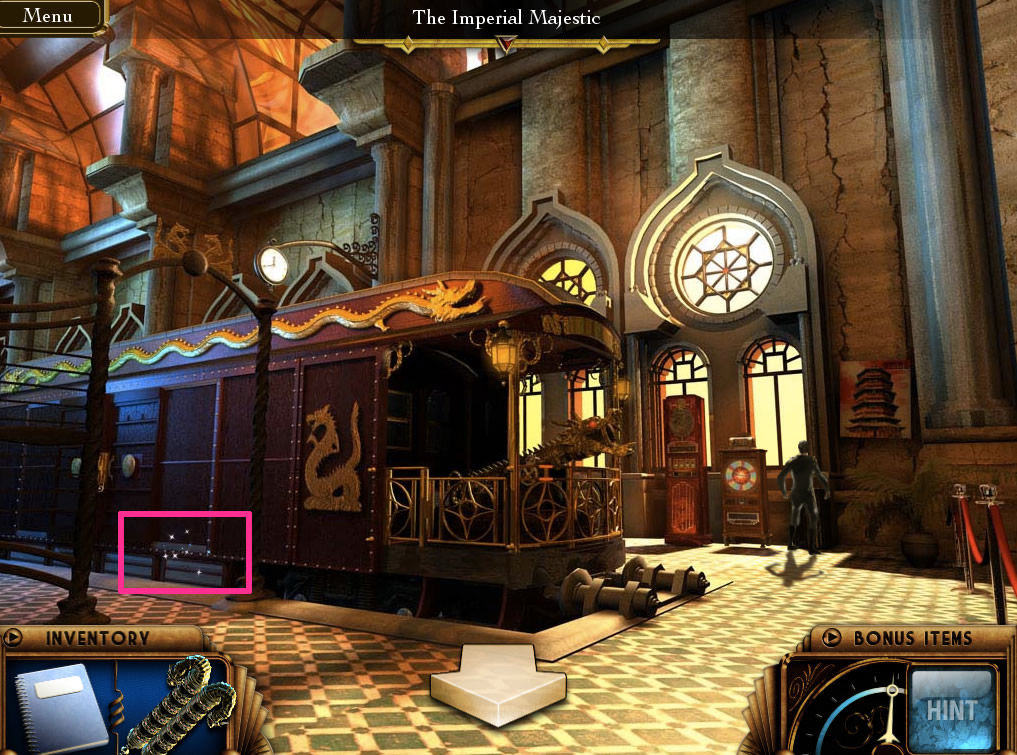
Use the glyph on the sparkling door on the lower left portion of the train. Screenshot.
Click the open door to enter the train.
Chapter 3:
Baggage Hold:
Use a match on the lantern. Screenshot.
Click the open suitcase for a hidden object scene. The two special items are a screwdriver and the photo of couple. Screenshot.
When you finish, click the center (a forward arrow appears) to go to the rest of the train.
First you must complete a maze. You can only see a small area around your character. Your goal is to get to the upper left corner. Screenshot.
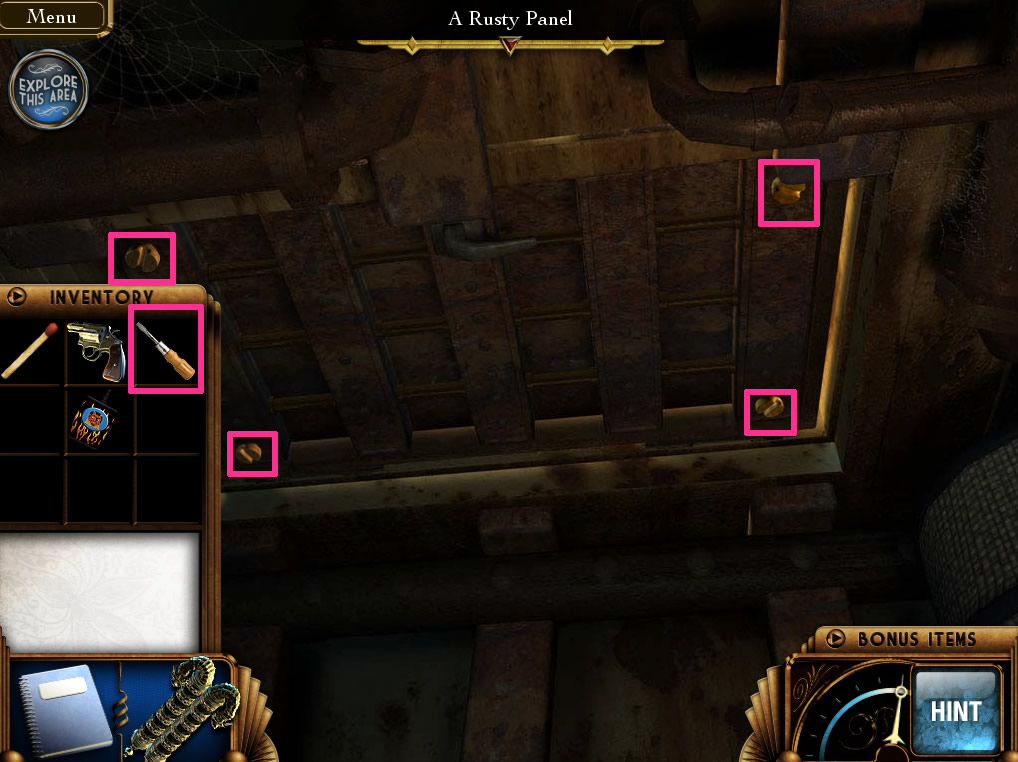
Use the screwdriver on the four screws of the rusty panel. Screenshot.
Click to go up to the next scene.
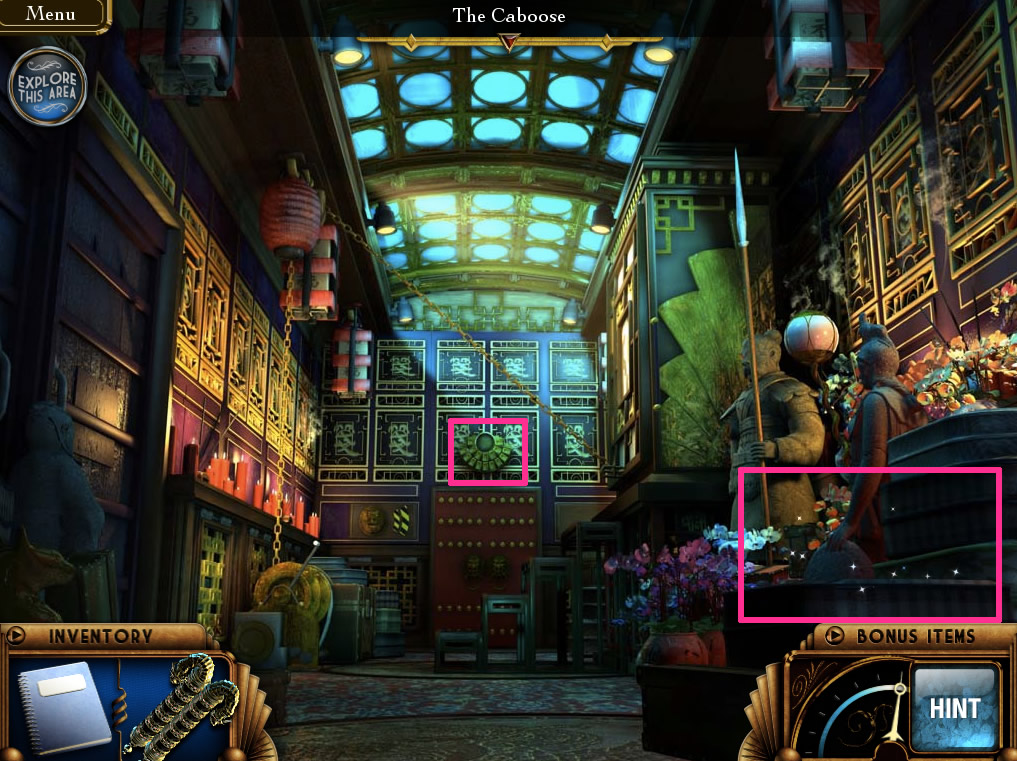
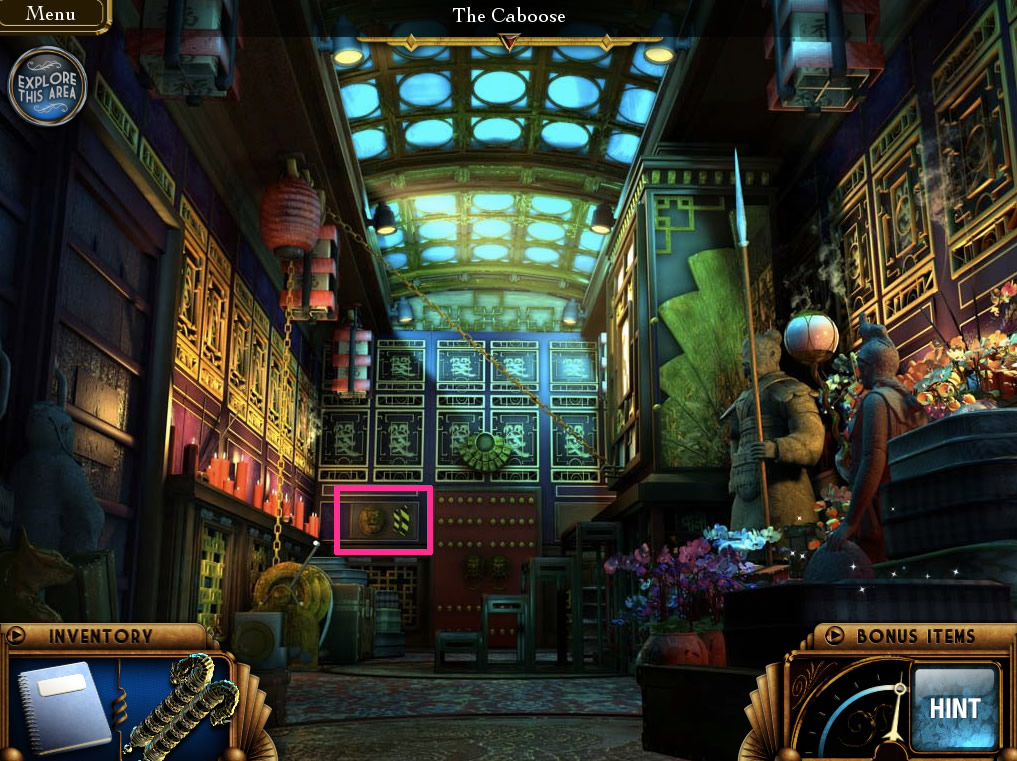
Caboose:
Main area.
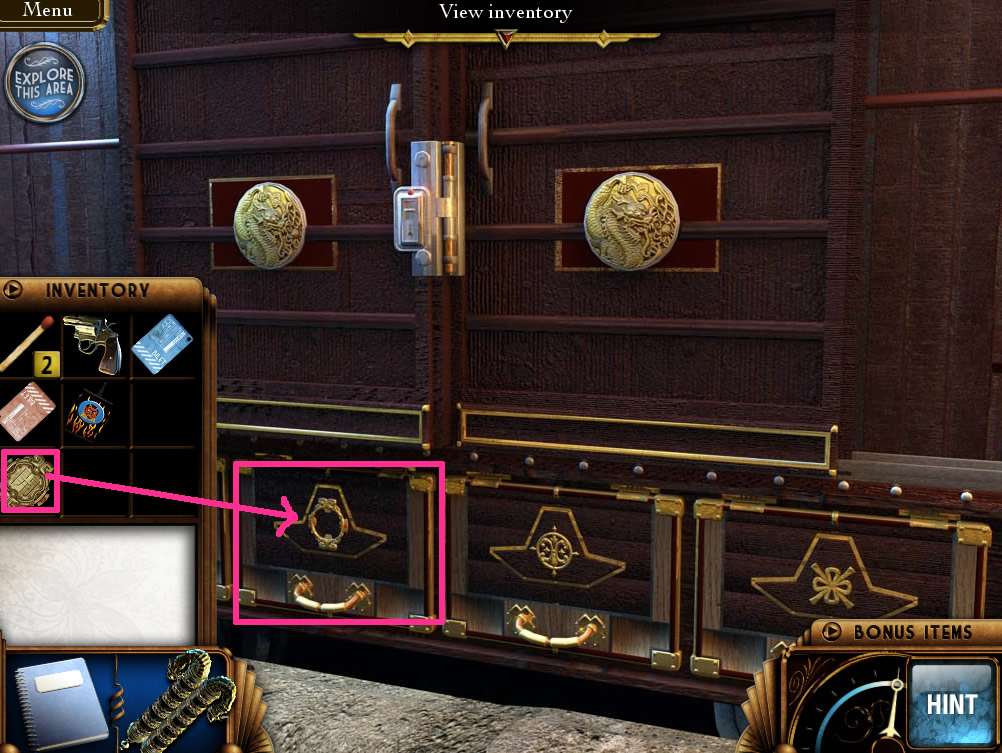
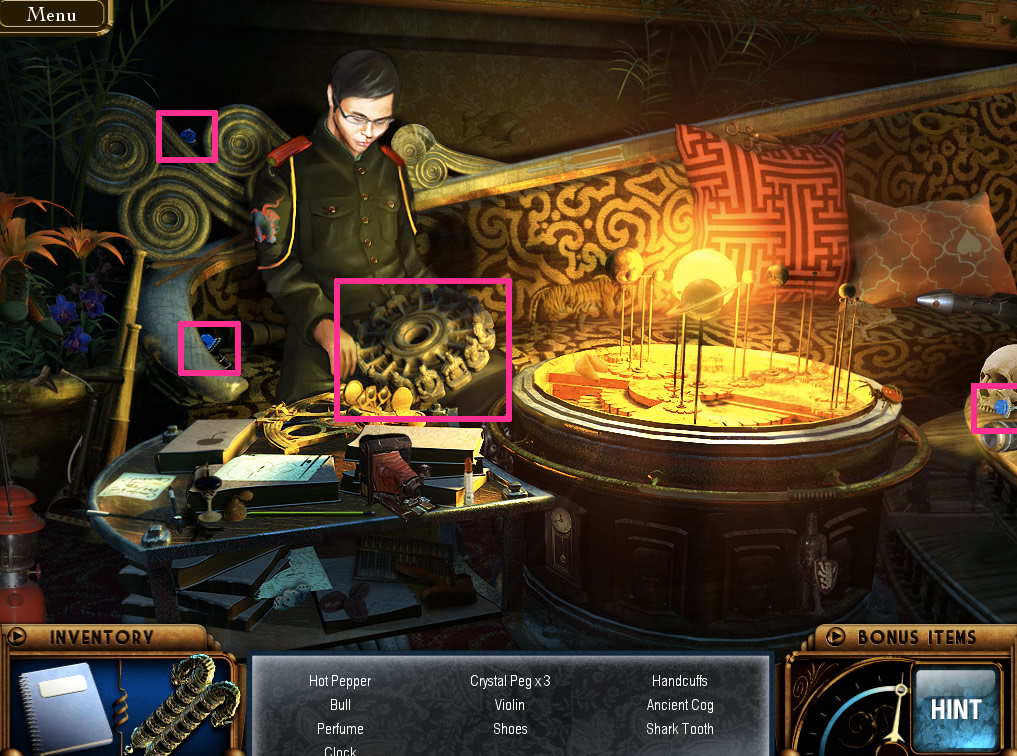
Click the sparkling place in the lower left for a hidden object scene. Find 3 Crystal Pegs, a Stone Wheel, a Sun Emblem, and a Jade Box. Screenshot.
When you find the Jade Box, you will get a Jade Symbol for the Scroll of Songs.
When you finish, click to zoom in on the fan-shape hanging over the door.
Place the Sun Emblem in the empty hole.
You now have to solve a memory matching puzzle. Flip the tiles and match the Chinese characters to each other. The tiles locations are random, so there is no one solution. If you can't solve it, you can click hint, and click it again to skip the puzzle.
The door will open, so go through it.
Observatory:
First you need to lower the stairs. The stairs are controlled by the panel with the buttons on the left. When all the buttons are lit, all the stairs will be down.
From top to bottom, click the buttons like this: left, right, left, left. You can actually click those buttons in any order, but you must click those four. Easiest ever. I did it totally accidentally my first try. Screenshot.
Go upstairs.
Click on the sparkling guard (Edward Cullen, is that you???). Screenshot.
In the hidden object scene, find three more Crystal Pegs and an Ancient Cog. Screenshot.
Go back downstairs. Go forward once. Pick up the trigger on the floor which is sparkling. Screenshot.
Back up, through the caboose, to the caboose balcony.
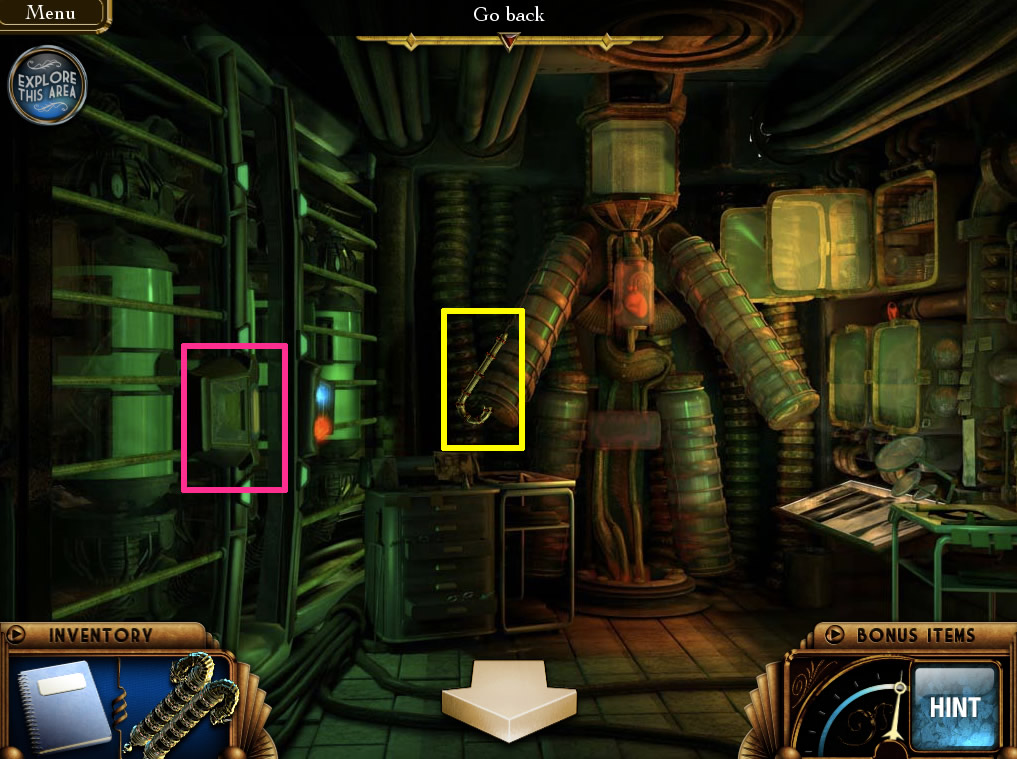
Caboose Balcony:
Collect the nozzle hanging from the ceiling ant the bronze cog to the left of the contraption on the right. Screenshot.
When you pick up the nozzle, it will assemble with the trigger and the flame bottle to form a blow torch.
Go back to the caboose.
Caboose:
Click on the winch on the left. Screenshot.
Use the blowtorch to repair the broken chain.
Click the winch to open the box on the right.
Go into the box.
Dragon Wheel:
Place the cogs (one of them was the stone wheel) into the Dragon Wheel. I don't think it makes a different which cog goes where. Screenshot.
You'll get a nice little cutscene, and then a key will appear. Pick it up.
Go back to the Observatory and through to a locked door.
Use the key on the door and go in.
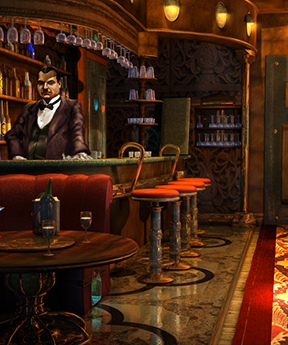
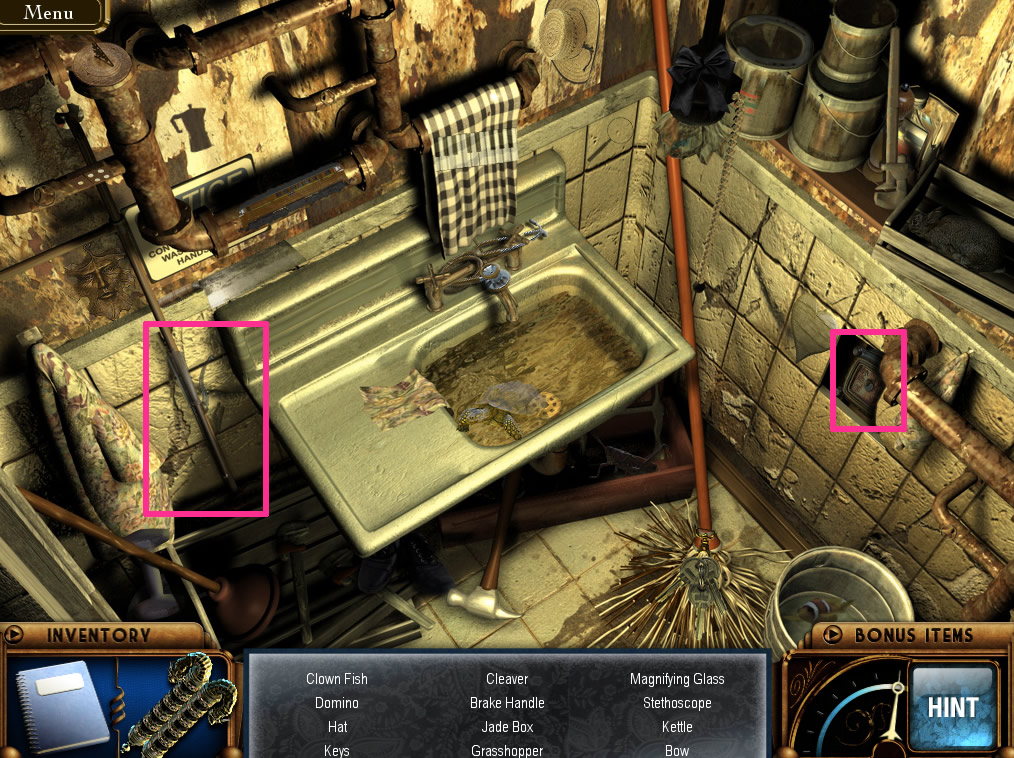
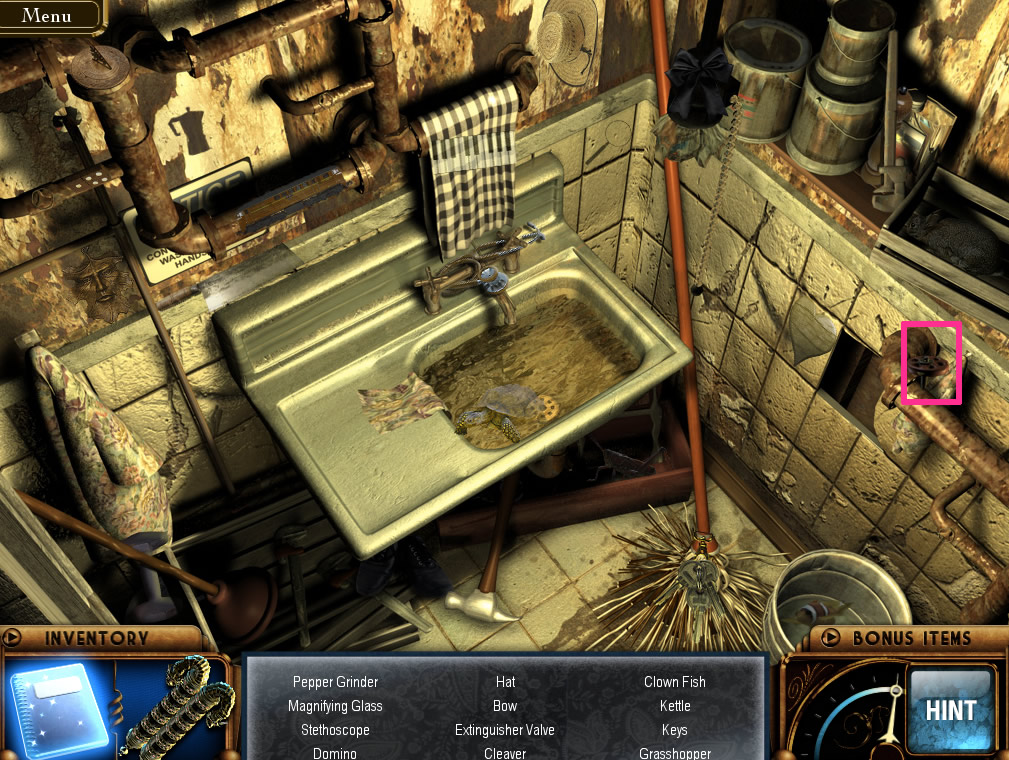
The Bar and Kitchen:
Main area of the bar.
Get a red crystal peg from the upper left corner.
You must play the Persuasion game again. Same rules as last time. Screenshot.
After talking to the bartender, click behind the bar (to the left) to go to the kitchen.
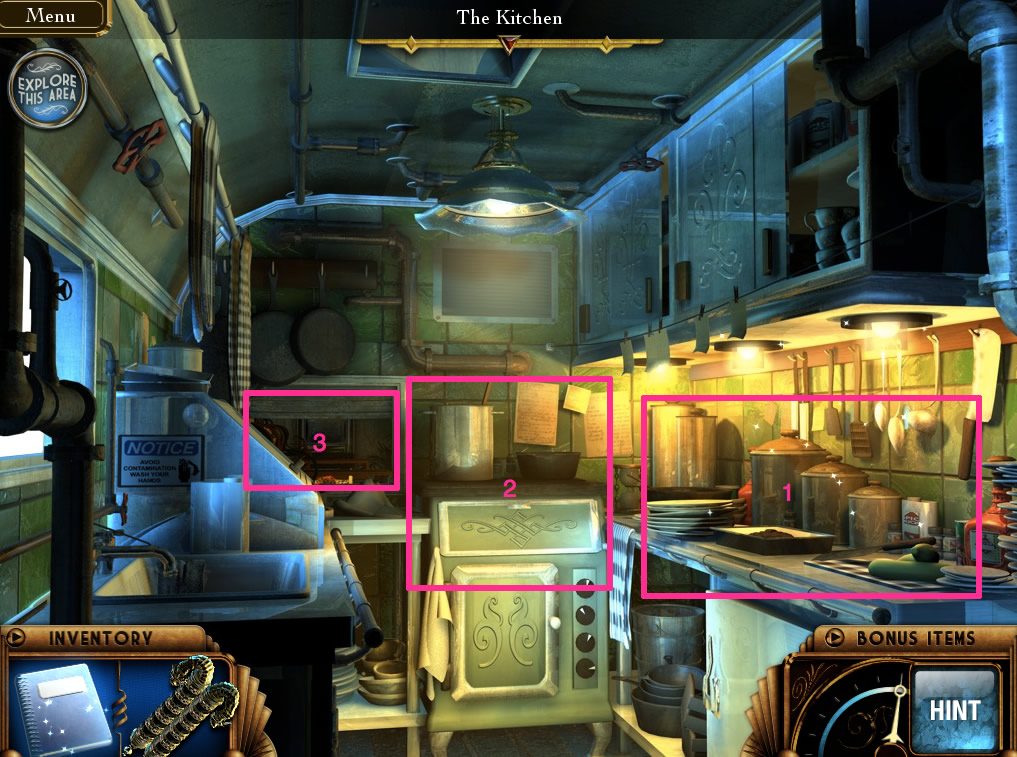
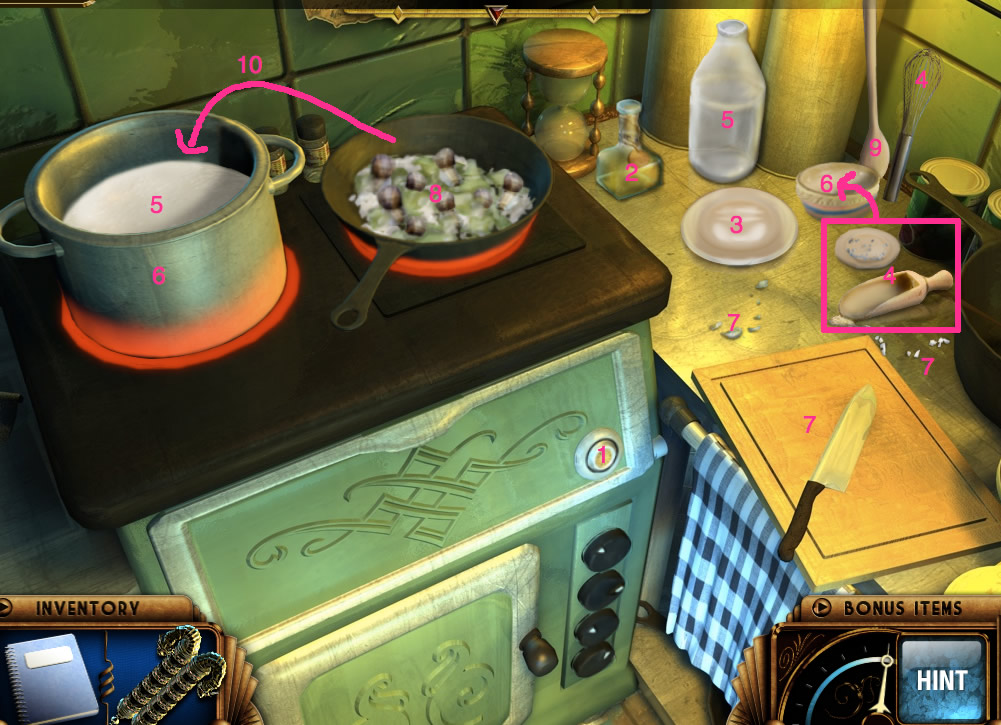
Kitchen main area.
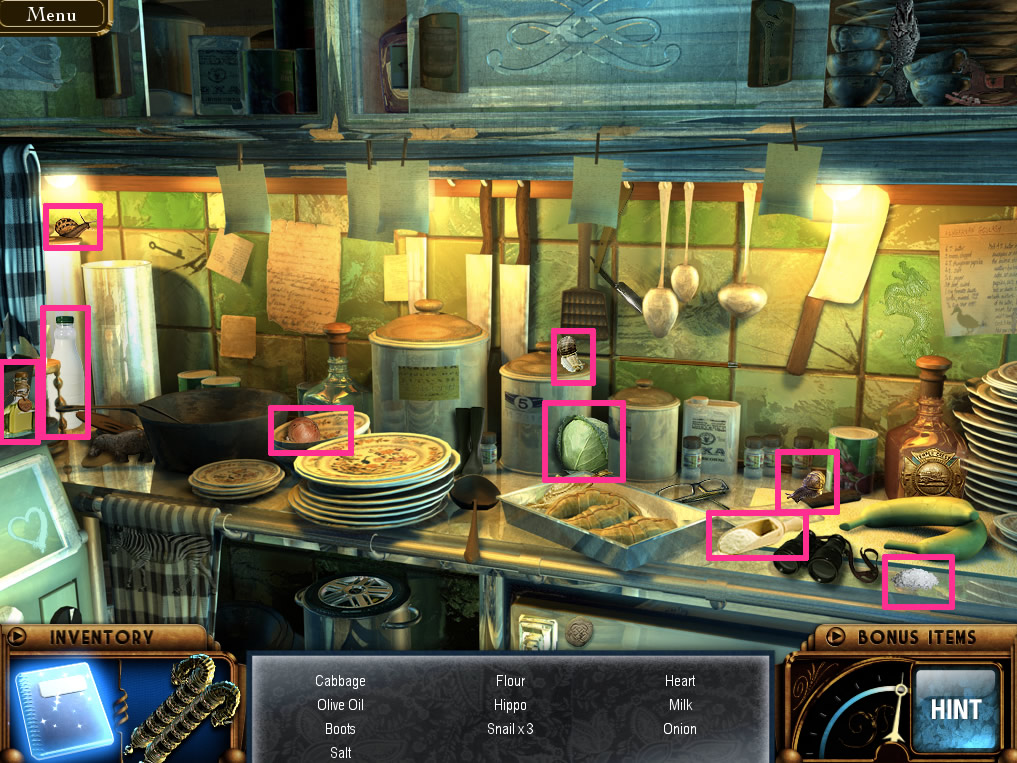
There is a hidden object scene on the counter. Pick up cabbage, flour, salt, 3 snails, olive oil, onion, and milk. Screenshot.
Click on the stove when done. The recipe will be copied into your notebook, but if you make any mistake, Epiphany will just tell you what you should do next.
Screenshot.
1. Turn on the stove by clicking the button.
2. Add the oil to the pan.
3. Add the snails to the pan.
4. Add the flour and salt to the bowl and mix with the whisk.
5. Add the milk to the pot.
6. Add the flour and salt mixture to the pot.
7. Drag the onion and cabbage to the cutting board.
8. Add the chopped cabbage and onion to the snails.
9. Stir the pan with the spoon.
10. Add the pan to the pot.
The soup should be served automatically. Return to the bar.
Click on the bartender to get the relic.
Go back to the Dragon Wheel.
Dragon Wheel:
Place the relic from the bartender on the wheel.
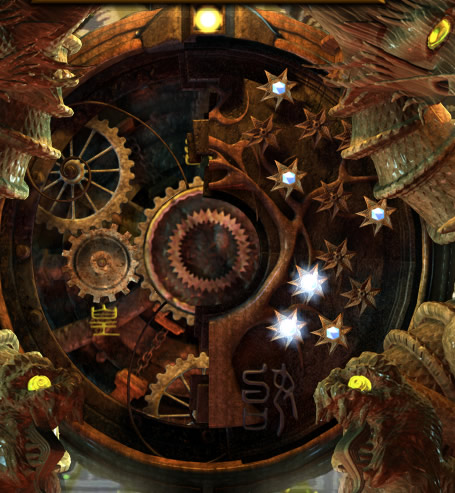
Put the blue crystal pegs in the wheel according to the image in the scroll. Screenshot.
After you're done, go back to the bartender.
Bar and Kitchen:
Talk to the bartender to get sedatives.
Go to the kitchen and click on the serving window left of the stove.
Click on the sedatives and put it in the bottle.
Click the bottle and serve the man. He will pass out.
You can now enter the dining car through the bar.
Dining Car and Hallway:
Dining car.
Collect the red crystal peg on the right window.
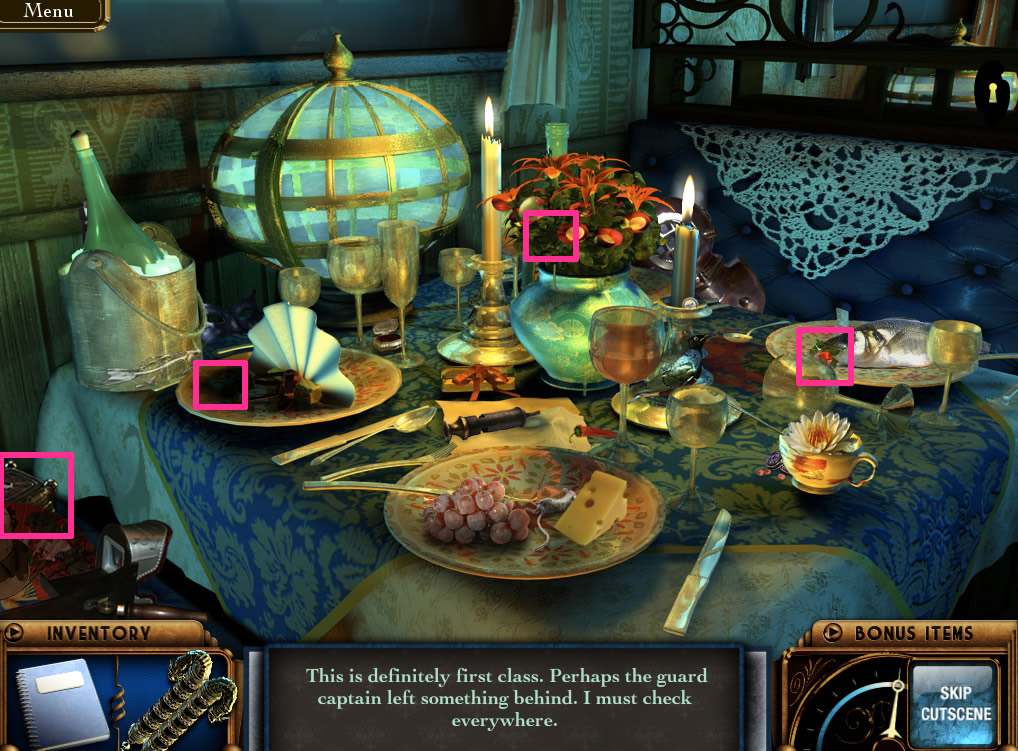
Click the sparkling table for a hidden object scene. Collect three red crystal pegs and a jade box (which gives you another jade symbol). Screenshot.
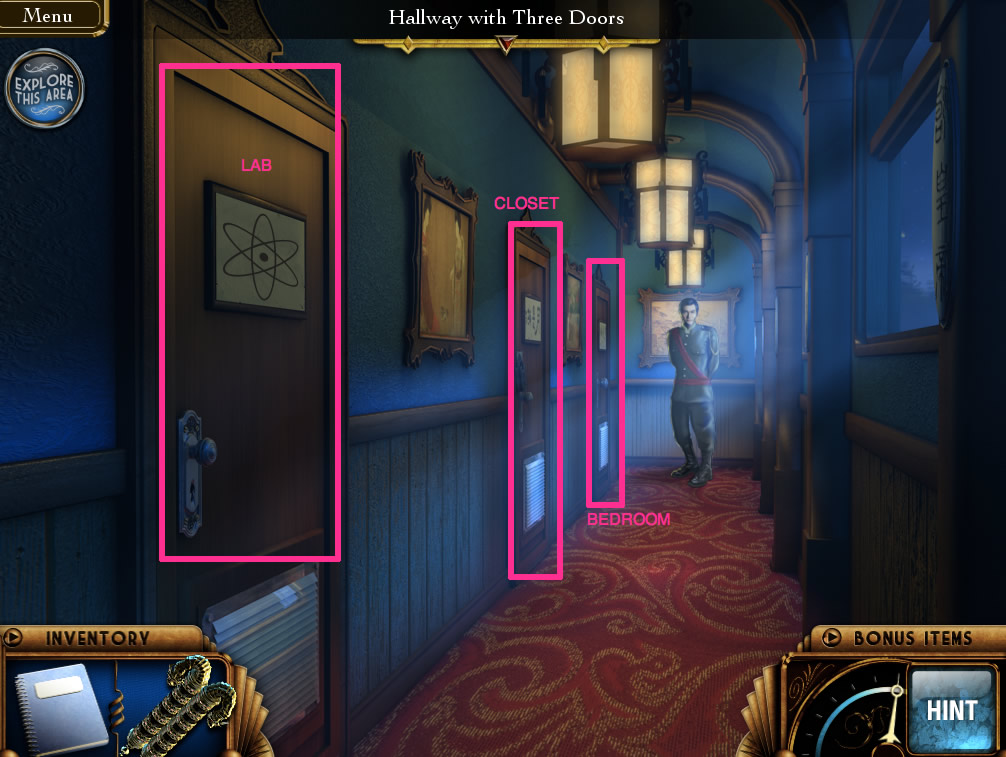
Go forward into the hallway and talk with Huang. Screenshot.
Take another red crystal peg from the floor.
Go into the door closest to you with the Lab sign on it.
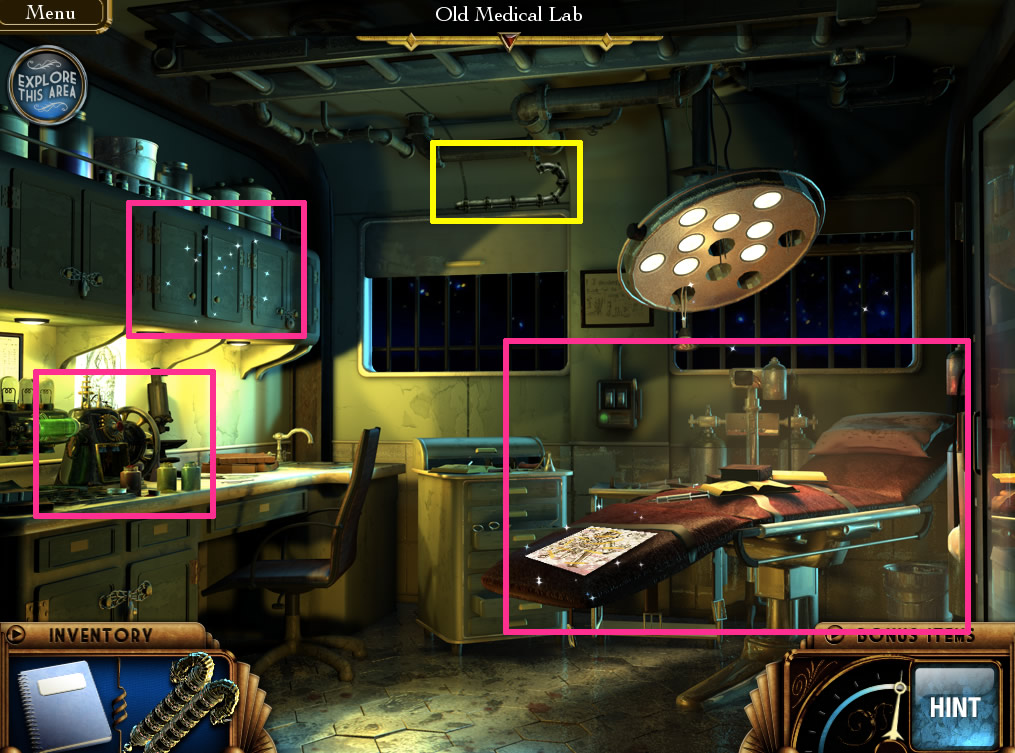
The Lab:
Lab screenshot.
Take the relic on the cabinet on the left.
Take the note on the chair.
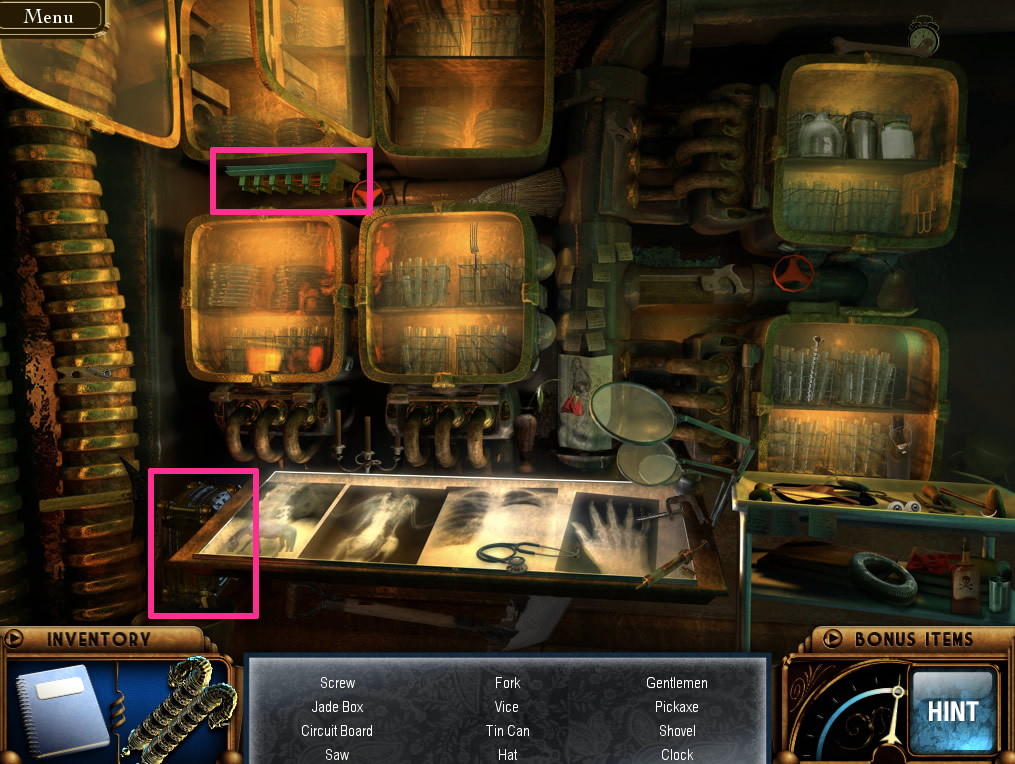
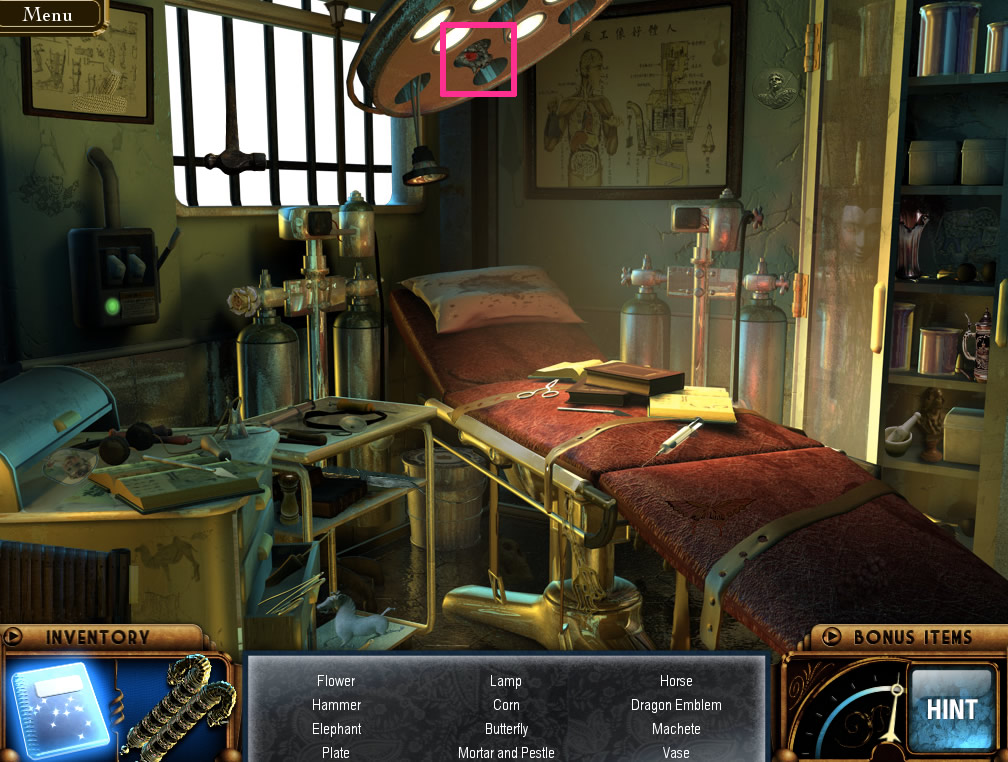
Click the chair for a hidden object scene. Find a metal fish, a statue piece, and two artifacts. Screenshot.
Go back to the Bar
The Bar:
Click on a panel in center, under the table.
Use the metal fish on the top right.
Get the relic fragment.
Back out one room to the Observatory.
Observatory:
You should be in the area where the door to the bar is.
Click the bust on the right. Screenshot.
Repair the broken part with the statue piece.
Take the relic fragment from the drawer.
Go back to where the Dragon Wheel is.
The Dragon Wheel:
Use the winch to open the box if it wasn't already opened.
Assemble the relic pieces into a whole. They will snap into position. Screenshot.
Put the relic on the other side of the Wheel.
Put the six red crystal pegs into the Wheel, based on the clue in your Scroll of Songs. Screenshot.
Back out of the Wheel.
Chapter 4:
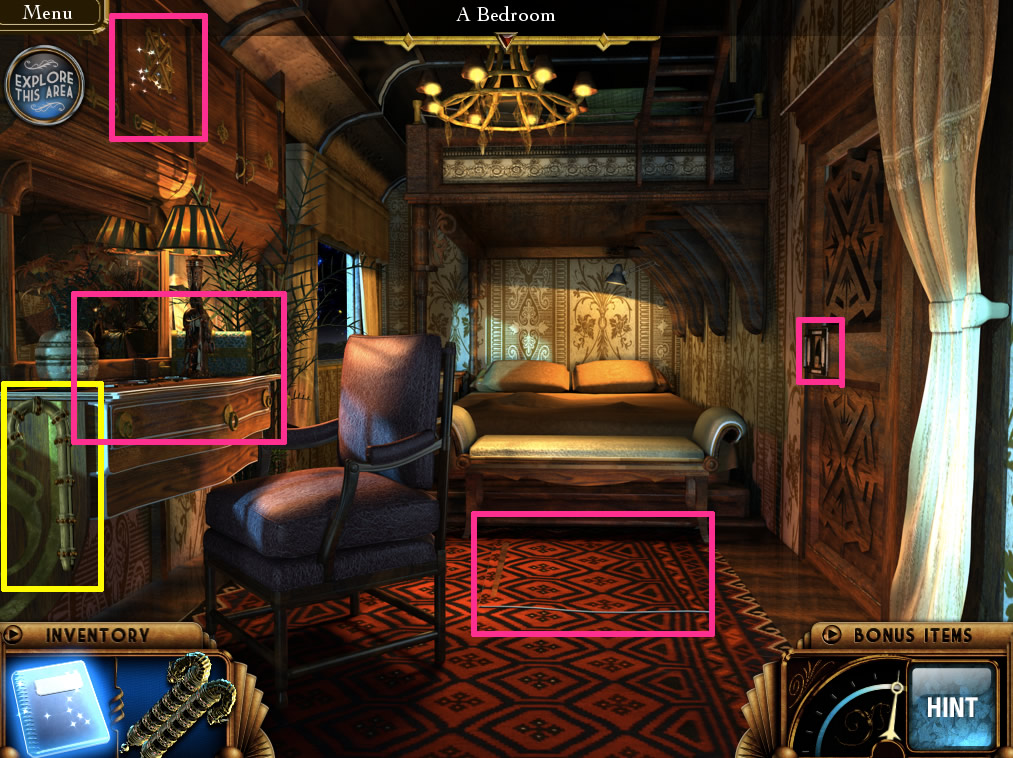
Bedroom:
Main area.
Click the cabinet on the top left and take a green Power Cell from it.
Click on the rug in the center of the floor.
Click on the trapdoor.
The puzzle is of the "traffic" variety. You must clear the top row and the rightmost row of blocks. Move the ones in the right bottom corner out of the way first, and the rest should go pretty easily. Screenshot.
You can't get out that way, but you'll find a key in the upper right.
Click the desk, and use the key on the lock.
In the hidden object scene, find a hairpin and another jade box (from which you get a jade symbol). Screenshot.
Click the door and the hairpin will be used automatically.
To pick the lock, you must find three positions and click to use the hairpin. When you are getting "warm", the lock will jiggle and a light will appear and get brighter. When it gets really bright, click. Do this three times. If the lock was a face of a clock, the first time is at 1:30, the second is at 11:30, and the third is at 6:00. Screenshot.
Go to the Dining Car.
The Dining Car and the Bar:
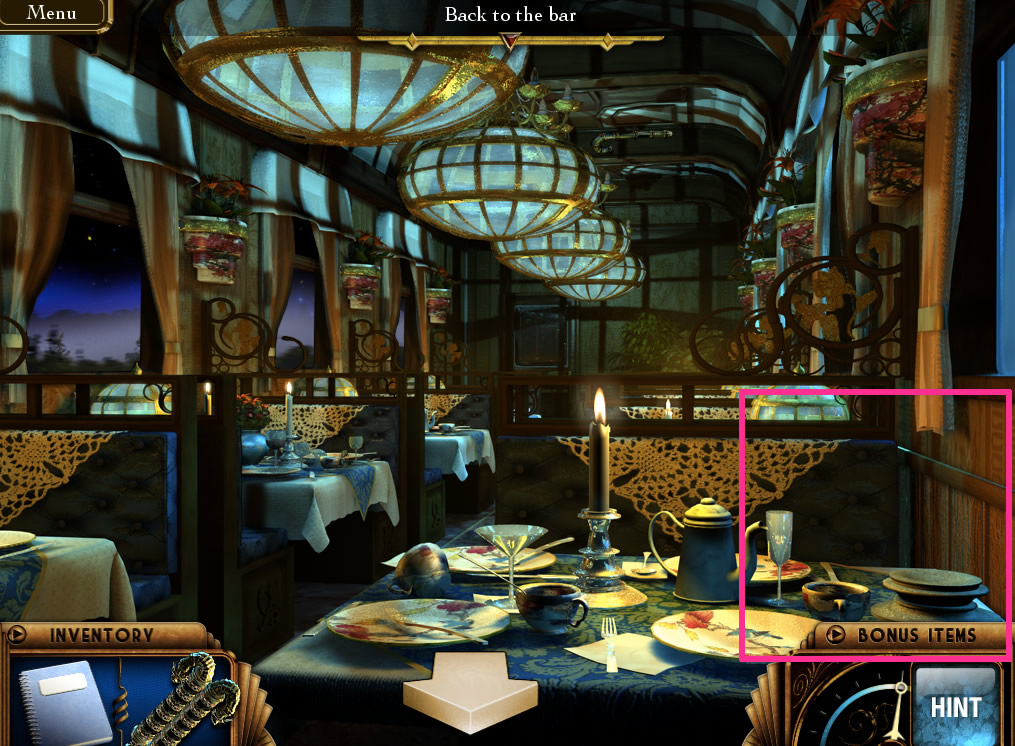
Click the globe shaped aquarium in the lower right to get a fighting fish. Screenshot.
Go to the bar and click the fish tank on the right. Screenshot.
Use the fighting fish on the fish tank.
Take the object from the tank.
Go to the lab.
The Lab and Hallway:
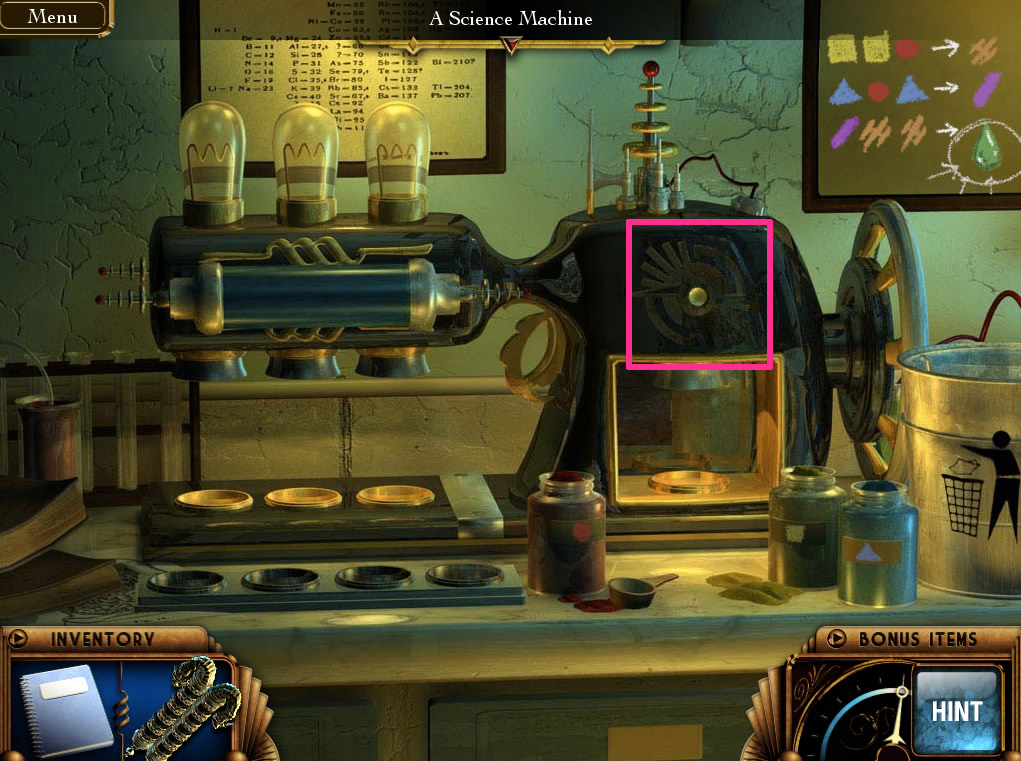
Click on the science machine on the left.
Use the object from the fish tank on the hole. Screenshot.
Follow the formula on the chalkboard to make acid: make two oranges by combining yellow, yellow, red; then make a purple by combining blue, red, blue. Then put purple, orange, orange in the machine to make the acid.
Go back to the Hallway.
Use the acid on the lock to the hall closet.
Enter the hall closet. The Scroll of Songs will help you turn the light on. Screenshot.
It's a hidden object scene. Find the brake lever and another jade box with symbol. Screenshot.
Go back to the Caboose.
Candy cane notice: You can check the list of candy canes now if you want, but you'll have an opportunity to pick up #4-8 when you get back on the train.
Caboose:
Click the panel thing to the left of the door. Replace the break lever, and pull it to stop the train. Screenshot.
Chapter 5:
The Village:
Main area.
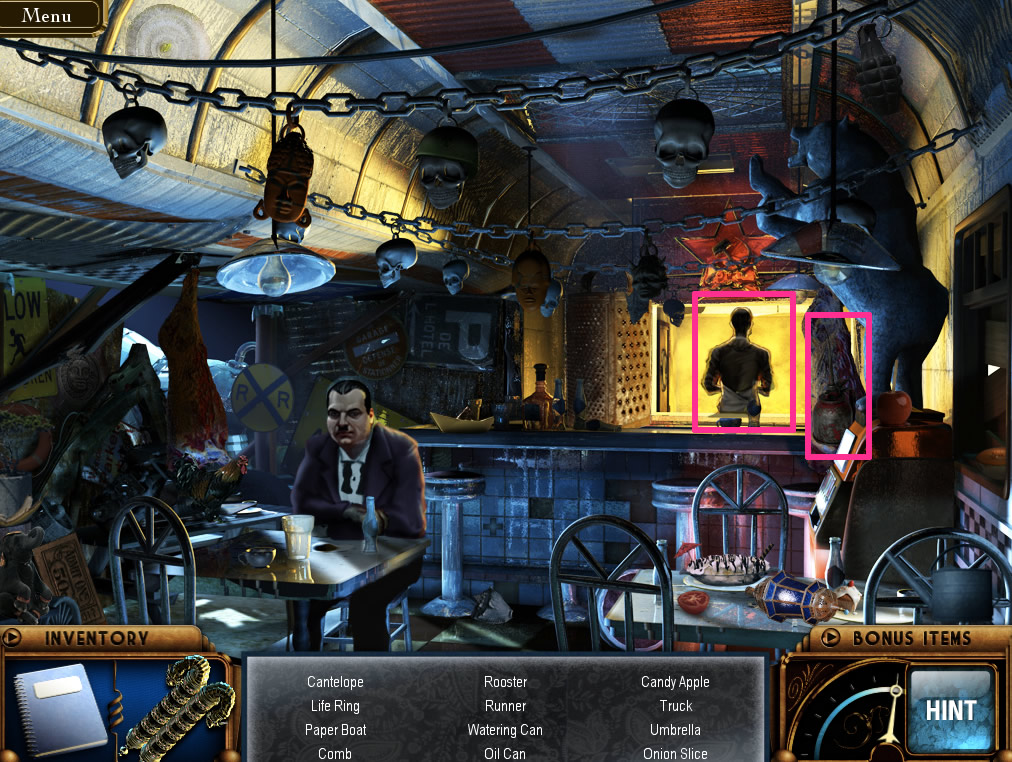
Click in the upper right to go to the restaurant.
It's a hidden object scene. The only inventory item is the oil can. Screenshot.
After you finish, click on the man standing in the back.
You must play another game of Persuasion. This one is a little trickier. Here's one solution.
He will give you a secret knock. Also take the smelling salts. Screenshot.
Back out and go to the left to the cabin.
Take the cannon ball at the left. Screenshot.
Click on the door and you will automatically use the secret knock.
Use the smelling salts on Nonna and she'll request tea. Screenshot.
Take the soldier figurine from the left hand side by the window and back out once, to the garden.
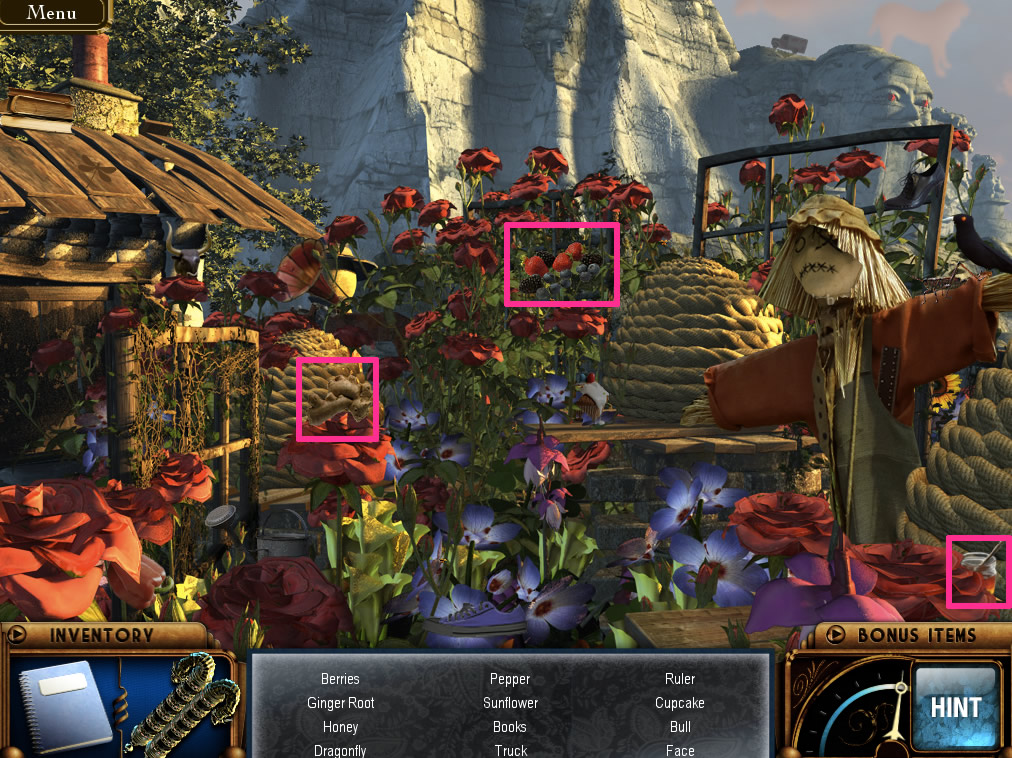
Click on the sparkling portion of the garden for a hidden object scene. Find honey, ginseng root, and berries. Screenshot.
Go back inside and click the right side to enter the "kitchen".
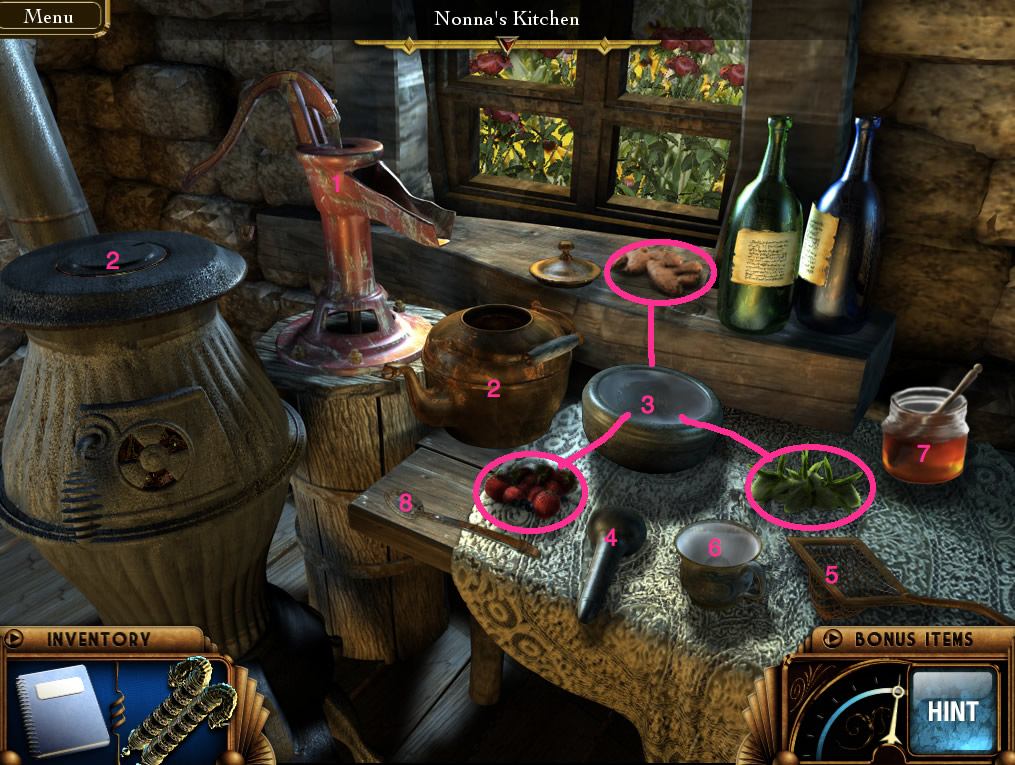
To make the tea:
Screenshot.
1. Click the pump to fill the tea kettle.
2. Use the tea kettle on the stove, and then click again to turn on the heat.
3. Add the berries, tea leaves, and ginseng to the morter.
4. Use the pestle on the mortar.
5. Place the ingredients in the strainer, and place the strainer in the cup.
6. Use the kettle on the cup.
7. Add honey to the cup.
8. Stir with the spoon.
Take the tea and give it to Nonna. She gives you a "key".
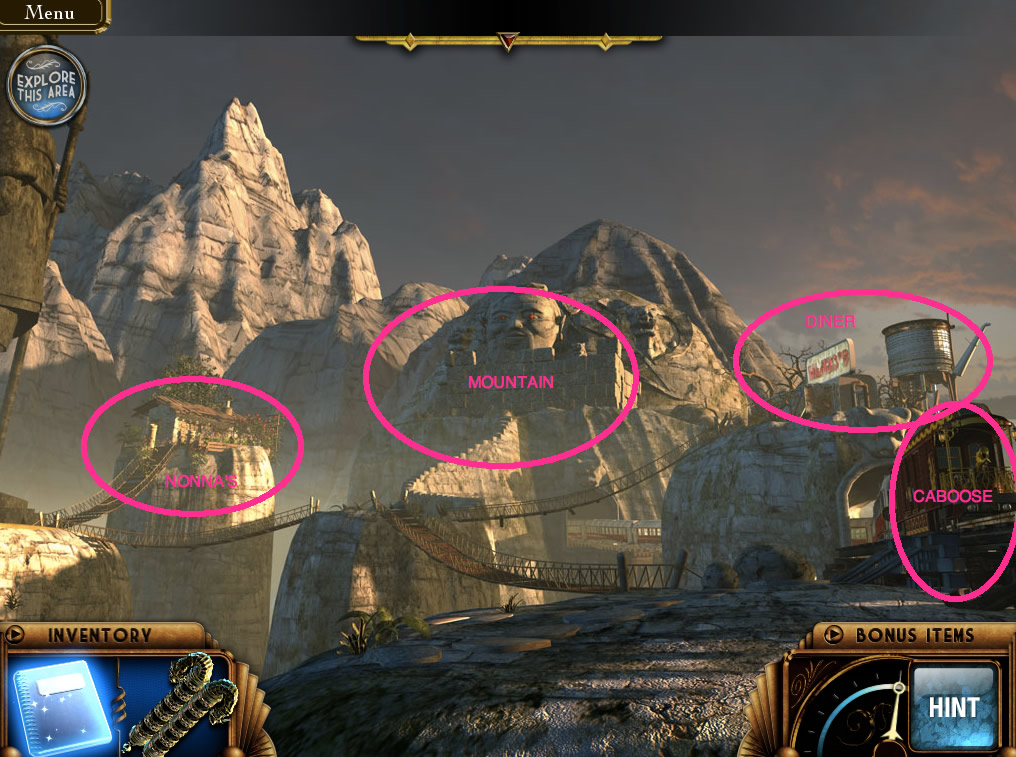
Going Up the Mountain:
Go to the main part of the village and click on the train to go to the caboose balcony. Screenshot.
Use the oil can on the cannon.
Use the cannon ball on the cannon.
Light the cannon with a match.
Back out and click on the mountain.
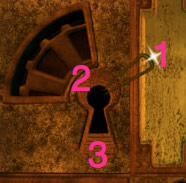
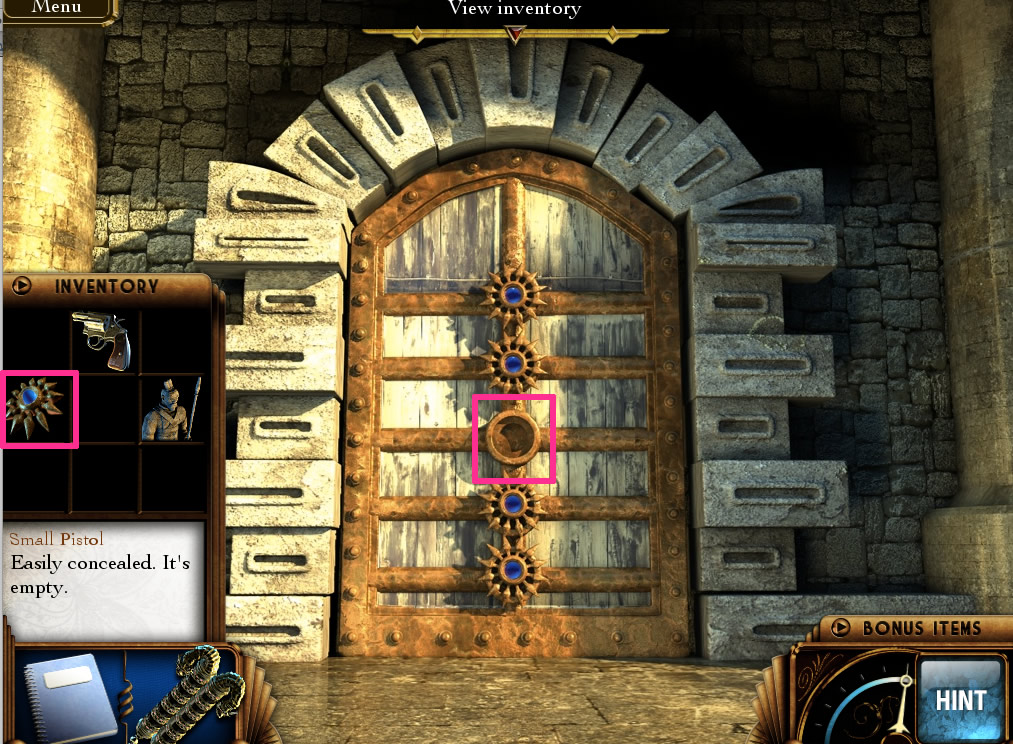
Use Nonna's "key" on the hole in the center of the door and go in. Screenshot.
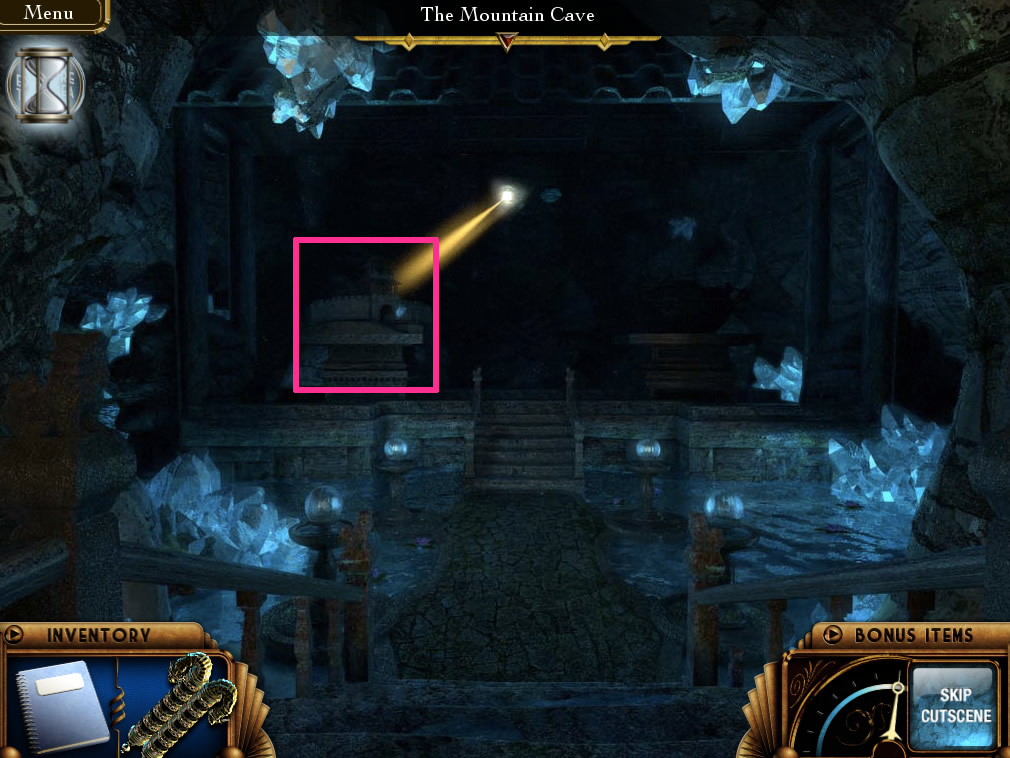
Click on the miniature model lit by the beam of light. Screenshot.
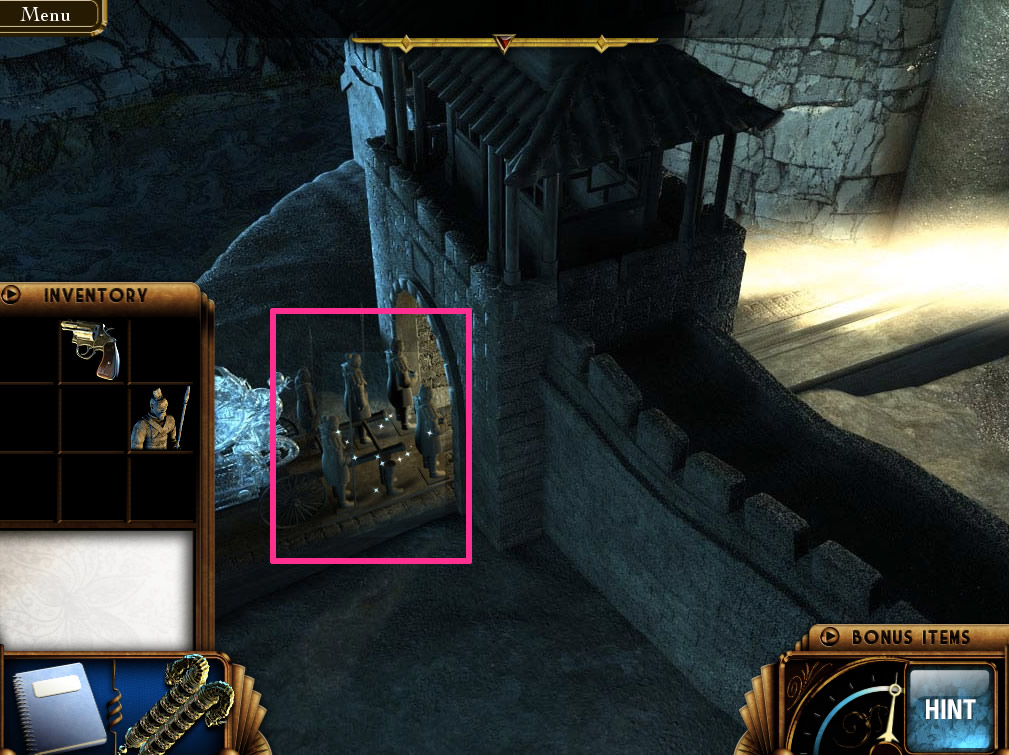
Use the soldier figurine on the figurines on the left. Screenshot.
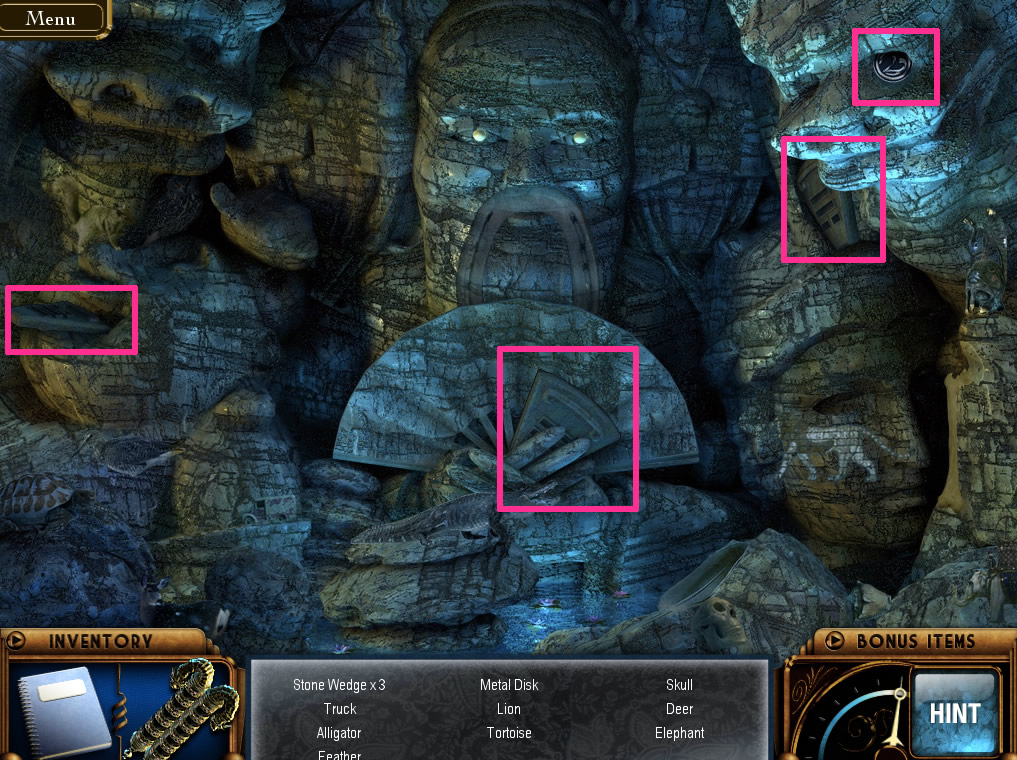
Click on the hidden object scene that is unlocked by this and find 3 stone wedges and a metal disk. Screenshot.
When you finish, the Scroll of Songs will float to a part of the screen. Click where it hovers.
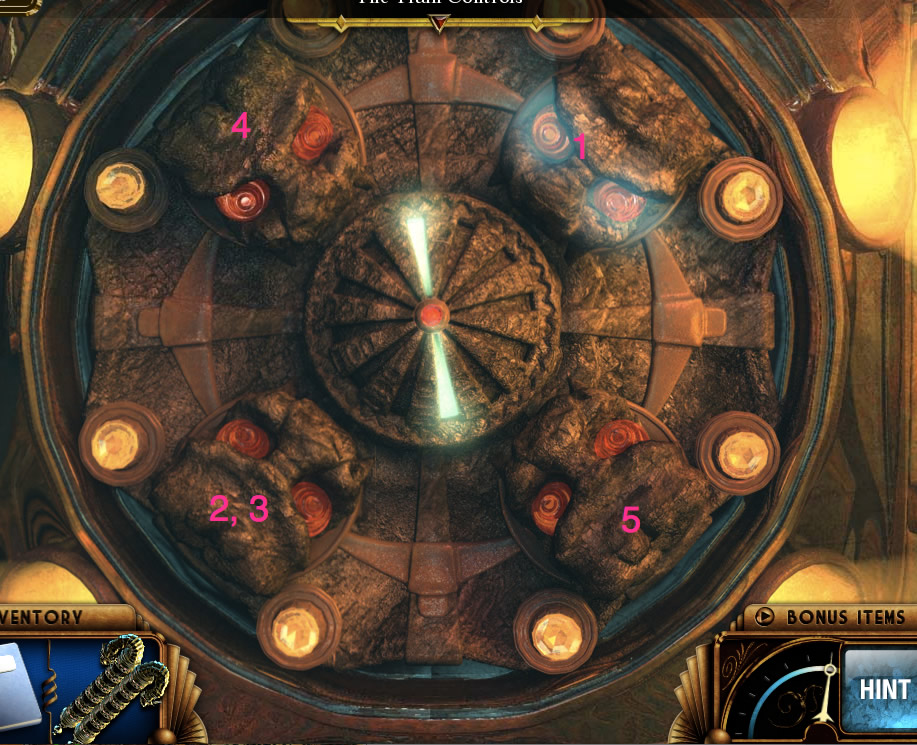
Use the metal disks to fill in the holes.
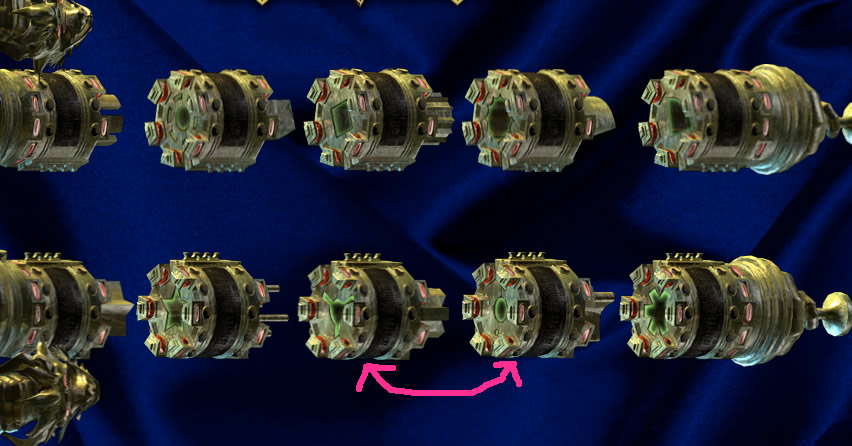
The object of this puzzle is to light up all the disks. Three of the disks do not rotate any other disks. Take a look at this screenshot. The three disks that move independently are marked in green. Make all the other disks glow first, and then make them glow. Start with the disk marked in red and go clockwise, making all five of them glow, then turn on the last three. Screenshot.
You get a jade box with jade symbol.
CANDY CANE ALERT! Make sure you have gotten Candy Cane #10 if you are collecting candy canes. You will not return to this area.
Go back to the train.
Chapter 6:
Caboose:
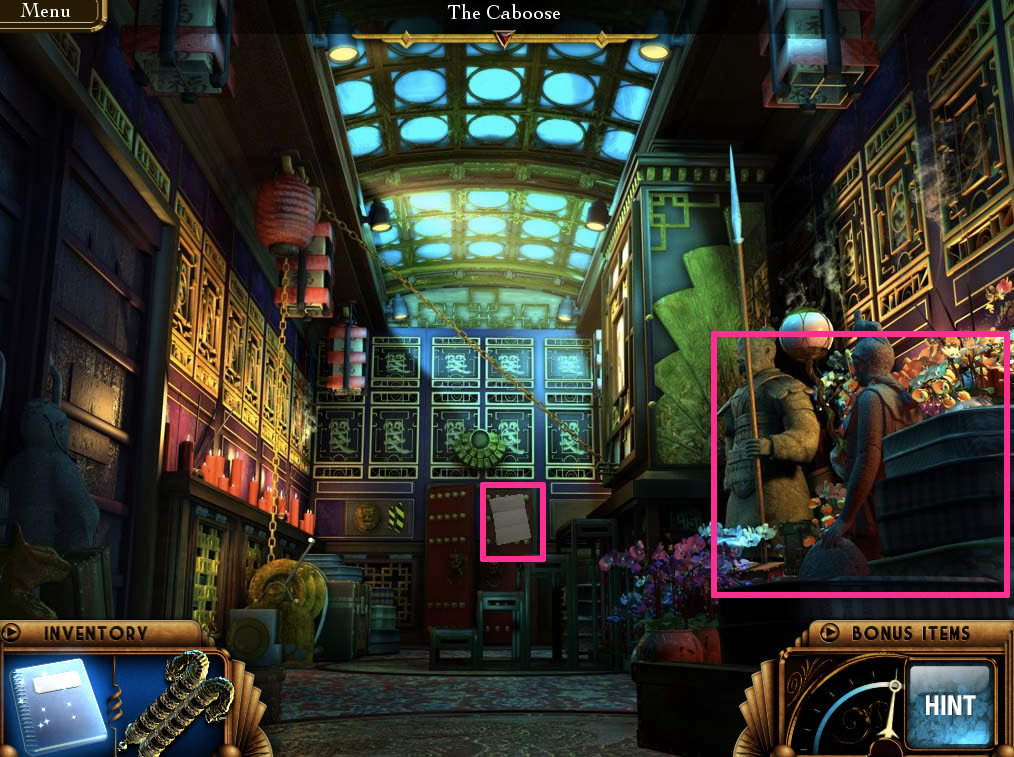
Click the note on the door. Screenshot.
Click the hidden object area on the right. Get the cardboard box. Screenshot.
Go to the kitchen.
Kitchen:
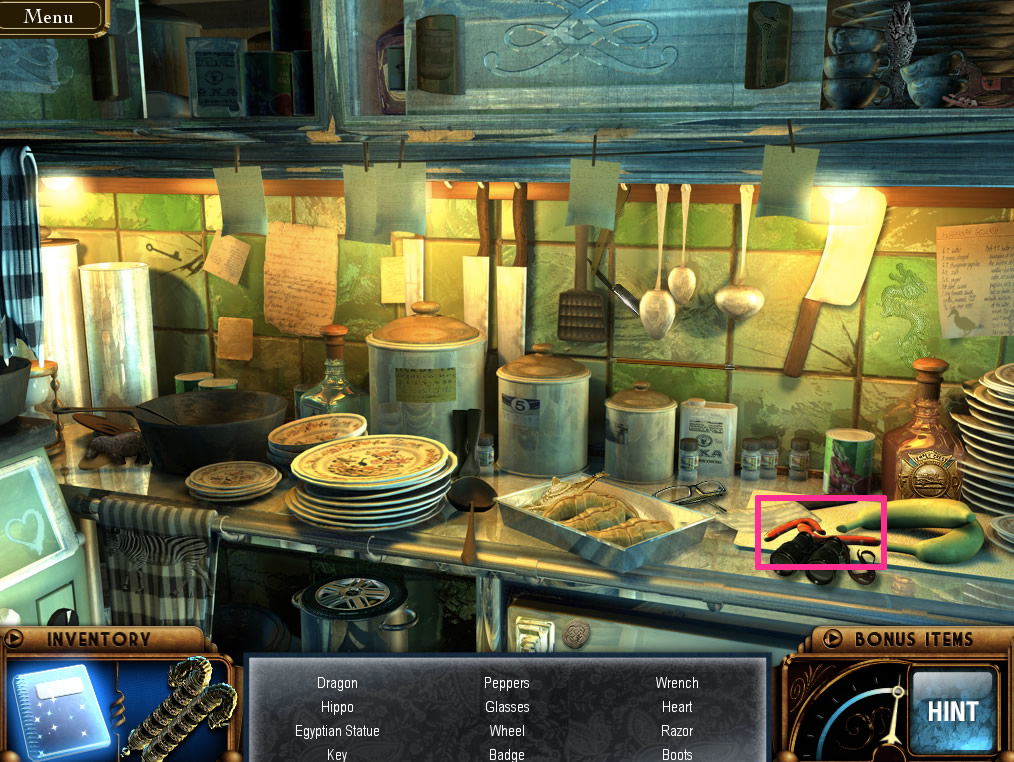
Click the counter for a hidden object scene, and find the hot peppers. Screenshot.
Go back to the bar and keep going forward until you reach the Greenhouse.
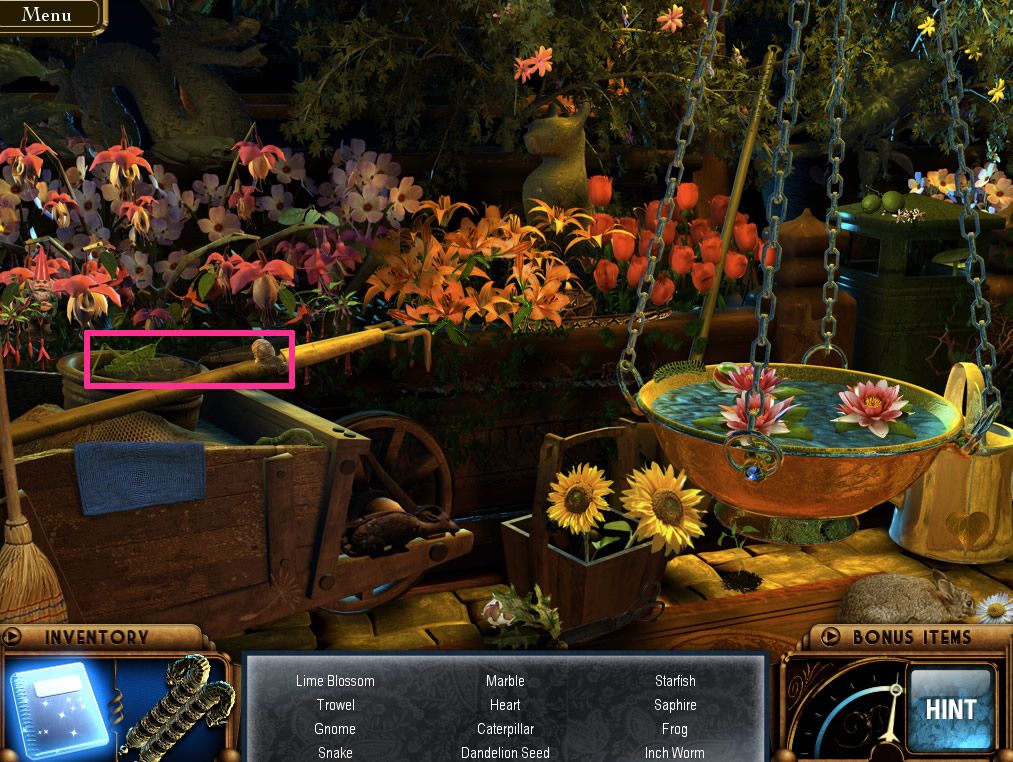
Greenhouse Car:
Main area.
Click the hidden object scene on the left and find the fertilizer. Screenshot.
Go to the Lab.
The Lab:
Zoom in on the science machine again.
This time, first make three yellow powders by combining blue, blue, and green three times.
Then make two purple powders by combining red, yellow, red twice.
Then make a pink power by combining purple, green, green.
Finally, combine yellow, purple, and pink to get a bomb.
Back out and go forward, past the greenhouse, to the Strange Hallway.
Strange Hallway/Theatre Car/Emperor:
Use the bomb on the guards. Screenshot.
Go forward to the theatre car.
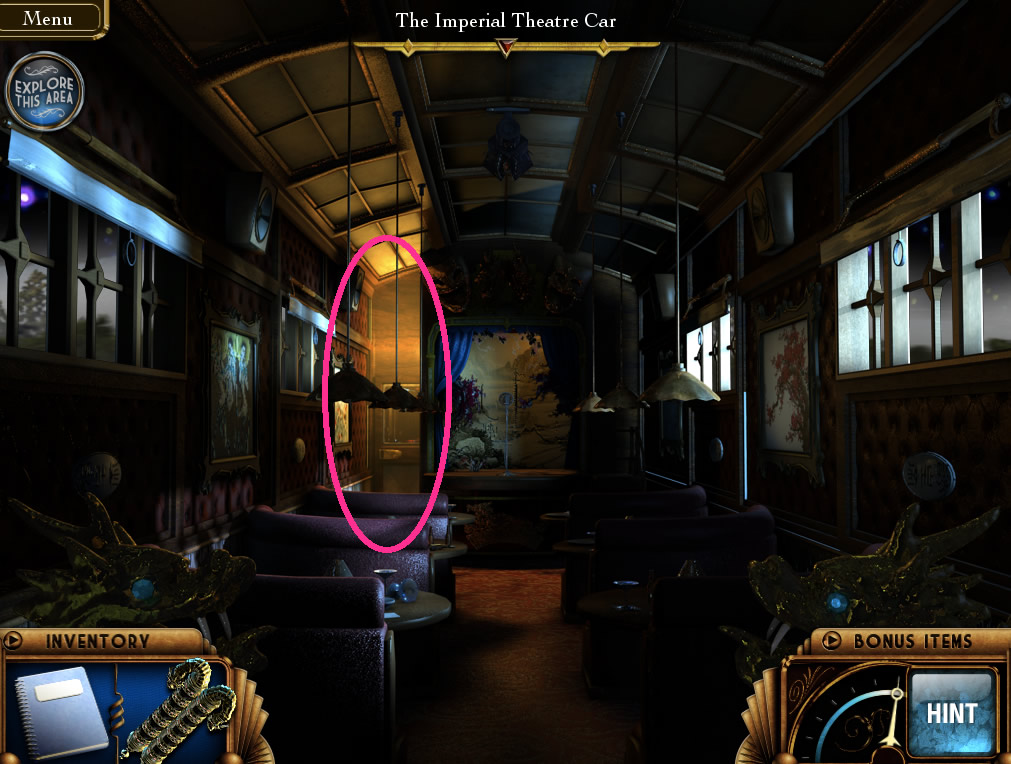
Click slightly left of center to go to the emperor's shrine. Screenshot.
Click forward again to go to the emperor.
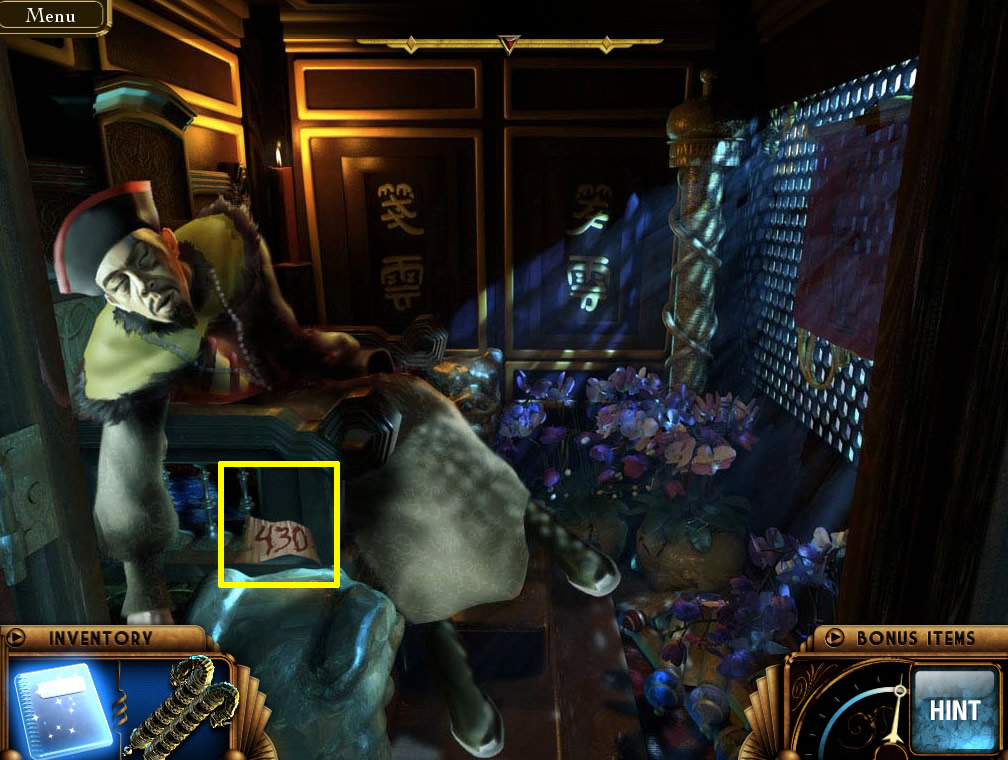
Take the note by the emperor's hand and the clue will go in your notebook. Screenshot.
Back out.
Chapter 7:
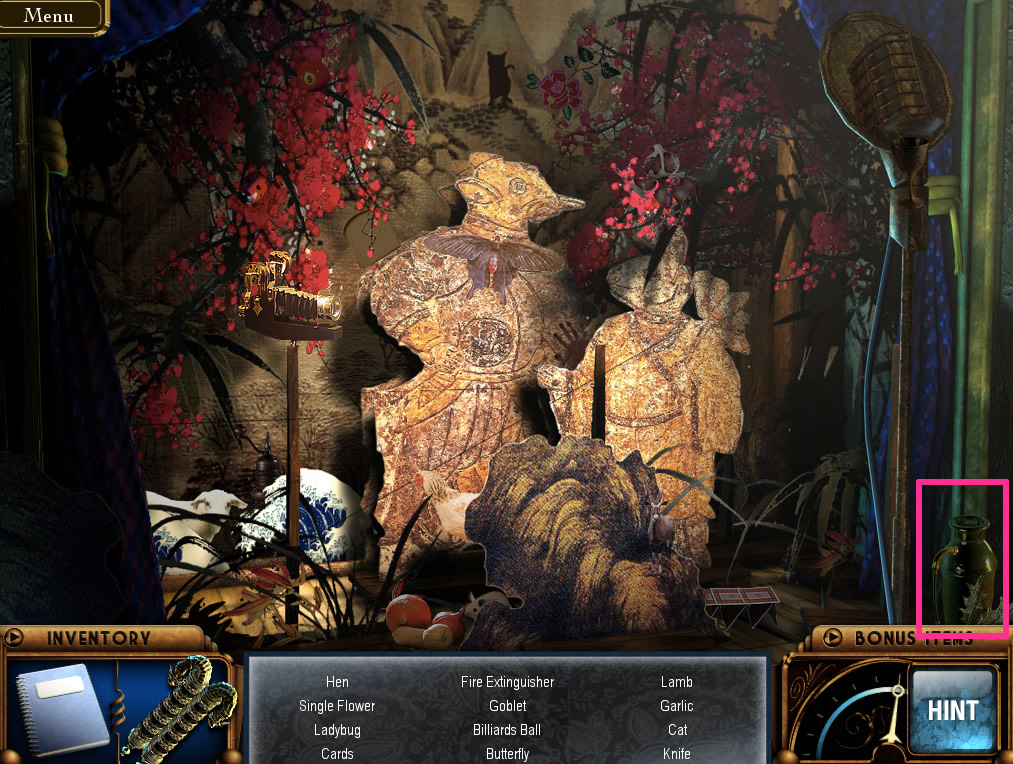
The Theatre:
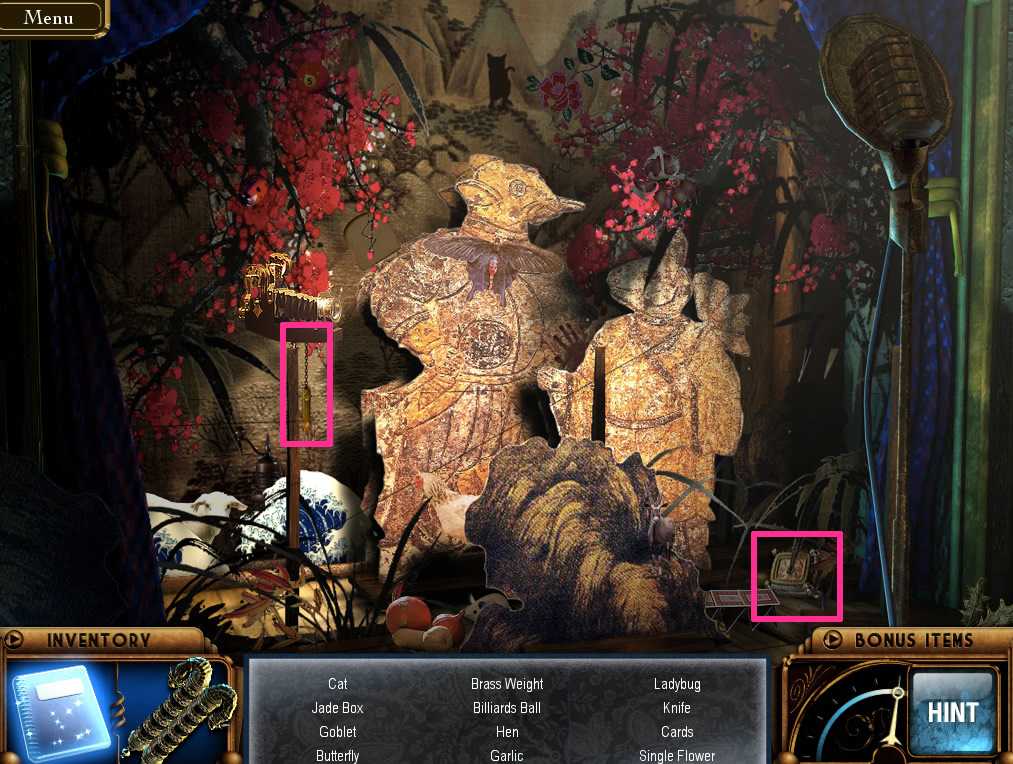
Click on the stage for a hidden object scene. Find the brass weight and another jade box with jade symbol. Screenshot.
Go back to the greenhouse.
Greenhouse Car:
Click on the grandfather clock on the right.
Use the brass weight on the left, symmetrical to the other weight. Screenshot.
Set the clock to the time on the note (4:30). The right weight controls the hour hand, and the left weight controls the minute hand.
Collect the red orb and white orb.
Go back to the strange hallway (the one where you knocked out the guards) and enter the first door on the left.
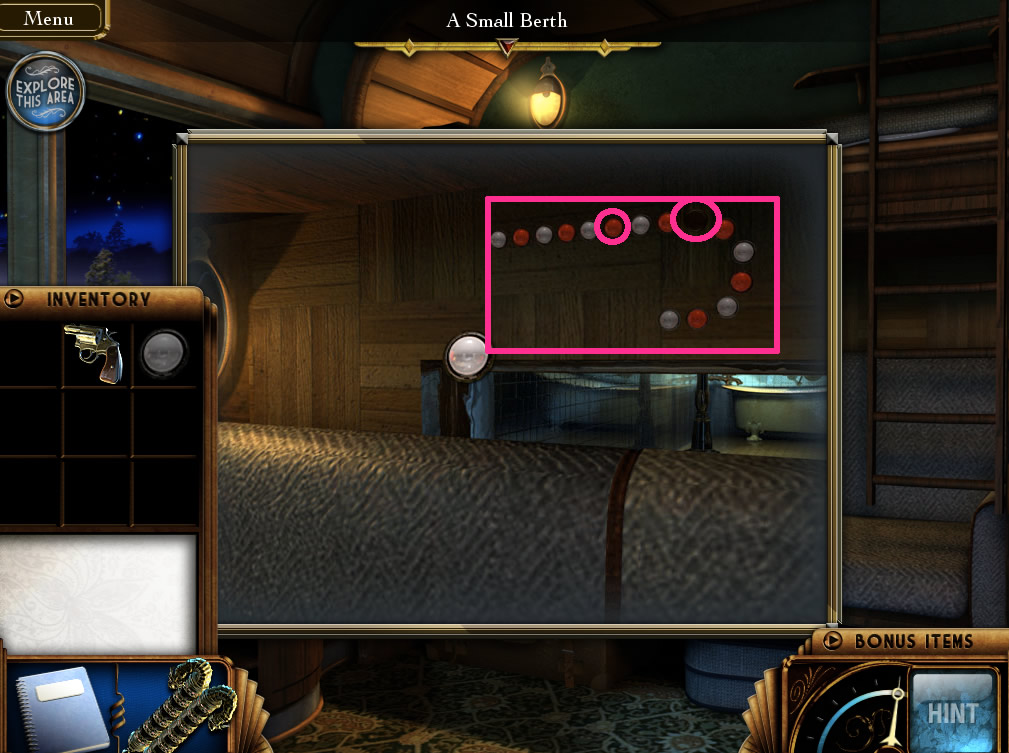
Caine's Berth:
Zoom in on the cane shaped pattern of lights and use the red orb on the first hole and the white orb on the second. Screenshot.
Go through into the bathroom.
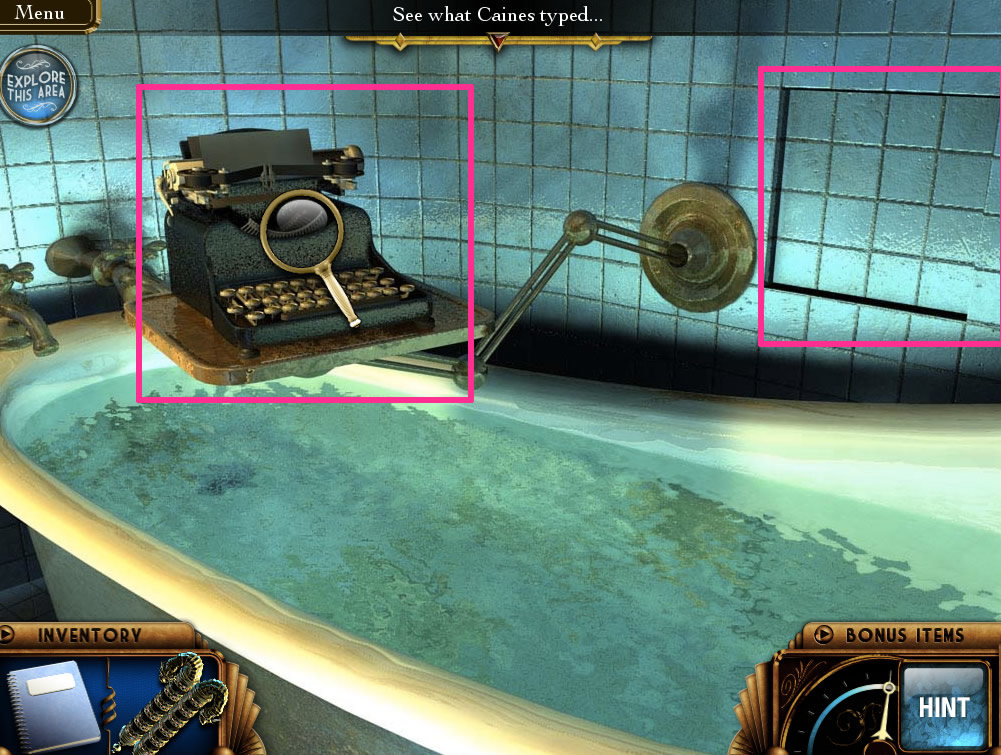
Click on the bathtub.
Click the typewriter. Screenshot.
Click the indented tiles on the right to reveal a safe.
Zoom in on the safe. The object is to let all four pegs reach the center. Inner wheels rotate all wheels outside of them. This puzzle can be completed in three moves: click the innermost, than the middle, than the outermost. Solution.
Take another green power cell.
Go back to the upstairs of the observatory car.
Observation Lounge:
Click on the panel on the telescope.
Use the two power cells. Screenshot.
Zoom in again.
The clue for this puzzle is the note in the typewriter in the bathroom.
1. Move all the black tiles in to the center, and the white tiles out.
2. Move all the tiles with decorations made in straight lines in, and curved lines out.
3. Move all the tiles with one part in, and with two parts out. (One part = squares, circles, and X shapes. Two parts = everything else.)
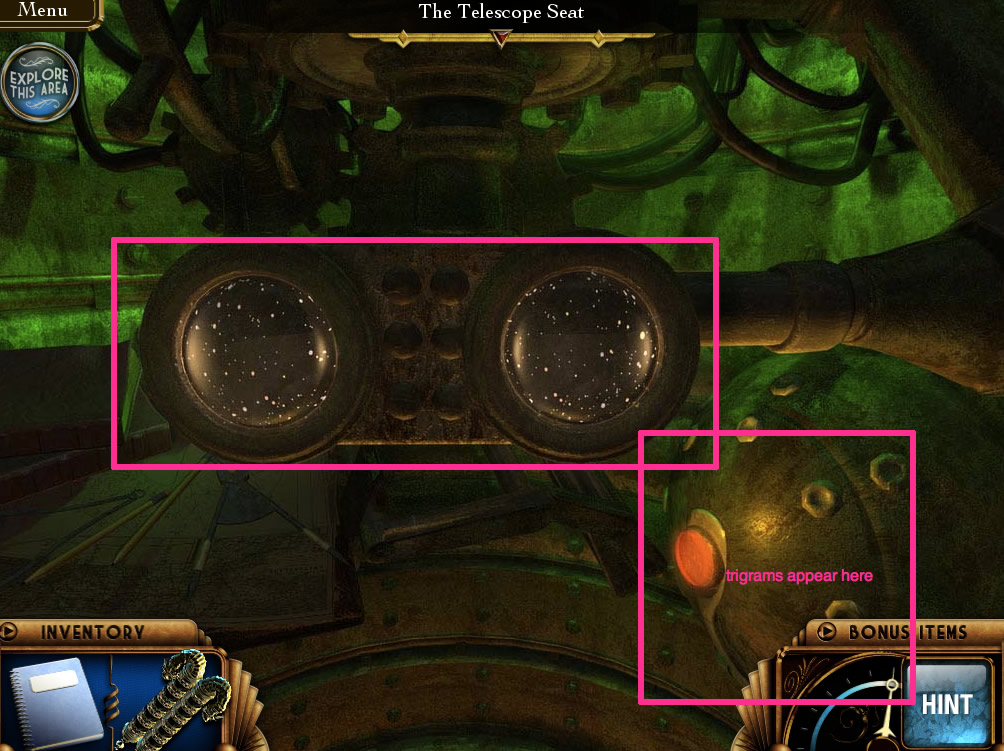
When you finish, go downstairs. The telescope cage will be opened. Click to go in and again to sit down.
Click at the binocular part to look through the telescope for hidden objects. Screenshot.
This hidden object scene is totally random.
When you finish, you will find a jade symbol and 5 trigrams in the lower right corner. Make sure you take every trigram.
Go back to the Dragon Wheel.
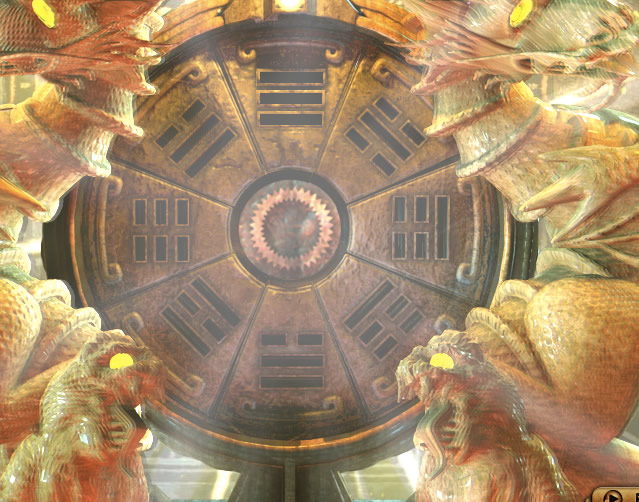
The Dragon Wheel:
Place all the trigrams in the dragon wheel.
Look at the Scroll of Songs for the correct placement of the trigrams, and click on the trigrams to swap them around. Screenshot of solution.
Go back to the hallway with three doors.
Hallway/Greenhouse/Theatre:
Click on the janitorial closet (the middle door) and find a handle in the hidden object scene. Screenshot.
Go to the greenhouse (one forward).
Click on the left side for another hidden object scene. Find a trowel. Screenshot.
When you finish, use the trowel on the sparkling tile on the floor.
Flip the switch under the tile.
Go forward to the theatre and click on the stage for a hidden object scene. Find a fire extinguisher. Screenshot.
The fire extinguisher and the handle will assemble to fix itself.
Go forward and the shrine will be on fire. Use the fire extinguisher.
Click the sparkling area to enter the secret chamber.
Secret Chamber:
Main area.
Cick the left door first. Screenshot.
Click the shelves on the right for a hidden object scene. Find a circuit board and another jade box with jade symbol. Screenshot.
Click on the tube on the left, and use the circuit board on the right side of the zoomed in scene.
For this puzzle, simply match all three symbols to open the canister. You must open all the canisters; what you're seeking is always in the last place you look. (Ain't that always the way?) When you open the last one, take the frozen hand.
Go back to the main part of the secret chamber.
Use the frozen hand on the handprint on the right.
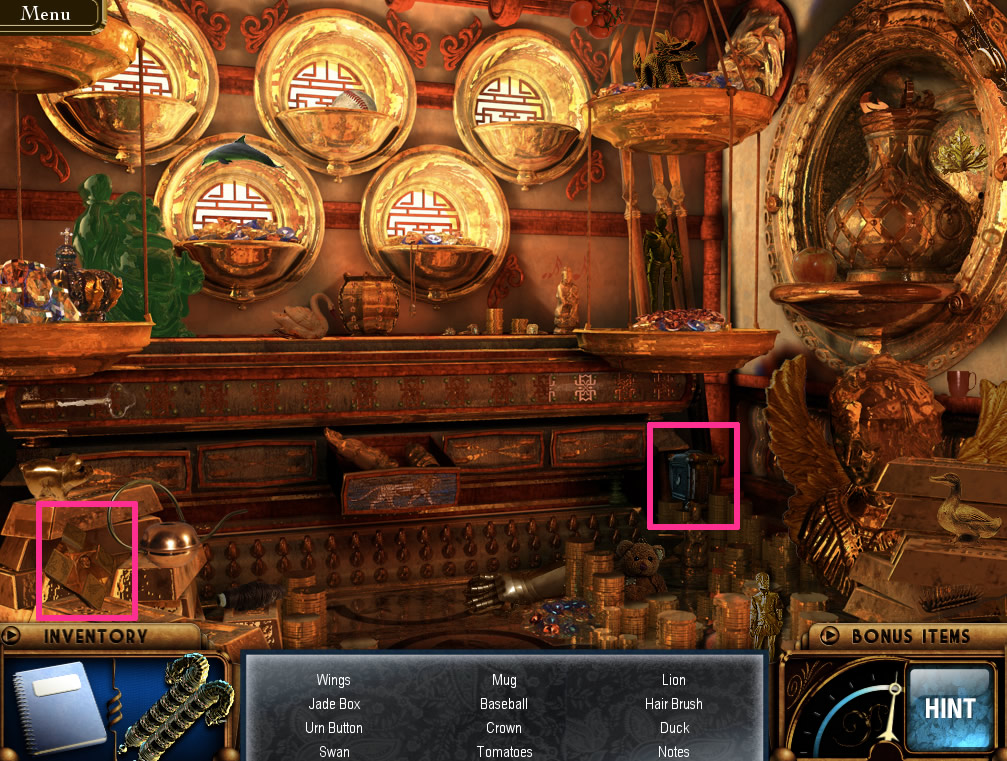
Go through the right door for a hidden object scene. Get an urn button and another jade box with jade symbol. Screenshot.
When you finish, you'll stay in the same area. Click the sparkling urn in the upper right.
Use the urn button on the hole.
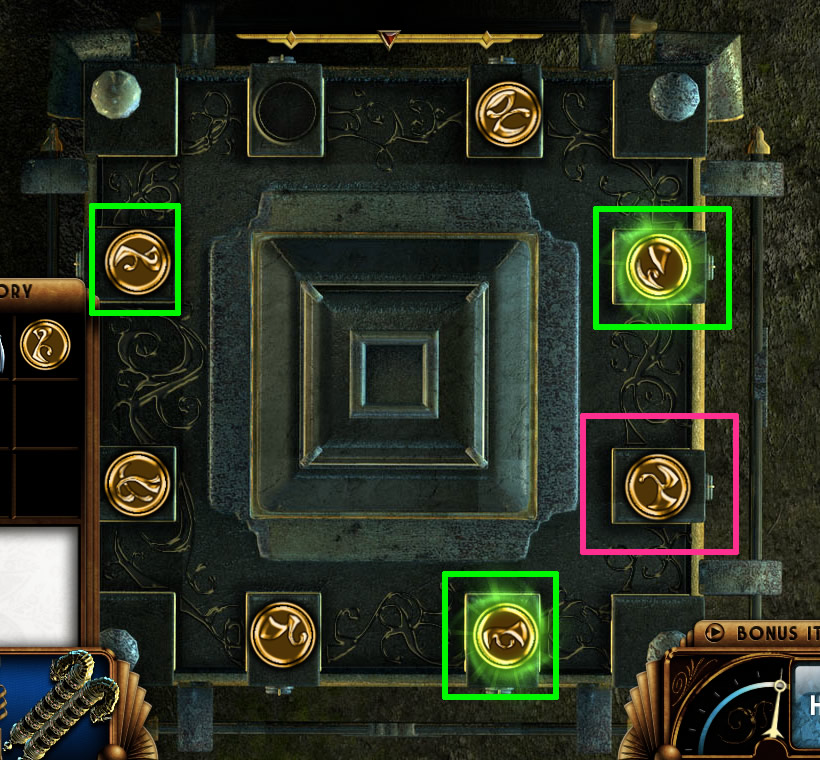
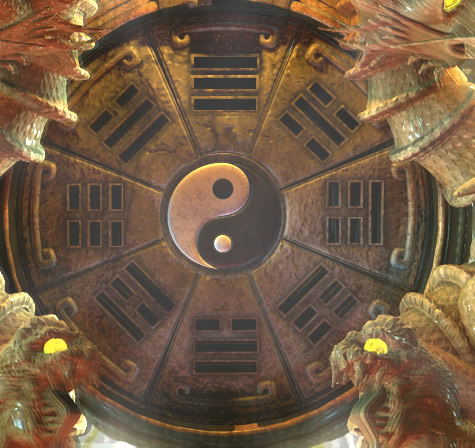
Follow the pattern on the back of the dragon turtle from the Scroll of Songs, as if the dragon turtle's head were the top of the urn. Screenshot.
Take the yin and yang.
When you come out, Caine will force you to go back to the Dragon Wheel. You won't be able to click on anything except backing up.
Dragon Wheel:
Add the yin and yang to the middle to complete the Dragon Wheel. Screenshot. Back out.
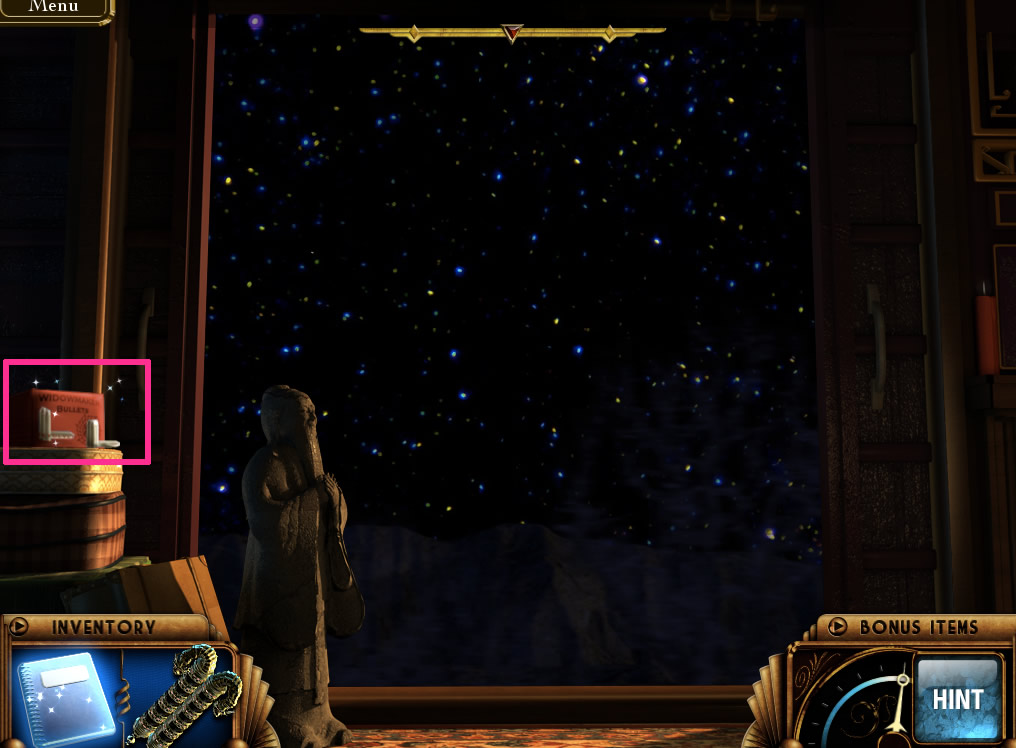
After the cutscene, click on Caine. The side door of the caboose will open.
Click on the open side door and take the bullets on the left. Screenshot.
Next stop: dining room.
Chapter 8:
Dining Room/Lab/Bedroom:
During this section, Epiphany will keep yelling at you that you need to go to the front of the train, but if you ignore her you can get it done with less backtracking.
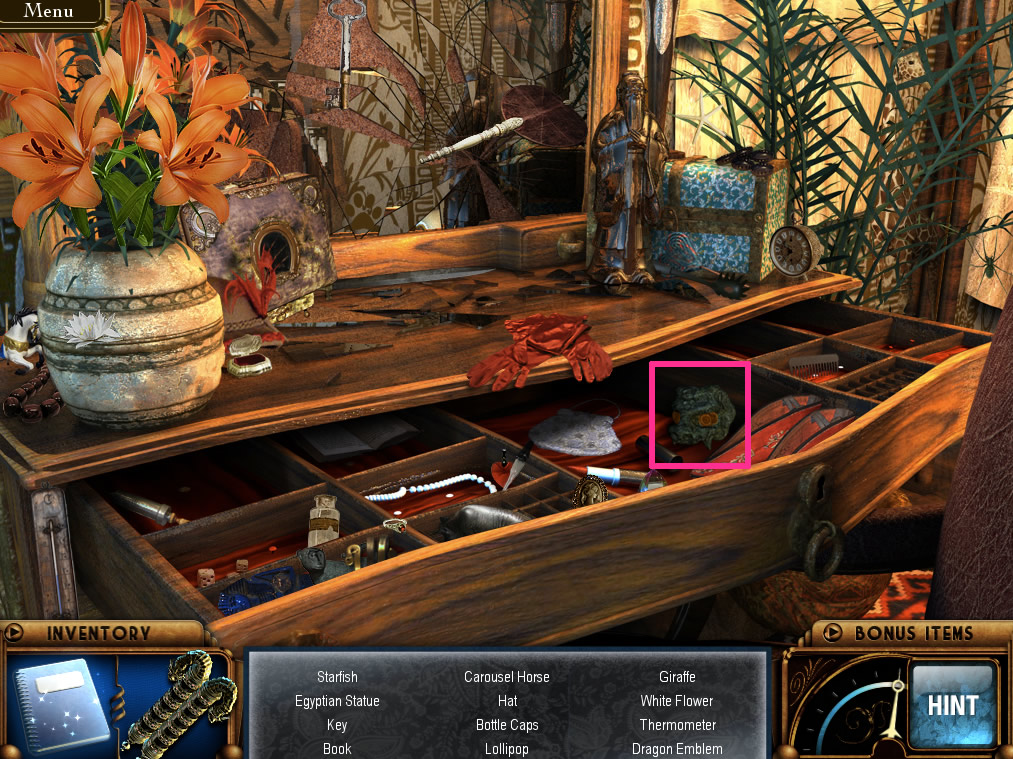
Go to the dining room and click the sparkling area on the left. Find the dragon emblem in the lower right and the other objects. Screenshot.
Go to the hallway with three doors and enter the lab.
Click the chair on the right for a hidden object scene. Get another dragon emblem. Screenshot.
Finally, go to the bedroom in the same hallway and click on the desk for a last hidden object scene and dragon emblem. Screenshot.
Now go to the front of the train.
Secret Chamber:
BONUS ITEM ALERT: You should now make sure you have all the bonus items, because once you switch the train, you won't be able to travel around freely.
Click on the wheel thing dead center. It's the train controls. I would have thought a nice system of levers would work better, but whatever.
Place the dragon emblems in the controls. Now you must complete a Simon Says puzzle. It's easy: it starts out upper right, then upper right lower left, and so on to the final combination: upper right, lower left, lower left, upper left, lower right. Screenshot.
Go back to the caboose.
Caboose:
Click the side door. You can't jump out yet, but you should pick up the bullets on the left.
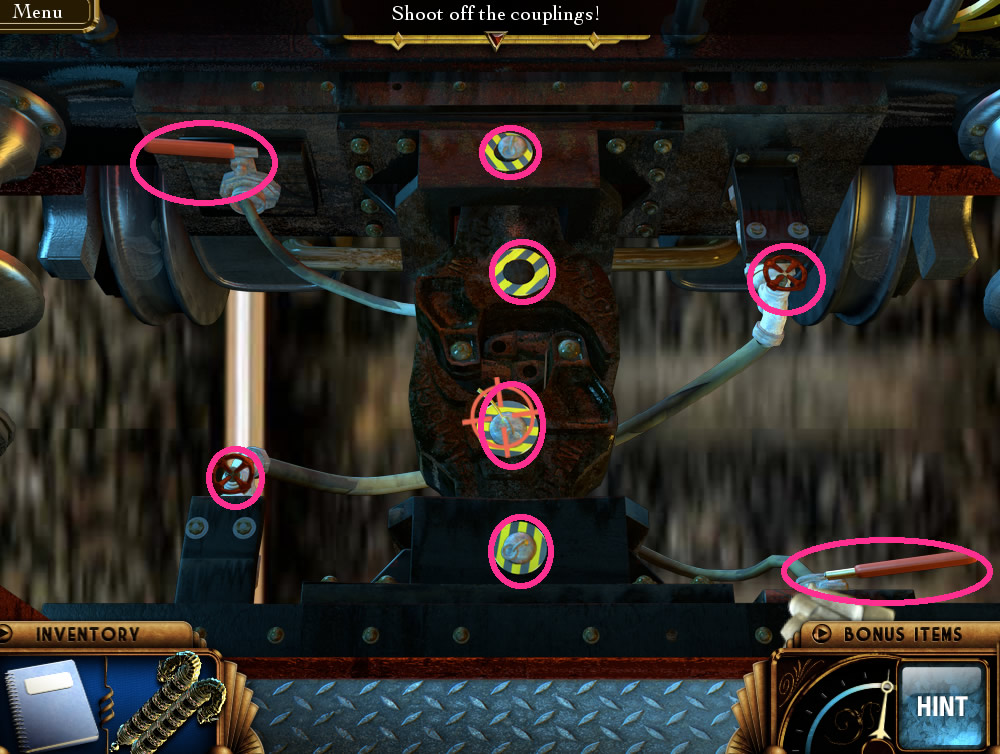
Try to go forward and it should show you the couplings. Shoot out all the couplings by clicking on them. Screenshot.
Go to the side door and jump out into Huang's jeep.
Ending cutscene! Hooray!
Posted by: joye |
July 19, 2010 1:34 AM
|
July 19, 2010 1:34 AM